|
|
Post by miket on Nov 27, 2014 17:06:30 GMT
With the seat holes now marked I've finished drilling the floor and I've measured out the locations for my fuel/brake line brackets - so once I'm confident in my riveting it's game-on. Also put a lick of paint on the steering column and pedal boxes now that I've realised how visible they'll be. Then I got out the front-to-rear part of the loom and stripped it of its plastic fasteners . I've ordered some split conduit and p-clips on the assumption that's how people normally run it along the ally-girder. Whilst my loom labelling was pretty thorough, I did find a loose end with no label - so if anyone recognises this single short red-with-white-stripe stub that would have been in the mx5 cabin I'd be interested! 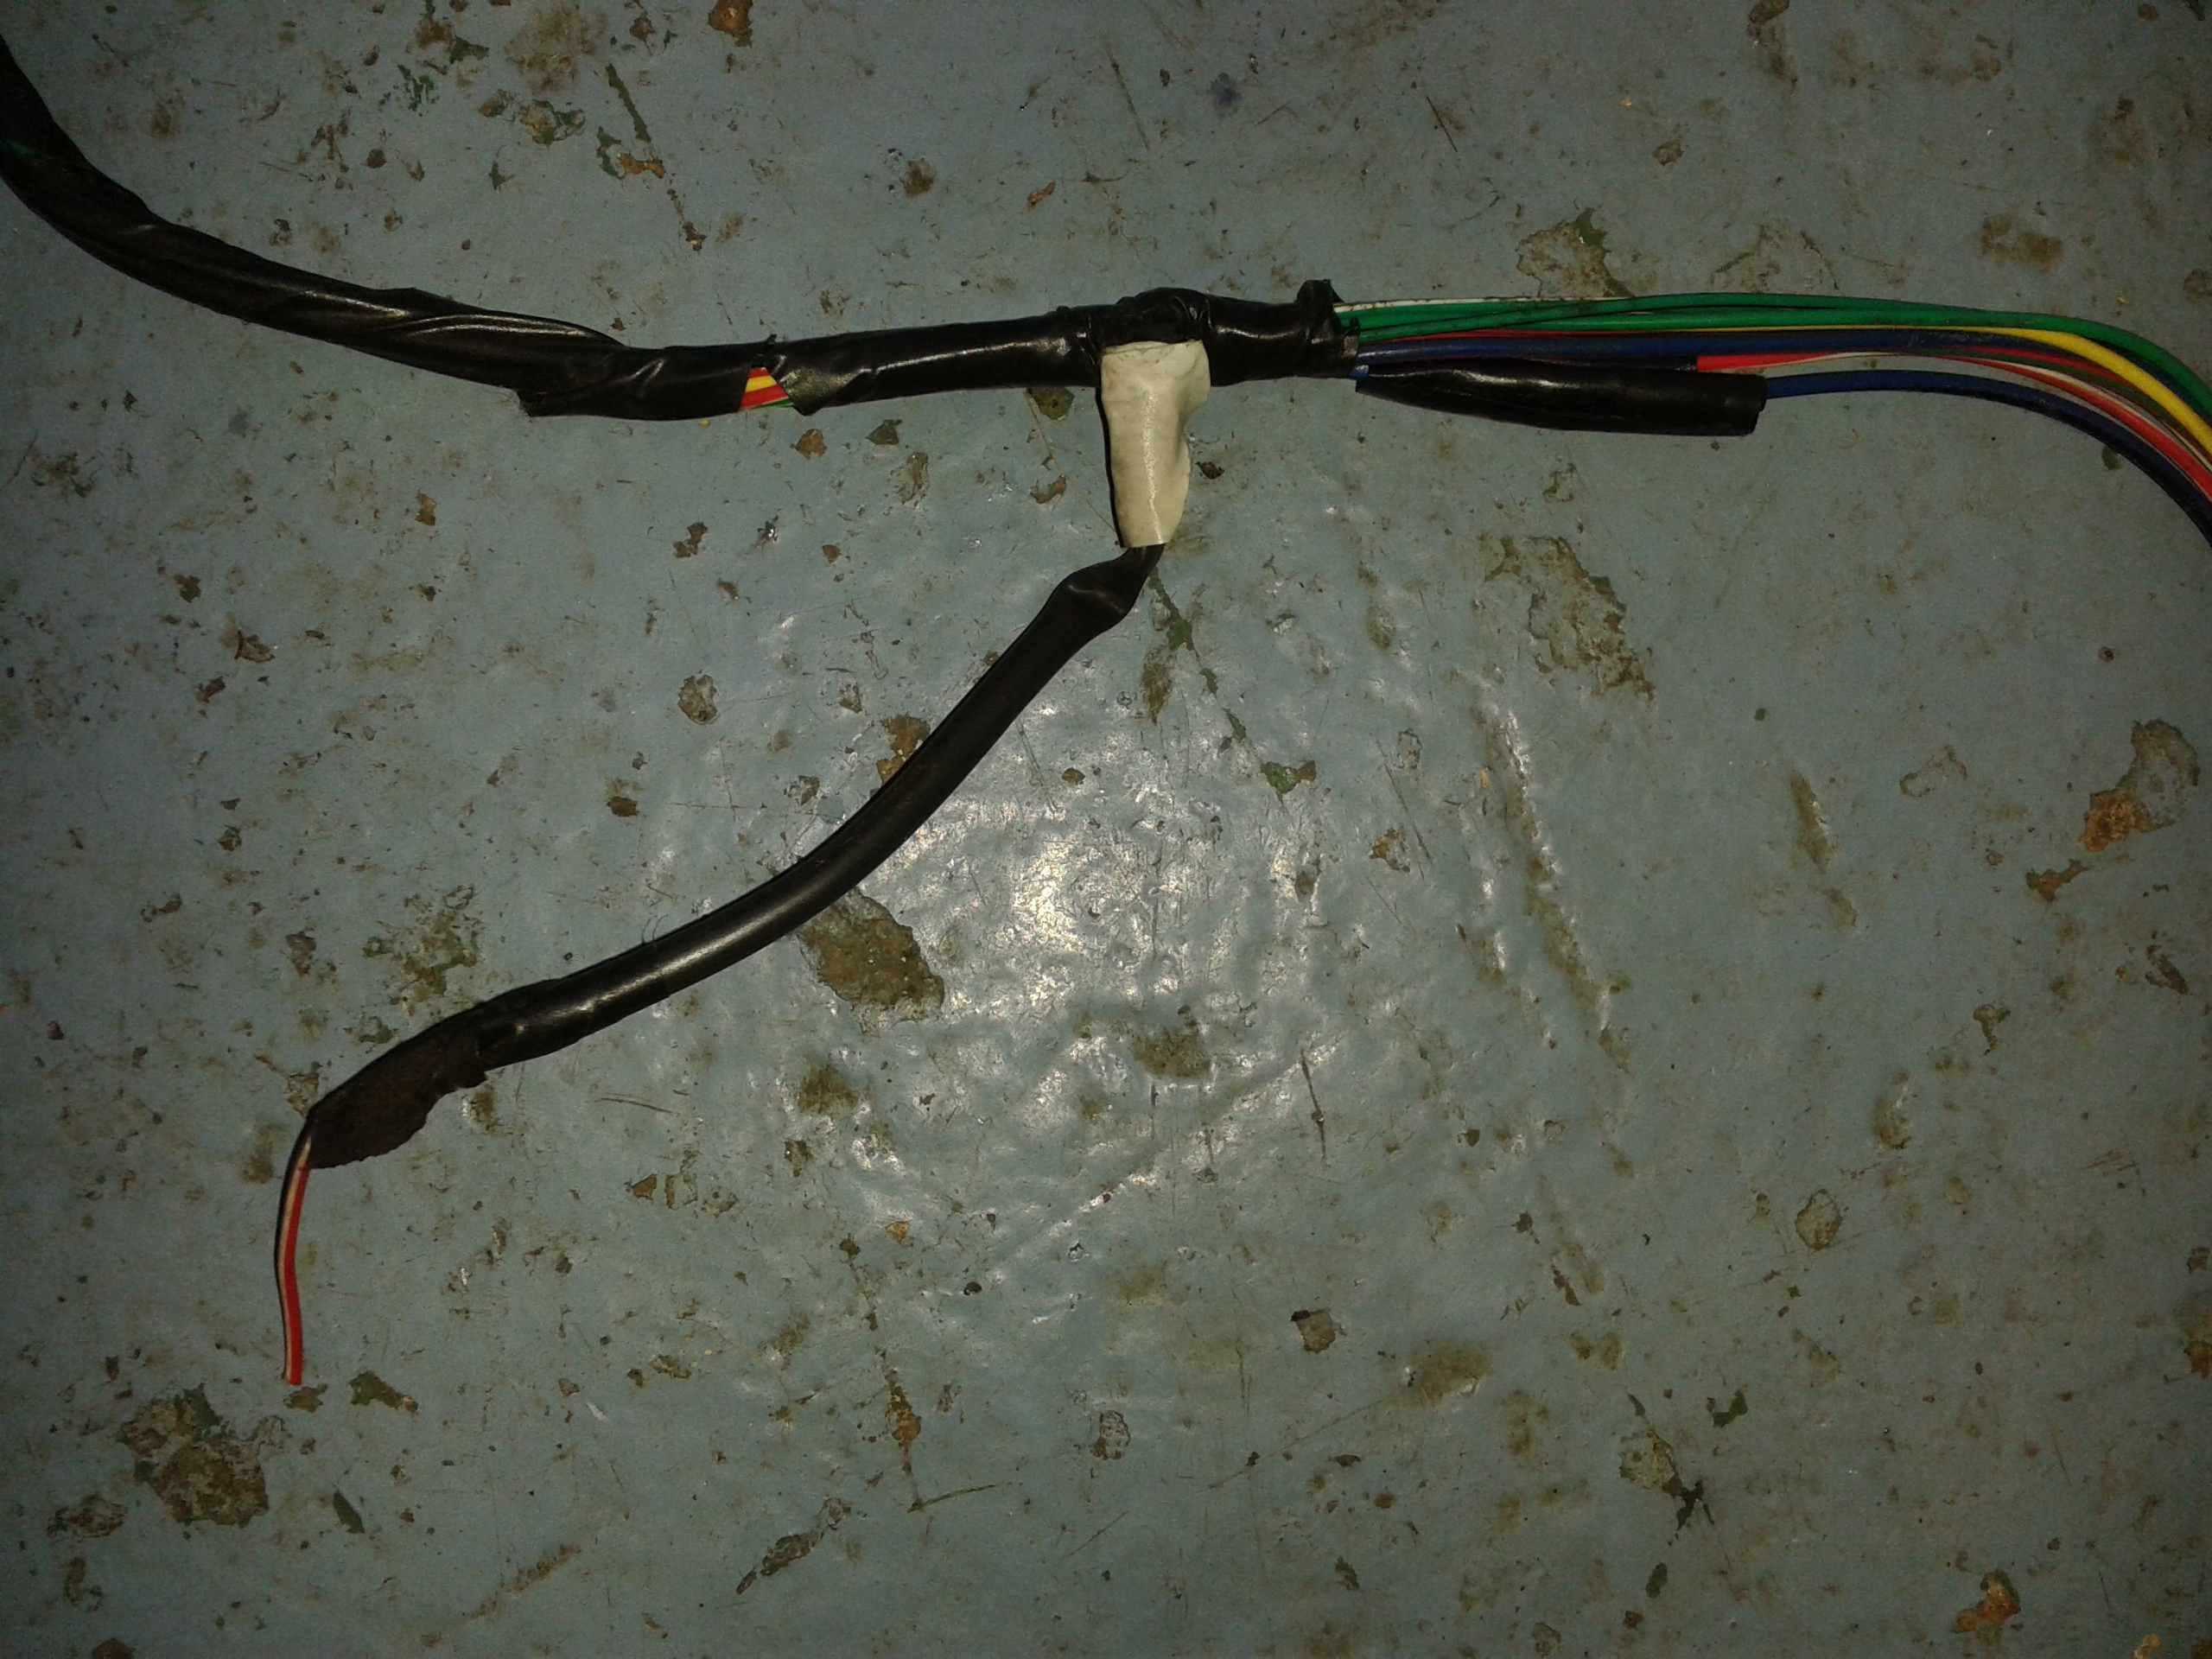 Hmm - garage floor's starting show signs of severe wear and tear after all the dismantling / cleaning stage. A new coat will have to wait 'til spring now tho'. |
|
|
|
Post by gwnwar on Nov 27, 2014 18:50:39 GMT
Single R/W were used for door switches.. Looks like it goes to the right in pic if so follow it to a plug and more info were in harness and pics..why did you cut the connector off??
|
|
|
|
Post by miket on Nov 30, 2014 8:16:45 GMT
Thank you and good question - I have no recollection of cutting anything off. I remember finding one of the minor grounds had already detached itself from its eyelet/terminal so maybe this wire died of natural cauases too.
Similarly the eyelet on the major ground to the ppf was split and the cable corroded back an inch or so. So I need to cut back and crimp/solder a new one on - and I suspect that's easist done before covering it over with a tunnel.
Local Rocket builder Carl kindly lent me a 200Nm-capable torque wrench so front hub nuts are done.
And the modified rear-wing stays (hole filled with JB weld) have been re-marked up ready for drilling for smaller bolts. I'm taking them to a neighbour with a drill press rather then risk my hand drill expressing a preference for softer material and wandering off target.
|
|
|
|
Post by miket on Dec 1, 2014 17:52:24 GMT
Hopefully I've now finished fettling the rear wing-stays. A while back I found that they're designed for the 1.8 with larger brakes and aren't a direct fit on my old 1.6. So now with one M8 hole drilled out to M10, the other M8 hole replaced by 2 x M5 holes and a crescent ground out to allow fit around the calliper bracket ... I think I've finished them! Also drilled the 4 x M5 holes in the hub nub. I have a modest total of four drills/drivers and only one of them was actually able to reach to make the holes without being obstructed by the suspension. If you're one of those who dives in and dismantles everything at the outset it might be worth marking the holes beforehand and drilling whilst there's as little in the way as possible. Oh and a wide drill chuck will want to wear away the rubber boot at the end of the shaft - I ended up protecting the rubber by taping a section of a plastic packaging around it. 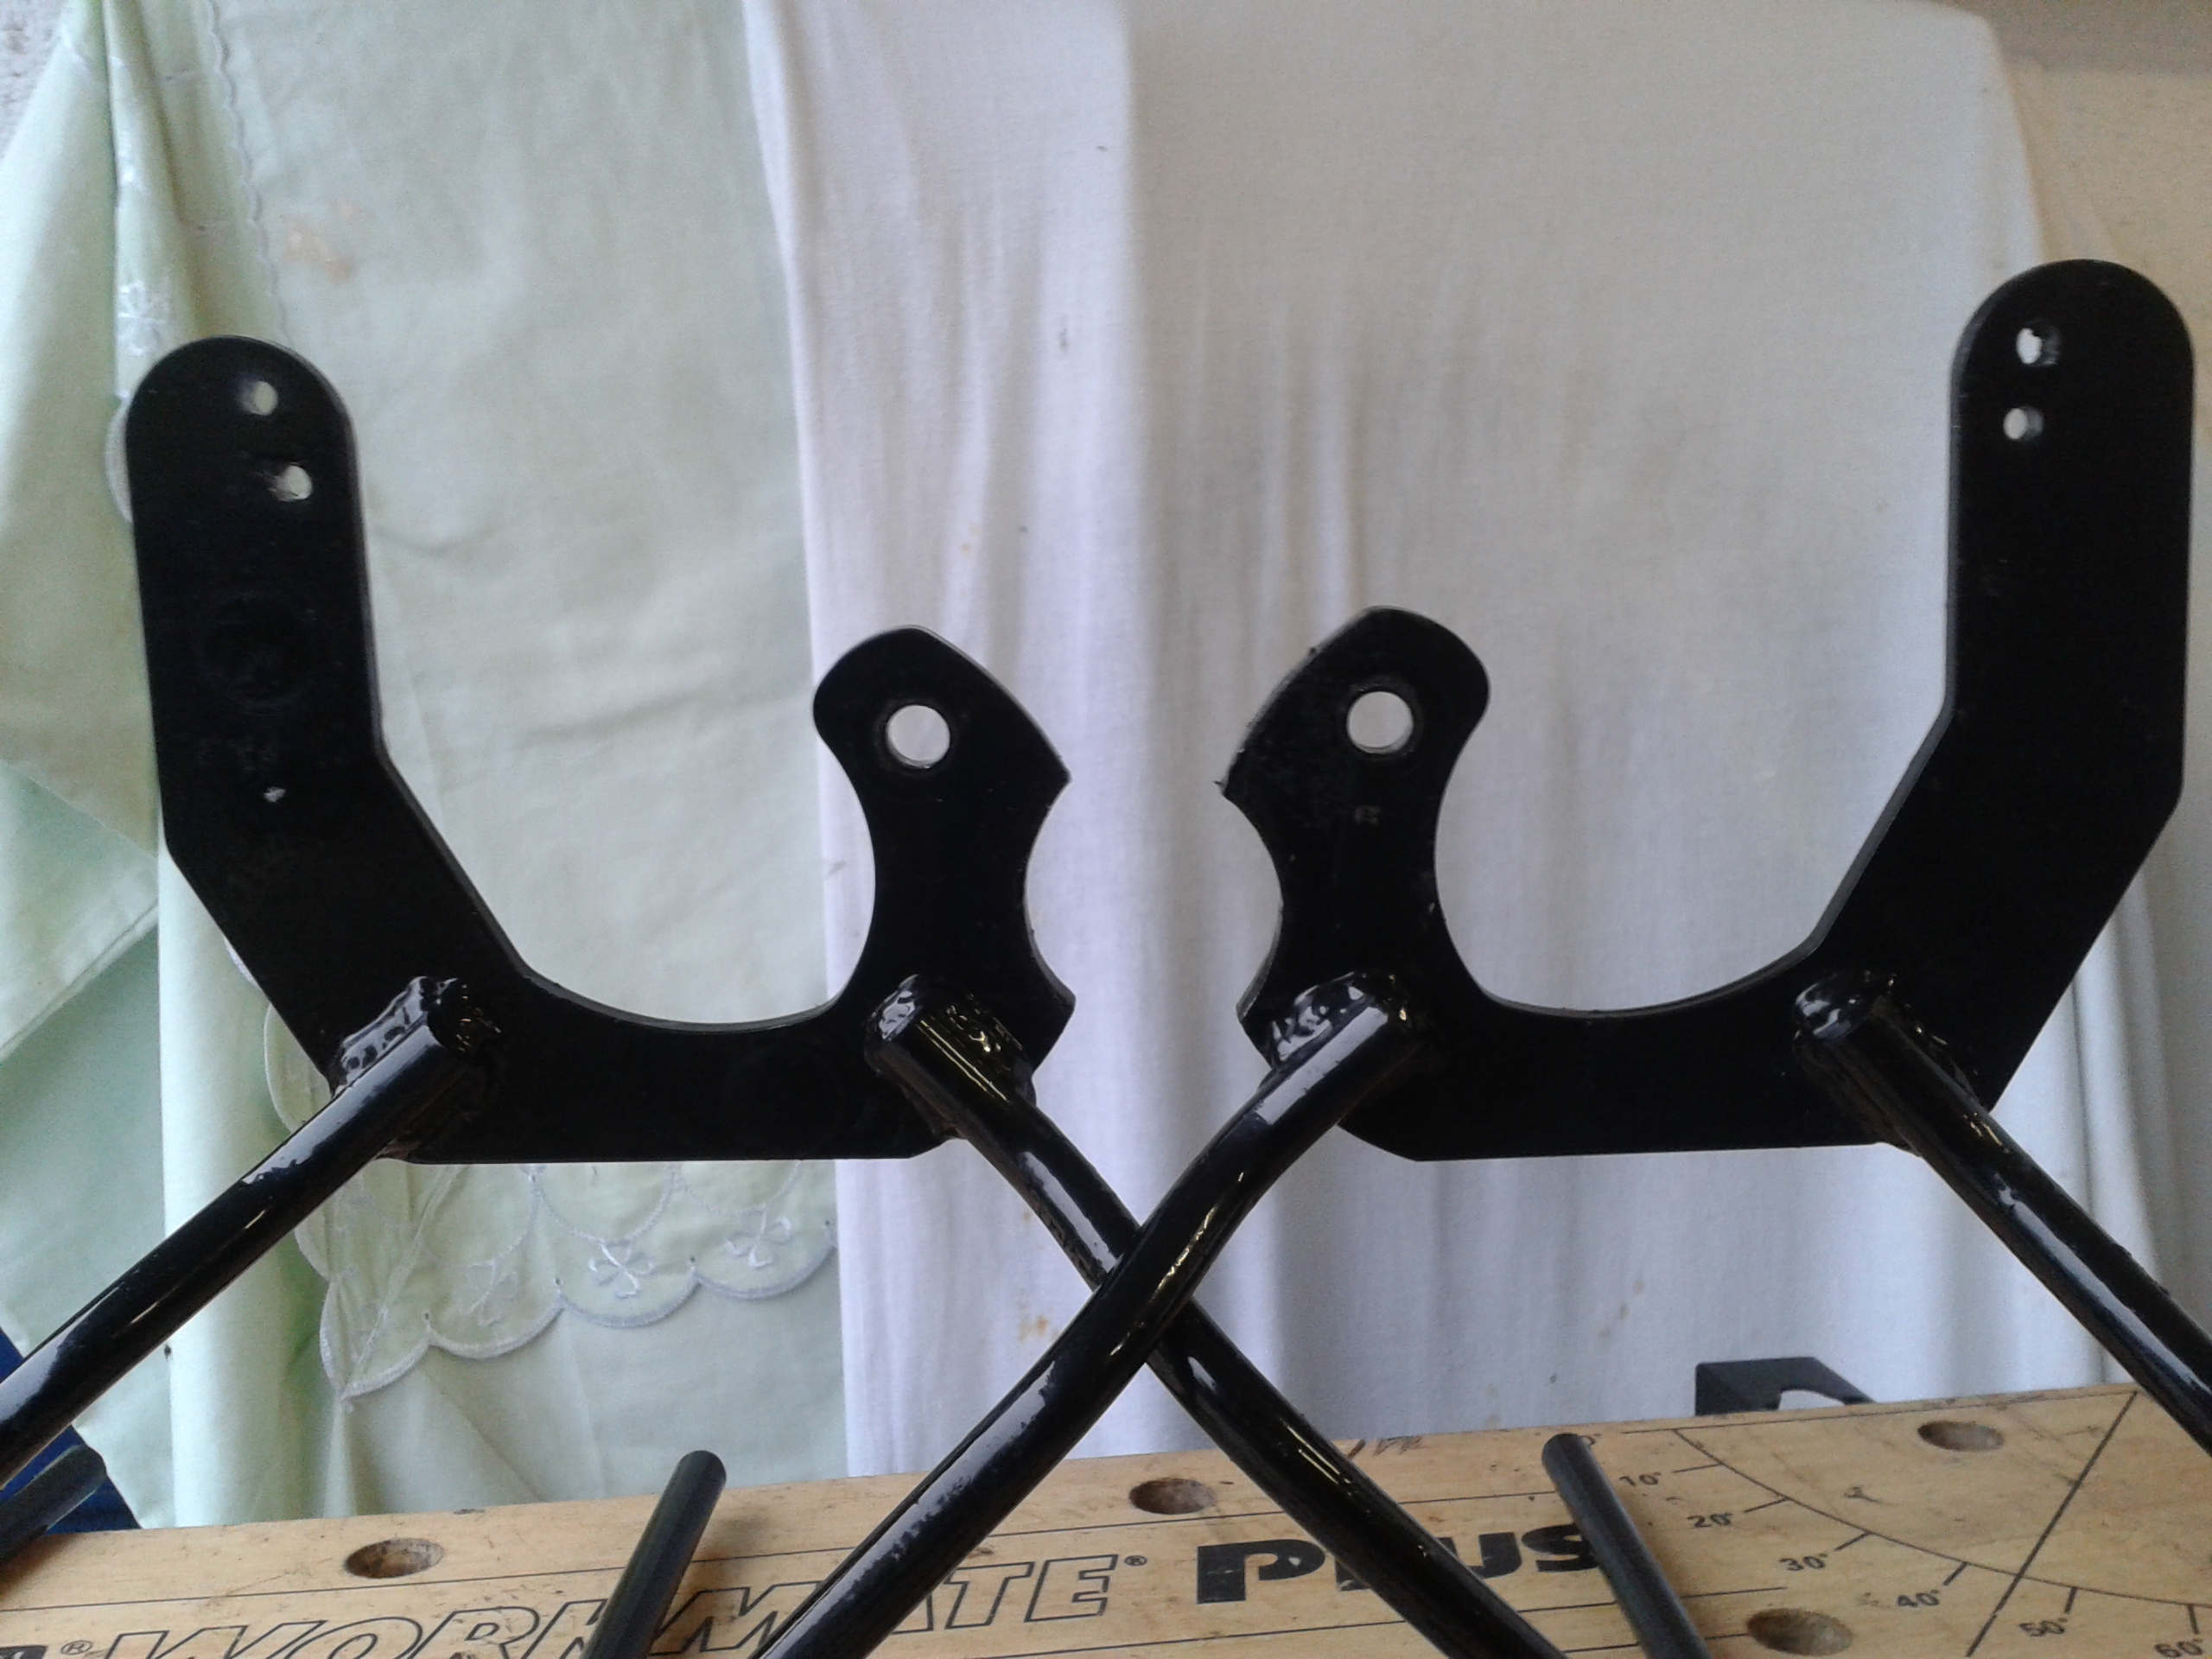 I won't put the rear stays on until my rear callipers are ready. Also Crimped and soldered the new earth terminal / eyelet on and re-attached it the ppf girder. Moved on to seeing how best to run my front-to-back loom along the ppf girder... more thinking to do on the options. |
|
|
|
Post by miket on Dec 2, 2014 17:11:01 GMT
Did my first riveting today albeit with a standard hand tool not the Lazy Tong. Put my brake/fuel line brackets on and all went smoothly. I wasn't sure whether the popped rivets are waterproof - it feels they must be, but I put a bit of sealant in the holes just in case.
Also dug out the 'special tool' to hold the no-longer-captive nuts whilst putting the rear dampers/springs back on. I got them on okay, but it raised a question about bolt markings and IVA that I'll raise a separate thread for.
Went on to get the disassembled brake parts back out of storage with a view to assembly. It's strange how what seemed acceptable parts when I was surrounded by the detritus of dismantling the mucky donor now look unacceptable for assembly on to an embryonic Exo... more shopping required.
|
|
|
|
Post by Toed64 on Dec 3, 2014 11:36:29 GMT
Those wing stays are an enormous improvement on the original, rather approximate flappy things...
|
|
|
|
Post by miket on Dec 3, 2014 16:32:29 GMT
Yeah agreed - I'd rather have to make changes to the new ones than use the originals.
Today was too nice a day to spend much time in the garage, but did my first pistons-into-callipers assembly with seals suitably red-greased. Thanks again gwnwar for the earlier pointer to the vid of how to do it - without the technique I'd have been chasing greasy rubber around for much longer.
|
|
|
|
Post by miket on Dec 5, 2014 9:24:59 GMT
Another rookie mistake made which I share for any novices who follow ... it turns out wiring conduit is sold based on internal diameter size ... who'd a thought it ... any one need any oversize p-clips!
Noticed my stamped vin number is lost under powdercoat and not really legible. I guess others must have hit this issue so I'll do some reading. If only I could retain everything I read in build-threads the first time I read them.
Also realised that the bods at POR15 who say it needs 2 coats weren't all working in the marketing department. Where I only put one coat there are little specks of rust colour over what I presume are pin-holes in the first coat.
|
|
|
|
Post by miket on Dec 7, 2014 17:14:06 GMT
I decided to try to avoid drilling extra holes in the ally girder for my loom's p-clips, so I got some 8mm OD / 5mm ID steel tube and made some bushes to fill the 8mm holes that the earth cable's plastic clips were in and make them the same size as the p-clip mounting holes at 5mm.... if I'd known I'd be buying tube and doing that a while ago then I could've used the same technique on the rear wing stays instead of JBWeld. 20/20 hindsight working well. Went on to roughen, clean and rivet the floor panels on along with some Tigerseal. After my earlier concerns, the Lazy Tong riveter behaved itself admirably and made light work of the job. Learned a couple of things: never exuberantly extend the Lazy Tong upwards underneath your garage door's roof rail, and if your Lazy Tong has a clip to hold it closed then make sure it's out of the way or it gets mangled. Respect to those who did the job with a hand riveter. I left the Tigerseal nozzle at its original hole size, laid a single bead with a loop round rivets and extra where necessary, and it only used a third of a tube. Some excess PU emerged when riveted, but I'd masked it up with tape so no worries. Once again golf tees made reasonable clecos. Did a quick check with a lamp in the dark and the floor doesn't leak light so hopefully it won't leak water either. I found I had one rivet slightly overhanging the floor-sheet despite my best endeavours, so filed that back a tad. Getting the floor on felt a bit of a milestone, not really sure why, but certainly warranted celebratory apple pie. 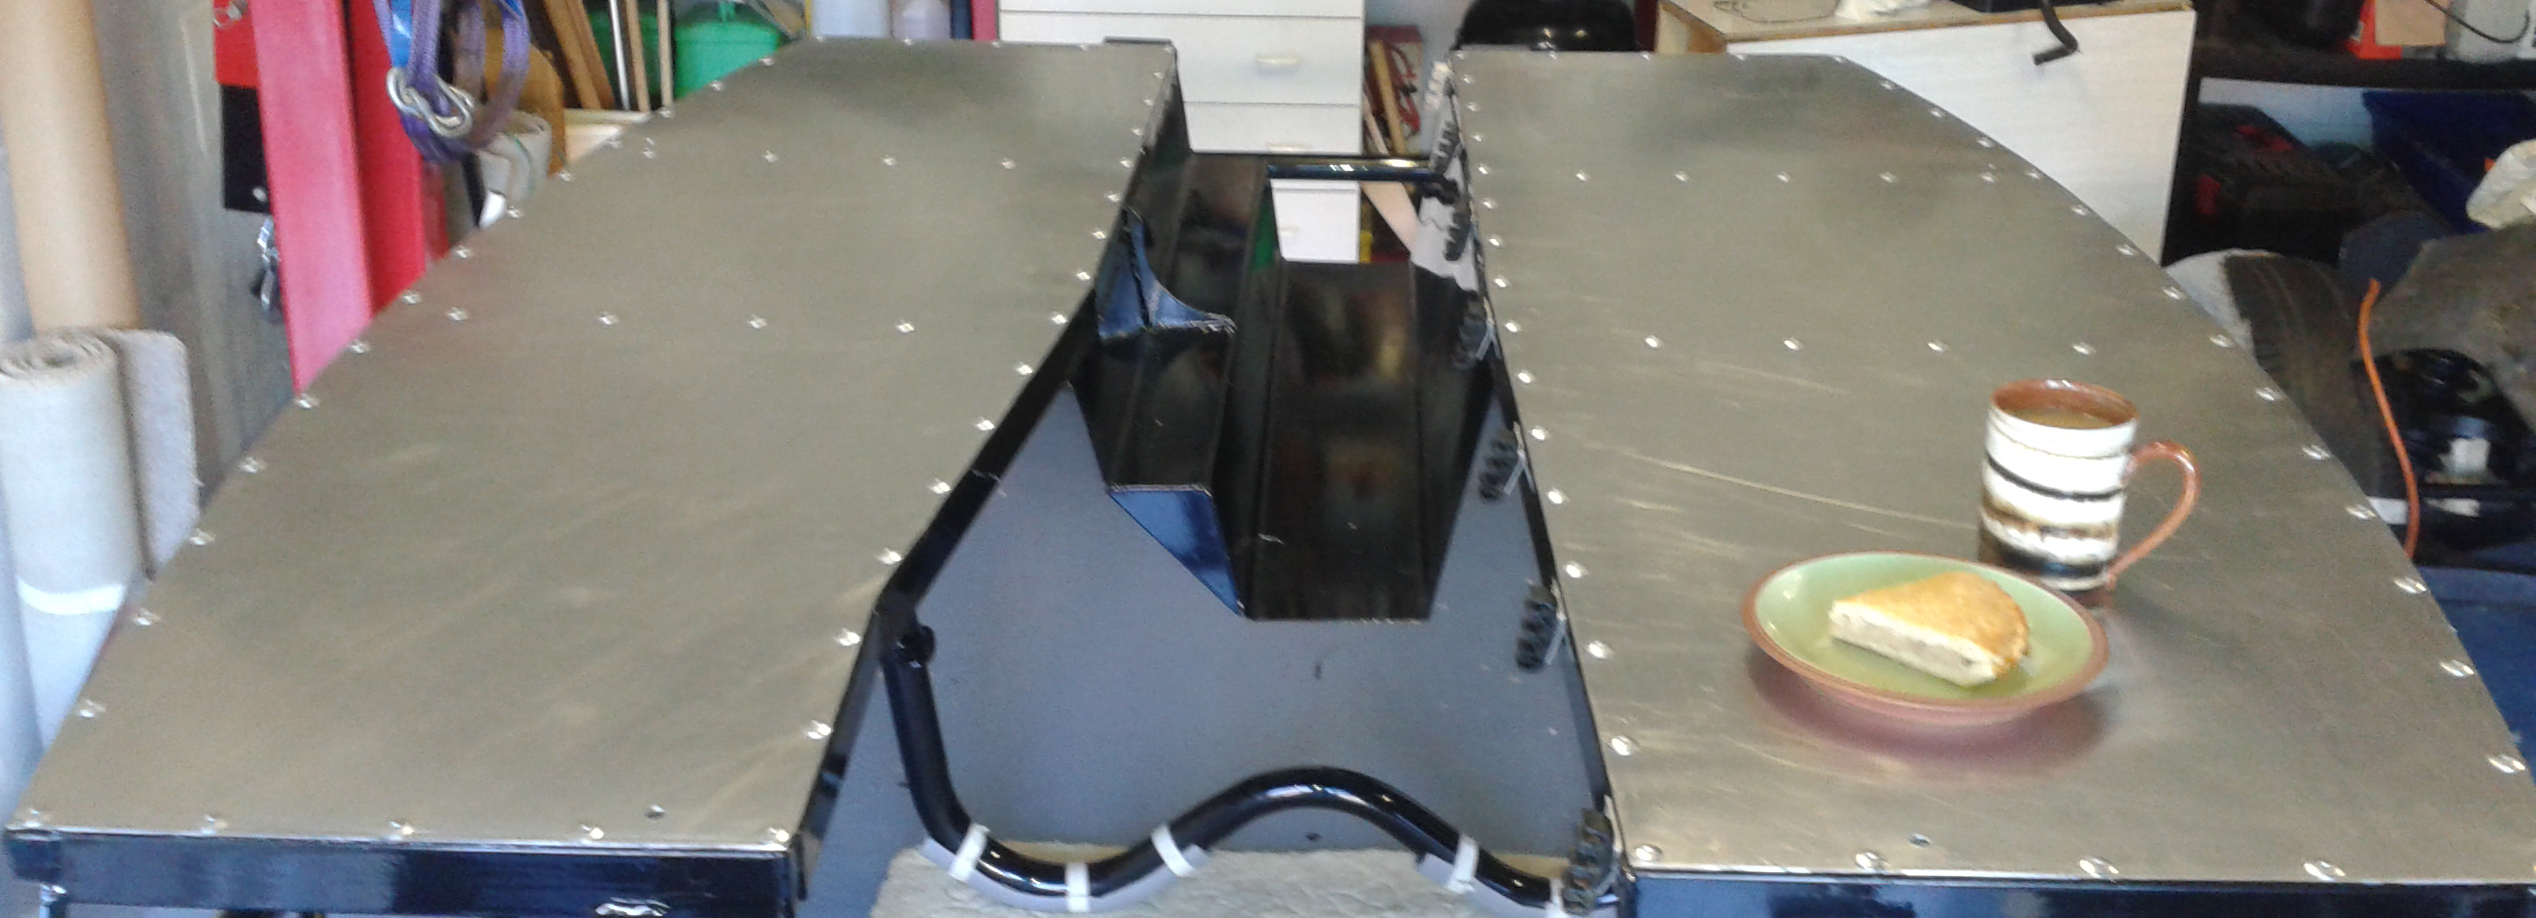 |
|
|
|
Post by miket on Dec 8, 2014 17:04:26 GMT
A while back I found my loom had a disconnected single red/white door switch wire. I was about to terminate it tidily and forget it, but then recalled that in some manufacturer's cars the door switches affect what the ECU will let you do. Does anyone knows whether my early NA likely to have any no-longer-needed 'auxiliary' wires that I'll need to deal with in any way other than insulate/terminate?
Thanks in anticipation - I can be a bit more focussed in my searching/reading with a few clues.
|
|
|
|
Post by gwnwar on Dec 8, 2014 19:39:42 GMT
Cut it out.. no problem..
|
|
|
|
Post by miket on Dec 9, 2014 9:05:15 GMT
That's nice n straightforward then - thanks.
|
|
|
|
Post by miket on Dec 9, 2014 17:09:17 GMT
Another day; another set of challenges. My set of long-reach circlip pliers arrived so I set to the rear brake circlips, but the end points of the pliers were too big so I ground them down 'til they fit. It was still proving a struggle so I had a go at the circlips with a cheap bradawl and they popped out easily! Hopefully the pliers will come in useful for something one day. Cleaned and greased the hand/e-brake bits for their seals. Got the first one done okay and then when I came to the second it was different:- 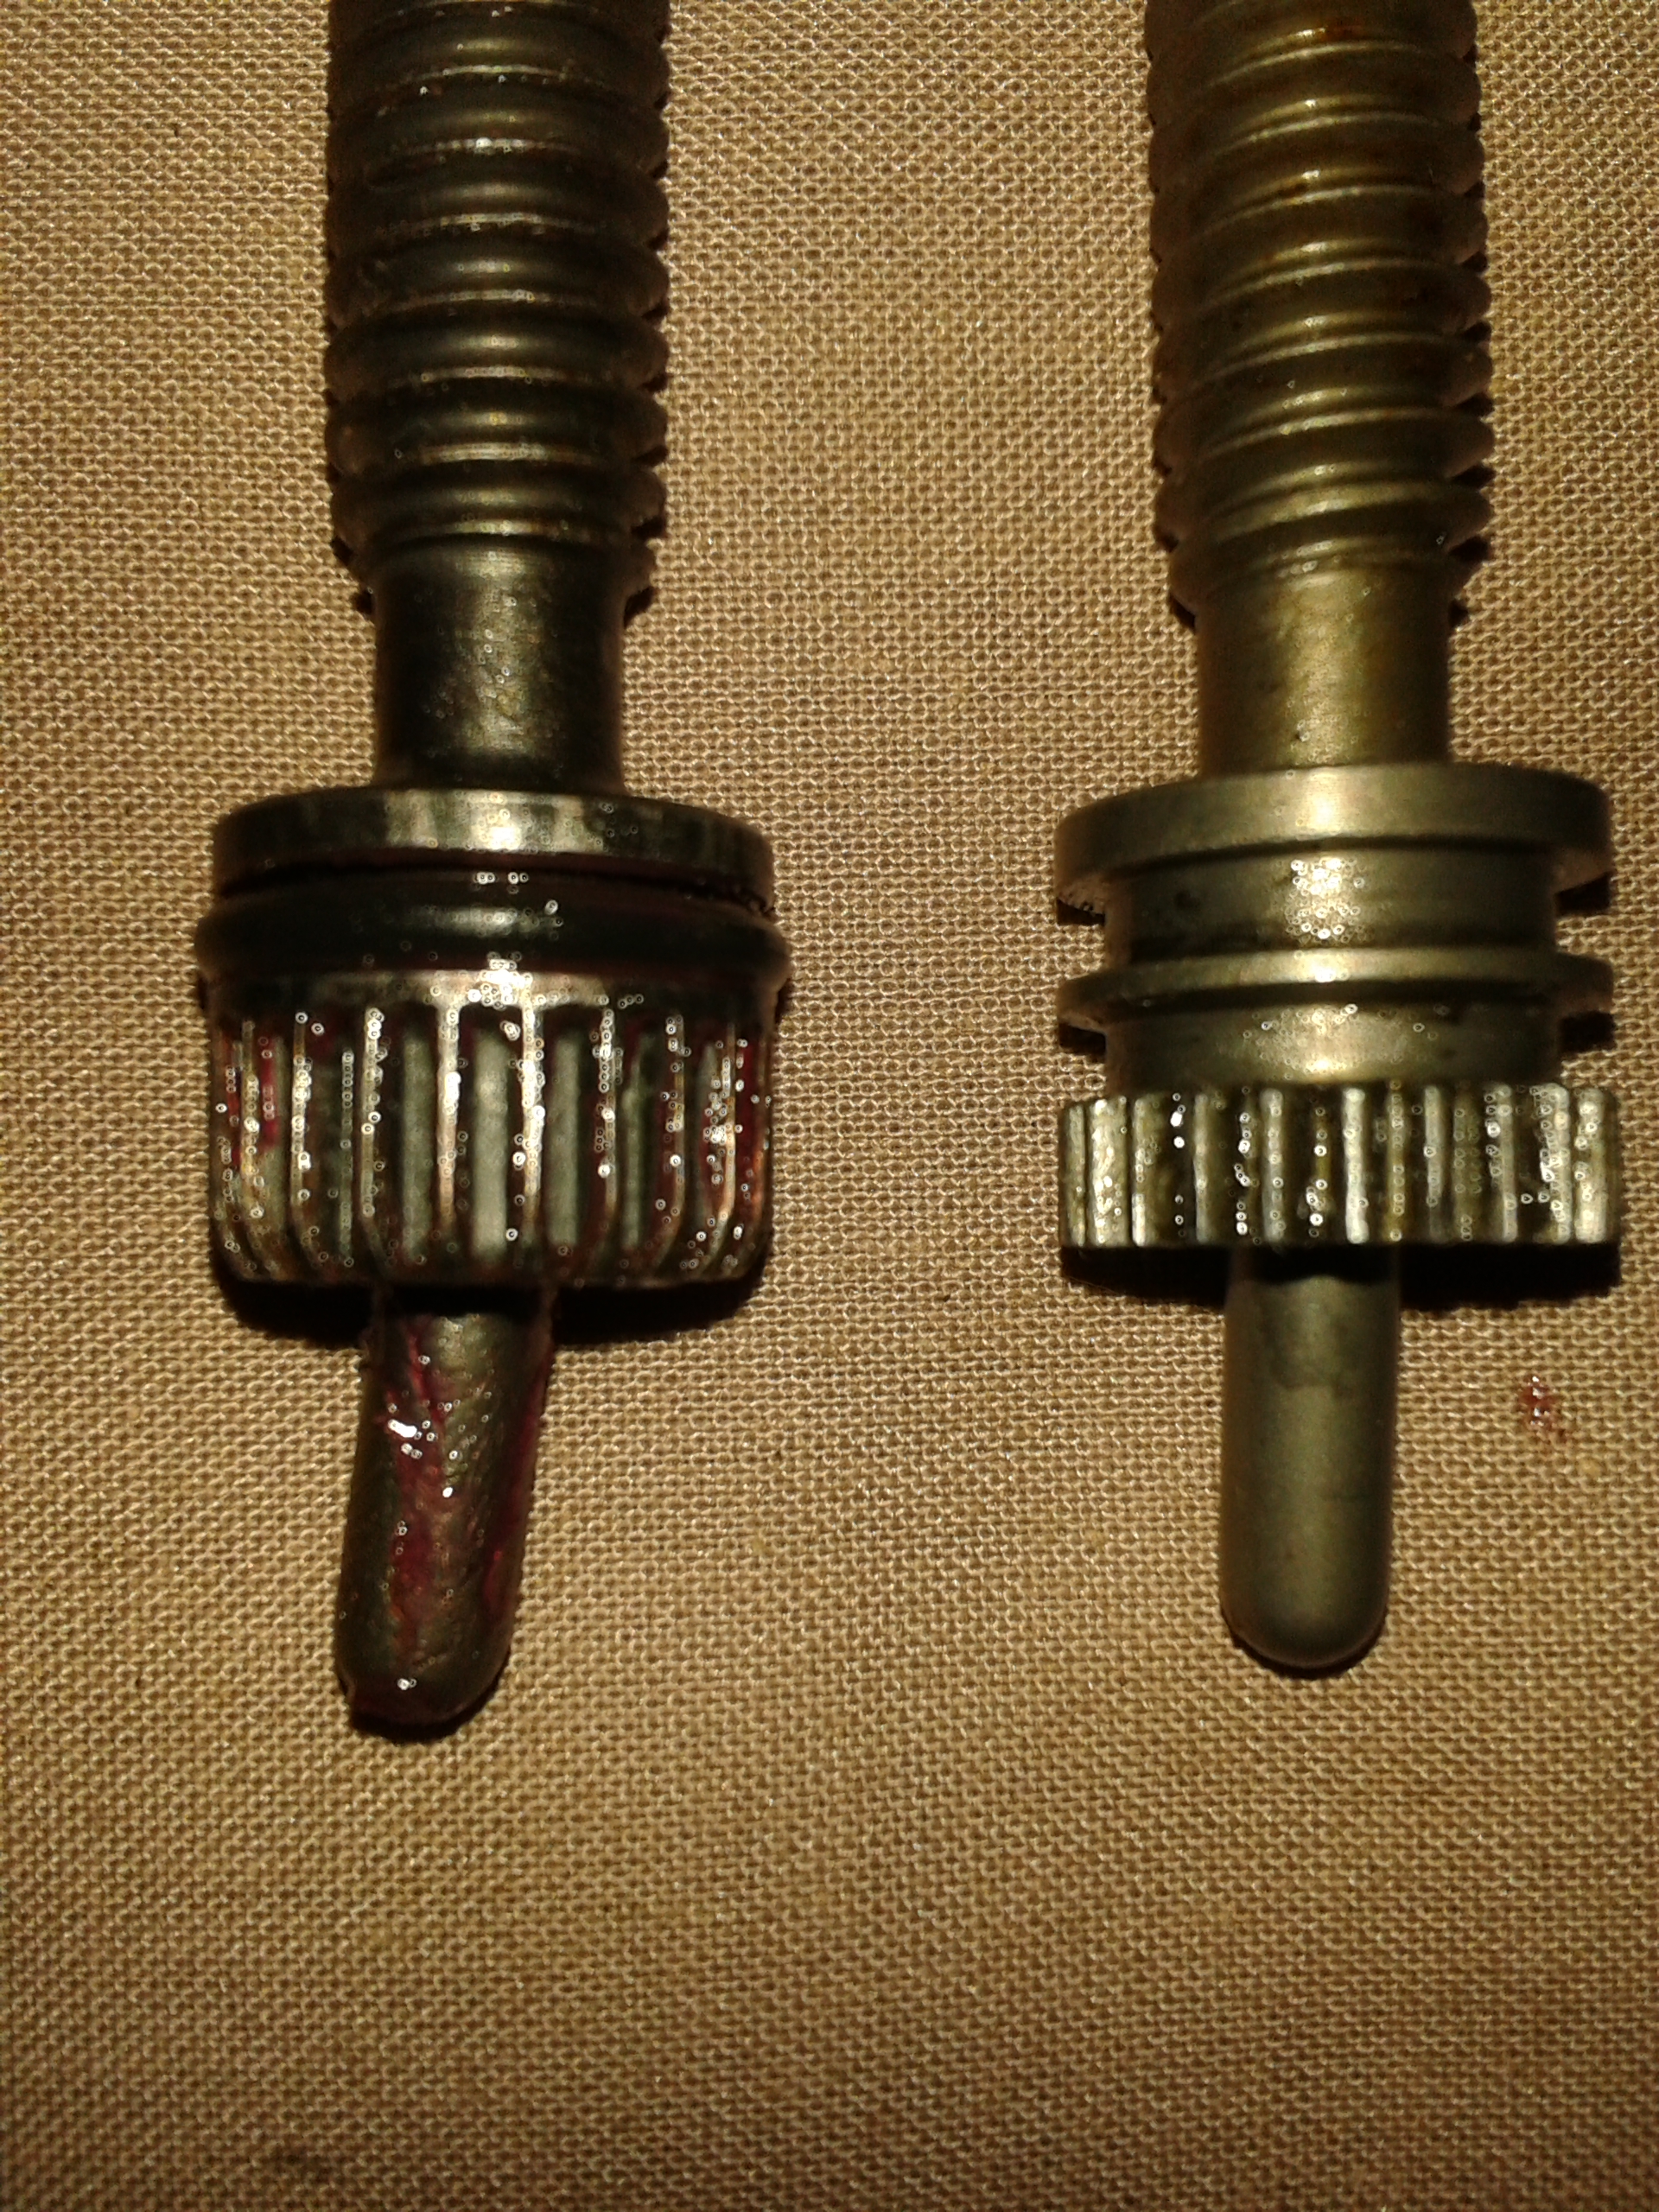 ..and this second one has two channels that would accept the o-ring. I wish I'd noticed before I'd taken the old o-ring off! Looking at them it feels that the channel furthest from the gear teeth is the most appropriate even though it looks a shade wider, but if anyone knows different please feel free to say. I moved on to a front brake and have been unable to persuade the piston into the bore. I thought perhaps the dust boot was obstructing it so I tried putting the boot on the piston first and feeding the boot in to the bore, but still failed miserably ... and then, without the aid of any tools, managed to split the new Budweg Service Kit dust boot with my fingers. Grrr. More shopping; more waiting 3-days to resume combat. All front brake piston-into-bore insertion tips welcomed. On the plus side; the Christmas tree's up now. |
|
|
|
Post by miket on Dec 10, 2014 12:43:41 GMT
Brake calliper servicing completed... until leaking brake fluid says otherwise anyway.
Getting the circlips back in the rear callipers was a palaver, but at least the carefully ground circlip pliers got used after all.
I revisited the fronts and it had been the dust boot getting in the way of inserting the piston. So I went back to starting with the boot on the piston overhanging the edge and inserting the boot in to the bore from there, and today it worked okay. I think this is because I salvaged an original dust boot that was in good condition and it had more materiel than my new/split service-kit boot i.e. it had more rubber to be able to extend it in to the bore from the piston.
I put a handbrake spring back on, but it doesn't seem to sit flat so I want to do a bit of research before assuming that that's as good as a spring gets.
|
|
|
|
Post by miket on Dec 11, 2014 12:00:44 GMT
I've been aiming to reuse the fuel lines and the fuel/brake line plastic clips from the donor. I'm generally pleased with the approach, but still concerned about how close the brake line is to the seatbelt buckle hole and any nut/bolt-head that'll fill it.  I guess this must have also been an issue for previous builds using p-clips but I don't think I've seen any mention of it anywhere. One option is to move the brake line to the remaining slot in the clip (top in the picture), but the brake line isn't a tight fit in that slot. Do you think it would be IVA-acceptable to wrap some tape round the brake line where it fits in the clip to make it a tight fit? ... plastic tape would be long lasting, couldn't go anywhere and can only help prevent any chafing?  |
|


