|
|
Post by miket on Nov 18, 2014 8:48:33 GMT
Thanks guys; excess weld duly ground down yesterday, but only to remove the peaks that would prevent a good contact either side and then POR15'd them. Clear sealant sounds like a good idea; I have black frame and black Tigerseal so I'll see how I get on report back. I also took off the power steering - just to do the simple MEV-pipe-looping system rather than anything more extensive. The pump was on this chunky bracket (below). I presume it's okay to remove this, i.e it doesn't have any other function or come in useful where it is for anything later? 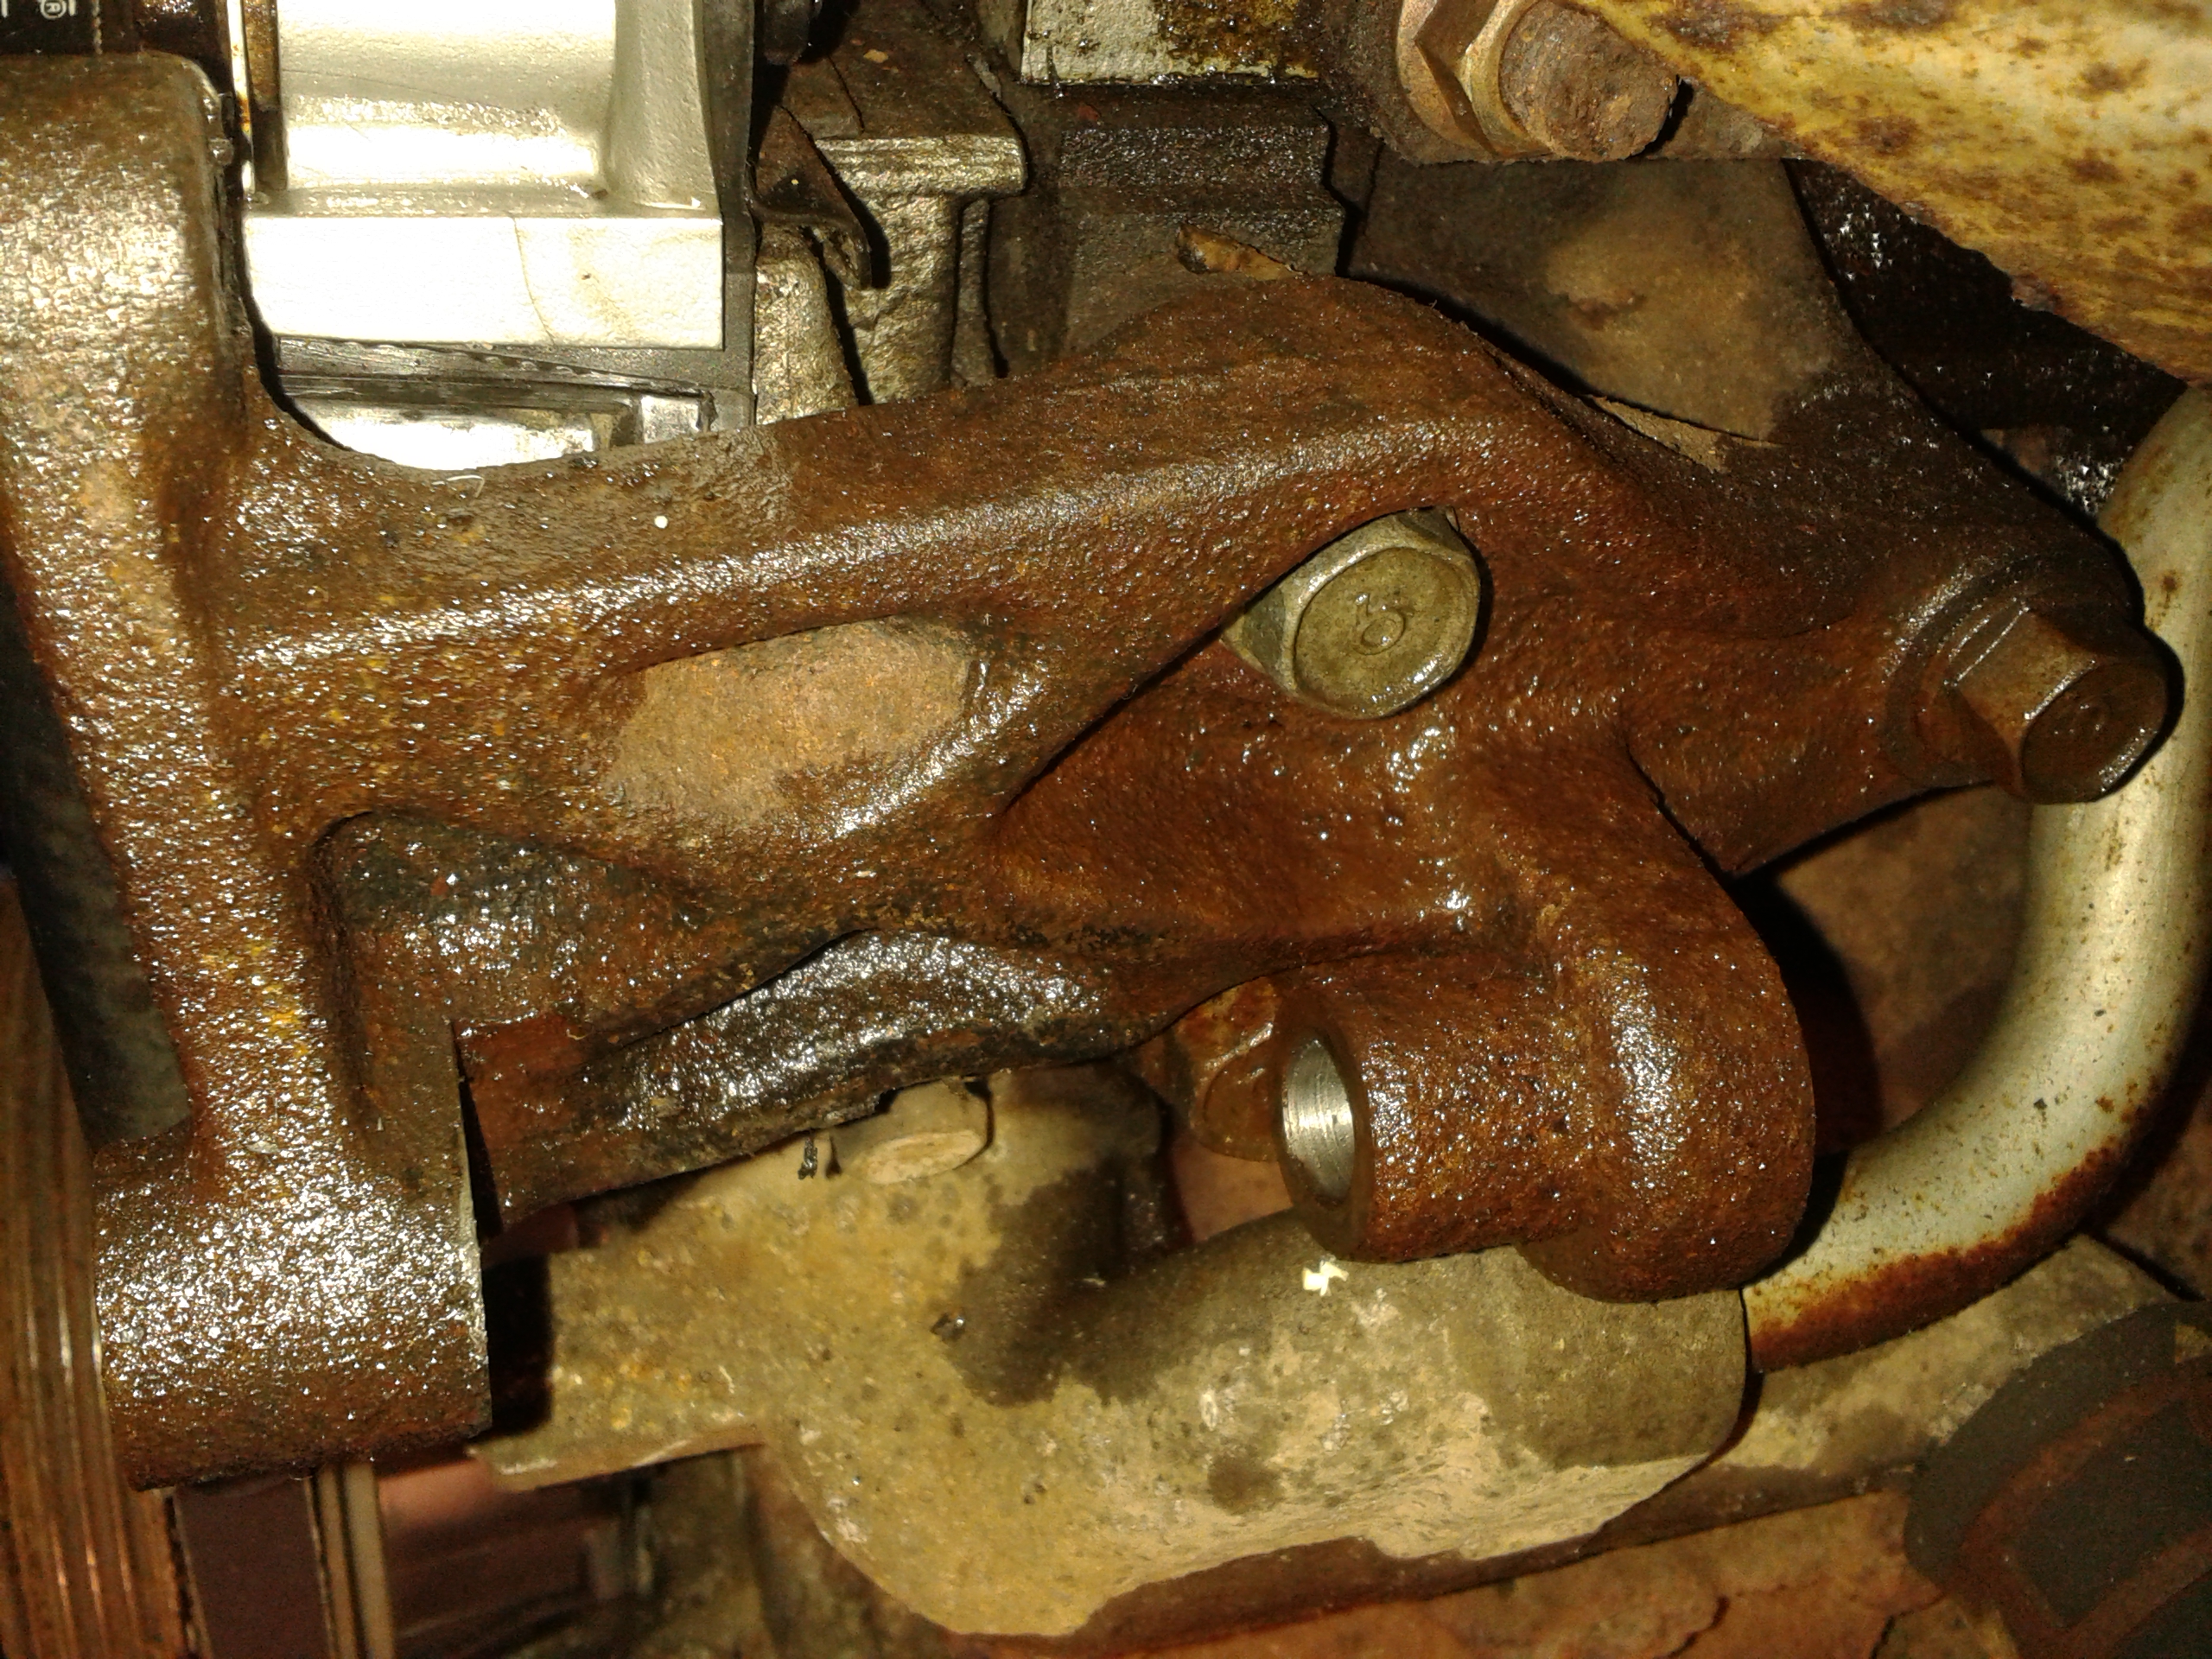 |
|
|
|
Post by snowbird1 on Nov 18, 2014 13:41:44 GMT
No problem removing the bracket, bolts are all in blind holes.
|
|
|
|
Post by miket on Nov 18, 2014 19:41:13 GMT
That's great - thanks for the info. I see that one of the bolt heads is hidden behind the mount for the pivot bolt so breaking it might be a challenge.
Got the floor cut out today. Even a fine 'permanent marker' pen didn't get close enough in so ended up using a scribe tool. There are a couple of bonus curves in my sawing, but overall I'm happy with it. I also marked out where the frame meets the floor including cross-members, then cut and peeled off the protetive film - for the adhesive to find metal. I'm hoping that leaving the rest of the film where the floor is visible from above will help give a tidy edge if any adhesive squeezes out on the inside. I smoothed the floor edges a little with an old oil-stone - I couldn't think of anything better and didn't want to risk power tools devouring too much ally.
Now to learn how to rivet. I have a nagging thought that I'll get deeply in to riveting and only remember the adhesive/sealant too late! Watch this space.
|
|
|
|
Post by miket on Nov 19, 2014 12:45:10 GMT
I got distracted on to planning the fuel/brake line run... I had a look at using p-clips but I can't find a way that keeps the 3 lines any less the 45mm (ish)top-to-bottom on a slightly longer bracket. This means that the uppermost line would be perilously close to the reinforced seatbelt hole/nut which is only 50mm up from the bottom edge of the floor. I.e it feels that it would be too close to get a socket on the seatbelt nut.
In all the pics I've seen on the forum no-one seems to have had to loop around the seatbelt nut/hole so I must be doing something wrong...I presume I have to avoid running one line over the top of another line's fixing head?
|
|
|
|
Post by gwnwar on Nov 20, 2014 7:54:07 GMT
On the PS bracket the part blocking the rear bolt is made to slide into the bracket.Pretty rusted on..try hitting it from the rear forward..or grind the rust off it and beat it to the rear..If all fails cut it off with a cut off disc.
|
|
|
|
Post by mrjingles705 on Nov 20, 2014 9:39:43 GMT
On the PS bracket the part blocking the rear bolt is made to slide into the bracket.Pretty rusted on..try hitting it from the rear forward..or grind the rust off it and beat it to the rear..If all fails cut it off with a cut off disc. +1 on this; it can be tapped free, it just takes time.... alternatively cut it, but be careful not to smack the water coolant bracket below (remove first maybe?). |
|
|
|
Post by miket on Nov 20, 2014 17:36:28 GMT
Top knowledge gents - I would never have suspected that and hence never gone to research it. Soaked overnight and persuaded it to move today. That is some PS bracket - I can feel the improvement in 0-60 time already.
So a good day today; as well as the PS girder removed, I got the floor drilled and the JB Weld arrived so I used it to start remodelling my rear wing stays as suggested. I've noted the advice about not fixing the floor until resolving the pedals, loom and fuel/brake lines so I'll look at those next.
Had a test run of my lazy tong riveter and on the 2nd rivet got the mandrel well stuck in it. A friend helped remove it by pushing it through with a new unused rivet ... which is now stuck ... without the head of the riveter in place so I can't even use the rivet that's stuck in it. Didn't let it spoil my day. Might let it spoil tomorrow tho'.
I also had another look on the forum at peoples' brake/fuel line runs, and it does seem to be normal to run a pipe over the top of the head of the next bracket's screw. I'll pilot a bracket to use the old MX% fixings and report back.
|
|
|
|
Post by gwnwar on Nov 20, 2014 18:04:06 GMT
The rivet shaft is sticking in tool before you even install in panel?? There are different size nipples (screw in)
were the stem goes into tool are you using the right size.. may want to go to next larger..
|
|
|
|
Post by mrjingles705 on Nov 20, 2014 23:38:01 GMT
Had a test run of my lazy tong riveter and on the 2nd rivet got the mandrel well stuck in it. A friend helped remove it by pushing it through with a new unused rivet ... which is now stuck ... without the head of the riveter in place so I can't even use the rivet that's stuck in it. Didn't let it spoil my day. Might let it spoil tomorrow tho'. Can you post a pic? If I'm understanding this correctly, this is the the nozzle head off right? it's hard for me to explain this but on my rivetter when one of the stems jammed, it 'notched' so it wouldn't move forward or backward..... I managed to get some grips and rotate it in place a few times to take the lip off (too some doing!) and then it come free. Only happened the once so I put mine down to a bad rivet. |
|
|
|
Post by miket on Nov 21, 2014 10:31:44 GMT
Thanks for the advices; I've got the rivet out - albeit by having to cut the mandrel head off, remove the rivet from the mandrel to be able to access the jaws, and then press down the jaws to be able to release the mandrel. I put the problem down to me rushing to play and probably using too small a mandrel for the screw-in nipple I'd installed - if I'm right then I've learned the lesson. The problem now is that MEV aren't over generous with their rivets so I can't make any mistakes without going to the rivet shop! I'll go read up on how to use it properly - it came with no instructions, but then neither did my screwdriver.
This morning I got the mx5 seats out of storage to offer-up and mark for drilling ... and discovered that the seat rail ends are bent downwards (i.e. not flat for the exocet rails) and there's big old spikes pointing down from the rails that presumably helped locate the rails in the mx5. So now it's some more reading on here to find how experienced people have tackled this previously.
|
|
|
|
Post by miket on Nov 21, 2014 13:19:50 GMT
"mx5 seat" reading done - thank you to the authors of earlier threads. I need to do/consider the following:-
- bend the bent rail ends straight with mole grips or vice. Love it. Done.
- raise rails on spacers to ride above the 40x20 sections.
- use crush tubes.
- use load spreader underneath.
- set the notches on the rails 3 different to better fit thingypit shape (presume sets seat slightly angled 'cos they'll still run parallel).
- potential palaver over passenger seat recline mechanism/trim preventing travel...some people created fixed replacement brackets, and no-one said "oh that went in just fine".
- potential for same, but less bad, on driver side.
No mention of the spike so I'll assume it's to be cut off rather than penetrate the flooring.
|
|
|
|
Post by nitram on Nov 21, 2014 22:54:28 GMT
You are doing fine. Cut the spikes off, bend the rails straight and bolt it in with spacers that suit. The seats of the donor (and maybe the runners) change from year to year and model to model. Just go with your instinct.
|
|
|
|
Post by miket on Nov 22, 2014 18:14:29 GMT
Thanks for the welcome encouragement. MX5 seat rails straightened, spikes cut off, seats offered-up and holes marked. Driver's seat is fine. Passenger one has the pre-warned-of issue with the recliner mechanism cover. The round section of the recliner cover touches the vertical metal side rail when forward - potentially trapping the seat-belt. Slid back the same section intrudes into where the side panel will want to be. MEV suggests removing the recliner cover, but it feels like that leaves sharp edges near the 'belt. Perhaps I can thin down the cover somehow. Now that I've seen the issue I'll re-read the previous threads in context. If you're one of the people who appeared to install mx5 seats I may be in touch! The holes in the rails are 14 mm but the bolts I took out of the mx5 are 10 mm. The centres of my holes are only 8 mm from the edge of the frame's 20 mm box section cross-rails, so 14 mm holes would be 1 mm from the edge of the frame's 20 mm box section. I don't know the gauge of the metal in the 20 mm square tube but it feels I'd be nibbling in to it. I also knocked up my first ever bracket - surely a rite-of-passage for a kit car builder. Aim is to use the old MX5 clips for the fuel/brake line front/back run. I'll reinforce the plastic clips with some PU. Just need another 6 now! Any advice on any shortfalls welcomed. 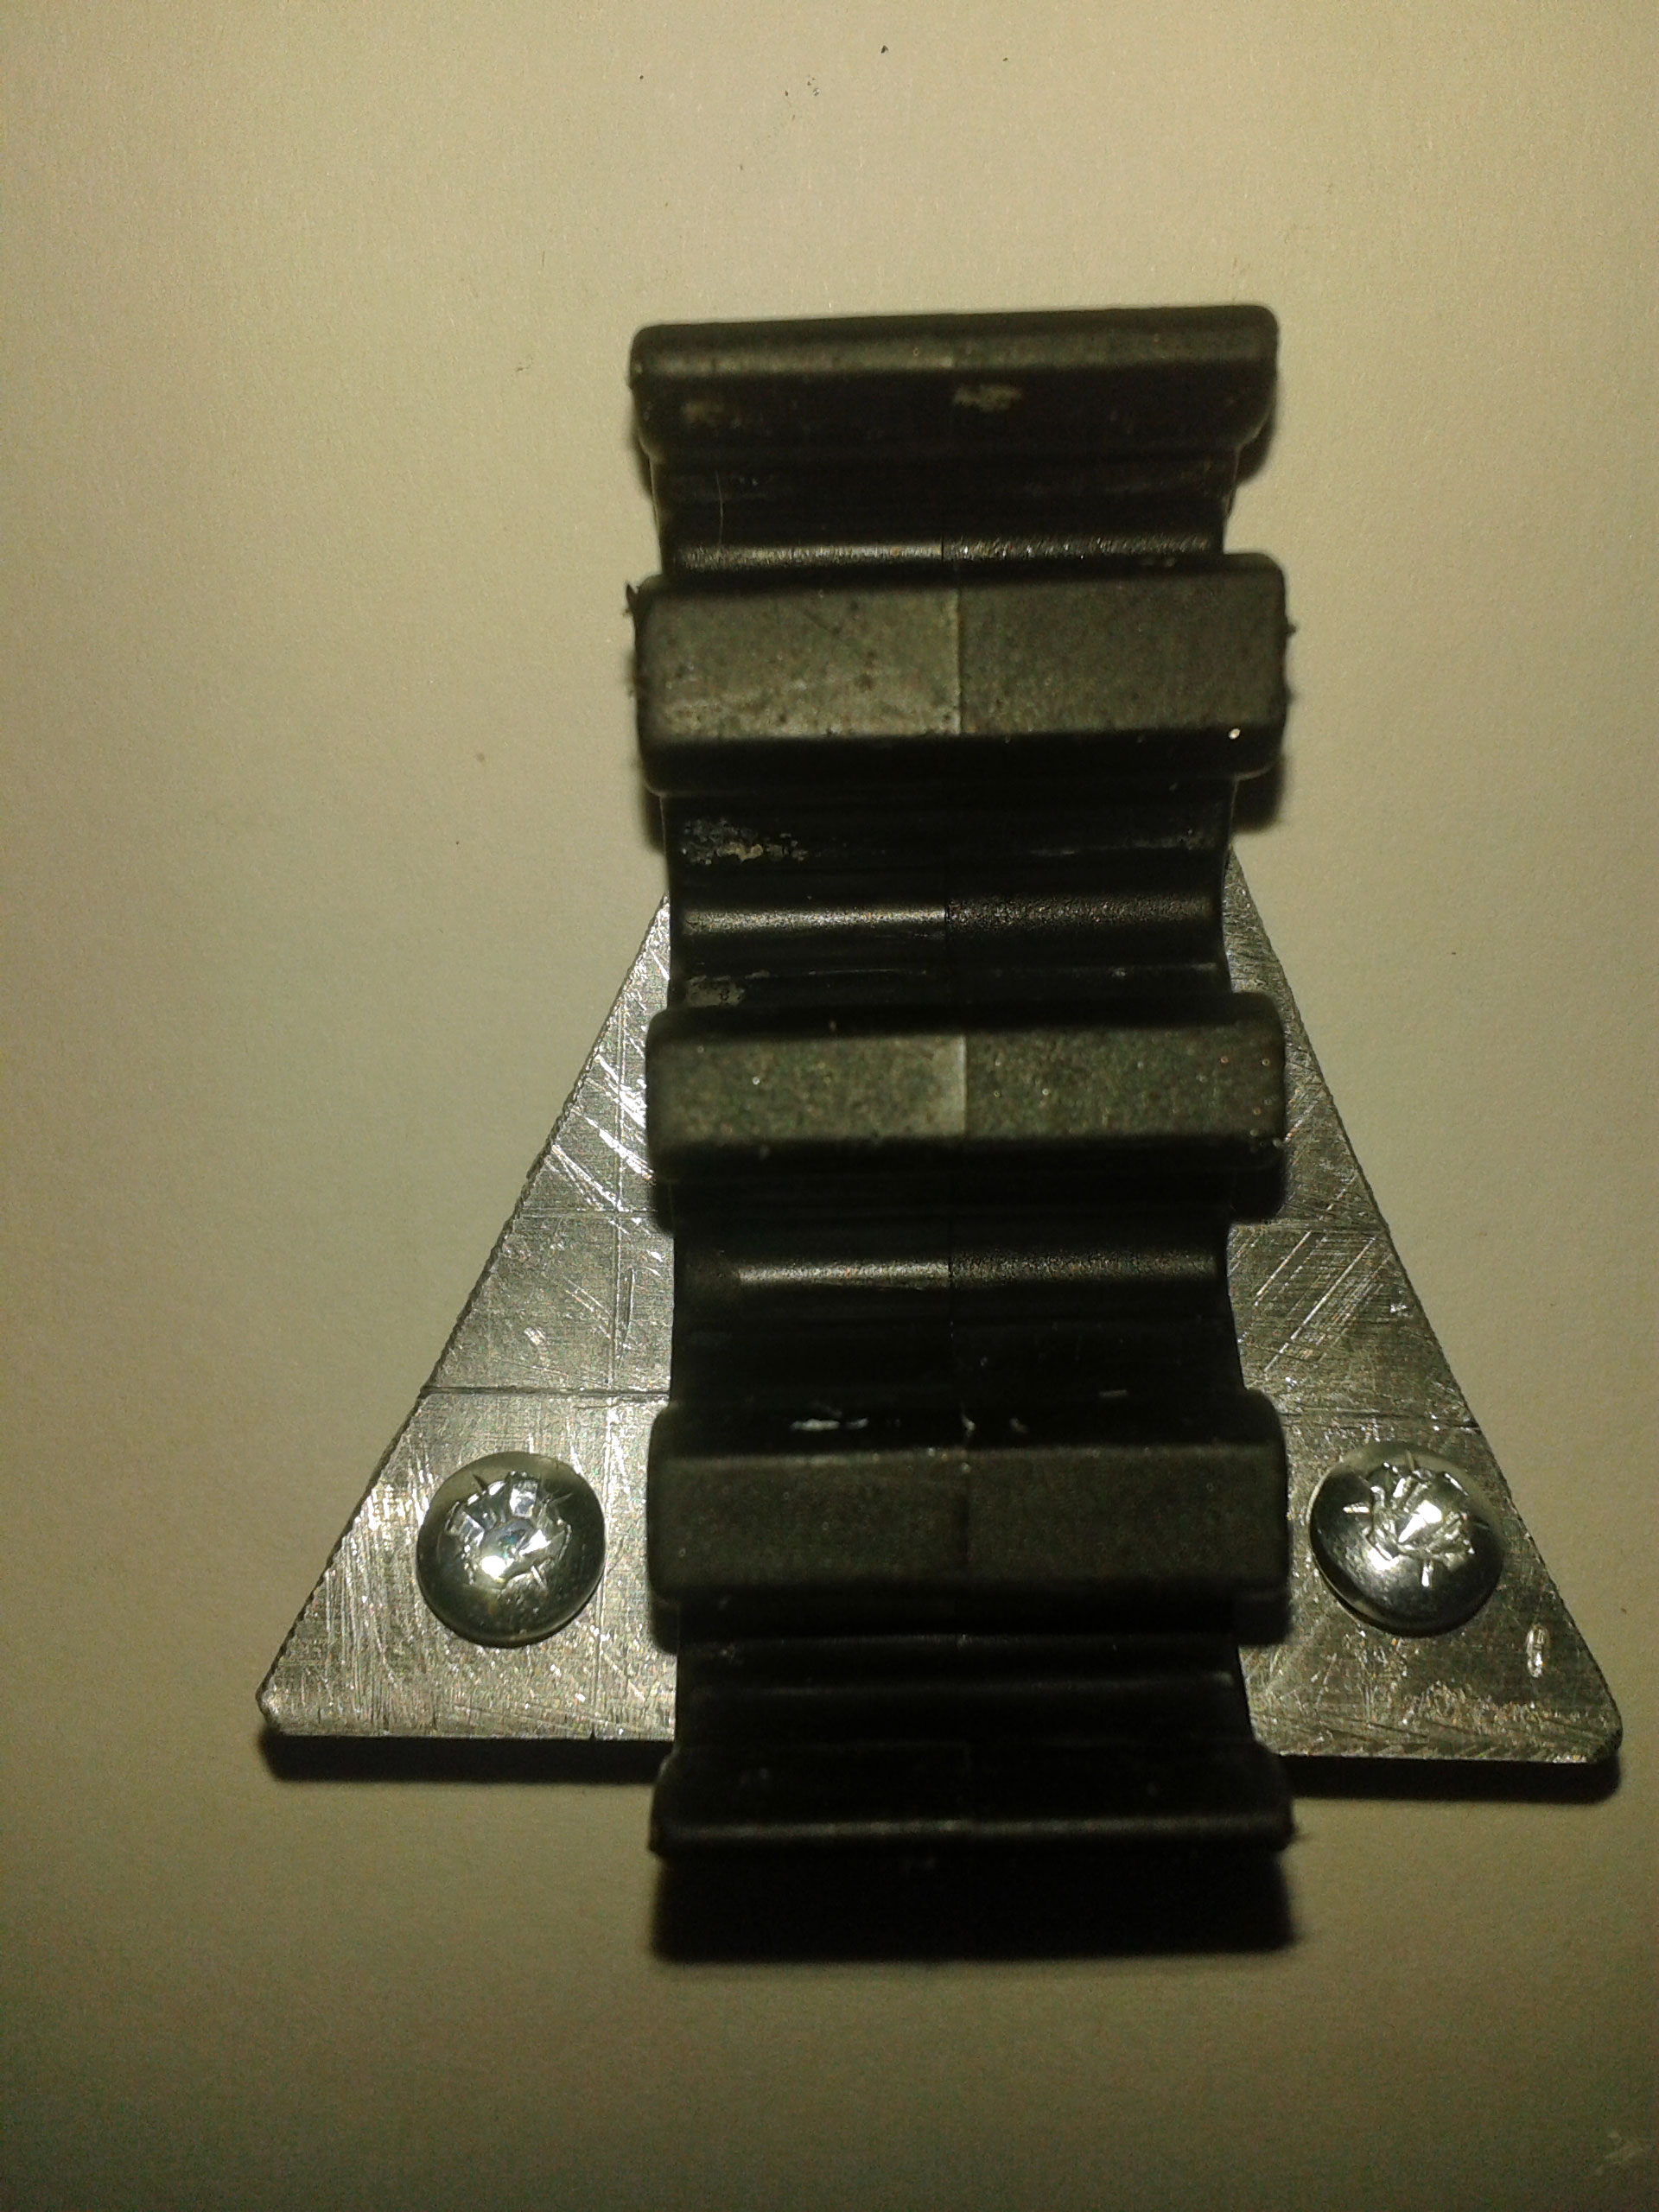 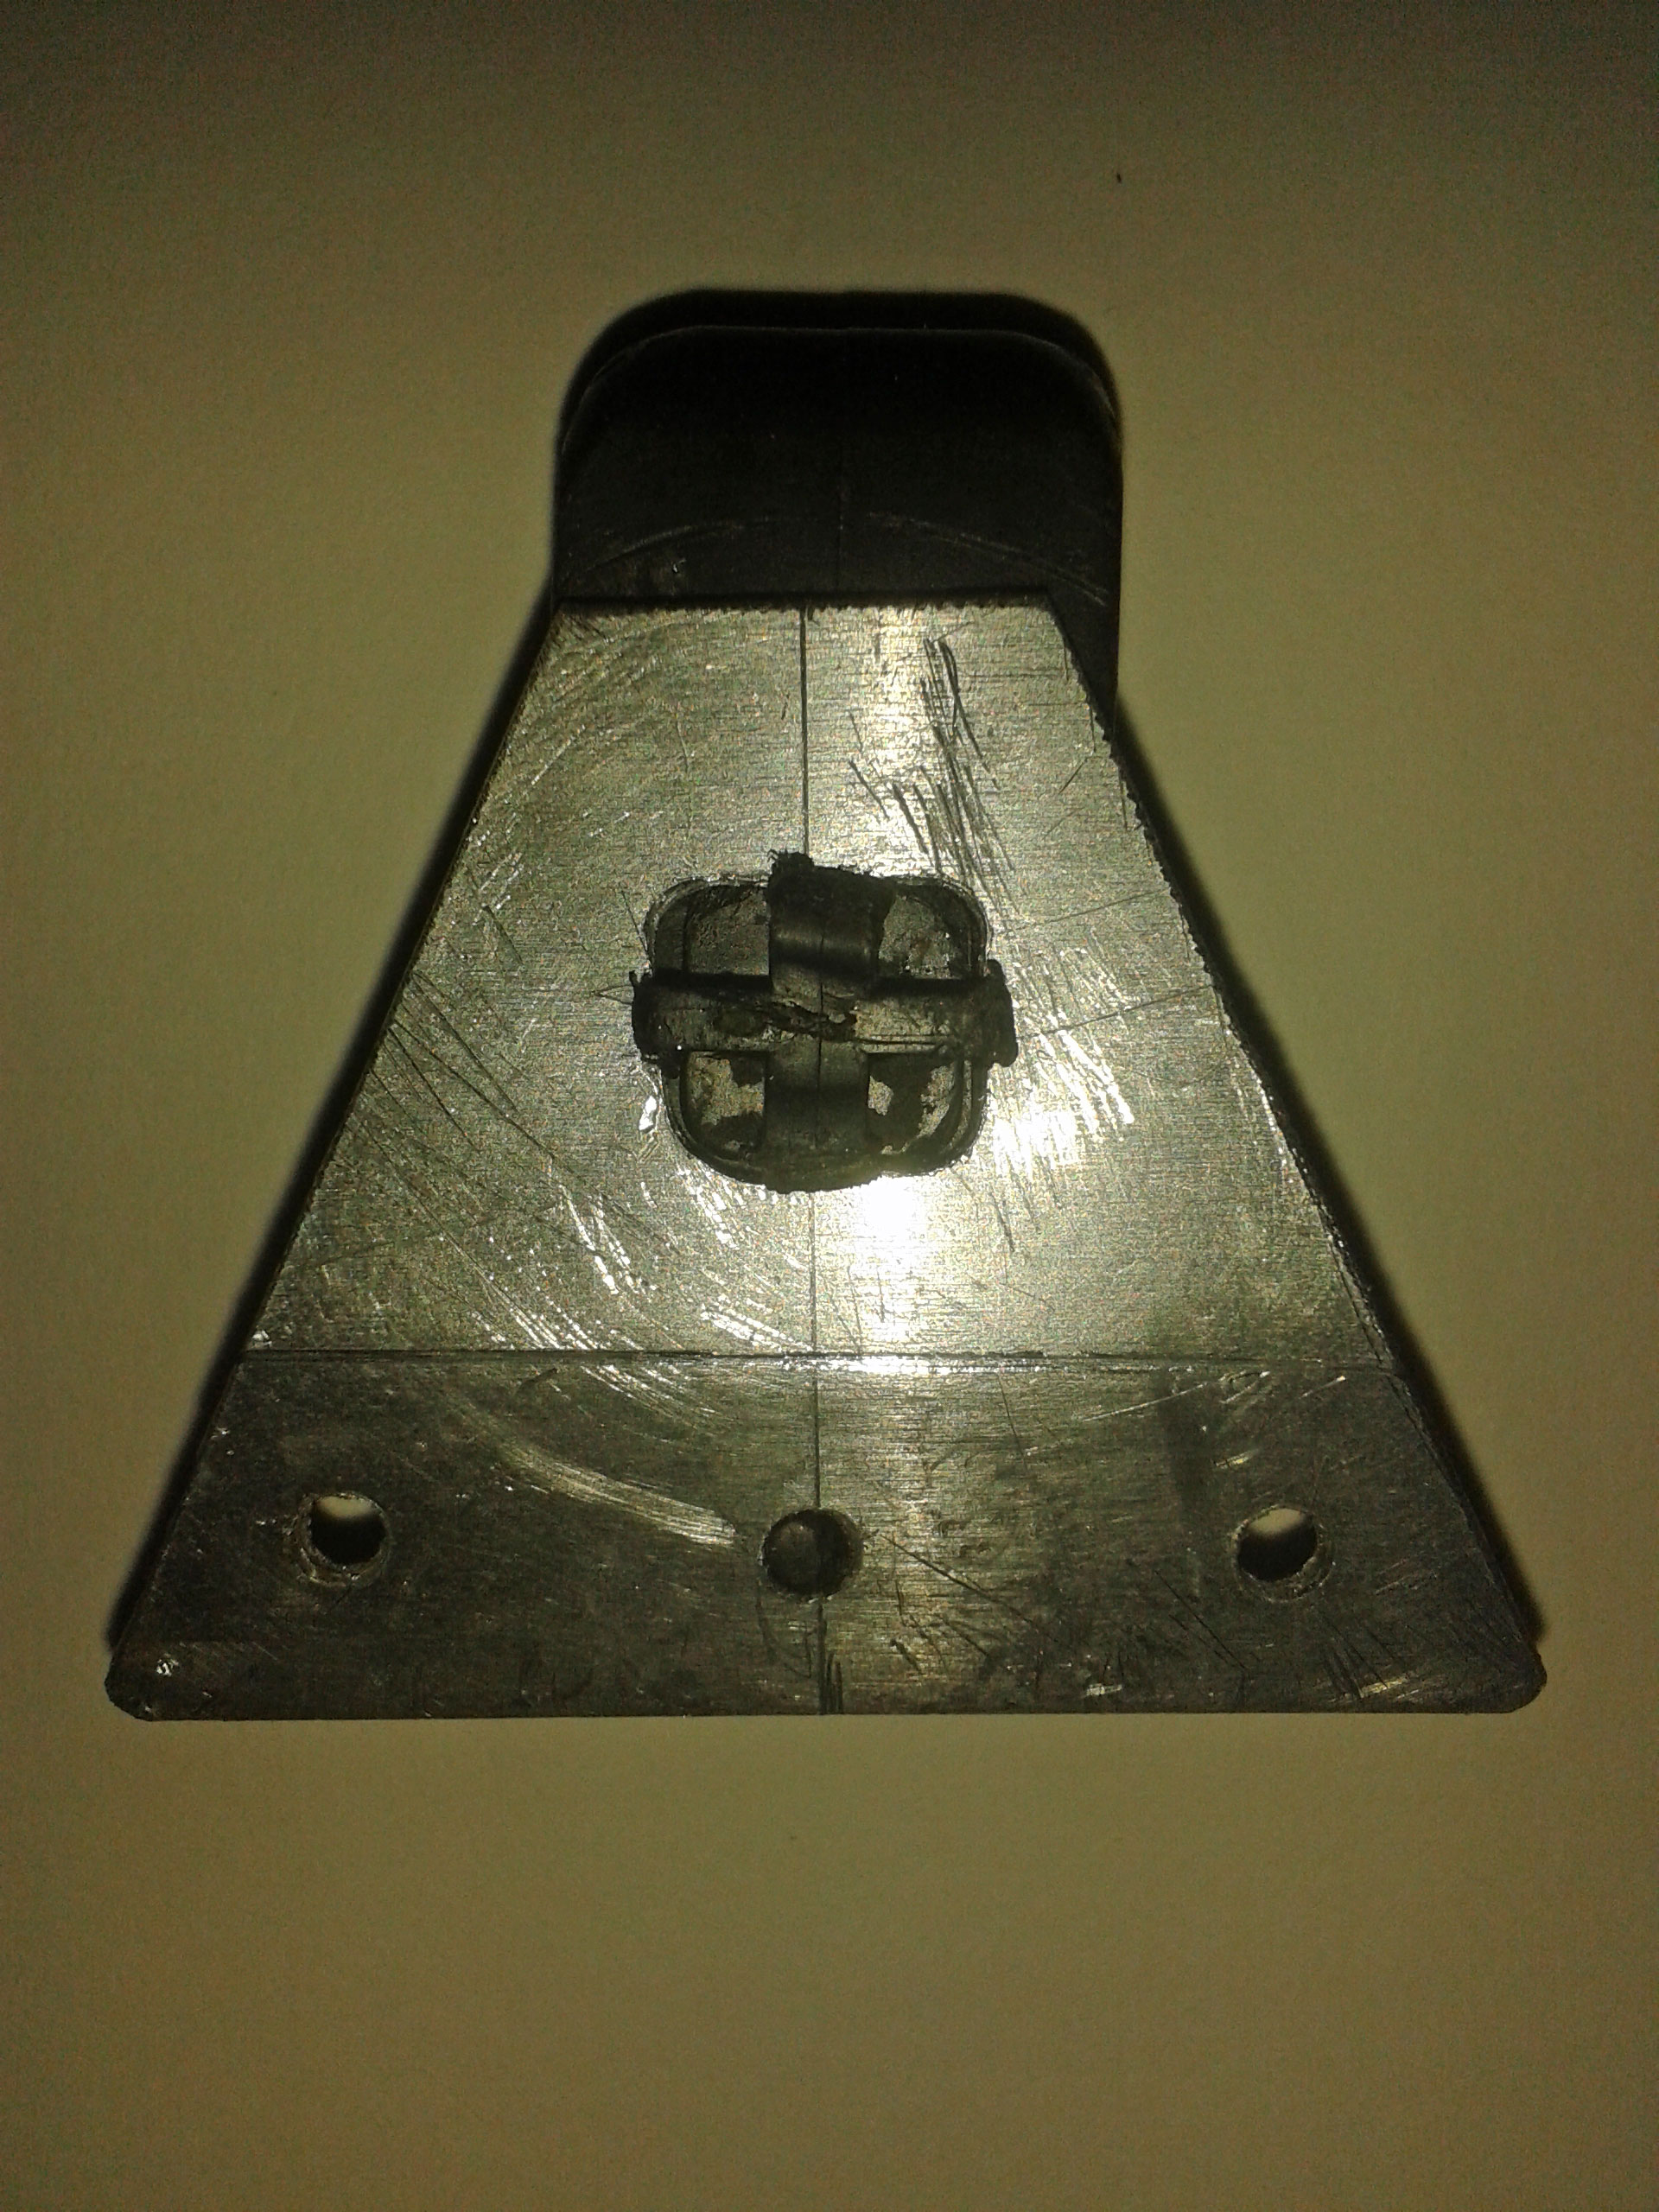 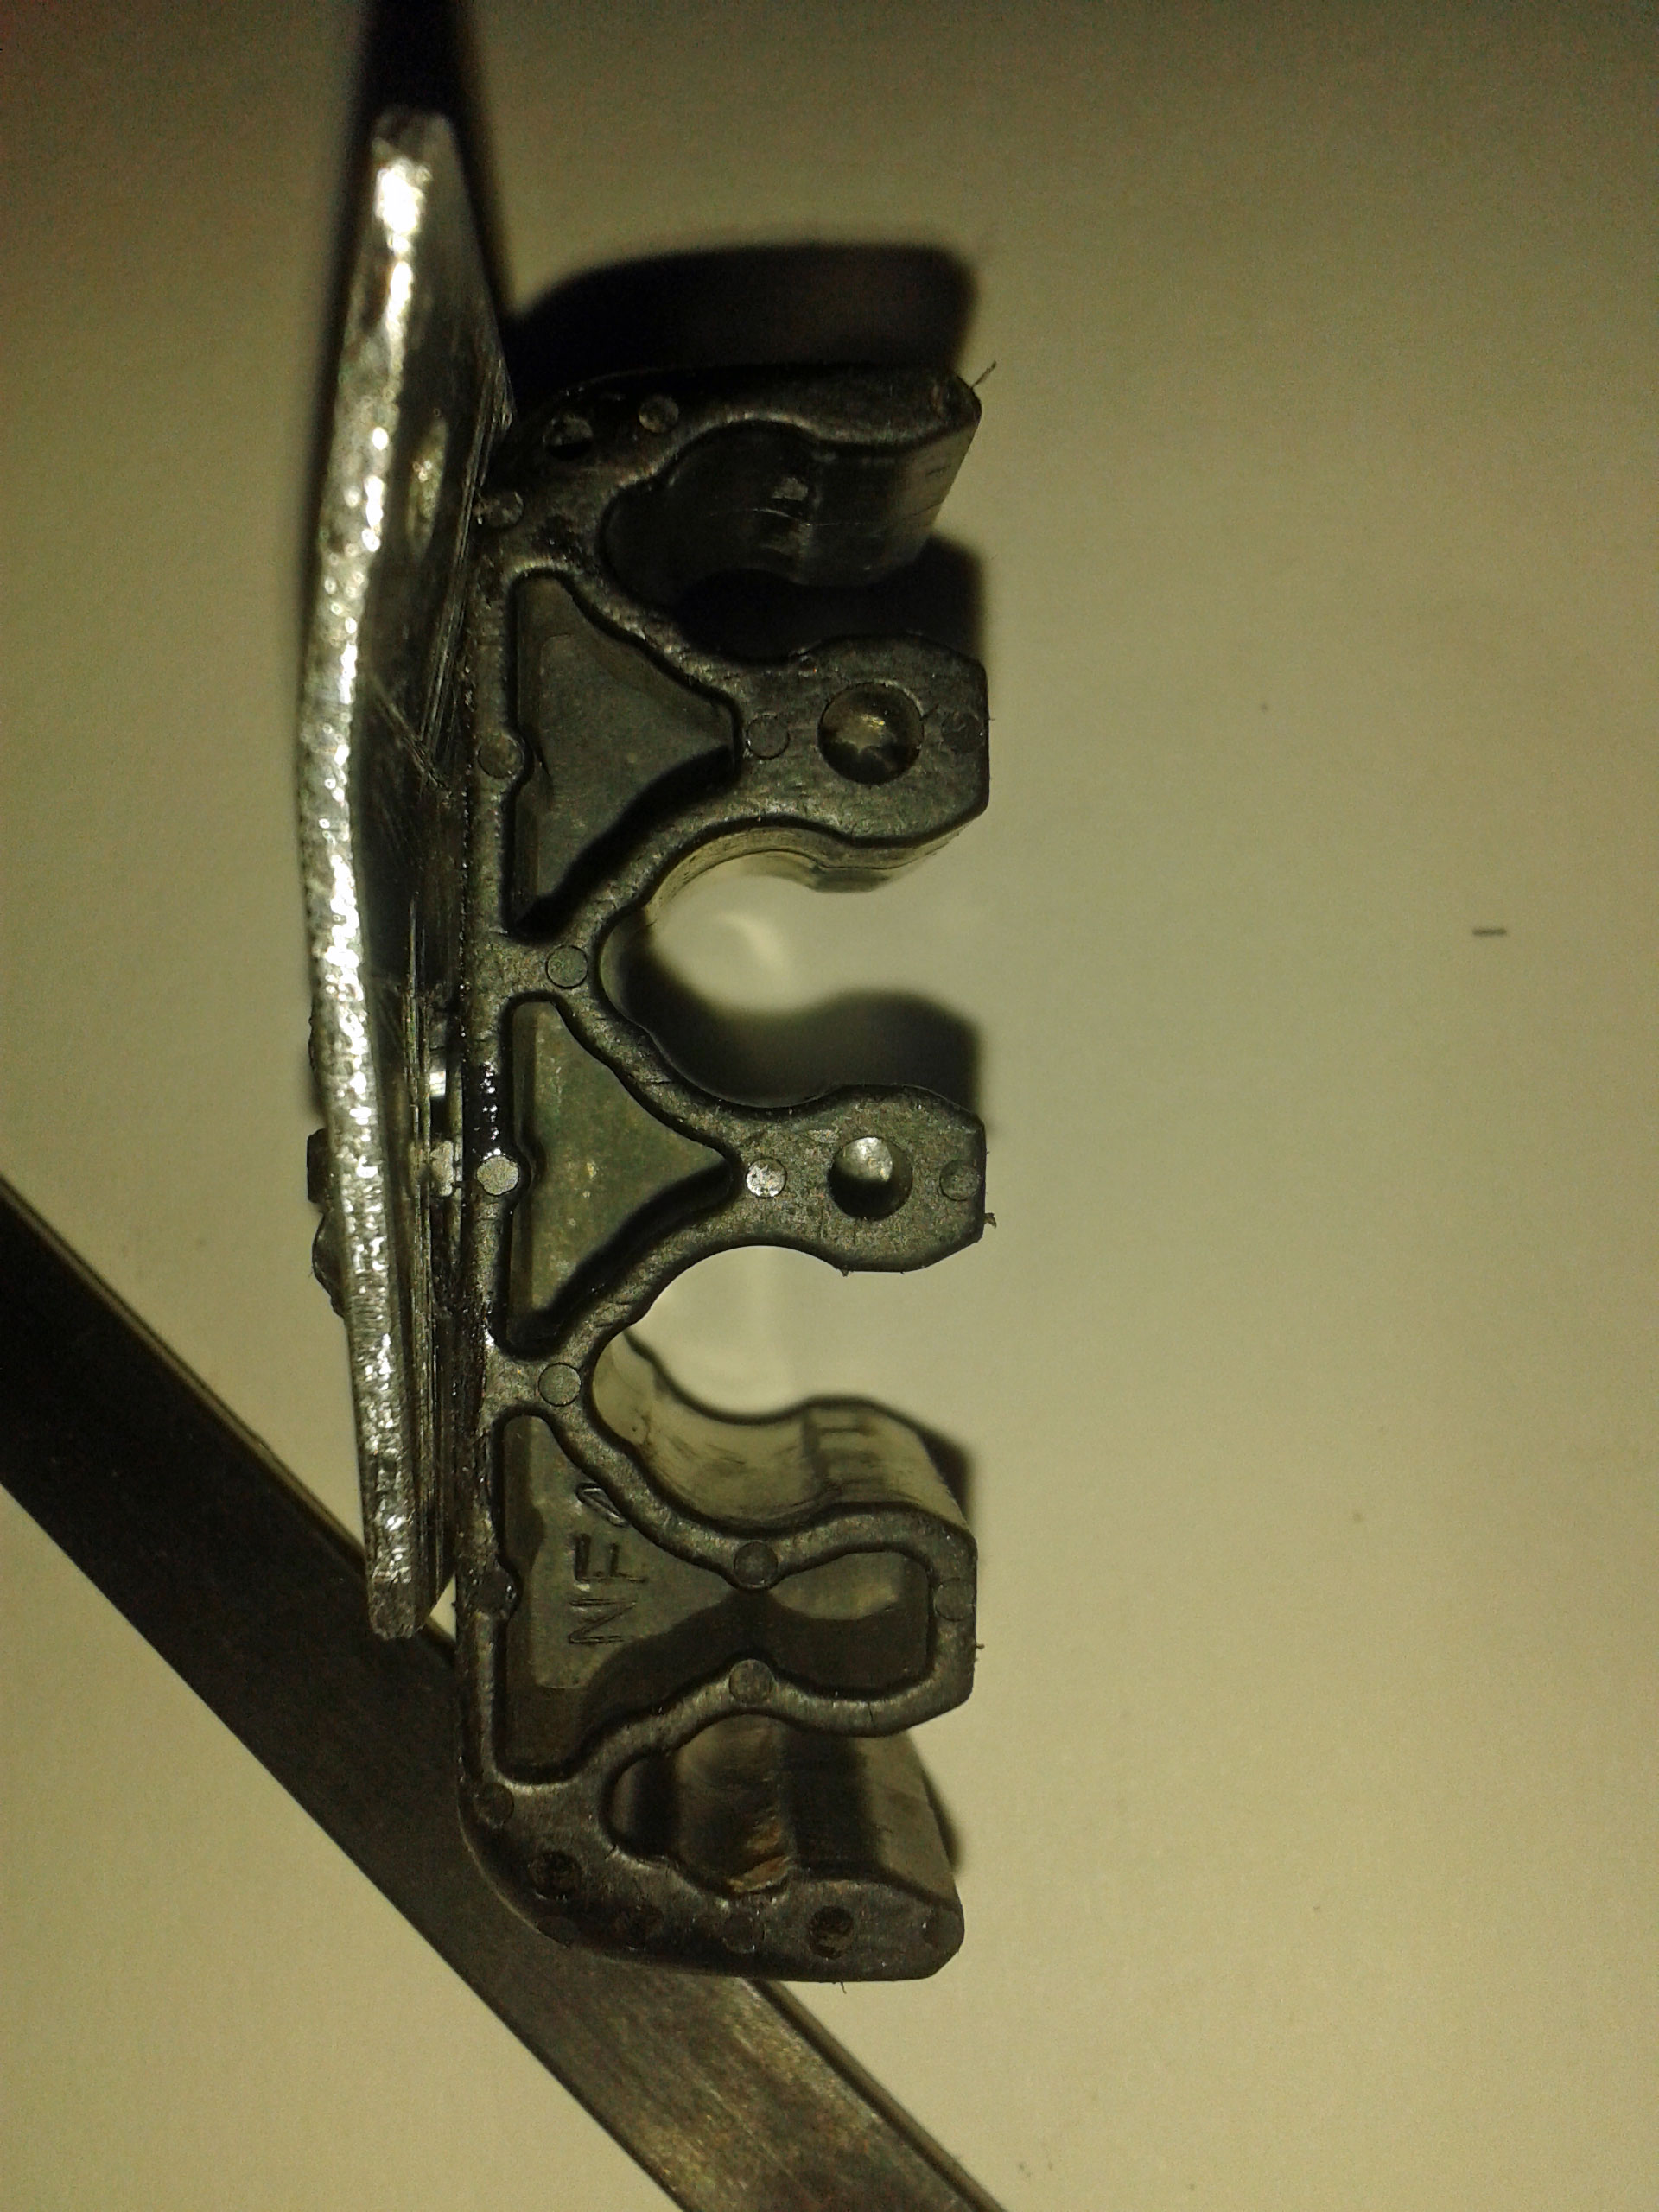  Also dug out the steering column, pedals etc and gave 'em an initial clean up. Another good day's progress. |
|
|
|
Post by gwnwar on Nov 22, 2014 21:23:33 GMT
I would use rivnuts instead of sheet metal screws.Maybe make brackets longer to put tubes up in tunnel more.
Are you going to be reusing the OEM tubes??
|
|
|
|
Post by miket on Nov 23, 2014 9:10:45 GMT
Thanks - good point - I guess I'd picked up the screws 'cos they came with the provided p-clips, but I might rivet them on for the lower profile head given that a line will pass over them. Yes I'm planning to reuse the original fuel lines as they're in very good condition and lay a new brake line. My thoughts on the lower positioning in the tunnel was to try and keep them close to the original mx5 positioning so that the ends arrived in more-or-less the same place for connecting up.
|
|


