|
|
Post by sheffjohn on May 7, 2017 19:36:21 GMT
Welded on lower rad mounts today. They have a hole in the bottom flat part to accept a rubber top hat bush. Top hat sits on the lower mounting stud of the radiator and pushes into the mount, locating with no bots or nuts needed.
Better picture of where my upper outlet is. Will come from there and slightly downward, to meet my coolant reroute hose.
Sat on its new mounts. They tuck nicely into the edge of the radiator, I like the look. Need to make some nice small top mounts aswell which will apply a small downward push to keep the bottom (weight-bearing) mounts secure.
Front clip sat on. Bottom of the radiator sits ABOVE the lower edge of the clip, keeping it all nicely safe inside. Don't like how some builds have exposed rad at the bottom. Seems very exposed to damage in my opinion.
Radiator was sized to sit fully inside the clip, hopefully next pic shows where the intercooler pipes have room to come round the radiator, as cooler will sit in front of the radiator.
Will have to wait to order and mount my inter cooler before I can start the shrouding inside the clip
|
|
|
|
Post by sheffjohn on May 8, 2017 21:26:51 GMT
Upper mounts welded on tonight. 25mm long exhaust bobbin bolted to the mount brings the mounting face out level to the radiator mounting holes.
The strap that drops down to the radiator from the bobbin is temporary, I suspect I'll remake these to integrate the intercooler mounting aswell. Will see when I get a cooler ordered and how it lines up.
Cut and shaped a little plate for the upper pedal mounts. Its links the 2 originally separate mounting tabs.
Angle of the picture makes it look like it raises in the middle above the column, it doesn't, that's where the flat plate angles forward to line up with the clutch pedal.
|
|
|
|
Post by Fin on May 18, 2017 10:00:23 GMT
So ! i went and picked up my kit. Thanks again to Stuart and Julie for being really welcoming, and helping me load the kit. It all looks super well made, GRP panels are a really nice finish, chuffed. Went straight back to a fabricator i trust on the way home, and we spent a few hours making some changes i had planned. 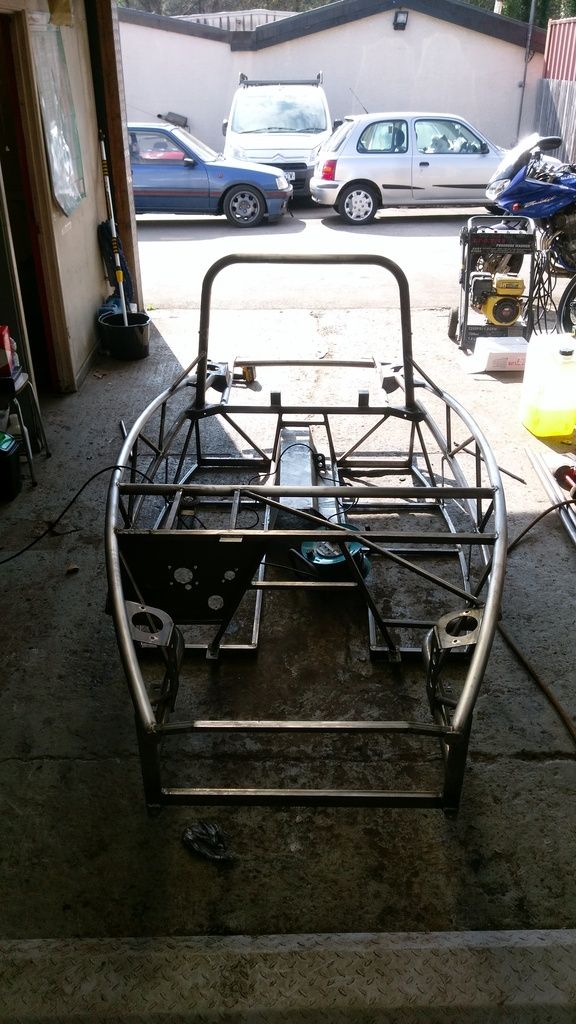
Harness bar added, single diagonal added. Rear hoop stays lowered to match the stays on the front of the hoop. Large diameter rear stay added. Personal preferences really, i prefer the look of the US frame with a similar setup, so decided to tweak mine ! Good few hours hand notching the pipes, There is a reason proper cage building tools are EXPENSIVE. 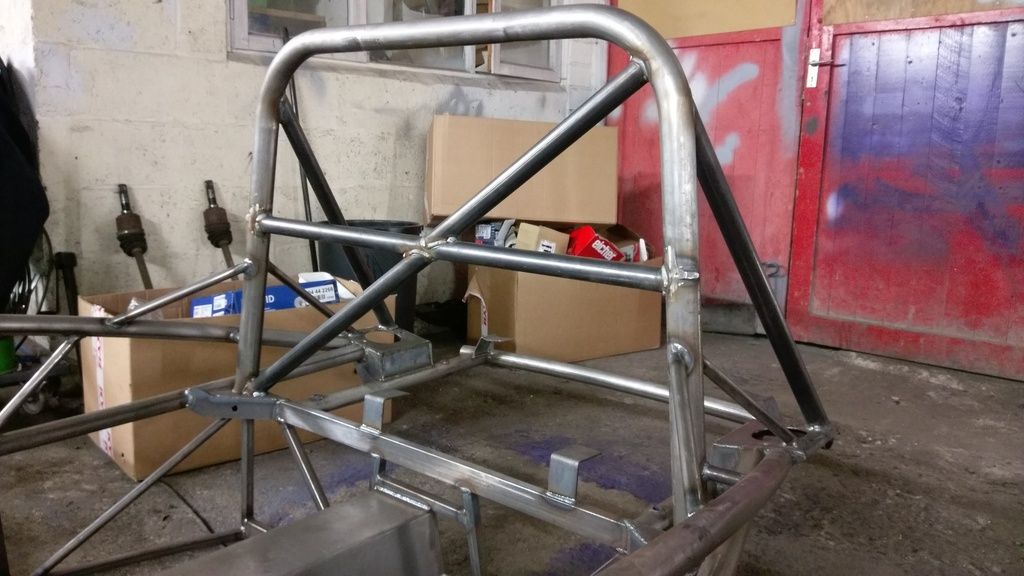 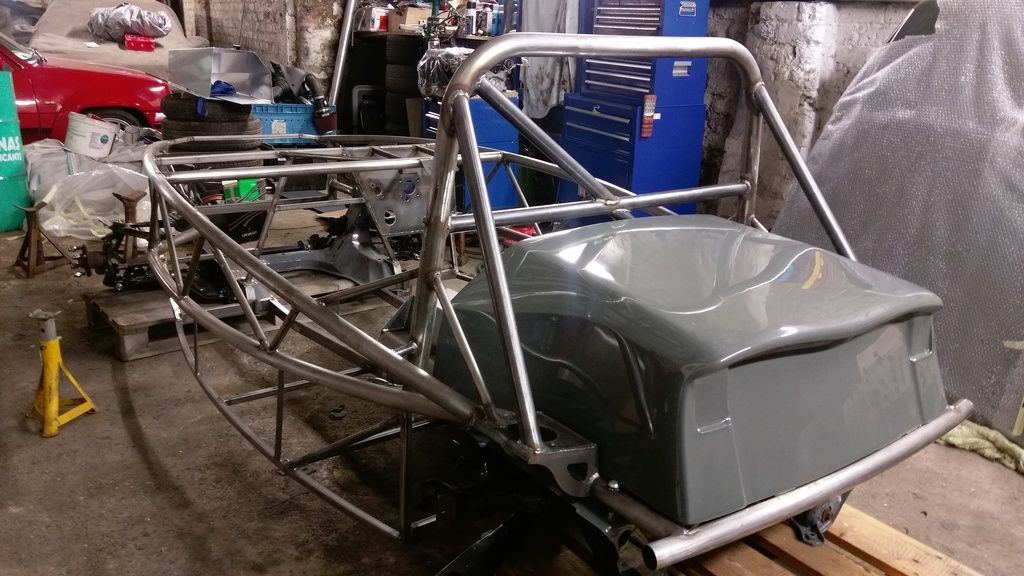 Love the design of the new bodywork ! 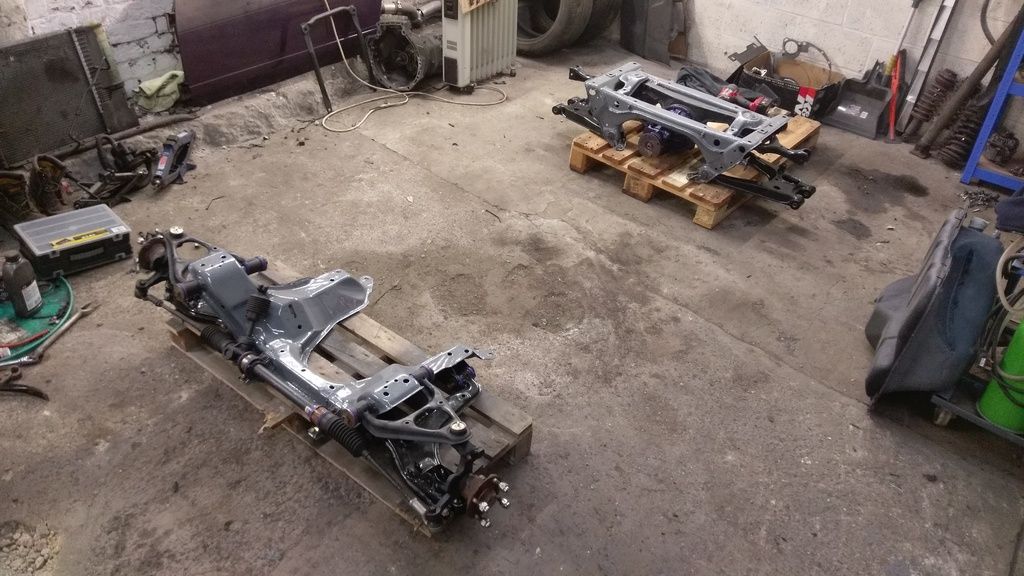 Pallets are my friend. I was doing the majority of moving the frame alone, including unloading from the van. Do not recommend lifting the frame alone for more than a few meters at a time.... Pallets worked well, sat the front end on, lifted the rear, slid rear pallet under. Im doing a full dry build, will assemble it all first. Then strip down and paint/powder the frame once ive finished welding any brackets on etc. Going to try to have as little as possible in the way of bolted on brackets, i cant stand them. 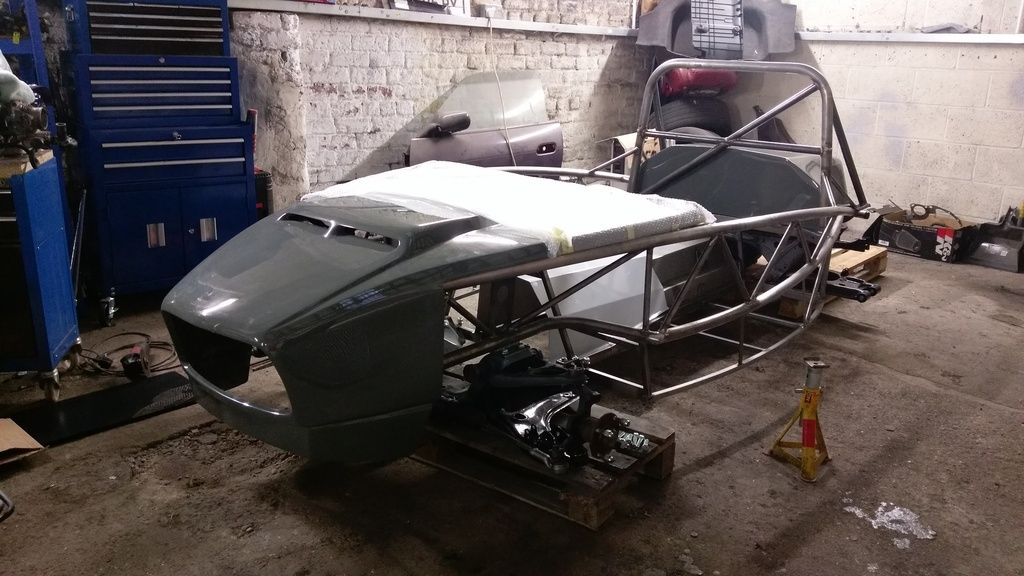 Looks good, particularly the bit where the GRP boot drops on and fits!! Mine's a nightmare and I'm having to take the tank off and further bend the tank mounts as it won't fit over. Going to have to notch the sides as well as they overlap the suspension mounts by about half an inch either side. |
|
|
|
Post by sheffjohn on May 19, 2017 19:34:00 GMT
Fin, the sides of the rear cover are rubbing/touching the shock mount plates.
It's only very slightly and a trim will cure it.
The changes ive made to the rear make putting the rear cover on tricky.
I really DONT think I will get the original fuel tank under there and still be able to get the cover on and off.
I was debating going to a smaller, lower ally fuel tank anyway, so if I can't make the original tank work that will be my plan.
|
|
|
|
Post by sheffjohn on May 23, 2017 21:09:29 GMT
 Cooler mounted. There's still a fair section of the radiator both sides and underneath the cooler which gets uninterrupted airflow. I'm hoping this, coupled with good shrouding to the mouth of the 'clip', and the thicker alloy rad, will keep the temps in check. Cold side straight boost pipe in. Just need a silicone 90 to the intercooler. |
|
|
|
Post by Stiggy on May 23, 2017 21:42:07 GMT
Great job, love the way you have managed to get it all behind the grp nose, usually we see pipes either side.
|
|
|
|
Post by sheffjohn on May 23, 2017 21:56:58 GMT
Great job, love the way you have managed to get it all behind the grp nose, usually we see pipes either side. Thanks ! Narrower radiator seemed like the only way to do it. For anyone's reference, it's an early Mk2 golf sized radiator, 1.3 and 1.6 engines. Obviously in an aluminium version. Wasn't expensive from eBay. Will require using a proper pressurised expansion tank though, not the original mazda style recovery tank. I think the outlets of the rad work really well in an Exocet, especially one with a coolant reroute such as mine. |
|
|
|
Post by sheffjohn on Jun 4, 2017 20:43:50 GMT
Started my front air guide.
Will possibly have to make adjustments as I add more to the frame/chassis but it's only aluminium and if I have to remake it later on this will serve as a good guide.
Side piece will have some thin rubber sheet riveted on which will cover the gap around the boost pipe, to keep it "air tight" but still allow movement
Top of the side piece is riveted to the little tie bar which serves as the upper radiator mount.
Bottom of the side piece is attached to the lower piece.
.
The lower piece is held currently by one centre bolt into the lower intercooler mounting frame. I may have to add a spine to the centre to add support. Will see how rigid it is when it has all 4 'sides'.
The whole Air guide will only be mounted to the coolers or cooler mounts. Nothing will tie to the main Exocet frame. It's all kept on the outside of the rubber mounts to make sure it all has a degree of flex.
|
|
|
|
Post by sheffjohn on Jun 14, 2017 22:19:45 GMT
Finished my bolt on air guide. It's made to be removable without taking off any boost pipes etc. So if for any reason I'm running without a front nosecone on, I can pop the alloy guide off aswell in 2 minutes.  All edges that touch the rad or cooler are edge trimmed, and I'm going to use some rubber sheet or wide edge trim to fill any gaps such as round the boost pipes. It looks a funny shape, but fits really nicely to the inside of the nosecone. Leaving roughly 10mm all the way around. Which will be covered with more wide trim or rubber sheet to 'seal' it. Just need to trim the top inside edge that nearly touches the top of the cooler.  Whole thing is mounted by 5 nuts/bolts. The lower nut is on the centre spine mount with mounts the bottom of the intercooler. This also provides some support to the spine, stopping it moving side to side |
|
|
|
Post by sheffjohn on Jun 23, 2017 13:40:39 GMT
Continuing my normal habit of starting more things instead of finishing others.
Bulkhead panel.
What a pain !
Go there in the end. Templates made from cardboard and masking tape.
Gone for one singe piece bulkhead which covers all but the piece underneath the pedals. I've put a 90 lip on the central section which the gearbox tunnel sits onto.
Edges will all be edge trimmed obviously.
Still have edges to trim and get it all sitting neatly. Need to decide how thick edge trim will be first and make adjustments for that.
Tunnel is held to frame with 6 rivnuts.
Will be making a wiring tray to sit behind the 'dash bar' similar to what others have done !
|
|
|
|
Post by tanny on Jun 29, 2017 16:21:03 GMT
Excellent work fella - now this is how you build a turbo Exocet! LOve the fab work. What sort of power will you be running with the Holset turbo?
|
|
|
|
Post by sheffjohn on Jun 29, 2017 16:42:44 GMT
Unsure on exact power goals yet to be honest,I'm hoping to build for 275-295 at the crank.
(This is for a first setup. Who knows what may develop in the future)
That may change based on budget as the build goes on.
The holset I'm using is basically the smaller frame to what I used for a super safe 340 on my 200sx, so I'm familiar ish with the capability, and the holset range is all tough as anything, which is a bonus.
|
|
|
|
Post by tanny on Jun 29, 2017 16:47:54 GMT
The Holset is an interesting choice as you say most people choose Garrett and have to pay through the nose for one typically. I was considering a TD04 from a Subaru Impreza WRX or similar however the Holset new t that price seems a real bargain. I have heard about 250bhp is about the max you want to run on a stock 1.8 MX5 block - it would be great if you can safely reach you goals. I'll be following this thread with great interest mate! I wish you all the best with the build
|
|
|
|
Post by sheffjohn on Jun 29, 2017 16:55:38 GMT
The Holset is an interesting choice as you say most people choose Garrett and have to pay through the nose for one typically. I was considering a TD04 from a Subaru Impreza WRX or similar however the Holset new t that price seems a real bargain. I have heard about 250bhp is about the max you want to run on a stock 1.8 MX5 block - it would be great if you can safely reach you goals. I'll be following this thread with great interest mate! I wish you all the best with the build Thanks ! The holset choice was easy for me. Recent background is with drifting, and there's a MASSIVE amount of people going with them now. A lot are proven in commercial applications, but still have really wide compressor maps suitable for lower boosts. Anything that holset are buiding to run 3+ bar, for 300,000 etc. Miles on trucks and the like, is durable enough for me! I've had personal issues with Garret turbos not being worth their pricetag. And this will be the second brand new turbo I've bought for less than £300 ish. Main weakness as I'm sure your aware is the rods on the mx5 blocks, forged rods are already bought! |
|
|
|
Post by sheffjohn on Aug 22, 2017 20:25:50 GMT
Picture related update - due to photobucket being an absolute sh**e, my pics are all gone. going through them slowly to replace but its arduous, so sorry threads a mess till its sorted !
|
|