|
|
Post by tolan660 on Jul 8, 2018 21:19:56 GMT
|
|
|
|
Post by hammy3601 on Jul 12, 2018 17:51:49 GMT
Looks great, get yourself some ACF-50 spray to keep those shocks looking like that. Genius stuff from the aircraft industry. Dont put it on now though but just before you go for IVA.
|
|
|
|
Post by tolan660 on Jul 15, 2018 18:49:00 GMT
Feels like I’ve had a productive weekend. I’ve not many pictures but will add what I have. Decided that i didn’t like the idea of hanging the Mk2 fuel tank so picked up a mk1 got all the rubber off with a wire wheel and thinners and gave it some primer and some gloss black. I’ve gone for braided fuel lines run inside cockpit on drivers side tunnel all connected with an fittings. Just need 90 bend and another 1m of pipe and that’s fuel done I hope. I order full braided brake and clutch lines from freaky I’d fitted most of these before I bolted frame down but have now connected tears up and added fluid and bleed them up. I now have work brakes. Also bled the clutch and all seem to be good. I’ve got to say the brake lines from freaky parts are money well spent I’ve not used copper before but I’d say these are worth the extra especially if you have to buy faring tools. While I was working around back end I decided to fit the handbrake so now I have a handbrake that works too. Then pulled it all back off to template the rear bulkhead. I’ll give handbrake cables a good clean before I refit. Also fitted front wheel stays for info I’ve used 20mm m8 bolts into old dust cover holes which are threaded. All went straight forward apart from they were catching on the upperwish done. After some messing I decided to unbolt the shock from chassis and drop it around 2 inch no more catching. I’ve now decided I’m going to order the shock spacers from USA they sort my ride height and stop the rubbing on the wishbones.......I think. Also got wiring all plugged in my labels seemed to work and most things made sense. Anyway all in all I feel like good progress has been made hoping next weekend to do the rear bulk head and refit everything through it and finish fuel lines to tanks. Then start to look at locating the earths and get oils in to diff gearbox gearbox turret and engine then I’m going to attempt to start her 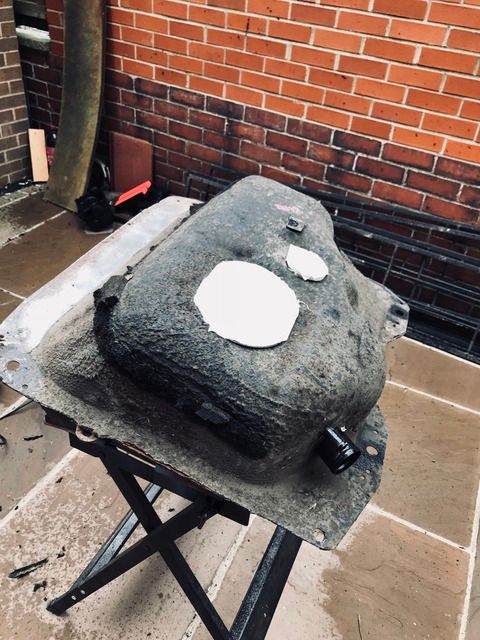 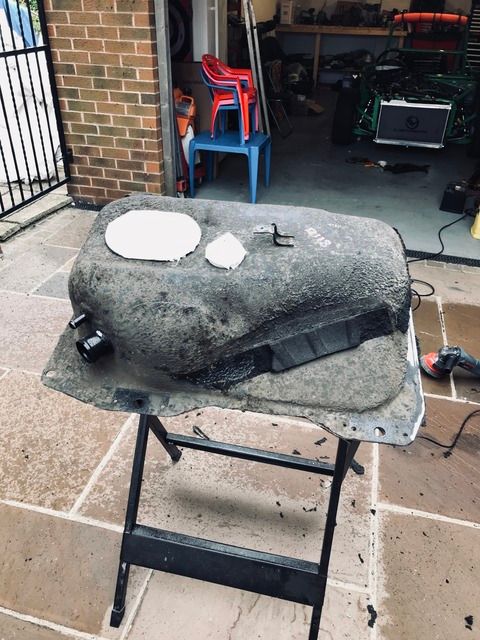 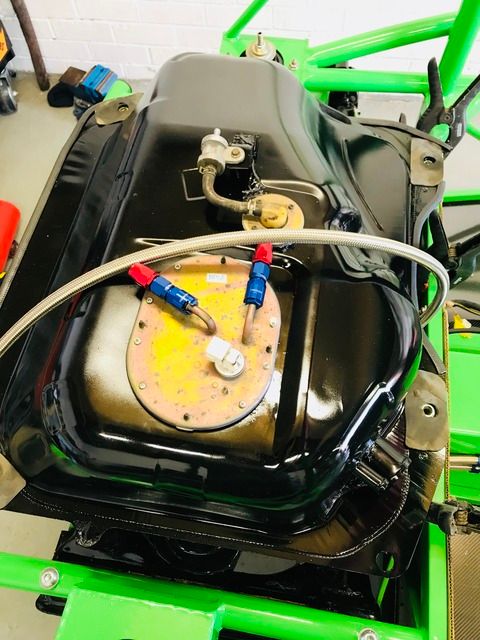 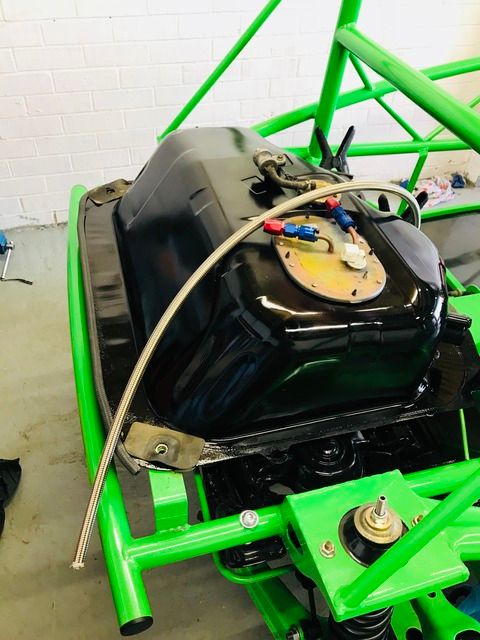 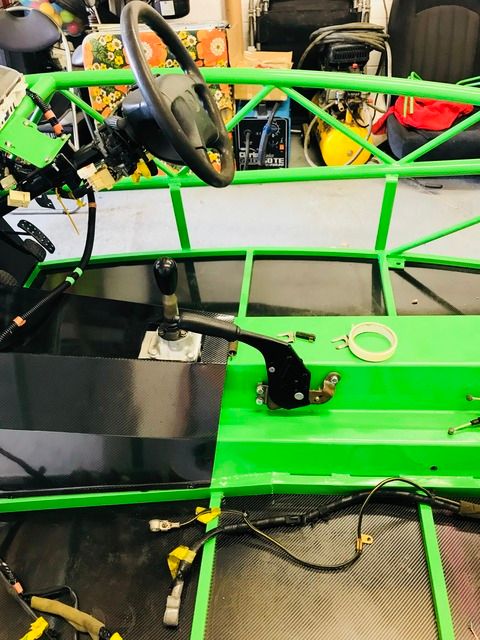 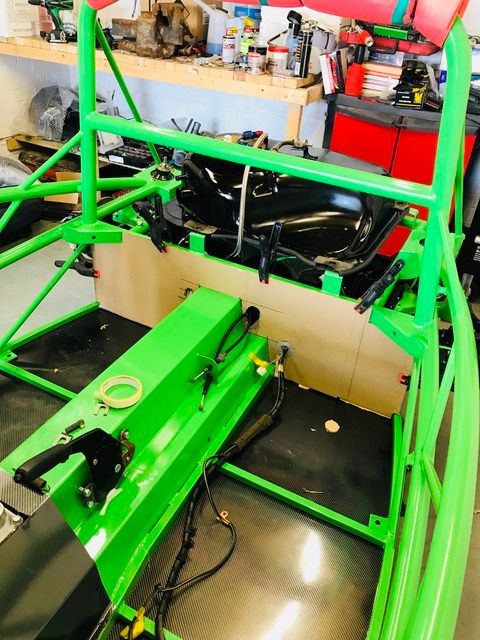 |
|
|
|
Post by hammy3601 on Jul 16, 2018 8:08:24 GMT
Very nice work on the garage👍🏻 Thanks to you I finally seen a build on a single garage, so far everyone seems to be fortunate to work on very spacious areas, guess I have a lot of cleanning down to do so I can start my own build! keep it up buddy I will be following this tread! I think loads have been built in a single garage, mine's in progress now and is also in a single garage |
|
|
|
Post by hammy3601 on Jul 16, 2018 8:10:03 GMT
Ive bought those AN fittings but cant for the life of me get them to fit in the braided hose, any tips? Have look at YouTube vids and they make it look easy
|
|
|
|
Post by buildercg on Jul 16, 2018 17:07:42 GMT
Hammy, I had the same challenge. My solution: create a 2-part wooden sleeve to VERY tightly hold the end of the hose in a table mounted vise. Ensure the sleeve allows room for the end of the hose that is going to accept the fitting. Then use a soft-face rubber mallet to hammer the fitting on. Ensure the fitting goes on straight (getting it started is the hardest part).
|
|
|
|
Post by tolan660 on Jul 16, 2018 19:39:40 GMT
I bought the rubber vice grips which help loads then make sure you get a nice clean cut then just shove it in took me a while to get it but after 6/7 I’ve got the hang of it. Get a clean cut and makes it a lot easier
|
|
|
|
Post by hammy3601 on Dec 15, 2018 17:57:14 GMT
Hows the build going mate?
|
|