|
|
Post by nigel on Jun 22, 2012 21:34:27 GMT
Fantastic News ;D and Congratulations  Look forward to seeing the car at the AMM. nigel |
|
|
|
Post by andybaird on Jun 22, 2012 22:54:56 GMT
Hi Daydreamer
Congratulation's
Andy
|
|
|
|
Post by martinw on Jun 23, 2012 9:33:19 GMT
Wahey - yet another Sonic! Congratulations! Hope the weather improves so you can enjoy it now! Martin |
|
|
|
Post by avantkiwi on Jun 23, 2012 18:30:26 GMT
Well done, I have to wait another week for my retest. Apparently there are no testers around next week!
|
|
|
|
Post by daydreamer on Jul 15, 2012 11:44:03 GMT
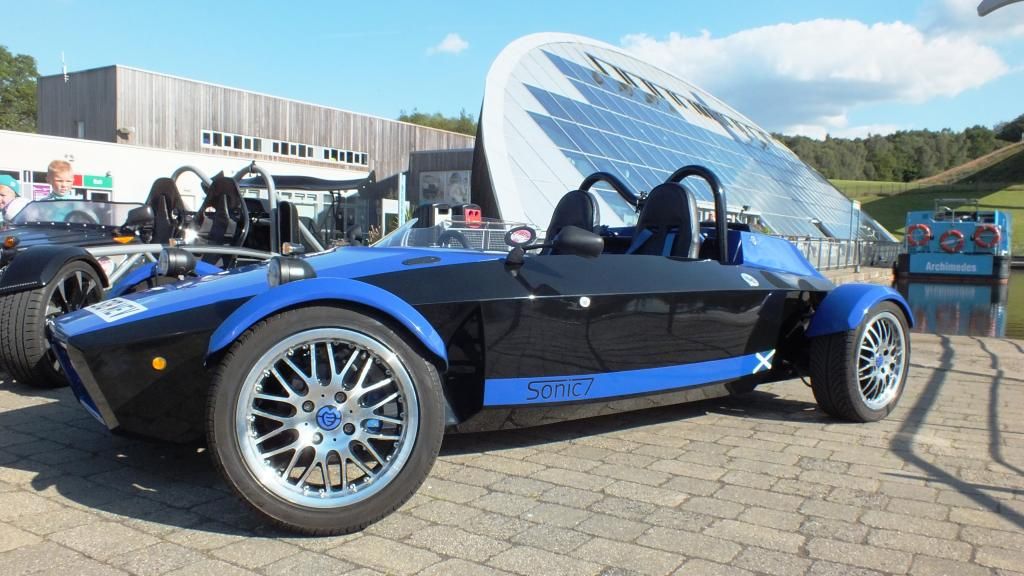
I had hoped to be making a euphoric post or two before now but I've been trying to fix a persistent gearbox oil leak. I've got it sorted now but only after quite a bit of mucking around. I had my first completely successful test run today and it does make me smile. It’s brisk, not lightning fast, but I’ve only got a bog standard 1.8. And, because it is a brand new engine, I'm keeping it below 4500rpm for the first 100-200 miles. It should get quicker as I push it a bit harder. To get to this point since passing the IVA I’ve changed the NS drive shaft oil seal 3 times , trying slightly different amounts of recess into the gear box and changed the driveshaft to a new one. All to no avail. In the end we concluded that the gearbox we rebuilt with a Quaife LSD did not have the end float on the diff set correctly. Fortunately I had a spare gearbox that I picked up on ebay last year for £50. So yesterday starting at 8:30am I changed the gearbox for my spare. Finished at 01:30 am Sunday.      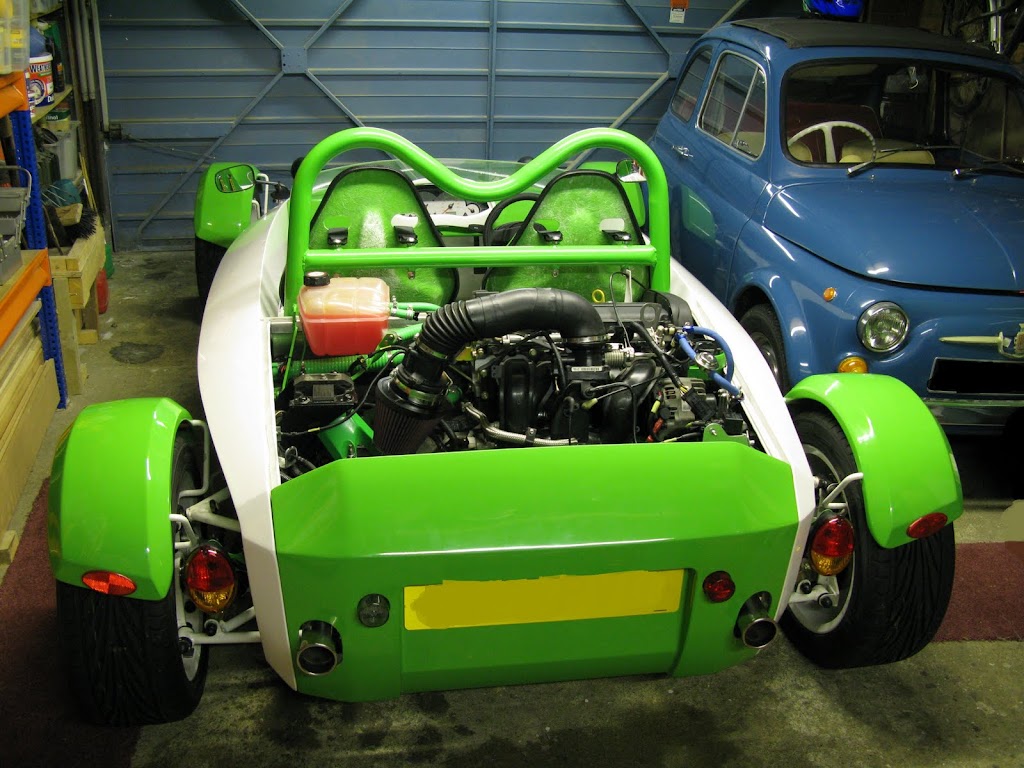 In my test drives over the last few days I found the front wings really flapped about even with the third bolt/tube arrangement so I've made an extra stay that fixes under the top ball joint. They are rock steady now. I'll make a separate post about that later. Things to do now, Get front wheel alignment sorted at my local tyre shop. I've no idea about the ideal toe-in so any suggestions are very welcome. Get the damping set up right. The Gaz shocks I have are equipped with a little dial at the bottom which I imagine is to set the compression and or rebound damping. I think the AMM at Curborough will be a good opportunity to get this done. Increase the ventilation in the engine cover. It gets really hot, too hot to touch the cover. Clean the car of oily handprints and get the decals fitted. Fit front wings. Rebuild , or rather get a pro to rebuild the gearbox that I’ve just taken out. There’s a lesson in there somewhere. Looking forward to Curborough. |
|
|
|
Post by Paul (madeye) on Aug 19, 2012 21:46:16 GMT
what resin is it that you used to fill the cover, i have a fair bit to do myself if you look on my rocket build, i saw this a while ago and have just looked to find it for your advice.
cheers, paul
|
|
|
|
Post by daydreamer on Aug 20, 2012 19:59:18 GMT
It's Isopon P40, available from your local Halfords and many other places.
Works very well to get the basic structure, I finished off with P38 which is a filler to get a fine finish.
I used the same stuff to make mounts under the cycle wings to hold the stays. That used quite a lot actually, but it made the job easy.
Good luck,
Guy
|
|
|
|
Post by Paul (madeye) on Aug 21, 2012 2:51:34 GMT
It's Isopon P40, available from your local Halfords and many other places. Works very well to get the basic structure, I finished off with P38 which is a filler to get a fine finish. I used the same stuff to make mounts under the cycle wings to hold the stays. That used quite a lot actually, but it made the job easy. Good luck, Guy does it have fibre in it or is it purely a filler, how big can sections go? i have quite a few open areas to block. cheers, paul |
|
|
|
Post by daydreamer on Aug 21, 2012 19:44:14 GMT
The P40 is a mush of chopped strands and resin, With support, i.e a mold, you could make panels as large as you like. The P38 is a filler only. You can get big tins, compared to buying matting and applying resin, it is much easier , especially for smaller areas. Separate matting and resin may be cheaper but more hassle. I suspect that layered matting with resin , will be more flexible and for that reason maybe stronger if you have large panels to do. I'm not an expert.
|
|
|
|
Post by robbiggs on Oct 10, 2012 22:47:59 GMT
Hi
Found your supportive pages and photos really useful so far on my build. Looking at the photos of your cooling pipes around the engine bay I noticed you have sourced a 32mm 19mm 32mm reducing T pipe. Can't find one on the web for love nor money. Where did you get yours from?
Regards Robert
|
|
|
|
Post by daydreamer on Oct 10, 2012 23:29:19 GMT
|
|
|
|
Post by robbiggs on Oct 12, 2012 19:02:00 GMT
That's saved me hours on the net. Many thanks Robert
|
|
|
|
Post by BobN on Dec 14, 2012 11:53:10 GMT
Hi Daydreamer.
Looking at you build diary it looks like you have used the standard focus ecu and loom and also fuse boxes. I do not have a clue about electrics and wondered if you can clarify a few things for me?
I think I have 2 looms from the donor. Engine one and then one for lights, dash etc.
I was thinking can I just plug all the engine bits back in and then re-connect to the focus fuse box and start the engine up? This way I don't need to re-wire or build a fuse panel (as I don't know how to do that anyway)?
Where I am also confused is, the focus loom with the lights etc on it also has the transponder module and all connected to a different focus fuse box. I am going to replace with Mev loom but how does the transponder module wires link to the engine loom?
Many thanks
Bob
|
|
|
|
Post by daydreamer on Dec 14, 2012 19:45:23 GMT
Hi Bob,
Yep, I used the focus loom and fuse box (s) as there are two of them.
If you just want to reconnect it and go then you need the looms complete , including some internal sections to the steering column. If your doing your own lighting wiring then the internal fuse box will not be needed, If you want the ford lighting then the internal fuse box may be needed, for the reversing light. Lighting loom sections and the “Security Module” are not needed to get the engine going. The security module, black box with two connector blocks, is for the remote locking and alarm and not needed unless you want the remote central locking mechanism to work and the horn to go off unexpectedly. The immobiliser is part of the ecu and works with the transponder ring around the ignition barrel and the key to enable the engine, for those to work you’ll need the loom from the ecu up to the steering column.
You’ll need all earths, there a lot of them, connected to a common rail or the chassis.
Looking at your loom it seems you have cut it as per the MEV instructions near the engine bay fuse box, this assumes that you will follow the MEV instructions and make a small fuse/relay box. If you follow the MEV instructions it will work.
I did use all the original focus looms , instruments , switch gear and fuse boxes without cutting it as you have. That gave me confidence that it would work at no cost for all the wiring and instruments. I striped all the unused connections from the loom, I’m now expert at taking the connector blocks apart and reassembling them. I had to extend the loom in two places so that it would fit around the chassis. I used all of the loom , including the lighting segments , so all my wiring is colour coded as per a ford focus mk1. I had never done any auto electrics before.
I took me about 40 hours to strip and extend the loom and rewrap it. Even going carefully I made 1 mistake , I removed the switched supply to the reversing light switch in the gearbox and I had to re-instate that, not easy once all the bodywork is on.
Would I do it the same way again, nope. Funnily enough stripping out the Ford loom, about 60% of it, tracing all the wires and removing all unused relays, fuses and connectors was great training in the electrics and it’s not that complicated after you’ve spent 40 hours working through it.
If I was to do it again I’d make my own loom as per the MEV instructions if using the donor ford ECU. If using an aftermarket ECU then I’d use the aftermarket engine loom and do the rest myself. Once you have understood the function of a relay and how to wire it , it’s straightforward. Ultimately it will be a lot tidier and lighter, the internal ford fuse box is massive and the engine bay fuse box a lot bigger than is needed on one of these cars. In my car, I moved the battery to the front and that meant I also moved the engine bay fuse box to the front. These design compromises would not have been necessary if I’d bitten the bullet and made my own loom.
Certainly the cheapest route is to use the Ford loom in its entirety with all the ford instruments + switchgear and it was painless for me, starting up first time. BUT be aware that if you do decide later on to change to an aftermarket ecu , perhaps as part of an engine upgrade , then that loom and Ford instrumentation is probably going to change as well and if I talk any more I’ll be giving away my secret upgrade plans.
I did buy an OBD-II reader ( USB to my PC ) and that helped with diagnosing a wiring fault in the engine loom. I had a MK1 donor and loom and I bought a new MK2 engine for £450 all in. Too cheap to resist but the MK2 has separate supplies for engine temp sensor and another sensor where the MK1 uses a common supply for both. The engine started but the temp reading was always -270 degrees and that meant the idle was off and the fans ran constantly. The OBD-II reader helped with diagnosing that issue as it showed what the temp reading was and told me where to look. If your using the donor engine and loom then they should all match up and you should not face that issue.
Guy
|
|
|
|
Post by BobN on Dec 14, 2012 20:59:58 GMT
Thanks Guy. I think I should give up on trying to using the engine fuse box and work out how to make small one that will work with the focus ecu and engine loom.
One further question do I read the instructions correctly and not all the pins on the c80 connector are needed?
As for the lights etc I have the Mev loom.
Bob
|
|