|
|
Post by clintavo on Dec 27, 2014 8:20:08 GMT
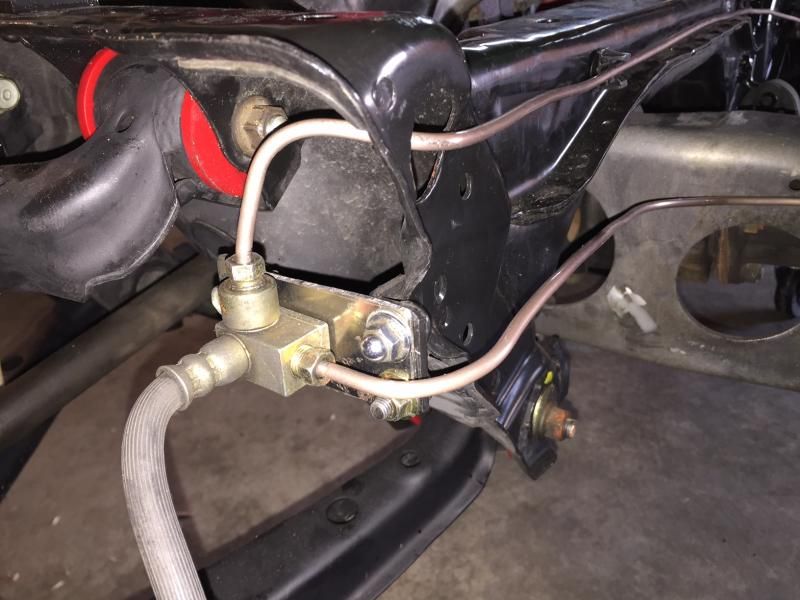
this is how I ended up arranging the rear brake junction. It required disassembly to install the chassis/sub frame bolt.  |
|
|
|
Post by clintavo on Dec 27, 2014 8:24:37 GMT
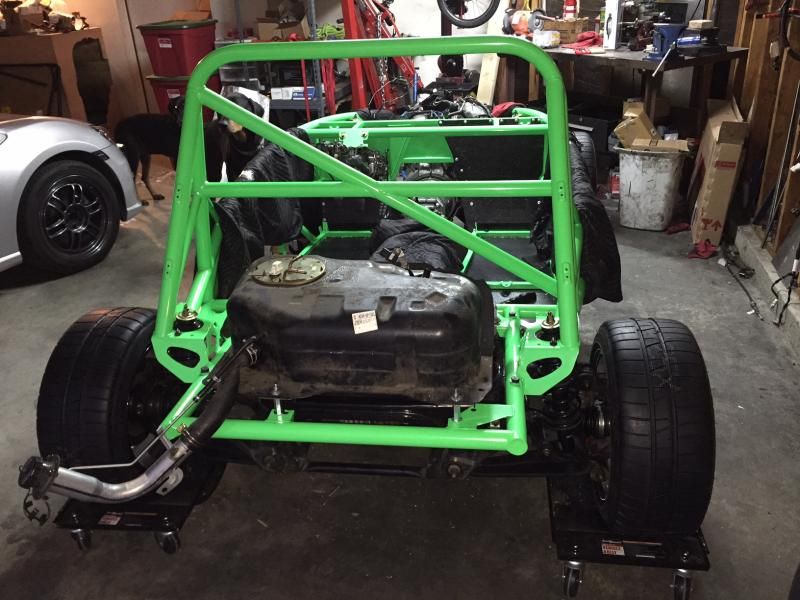
These threaded spacers from Lowes were PERFECT with the addition of a flat washer per side. There is a 3-5 mm gap under the fuel tank. [img src="![]() i66.photobucket.com/albums/h264/clintavo/IMG_2173.jpg i66.photobucket.com/albums/h264/clintavo/IMG_2173.jpg" style="max-width:100%;"]   For those concerned with shock transmitted from the chassis to the tank, know that the mounting points on the chassis are not overly rigid... some shock absorption is provided by the flex. |
|
|
|
Post by clintavo on Dec 27, 2014 8:37:55 GMT
No roll-over valve. Should I put an evap canister on the open tube, or just block it? Is the electric plug for (no-longer-needed) emissions stuff?  |
|
|
|
Post by JIDiesel on Dec 27, 2014 13:34:18 GMT
No roll-over valve. Should I put an evap canister on the open tube, or just block it? Is the electric plug for (no-longer-needed) emissions stuff? Your tank looks to be from a 2000. The switch (pictured) controls the electrical valve on connected to the charcoal canister that would be located on the lower side of the fuel tank. Are you running a stock computer? Are you keeping the car in a garage? if so it would be recommended to keep the canister. |
|
|
|
Post by clintavo on Dec 28, 2014 6:31:38 GMT
Unfortunately, I tossed all the emissions stuff.
Stock computer (for now) in a garage. Aside from the fuel smell, is blocking it likely to cause drivability problems?
|
|
|
|
Post by linuxd00d on Dec 28, 2014 8:46:14 GMT
No roll-over valve. Should I put an evap canister on the open tube, or just block it? Is the electric plug for (no-longer-needed) emissions stuff?  So Mazda eliminated the rollover valve starting in 2000? My 1999 has one. What the heck?!? Does it mean it's not really needed? |
|
|
|
Post by steadfast on Dec 28, 2014 16:06:00 GMT
That is one clean gas tank! 2000 was the new redesigned tank. An EVAP canister would likely work. As for the sensors, I left mine all plugged in. Although I don't really think it matters.
|
|
|
|
Post by clintavo on Jan 8, 2015 19:18:48 GMT
I am installing the braided brake line kit (very complete and worth every penny), and can only find a single front line from the master cylinder. The donor had ABS... do I need to source a non-ABS master cylinder?  |
|
|
|
Post by lhintze on Jan 8, 2015 19:44:31 GMT
^I'm at the same point and would like to know as well.
|
|
|
|
Post by greg on Jan 8, 2015 19:49:19 GMT
Yep. My non-abs master has an opening pointed towards the clutch master for the driver side wheel. Ill take a pic later for you.
|
|
|
|
Post by clintavo on Jan 8, 2015 20:03:32 GMT
Yep. My non-abs master has an opening pointed towards the clutch master for the driver side wheel. Ill take a pic later for you. Cool, thanks! |
|
|
|
Post by JIDiesel on Jan 8, 2015 20:35:31 GMT
I am installing the braided brake line kit (very complete and worth every penny), and can only find a single front line from the master cylinder. The donor had ABS... do I need to source a non-ABS master cylinder?  You will need a non-abs master it has the extra hookup for the front drivers brake cylinder. |
|
Warren van Nus
Junior
  Live every day as if you are Tony Stark
Posts: 83
|
Post by Warren van Nus on Jan 8, 2015 22:57:39 GMT
You don't need a new master. A simple $5 tee fitting would solve this problem. The thread is M10x1.0. An all-female tee could take the place of the driver's side union portion of the proportioning valve. Another thing to be aware of is the various proportioning valves in ABS and non-ABS systems. www.flyinmiata.com/tech/stock_bpv.phpYour ABS proportioning valve will put more brake bias to the rear. This is likely a good thing, as Miatas are notorious for being overly-forward in the bias. That said, when you have your stickiest rubber on your grippiest surface, check to make sure the rears don't lock before the fronts. |
|
|
|
Post by clintavo on Jan 9, 2015 2:58:22 GMT
That's great to hear, Warren. Thanks for the insight!
|
|
|
|
Post by clintavo on Jan 11, 2015 19:22:19 GMT
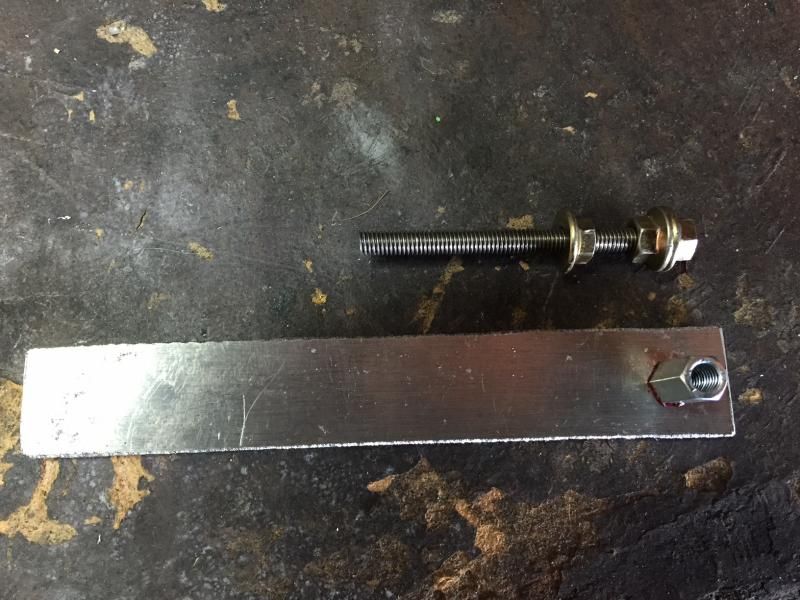
Made a tool for installing rivnuts, since the tools seem a bit pricey (and the mandrels can break). Used stainless rod for increased strength. Have installed 10 rivnuts, and only now feel the rod has stretched. Will use a new segment of the rod to install any more. LMK if anyone wants a tutorial on how I am installing them.   |
|