|
|
Post by tojeiro on Feb 23, 2017 16:19:10 GMT
So for the MX5 the top of the radiator cap is basically level with the split line between rocker cover and head. 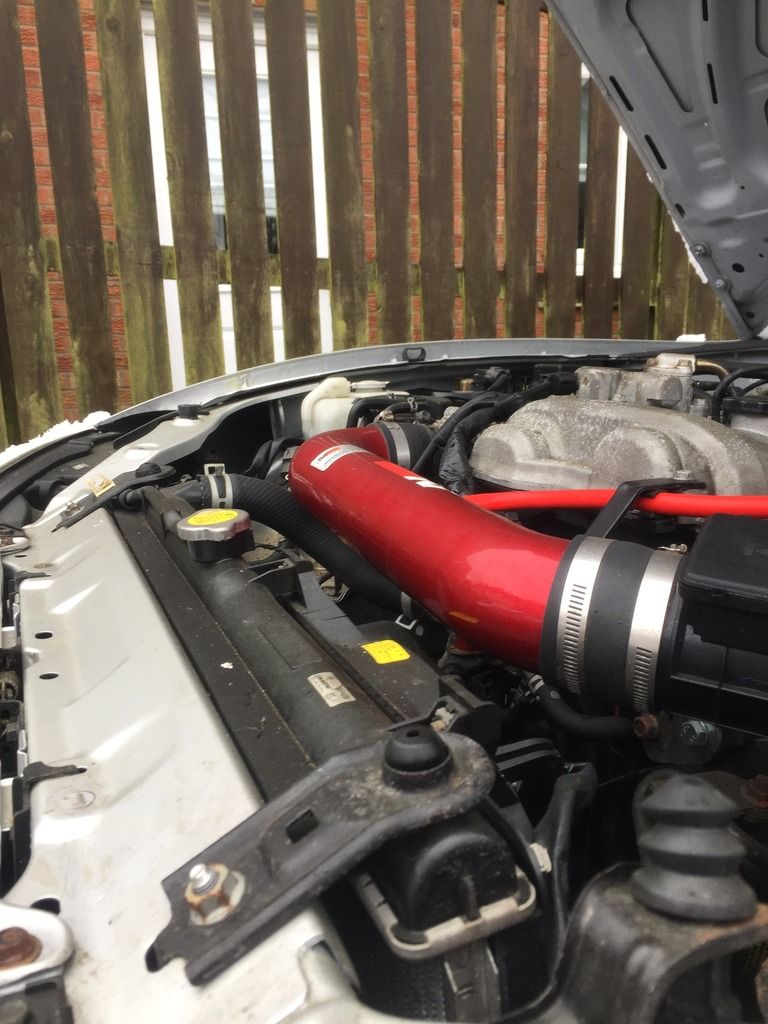 I couldn't easily put a level on it due to the intake pipe but eyeballing it it is very close. Mine is mounted like this, with the curve in the body I don't think any clearance issue will occur. Top of cap is 45mm above frame rail. Have had it running up to temp with no issues (other than avoiding carbon monoxide poisoning) 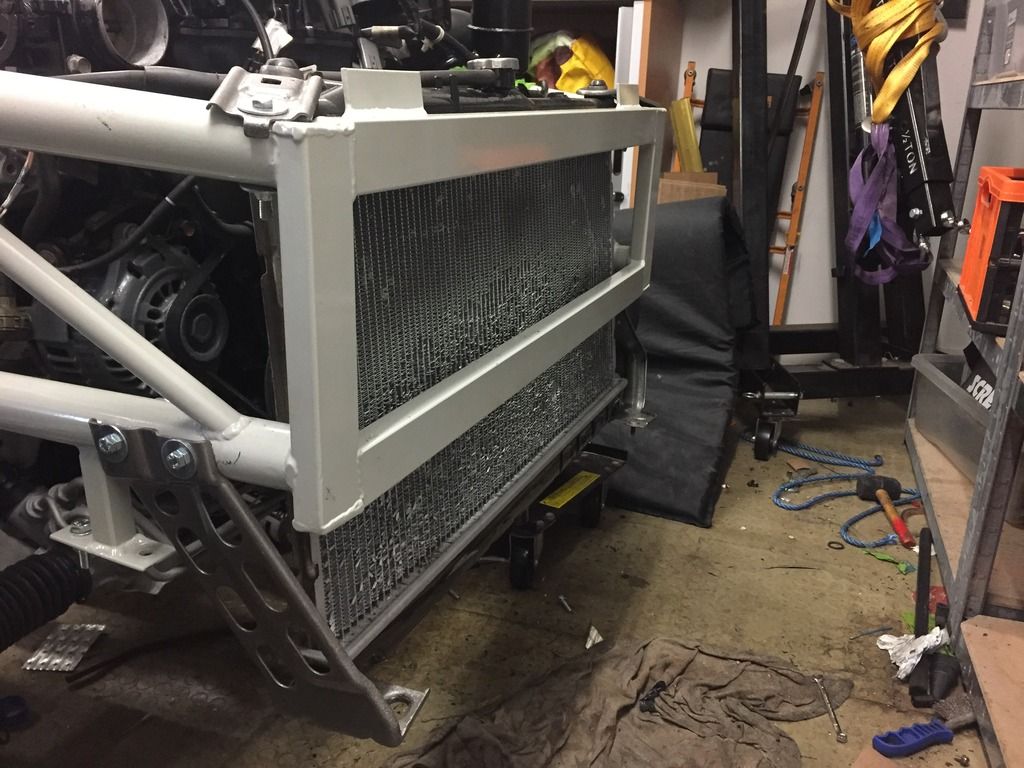 Also going to fit a new rad, using this one at the moment to flush any crap out since my engine rebuild. |
|
|
|
Post by stevednorris on Feb 24, 2017 10:42:28 GMT
Mines fitted at the same height as the picture posted above, I've had no issues with fitting the body or bleeding the system. I've fitted my expansion tank directly behind the radiator on the driver side.
|
|
|
|
Post by snowbird1 on Feb 24, 2017 14:04:46 GMT
snowbird 1, thanks for the pic, where is the header tank on your build? I conscious that the size of bonnet opening hides quite a lot of what during build is readily accessible and I dont want to start lifting body on and off (its that one man build thing again!) I used a generic $15 tank mounted on the firewall: 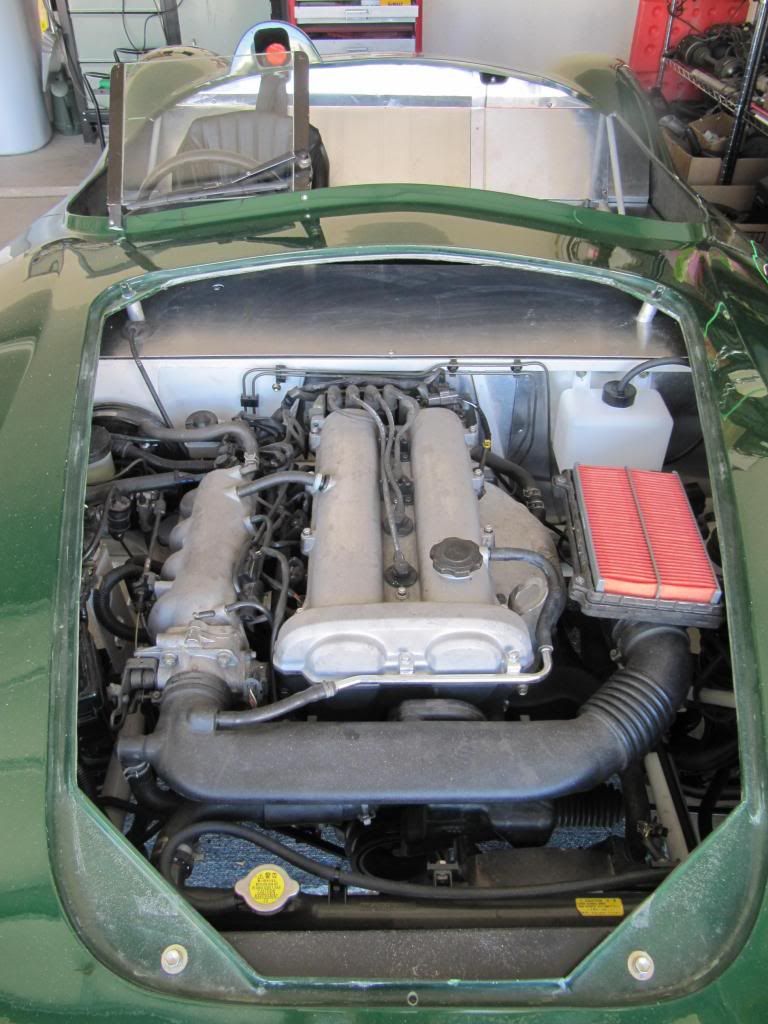 |
|
|
|
Post by Stiggy on Feb 24, 2017 16:55:17 GMT
As 'gwnwar' mentioned the lower chassis cross member appears to restrict the airflow to the rad, I would like to see a round tube in that location - that being said the car AZ car cooled fine at 40 deg C - once I sorted other problems with the cooling system - good tip from 'gwnwar' 'use only a genuine Mazda thermostat'. Another picture of the rad location: 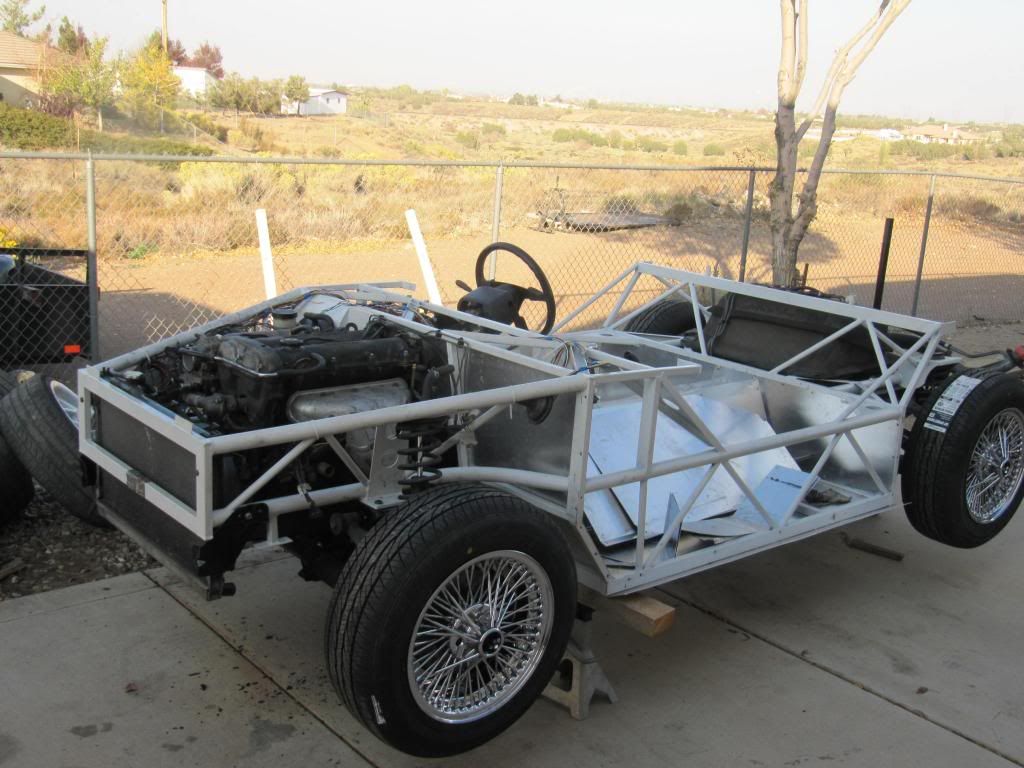 Looks low but never in danger of grounding even over some steep curbs around here. The air flow on an MX5 is shown below, considerably more restriction than on Replicar !  Please see my wind tunnel testing on Replicar, (just posted) proof of cooling efficiency is evident in the first few seconds, spot the smoke stream as I momentarily slip it in the front grille, immediately smoke escapes partly around the wheel arch. |
|
|
|
Post by R2S on Feb 24, 2017 19:17:29 GMT
Stuart Smoke going in through nose and out through wheel arch doesn't prove cooling efficiency unless of course you channeled airflow through radiator as snowbird1 did.
As it is I plan to do similar and channel air through to rad by closing in albeit I will place vents in same but Im still too far away to worry about such, I just didn't want to have to fit and refit rad.
btw my Mk2 donor didn't have all that foam at the front but it did have an alli crush bar which has proved very useful.
|
|
|
|
Post by R2S on Feb 24, 2017 19:19:59 GMT
snowbird 1, thanks for the pic, where is the header tank on your build? I conscious that the size of bonnet opening hides quite a lot of what during build is readily accessible and I dont want to start lifting body on and off (its that one man build thing again!) I used a generic $15 tank mounted on the firewall: Thanks really helpful picture I'll place my header in same place ensuring checking and topping is easy. |
|
|
|
Post by R2S on Mar 6, 2017 18:02:58 GMT
Radiator finally fitted couple of photos of brackets. 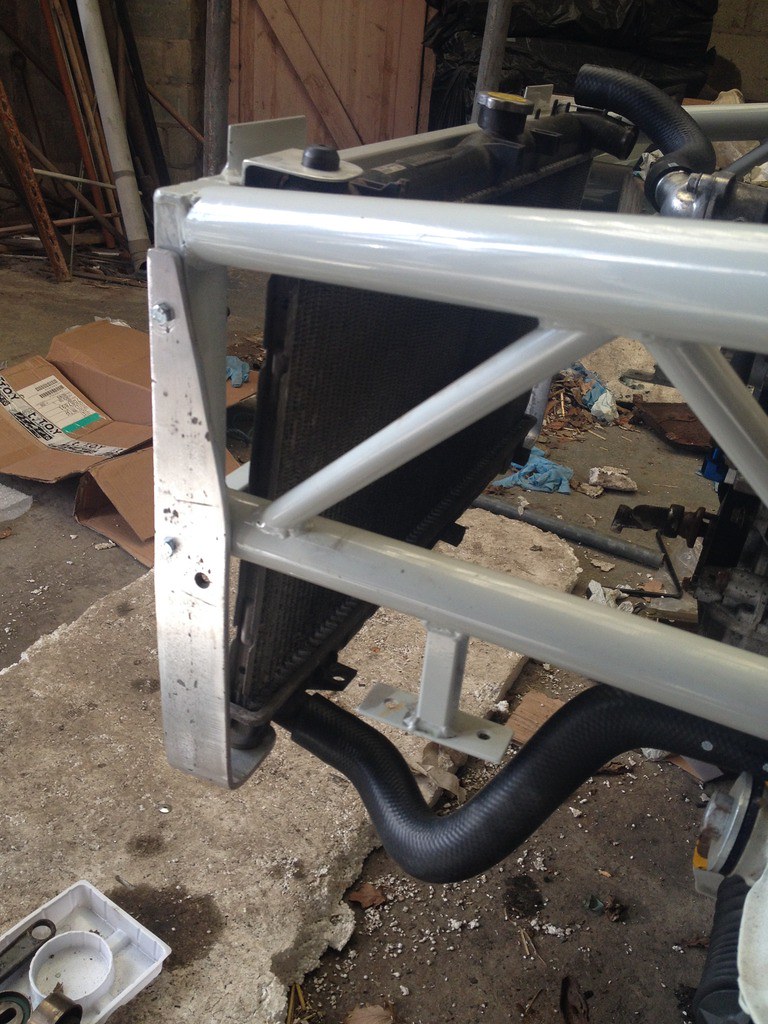 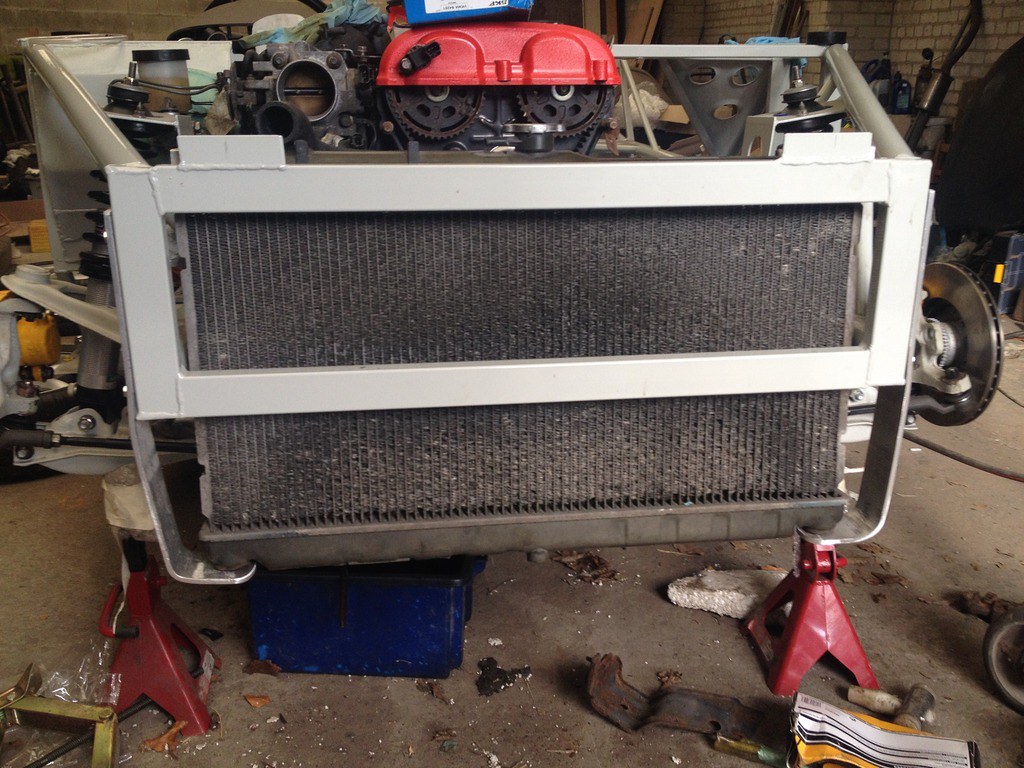 Had a look at fitting transmission tunnel then realised passenger bulkhead needed to be in place first so decided to fit, anyone else think the bottom bend on the sheet metal should go down rather than horizontal (as supplied)?  |
|
|
|
Post by p5curly on Mar 6, 2017 20:04:04 GMT
If the panel was folded as a 1 off part it may have been over folded you can tap it back with a block of wood
|
|
|
|
Post by R2S on Mar 11, 2017 15:41:14 GMT
Had one of the most frustrating days since the recalcitrant ppf bolt! (I'm sure there will be more but this is something that really shouldn't be that difficult and can be sorted in manufacture). For anyone yet to start their build make sure you trial fit and cut your transmission BEFORE fitting the chassis to the subframes and engine if you want to get a neat finish/location for the gear shift cut out. One for the Gaffer Why isn't the transmission panel made to fit the chassis frame? It would make life so much easier and avoid the need for fiddly little 'filler' pieces between the frame and sheet metal (or have I just got a rogue tunnel?). It would also mean my original cut out would have been in right place! 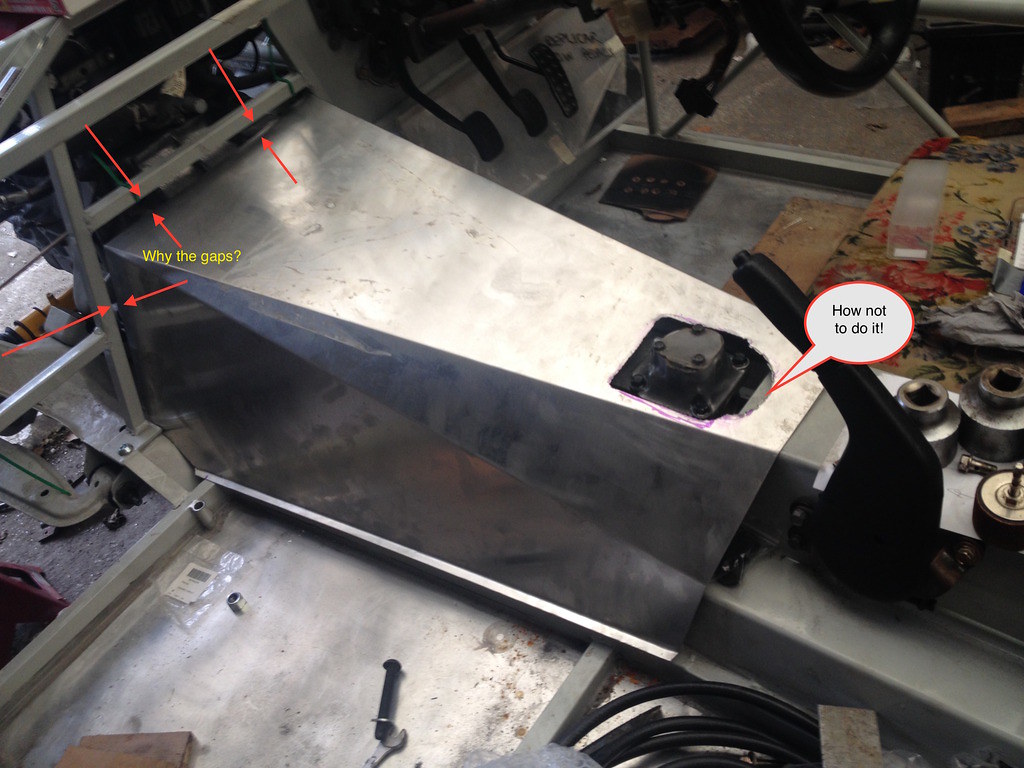 So pissed off I chucked in the towel and am going to fabricate my own tunnel. Stuart is this something you could address to help future builders? |
|
|
|
Post by p5curly on Mar 11, 2017 17:58:11 GMT
I feel for your frustration mate do you need any help with mocking up a new panel
|
|
|
|
Post by Stiggy on Mar 11, 2017 18:45:13 GMT
The tunnel is not supposed to fit to the chassis as you are showing it. Look at page 32 of the build guide. www.mevltd.co.uk/assets/documents/MEV_REPLICAR_BUILD_GUIDE.pdfYou will see that the tunnel is designed for the front bulkhead alloy panels to have a bend on the edge. These bends fit inside the end of the tunnel as an overlap for joining the 2 panels together. No need to fabricate another. All panels need adjusting and trimming, that is part of the build work. The gear lever gaiter will cover the cutout you made. You can bend the lower bulkhead panel differently if you prefer. Make a card template before you cut the alloy. |
|
|
|
Post by R2S on Mar 11, 2017 19:21:47 GMT
Stuart My point is if the tunnel is made to fit the frame it can be riveted in at firewall from underside and foot plates can then be returned onto tunnel . Much more straightforward (it would make life so much easier for builders) than current arrangement and adds another layer of stiffness. Just suggesting an improvement/refinement learning from experience rather than continuing to propagate a less than ideal/efficient solution. My view is that the easier the build is made the more satisfaction all (with the exception of sadist) builders will get and the better the message going out to potential builders on how straightforward the build is. On this very subject Id also suggest that the brackets for the solid to flexi brake pipes at front should be installed in manufacture; there must be enough builds out there now with enough information to identify the best (most practical - no pipes fouling on full lock etc) location. Should end by saying I still think the kit is a cracking bit of design and well worth the money (and more) and Im glad I spotted it at Newark in 2013  |
|
|
|
Post by tojeiro on Mar 11, 2017 20:46:32 GMT
I used a generic $15 tank mounted on the firewall: Thanks really helpful picture I'll place my header in same place ensuring checking and topping is easy. I found I could reuse the std MX5 tank mounted in this area using a standard shelving bracket. I'll try and post up a photo on my build tomorrow. The only issue mounting on passenger side is the feed hose on radiator is on the wrong side but not an insurmountable problem. |
|
|
|
Post by R2S on Mar 11, 2017 21:04:34 GMT
I feel for your frustration mate do you need any help with mocking up a new panel Hi Im having a complete rethink, was going to use the supplied tunnel and fit rounded tunnel (in 3mm ply covered with same fabric as seats) over top, following todays events Im seriously considering creating a curved tunnel right from the get go (similar to racing replicar) in metal. Will give you a shout if I need some help. Thanks |
|
|
|
Post by brumbrum on Apr 7, 2017 12:28:04 GMT
Hi Gary Thanks for taking the time to discuss and show me your Replicar build, very interesting and inspiring. Thanks again Simon 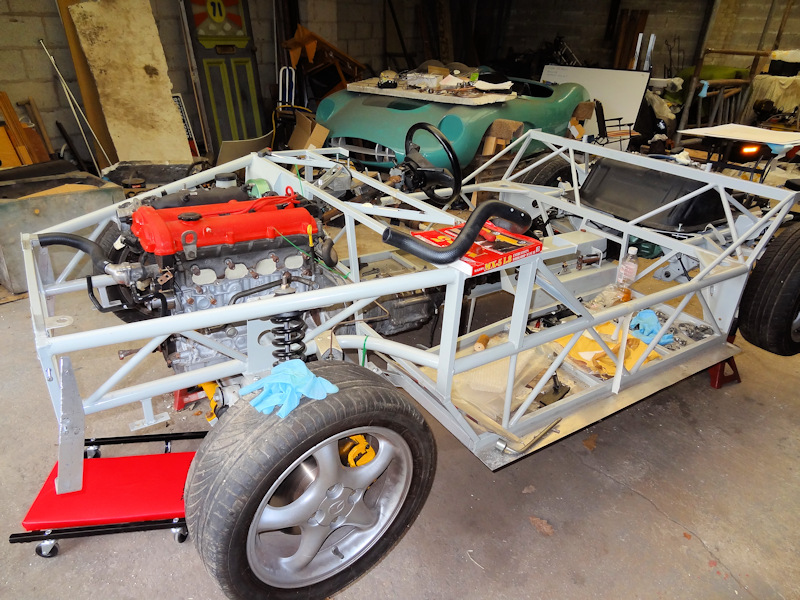 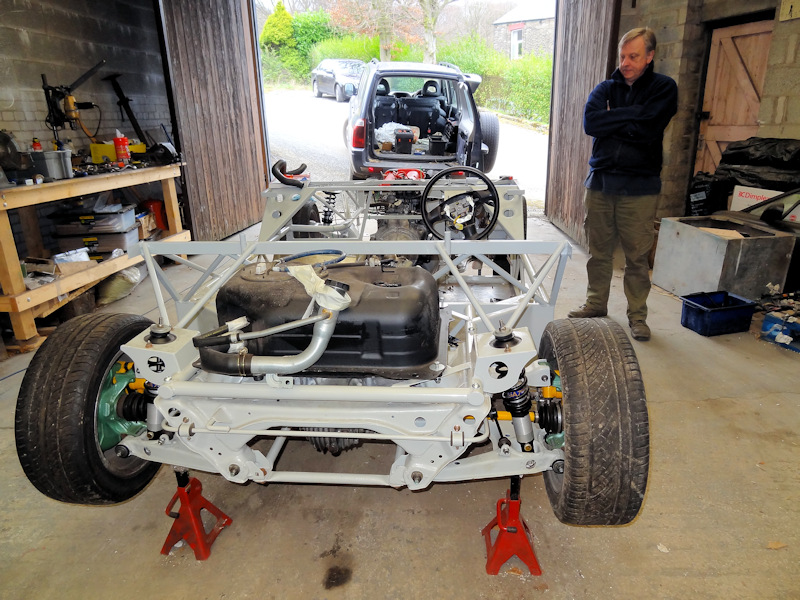 |
|


