|
|
Post by casesensitive on Sept 1, 2014 9:07:35 GMT
Also, did anyone/everyone else have to grind quite a bit off the nearside pedal box mount to allow the clutch pedal to rotate freely without fouling? Seems a shame to have to take a flapper to my expensive powder coat. Primed and awaiting painting in as close a colour as I can find in Halfrauds.  |
|
|
|
Post by airforceone on Sept 1, 2014 9:23:06 GMT
No, I just spaced it away from the mount but using extra nuts between the pedal box an the mount.
Think I dropped it by 10mm or so, needed to be lowered anyway for the pedals to be at the correct height.
|
|
|
|
Post by deanohonda on Sept 1, 2014 9:30:43 GMT
I also did the same just spaced it away from bracket
|
|
|
|
Post by rossco on Sept 1, 2014 10:49:28 GMT
I also had to space to give the correct height.  |
|
|
|
Post by casesensitive on Sept 1, 2014 13:21:10 GMT
Yeah, I spaced it too, based on reading other guides, but it doesn't look like it was by enough (~12mm I think).  |
|
|
|
Post by casesensitive on Sept 5, 2014 8:20:15 GMT
Has anyone used diamond mesh in the front side panels rather than the aluminium that's normally used? I quite like the grill at the front, and it seems to me that the cooling advantage would be plus. Reading the IVA manual it seems like so long as the panels have gaps that are smaller than 40mm (they'd be no bigger than 6/7mm I'd imagine), the only requirement would be the 'cheese grater' effect. I know at least one build ( JimK) got in trouble at IVA for making the engine cover out of perf. Anyone able to confirm either way? |
|
|
|
Post by casesensitive on Sept 21, 2014 23:04:02 GMT
|
|
|
|
Post by casesensitive on Sept 21, 2014 23:17:15 GMT
Radiator bracketI used the leftover bits of the trailer hitch, at a fairly excessive 6mm thick. One piece already had holes exactly where I wanted them, and already ~11mm. I drilled them out to M12 (the biggest drill bit I had) at both ends 70mm apart in two pieces, and widened one bit to ~13mm with a round file. I ground down the radiator lugs to fit, as it's easier than filing the holes in the iron.  25mm M12 socket head bolts with penny washers either side. I'll paint these and the extension bracket when I get paint that matches my chassis.  Rad pretty much upright in the end, should make for a decent cooling surface.
|
|
|
|
Post by casesensitive on Sept 21, 2014 23:25:42 GMT
Side panelsBetween cardboard and wood, I made 7 templates before I was completely happy.  Hmmm, don't know about anyone else, but my templates did not fit into the sheets provided.   Had to buy 3sqm of aluminium for the front floor, so I had plenty to make new panels out of.  The IVA trim actually improves the appearance of the panels I think. I ended up trimming the two areas where the side panels meet the front firewall as much for appearance as because a child's head might actually fit in there. 
|
|
|
|
Post by casesensitive on Oct 26, 2014 11:43:25 GMT
Hmm, Flickr eating my photos again. Looks to be a thing with iPhoto; it synchronises deletions! PITA. Will have to upload them again. A few small jobs this weekend, the last of the donor tear down, choppy choppy! Stripped the doors, boot, bonnet, and broke in the windows, collecting the glass on some tarps. Made a Focus cabrio, briefly, can't seem to locate that one, shame. Getting through the car with a 230mm grinder was made possible by flipping it over and cutting from the underside. Tough job to do solo. Off to the scrappie with you!     |
|
|
|
Post by casesensitive on Oct 26, 2014 11:48:42 GMT
Air ventsBonnet and Engine cover vent grilles, spent most of the time sanding and levelling the edges.  Engine cover was briefly hinged from the inside, with some vertical spacers, but it didn't work out, so I filled the holes and bought some piano hinge which I'll mount upside down for a smoother look.  Cut out the grilles and put on a lot of Stixall black.   Contrast will be better when I paint the bonnet 
|
|
|
|
Post by casesensitive on Oct 26, 2014 11:52:23 GMT
Handbrake cableHmmm, issues. Its seems like these holes need to be bigger to accommodate the focus handbrake cable. I'm test fitting the donor ones, will replace with new ones once it's all sorted, and I'm sure they're right.   Which I'm not convinced they are. One appears much shorter than the other, as it, it has less travel from fully extended. Anyone notice this? Cannot get the one I have on the rear left, top in this picture to stretch. 
|
|
|
|
Post by casesensitive on Oct 26, 2014 12:00:31 GMT
Cooling pipesAnd finally for this weekend, I eventually conceded and cut the pipes 85mm shorter. This will allow me to start the bend in my silicone pipes inside the tunnel and stop them from getting wedged on the the horizontal chassis bars. Awful shame to have to cut off the lovely flared end though. 
|
|
|
|
Post by casesensitive on Nov 16, 2014 16:49:31 GMT
Handbrake cableNow question of it, the ST170 donor's handbrake cables are definitely uneven, there's 35mm in the difference in the extension of them! So I bought a new set, 1770mm.   Fitting it, I discarded the rectangular circlips (squareclips?), neither B&Q or local motor factors had one. I'll nylock it when the final fit is done. Loosened the M10 on the centre cable as far as I could, fitted the calliper end, then pulled the cables through the outers to the chassis bracket. Cut off the rubber grommet and then tightened the nut till it was FT.   Definitely pulling harder on the upper (left) cable, to do with the placement of the lever. It's 8mm less on the calliper end, probably have to do something with guides. Bought a longer (343mm) centre cable for that. Very rough cut of the centre tunnel, broke my second jigsaw, ended up doing it with a 12" hacksaw blade and files, which took an age. In its death rattle, the jigsaw managed to stamp a load of marks on rear of the tunnel which is a pain, looks much worse close up. Definitely going to have tap out some of it or maybe cover it with vinyl or spray it with plasticoat. Panel beating, another Rocket builder skill! 
|
|
|
|
Post by Raj'sDad on Dec 20, 2014 20:19:05 GMT
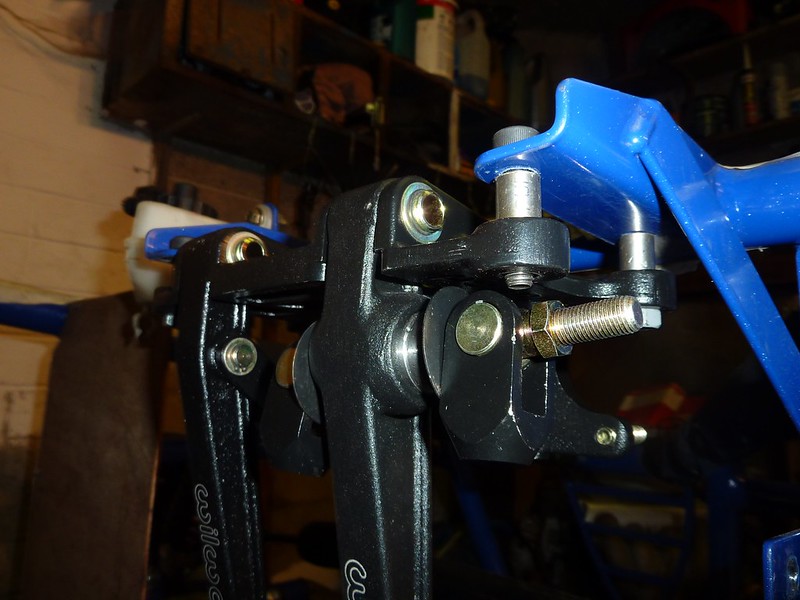
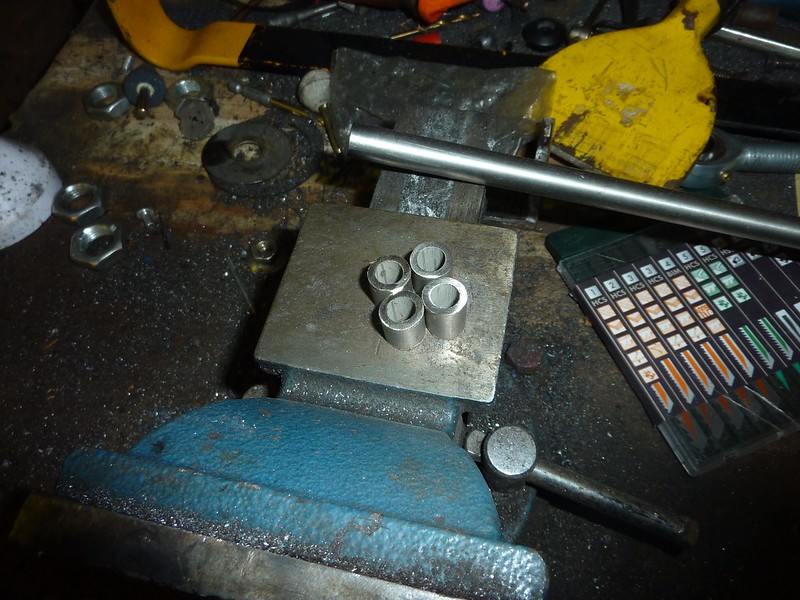
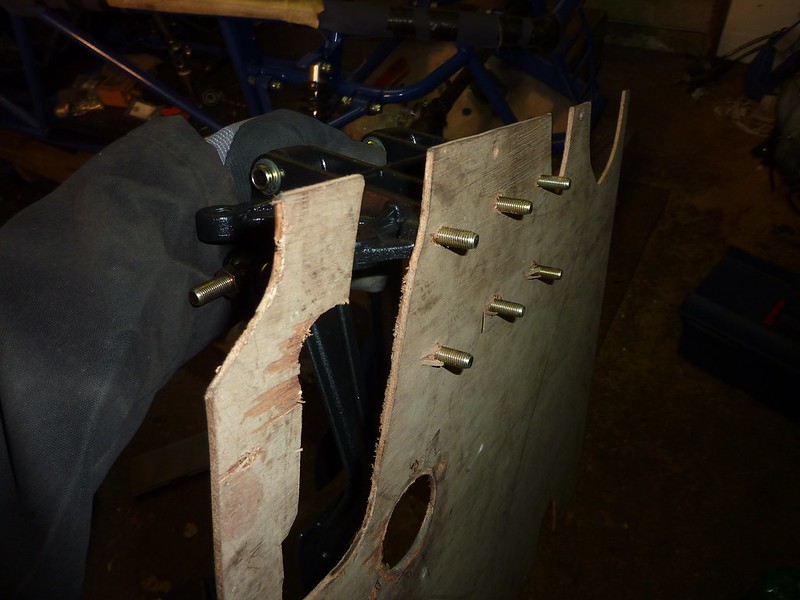
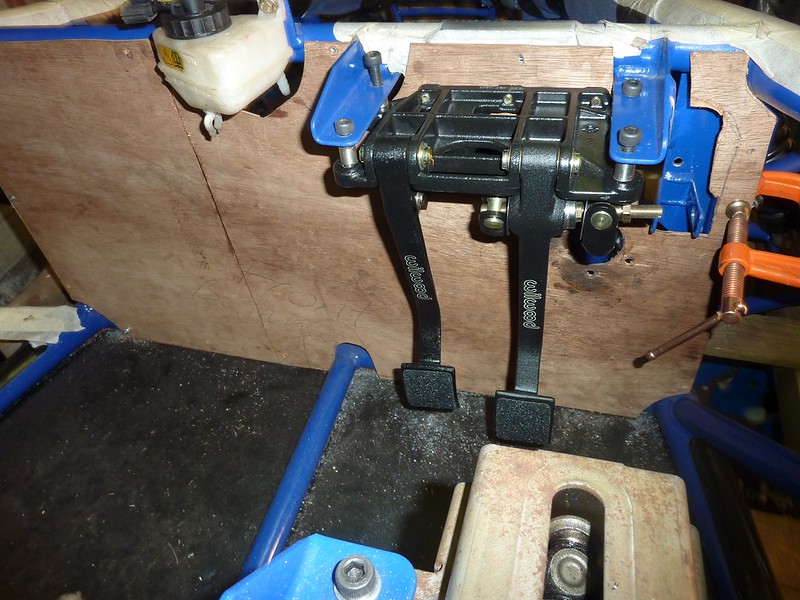
Fitting the pedal boxI spent a good deal of time wondering how I'd go about marking the front bulkhead for the holes through which the pedal box threaded screws would go. Particularly as most people put spacers between the mounting point on the chassis and the top of the pedal box. Rather than reinvent the wheel, I copied this idea, making 4x 13mm spacers out of some 8mm ID/12mm OD crush tube I had left over from the seat rail mounting. Ground, flapped, deburred and a slight chamfer added to the inside edge to allow the bolts through easily.   Mounted temporarily with 50mm M8s, washers and nuts will be added later. I found that the back right one will have to be about 53mm to have enough thread to clear the balance bar, but that the others could be 60mm or so without any great difficulty. That's all very well, but fitting this on with the bulkhead relies on having a bulkhead made of jelly and ideally, having 4 hands. So, after lots of consideration, I decided to guess. The top centre bolt runs ~28mm below and ~8mm to the left of a rivnut I'd put in the chassis, so I marked that on the corresponding hole on my wooden bulkhead. Not very scientific but it mostly worked. Then taking off the pedal box and drawing around all 6 bolts with a pen, I started to drill the template.  Of course it went through, but would everything line up first time? Ah, sort of! There was a bit of pushing and shoving, but it all seemed to go fine. Obviously this pushing and shoving wasn't going to fly with the metal bulkhead, wouldn't be very useful if you could.  Hi We are building the Sonic 7, reviewing through this thread, I wanted to verify whether these are required on the sonic 7 as I have not seen them used on any of the other Sonics? Thanks |
|