Jimmy, here are some pictures from when I did the bodywork for Georgia Tech's 2010 FSAE car.
plus.google.com/photos/106049692273986530726/albums/5686580339259356641 It was the first time I ever did any moldmaking, I made a lot of mistakes and have learned a lot since then.
Here're some tricks with moldmaking out of foam:
Get the shape you want out of the foam first, be sure to match all the contours. Large changes in form is easy at this point, but be careful not to take off too much. The highest grit worth using is 100 or so. Don't worry about a smooth surface. Be sure that you don't have any negative draft angles. Basically, these are "overhangs" or features that would cause the part to become mechanically stuck to the mold. Even vertical surfaces are a problem, you want to make sure you always keep at least 5 degrees of draft angle on each side to guarantee a safe pull. (Ignore the 0.5 degree marking on the graphic, the image is for injection molding).

Once you're happy with the shape, paint on regular Elmer's wood glue. You can get it in gallons, just use cheap chip brushes. The wood glue does not react with the foam and gives the mold a very hard crusty surface that will withstand the stuff you're putting on later.
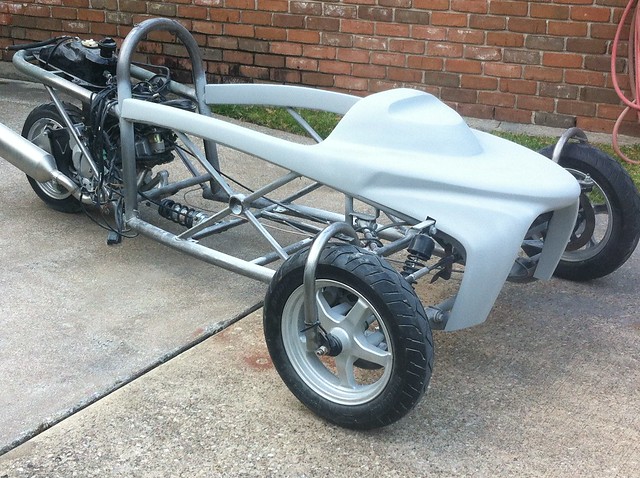
The panel in the middle mocked up on the car is just foam with wood glue.
Skip the Bondo. No need for plugs where you're only pulling one female. Bondo is terrible to work with.
If you need to build up an area, plaster of paris is great, just smear it on with your hands and/or those flexible plastic spreaders. Be sure to mix it well, it's easy to get rough little bumps that make the surface lumpy. Sand down the plaster to about 120 grit. If an area is nice and smooth with just foam and elmers glue (deviations less than 1/16"), you can skip the plaster. Plaster is just for large buildup.
After the plaster, use drywall joint compound to coat the entire surface. You can get this very smooth, down to 180 grit. Anything higher will just clog the paper.

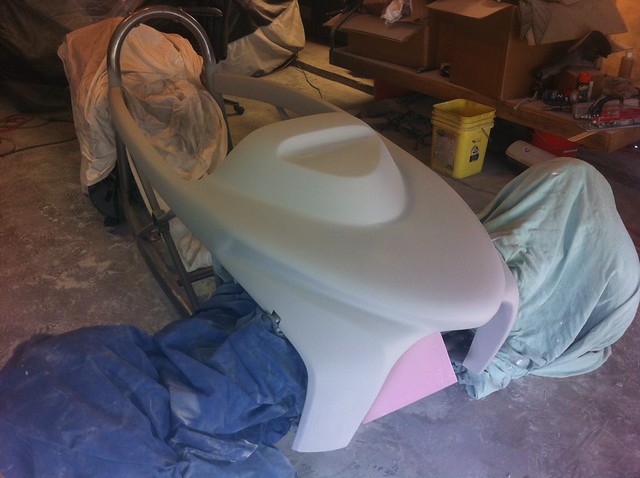
The nose in the picture to the right is after drywall compound. Smooth, but not shiny. Shiny happens later.
Inevitably you're going to have a few defects and holes to fill. Resist the urge to use Bondo. Bondo is miserable hard stuff for permanent applications. You need something easy to work with:

Dolphin Glaze is Bondo on Easy mode. It's amazing stuff, and not too expensive. It takes 20% of the time to form and sand down smoothly.
You probably already do it, but I have to add this: whenever you're sanding anything, make sure you're wearing a dust mask. No need for a full respirator, but you will really screw up your lungs with all the dust without a mask.Anyways, once you have a nice smooth surface, you need to put on high-build primer. Automotive primer is perfect. The 2K and 4K activated products are amazing for this, but it needs a full HVLP setup, safety gear, and a little bit of practice. In your case of such a small mold, you'll be fine with rattle cans of high-build automotive primer. This stuff is great. It fills tiny holes, is self-leveling, and can be wet sanded and polished to a Class A surface. When spraying paint or anything with VOCs, you need a respirator with carbon filters. Every home improvement store sells them for $20.
Anything like this primer will work:

Spray a thin coat, wait 5 minutes or until it's tacky, spray another coat, repeat 4-6 times. Resist the urge to build up the paint in defect areas. There are handles made for spray paint cans. They are your friend.
Once the primer is cured (4-8 hours depending on temperature), you can start sanding. If you did a great job spraying, you can start wet sanding at 400 right away. If it's your first time, you'll probably need to start at 220.
Buy a sanding backing pad. It should be around $10, it will be worth every penny. Never have your fingers directly put pressure on the sandpaper, you'll just burn through in localized hotspots.
Get a spray bottle, fill it with water and a few drops of dishwashing soap. You'll want to keep the surface and the sandpaper clean. A bucket of water to rinse the paper off is handy. Use light pressure, move in tight circles. With a tiny amount of practice you'll be able to feel when you've worked out all the bumps and scratches just from the resistance of the paper moving. Work your way up from 220 to 400 to 600 to 800 to 1200 to 1500. If you do it right, each step should take around 2 minutes per square foot of area. Always rinse the surface, your hands, and the backing pad completely before moving up in grit. Previous grit particles will find their way onto your new paper and leave nasty swirl marks if you're not careful.
If you burn through the primer, you need to re-spray. You can do it locally if you mask off everything else. Just be prepared to feather the edges. Generally if you're going to burn through, it will be in the 220 or 400 stage, so you won't lose too much work.
After you get the surface to a nice 1500, start with the rubbing compound. After following those instructions, use polishing compound. You know you're ready for the next step when water beads up on the surface instead of spreading out in a sheet.
After your surface is polished, grab some Mirror Glaze release wax:

Put on three coats, follow the instructions carefully. Your fourth coat will be a little different, you'll need to buff it very quickly.
Once that's done, you have a perfect mold that will release the first time. PUT YOUR TIME INTO MAKING THE PLUG PERFECT, it will save a ton of effort and time later.
You will not even need to wet sand the female mold or final part, the surface finish will be perfect. It is much easier to sand convex plug surfaces and primer than it is concave gelcoat.You'll need a mold release paste for extra security. Partall Paste #2 is great. Avoid PVA, it requires quite a bit of skill to spray and avoid surface imperfections. Hand-applied paste does the same thing and is much easier to achieve high quality finishes.
When you do the layup of the female, the best way to apply the gelcoat is through a spray gun. If you don't want to spend $150 on a dump gun (HVLP won't work without a lot of thinner), you can brush it on gently with no downsides. Make sure you use good brushes for the first two layers. You don't want to leave bristles in the mold surface. Once you get about 2 millimeters of gelcoat on the surface, let it sit for 1-2 hours. If you lightly press it and it leaves a sharp fingerprint, you need to wait longer. It is ready when it does not retain fingerprints. Don't wait too long to apply fiberglass or the gelcoat will start to shrink off the mold surface.
Your first layer is the most important, you cannot have any air bubbles. I suggest 1.5 oz/ft fiberglass mat. US Composites has the best stuff for the cheapest prices. Polyester resin is much easier to work with than the other kinds, as it breaks down the binders in the mat and makes it very pliable. Only do about 4 layers of fiberglass at a time. It heats up as it cures and will damage the surface if it gets too hot. For a one-time mold, 4 layers of 1.5oz mat is fine. A trick to make the mold rigid is to let it cure, leave it on the plug, and then cut some wood reinforcements to the rough shape of the mold. You can join the mold and wood pieces with fiberglass. Bonus points if you sand the cured fiberglass with 180 grit beforehand to make the bond stronger.
Resources for more info:
www.fibreglast.com/fibreglast_how_to_make_fiberglass_moldwww.fibreglast.com/product/mold-constructionGood suppliers:
www.uscomposites.com/www.fibreglast.comGood luck! If you want to work something out where you ship the finished plug and I do the female mold and final part layup, let me know. I don't have a setup or tools for forming the plugs, but that could be worked out too.
Just for fun, here's the bodywork I did the next year with a 5-axis CNC:
plus.google.com/photos/106049692273986530726/albums/5563054876262025073Man, I can't wait to have a CNC again...