|
|
Post by erik on Jun 22, 2012 19:18:58 GMT
Hey That's nice the gelcoat is of good quality! are you going to paint it in future? I dremeled the Upper engine brackets oval with the engine in the chasis and managed to get the bolts in. Up to now I have nothing bolted tight, just good enough the engine won't fall out. I hang the swingarm in the chasis and as like edwin's pics show, on the nut side of the swingarm shaft a bushing needs to be added later. Because the shaft is hollow I do reconsider to add an additional locking thingy to ensure the nut won't get lost, Mainly because the start of the thread on the shaft is taper and the locking is not 100% secured. As like every bolt, the 1st pitch is tapered to ensure easy mounting of the nut and for this reason 2 pitches cannot be used for full strenght. Fortnately, the holes in the swingarm bracket are spot on but the top hole for the shock is 11mm for m10 bolt. When the swingarm had been mounted I couldn't wait to throw in the rear wheel and testfit the RTR handbrake brackets sold here: www.roadtrackrace.co.uk/acatalog/tR1ke.htmlUnfortunately... the brackets need rework as well. The caliper mounting holes are 7mm dia for M8 bolts. the rearwheel shaft diameter is 27.5mm at the bracket location and the thread is 24mm and the holes in the bracket and spacer are 28mm. Because the spacer needs to be mounted on top of the bracket you will have 2mm slob on this spacer. The stock aluminum spacer has been designed as a stop for chain adjustments and as you see, this spacer fails it's basic function. Unfortunately, the dimensions are spot on when the spacer is placed behind the caliper bracket and sits great in the Z-bend in the bracket but the caliper won't fit the brake disk unless one adds bushings. The only way to make this design work is to permanently attach the spacer to the bracket. Welding on stainless steel does cause enormous stresses which will bend the brackets which need to be reworked with milling tools which isn't easy because one removes stress on one side which will bend the bracket even more. The only options I see now is to drill 2 holes of 5mm, cut down the rear of the drill in 2 pieces and glue them permanently in the holes. An other option is to drill a hole in the centre of the bracket and spot weld the spacer on the bracket so the stress will go all around hoping it not to bend. No I am not getting angry, I am a patient man by nature but making right what went wrong is not funny because I payed 171.35 euro for the handbrake kit and I will be ruining some drill heads soon hoping not to weld the drills onder heat to the brackets. Stainless steel has very fast heat build up. 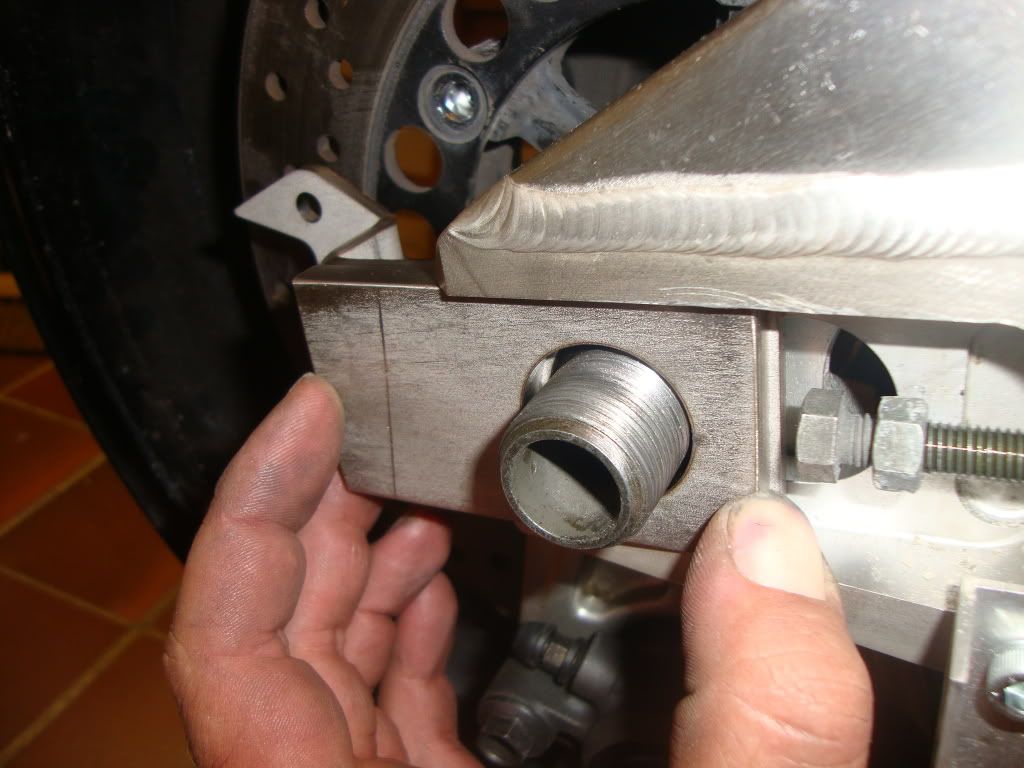 |
|
Deleted
Deleted Member
Posts: 0
|
Post by Deleted on Jun 22, 2012 22:32:23 GMT
It's either for the LYNX reverse or for a Kliktronic auto shifter, I think they are called Celwin and Cedrick
|
|
|
|
Post by erik on Jun 23, 2012 21:09:42 GMT
Well, i ended up drilling a 6mm hole in the bracket and added a large chamfer, clamped the bracket and spacer together and welded the hole full and finished the surface. That'll do it. Sorry, no pic of this. Drilling a hole was a PITA because this stainless steal will harden under pressure so I had to push hard to punch through the surface. Coolled the drill and hole with WD40. The small bracket was good, only the alum bushing had a hole of 10,7 and the outer cable is 11.2mm . This was 0.5mm too small! had to bore her up to 11mm to get me a press fit. Unfortunately, QC of RTR must have seen this problem and grinded the ends of the outercable to fit the bush... I Converted a extended nut to a cable mounting bracket and welded to the chasis. The outer cable was just long enough for a left sided handbrake mount. the inner cable lenght was spot on. I haven't added the 2nd clamp for testing but it should work properly. Fine tuning can be done with the caliper lever adjustment bolt. Because the engine brackets needed to be oval, the enging must have been rotated slightly forwards which resulted that the exhaust touches the upper frame. I shortened the front section to move the exhaust clamp as much forward as possible to reduce the pressure to the upper frame part. the exhaust tube is still touching the frame but with little resistance. I may hammer a ditch in the echaust pipe for clearance later. Not funny indeed... The fun part was only a short session. The exhaust bracket is positioned in parrallel to the exhaust can. Looks great and the welded bracket will provide max strenght later. The square tube has a little downwards bend which I think is great to deal with the grow of the exhaust pipes when heated.The original gommets in the right side passenger footrest is discarted. Bending towards the swingarm in minimal. clearance approx 5mm Keep in mind the bolts and nuts will be exhanged later for blingbling versions. Regards, Erik 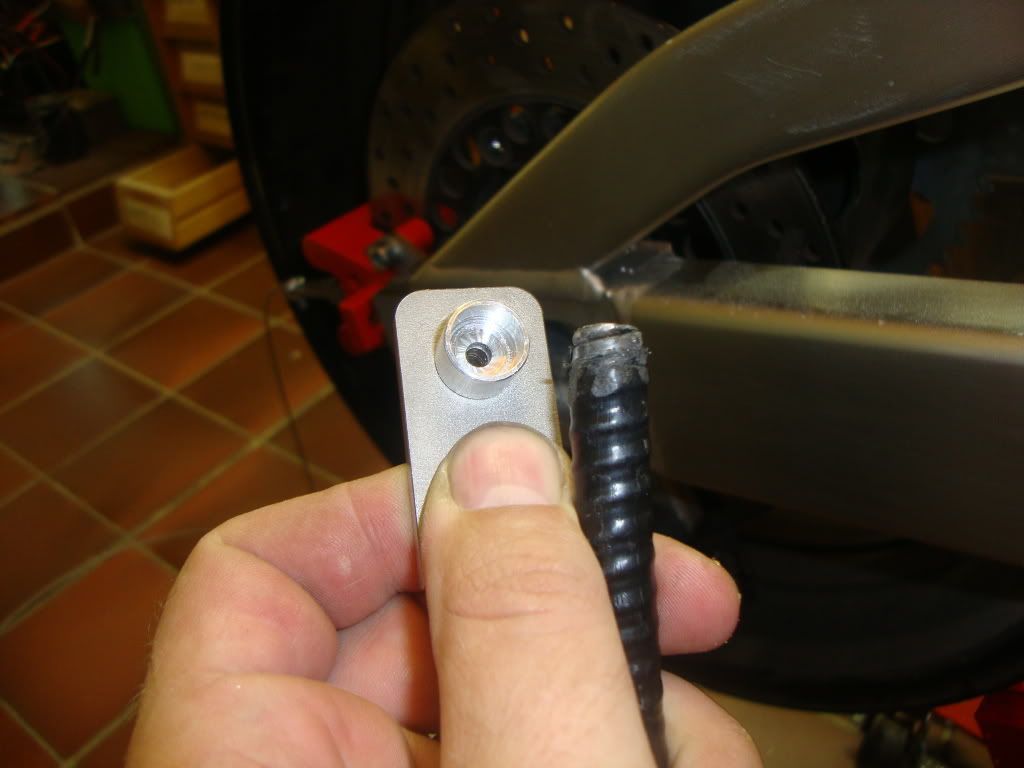 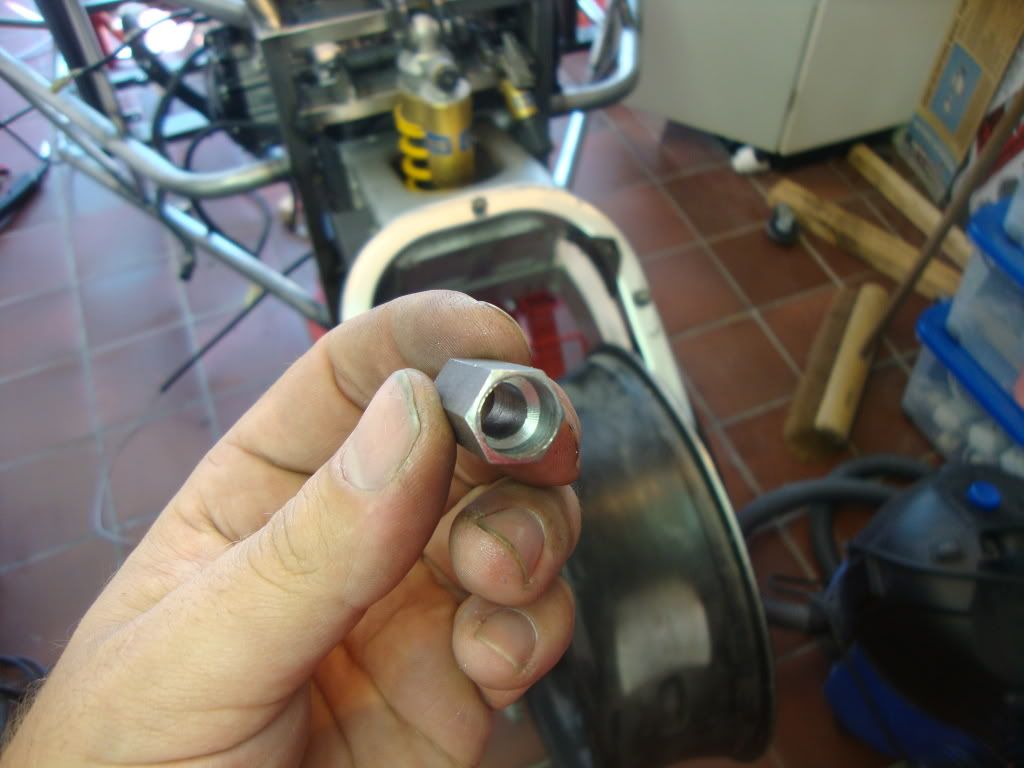 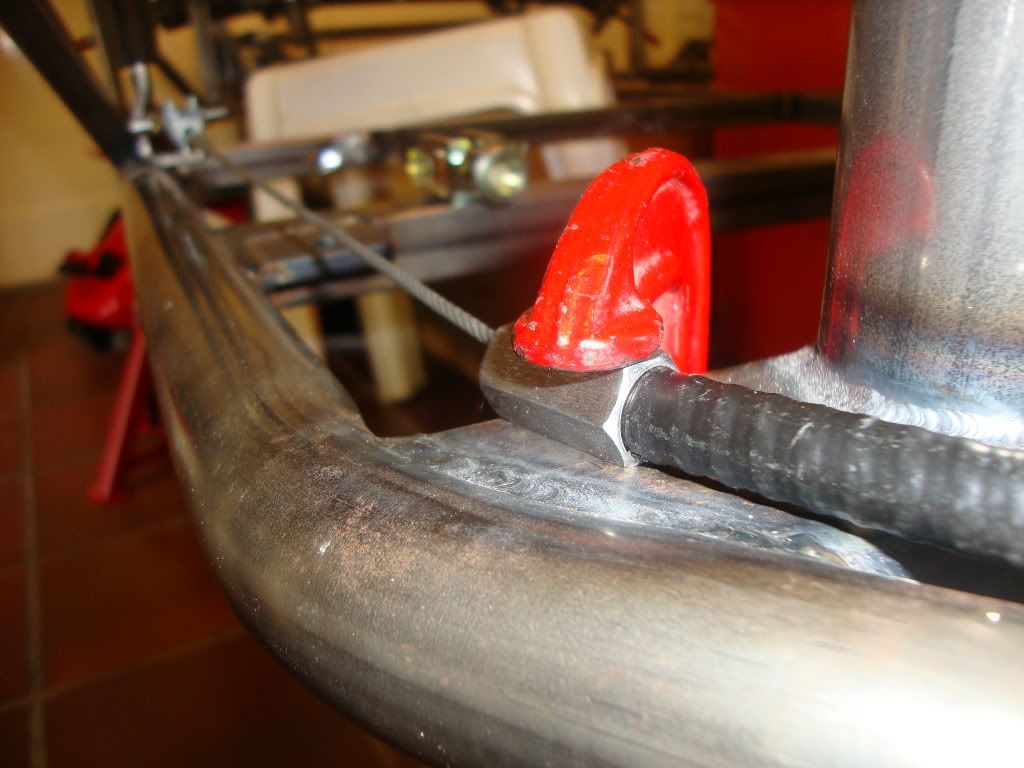 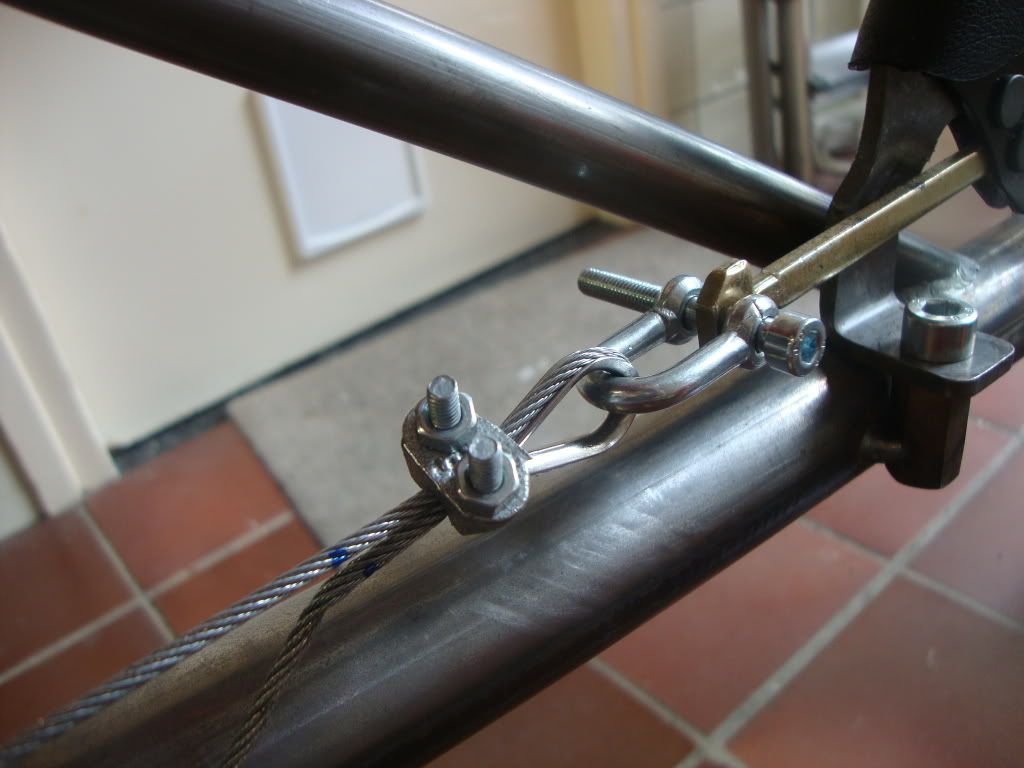 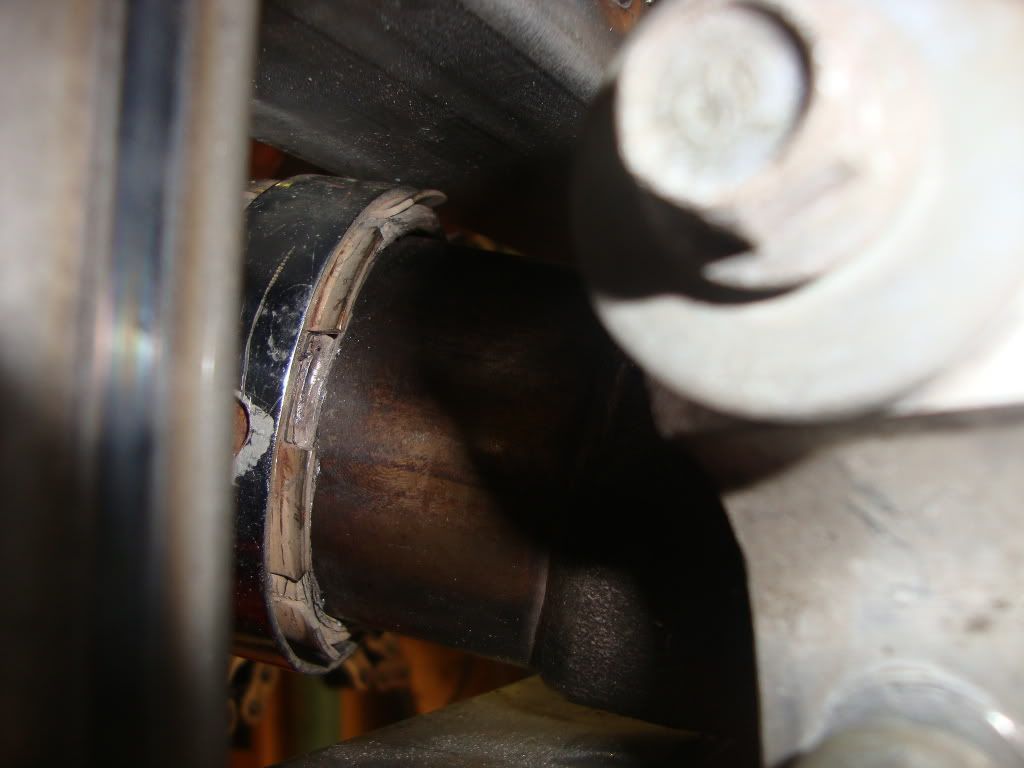 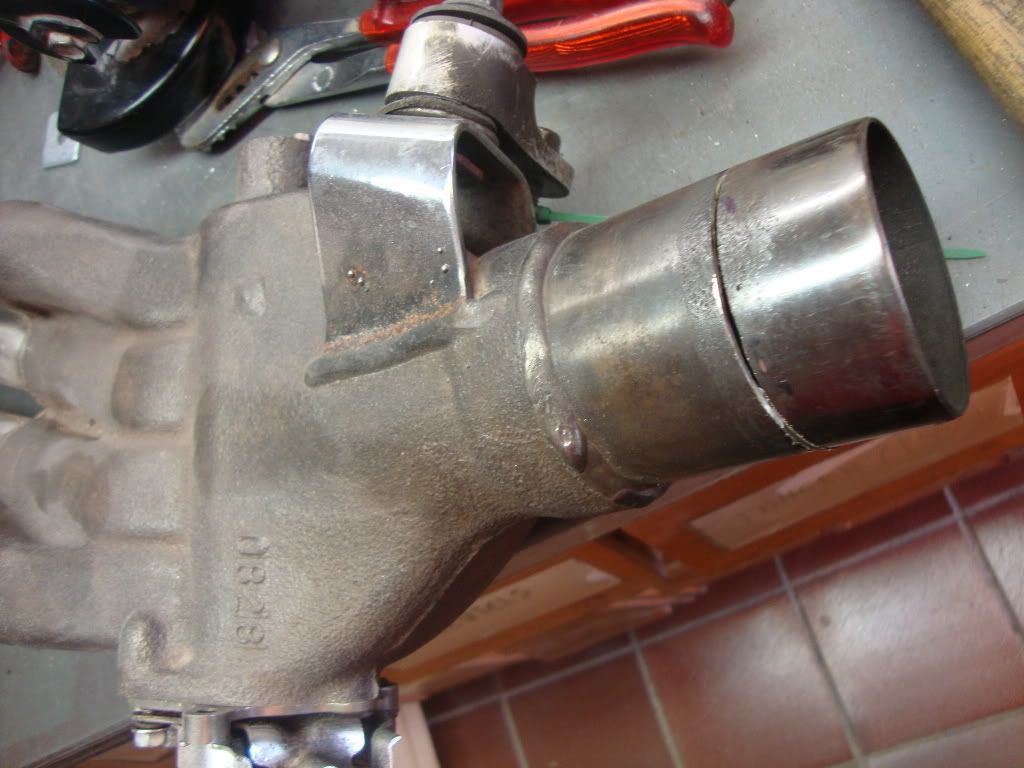 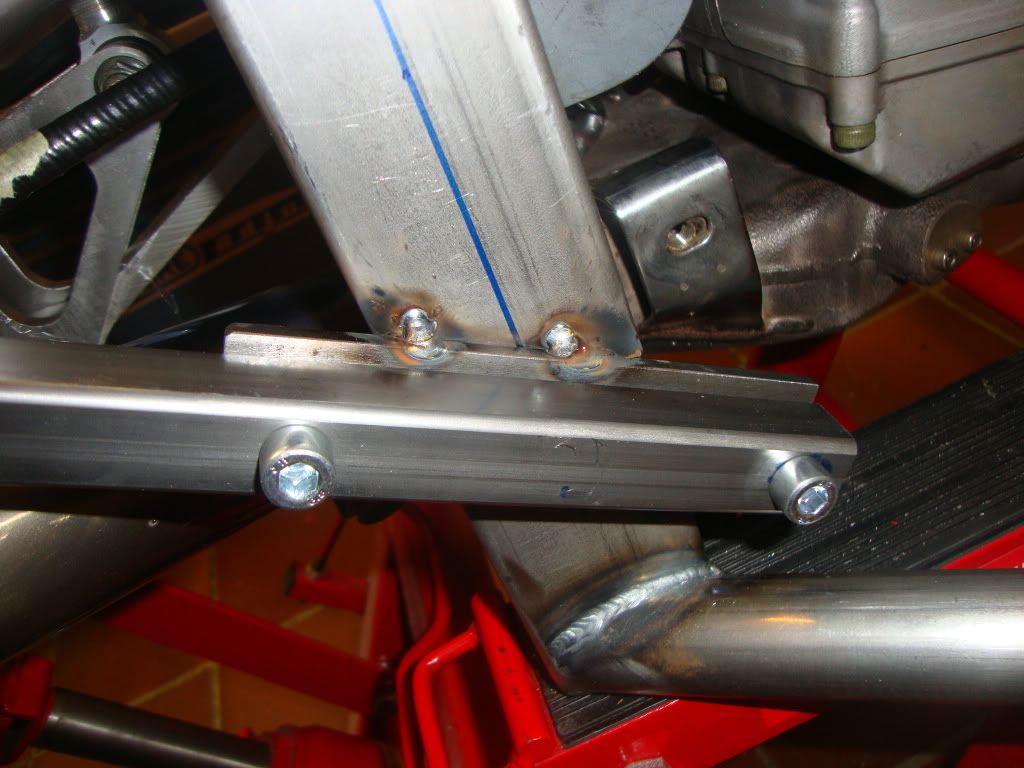 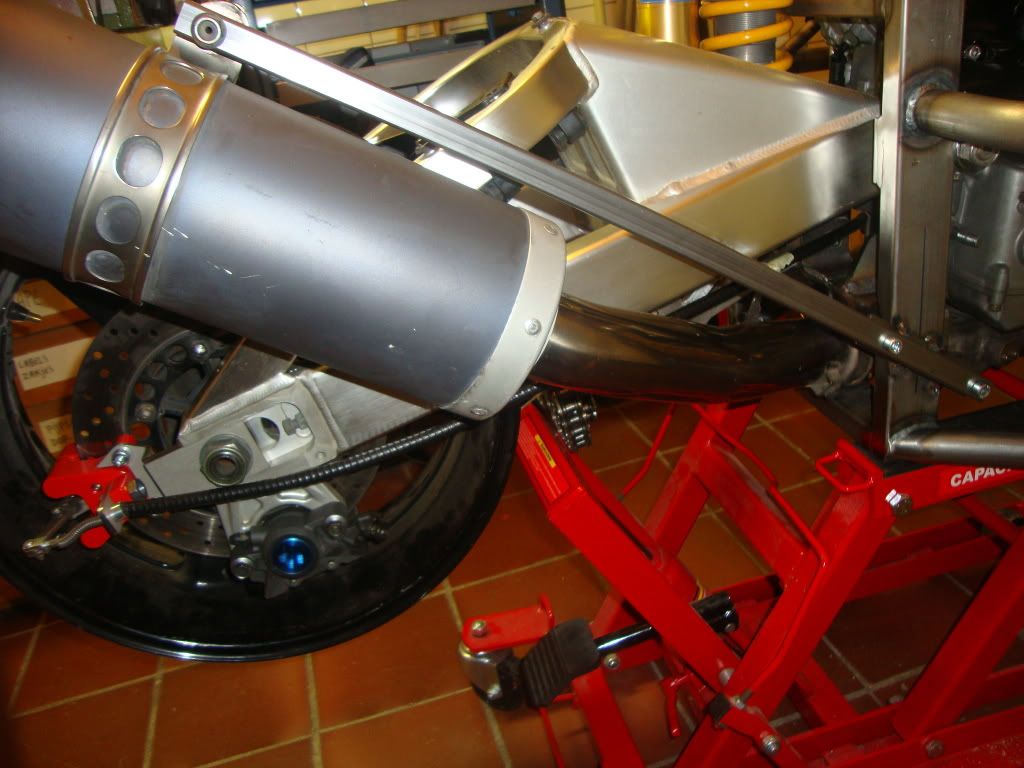 |
|
|
|
Post by erik on Jun 25, 2012 20:11:54 GMT
Throttle pedal: 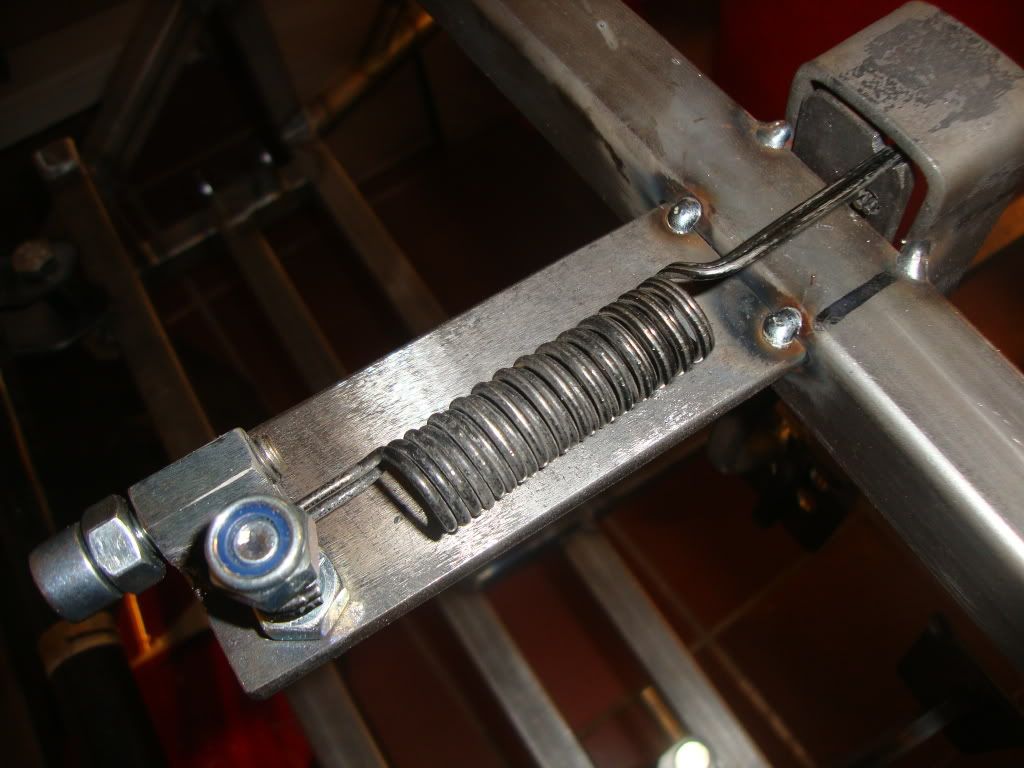 |
|
Deleted
Deleted Member
Posts: 0
|
Post by Deleted on Jun 26, 2012 13:13:05 GMT
I like the throttle setup. Spot on.
Sent from my LT26i using ProBoards
|
|
|
|
Post by erik on Jun 26, 2012 16:20:48 GMT
Thx!
Took me a while to figure out a simple construction. I used the double sidestand spring of my R1 here. I measured the pedal pressure of a Street Ka with a fishing scale and this was 0-4kg. This version is 0-8kg but can be halved by removing a spring. The carb cable needs 4kg pull to open 100% as well. I'll change tension later when the cables are connected. The carb cable tension will be a fraction of 4kg because of leverage. When i remove one spring I think It may be approx 5kg of tension to actuate the carb which seems pretty good.
we'll see...
Yesterday and today is not productive. I haven't made up my mind about the gearbox connection. I am even not sure which direction to shift through the gears (pull or push?) and where to place the poke. I do fancy a dashboard version like 2cv as well which seems to be spot on with the knob travel distance (3" forward, 3"backwards) A poke in the tunnel will increase the travel a lot. For now I have bolted the original R1 rod to the gear box lever facing downwards. The movement is very light.
|
|
|
|
Post by erik on Jun 29, 2012 20:44:56 GMT
Just untwisted the double spring on the throttle pedal.A single spring will do just fine now. I'm looking forward to the result with the throttle cable connected. Can anyone add some comment on the clutch pedal force? Does this pedal need an aditional spring too? Today I completed the gearbox linkage. I have looked to every build on this forum and somehow the used versions are not compatible with the use of the original R1 gear rod I fancied to use. The rod just makes a perfect travel of 6cm from neutral to change gear. because of this I couldn't use a rotating gear lever but I used a linear movement instead. 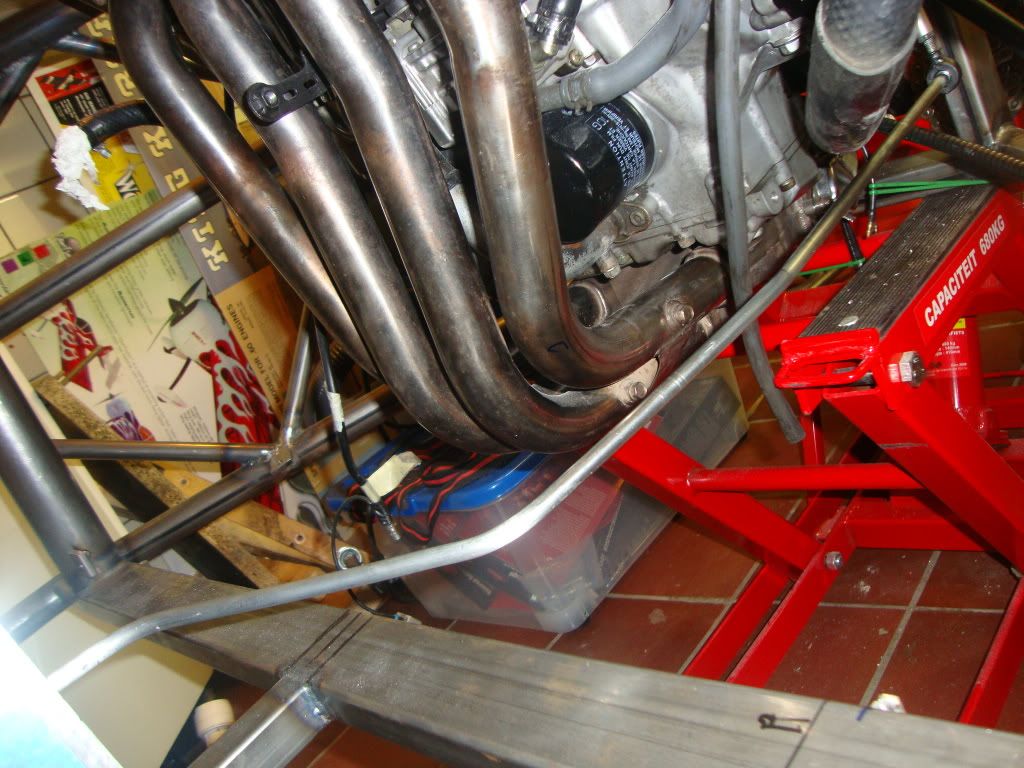 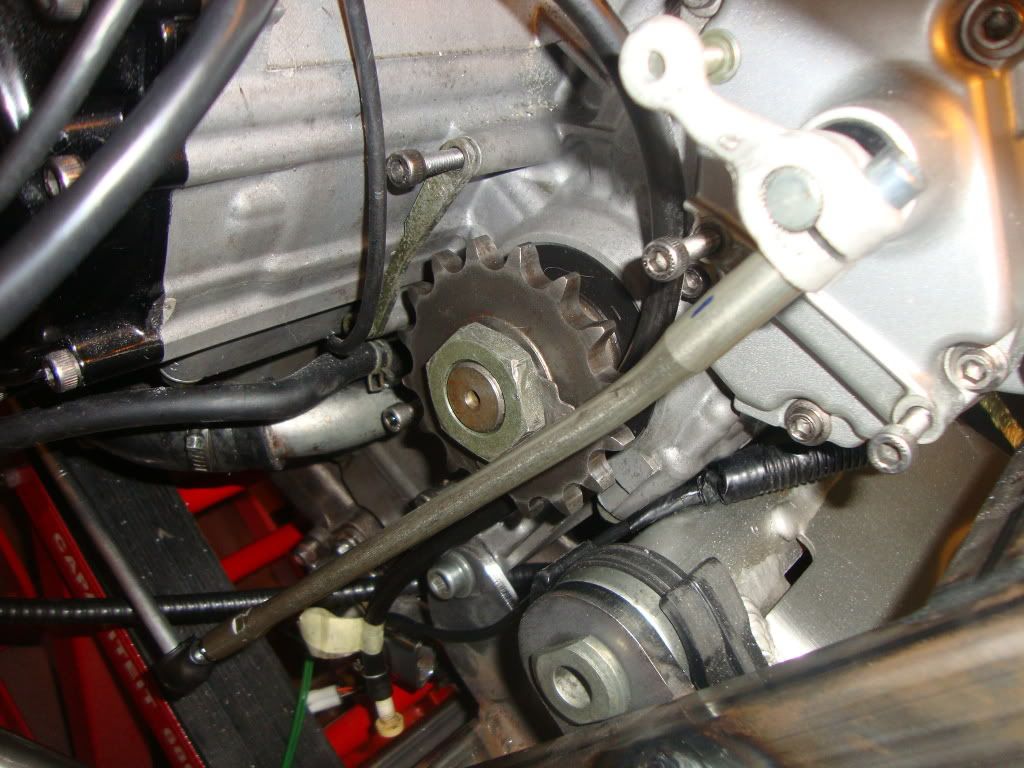 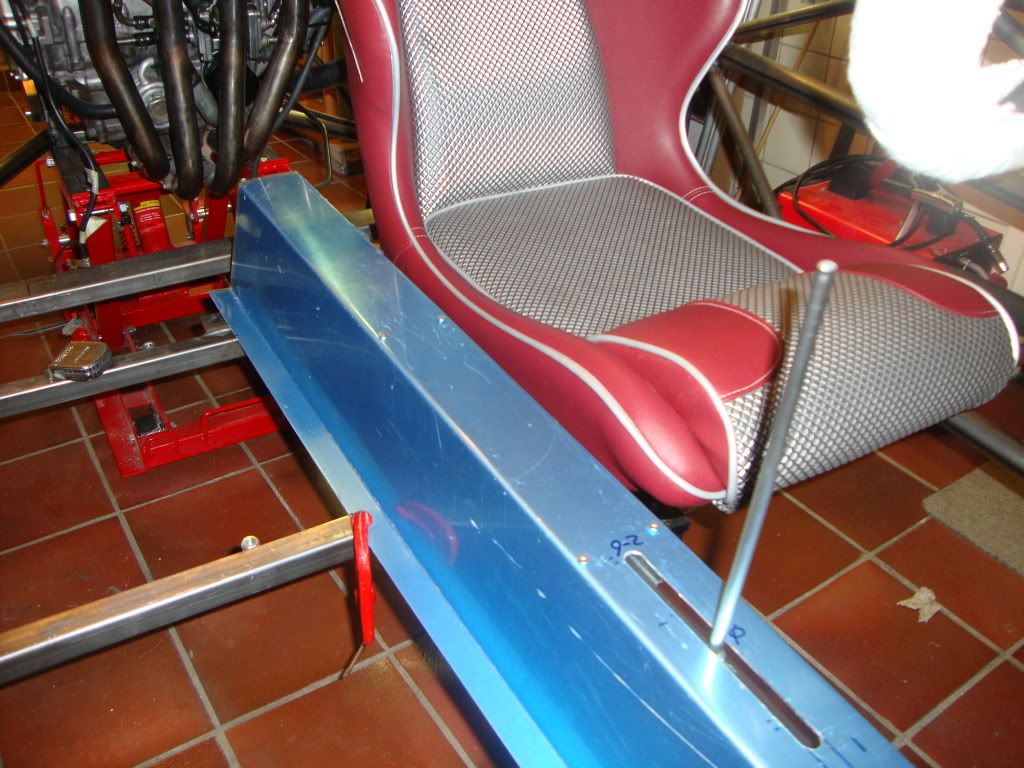 The gear rod on the tunnel may have to be bend rearwards or shortened later. I haven't found a nice gear knob yet. I intend to floor mount the tunnel so I need to make some slots on the sides later when the floor plate is in. I always fancied Ducati SuperMono cooling slots. I may cut out a MEV logo in front of the gear as well but first I need to add a plate under the slot to protect the bearings from rain. Too bad the tunnel is just a tad too short to connect to the bulkhead. |
|
|
|
Post by slugshot on Jun 29, 2012 22:09:07 GMT
Hi Eric, my clutch peddle has the same feel as a car,but i have a barnett pressure plate with heavy duty springs and i have also re positioned the cable closer to the pivot on the peddle,It has more peddle movement for the same actuating arm movement. I find it far better to use, I can ride the clutch with more control.
I also have my gear selector with 1st forward.I also tried different length selector levers, too long was to light and short was harder to find neutral.
It will be interesting to see how you manage to fit all your wiring and plumbing in the tunnel and still have room for your moving gear selector rod. good look.
|
|
|
|
Post by erik on Jun 30, 2012 7:06:37 GMT
The gear selector rod has been mounted on rails on top of the tunnel which leaves more space on the bottom where one needs it badly.I need to cut out the slots for a bottom mount to see what area I end up with for the pipes and cables But I am sure it will be a PITA just like all others have experienced. For this reason I relocated the parking cable as well.
yeah, The leverage on the gear selector was a hard thing to do until I noticed the movement of the original rod was spot on (on the wrong side of the leverage tough..)
I am not sure if a Barnett clutch is needed on my engine. The Dyno graphs show no clutch issues which makes me wonder why it would slip later. I think I may add the other spring to the clutch pedal too and may modify the clutch later if needed. Good thing on relocating the cable closer to the pivot. Can you post a picture of this?
|
|
|
|
Post by slugshot on Jun 30, 2012 15:35:55 GMT
Hi Eric, the distance from the centre of the pivot on the clutch peddle to the centre of the cable clevis pin is 35mm, standard on mine was 52mm.
Before i dismantled my r1 i measured the amount of movement the inner cable had at the engine end of the cable, it was 13mm, so i set the peddle stop to give the same amount of movement so it wouldn't reverse the std clutch spring, that was before i got the barnett kit.
|
|
|
|
Post by erik on Jun 30, 2012 21:16:18 GMT
Yeah i nooted several had that reverse issue and I measured the clutch lever movement too. The only thing I forgot to look at was the headlights operation so that will be a challenge later.
Thx for the measurements!
Today I wasn't statisfied with the linear movement of the gear selector. Biggest problem is the bearings will get wet in rain. I purshased a better qty rails and the movement feels even more solid and smoother with the rails placed outwards in the tunnel. Need to make some adjustments and will add a strip under the slot to close it visually.
Still looking for a gear knob. I am eyeballing to a MOMO Sphere Airmetal Aluminum Shift Knob which matches the wheels I ordered 5 months ago. Last week I got a pm that my order has been put in production so that's nice. Not expecting my Momo wheels before italian summer holiday (4 weeks).
Got 2x 3m cables for the throttle and clutch. Both are same dimensions as the original throttle cable. should be fine I guess. Will have to take a look at the clutch pedal connection on other threads for inspiration ;P
grtz,
Erik
|
|
|
|
Post by erik on Jul 2, 2012 20:40:13 GMT
Hey guys, Just mounted the throttle cable and found the response very sluggish on the pedal when pressed in. I think this is because of the 180 degrees bend in front of the throttle pedal.I am reconsidering to swap the 1.5mm inner cable for 0.6mm nylon coated,7 winds steel fishing wire (30kg rated) to minimize friction in the outer cable (steel,nylon tube inside). Has anyone experienced the same thing and what can be done to have a more direct feeling? I have made the connection as low as possible to gain throttle pedal throw. Pressure without spring is 3kg now. Have somebody added a max throw throttle pedal stop on their tR1ke? Does the clutch pedal have similar sluggish response? Been searching for a suitable gear knob. At first I reconed a ball version would be good, but having gear up/pull poke i reconed the ball was better suited for a gear up/push setup so I chose this one to match my ordered wheels and alu/chrome mirrors: www.motorspeed.com/Momo-One-Aluminium-Gear-Knob-in-Chrome-Fininsh-with-Momo-Log/cat/4/sub/14/product/27131The price seems very good but they don't seem to ship to the Netherlands (country not listed). I came across this knob and the title makes me doubt if Momo is close to being bankrupt? I noticed many stores haave only a small range of items on stock too. www.motorspeed.com/Momo-Race-Evo-Gear-Knob-At-Discount-Price-From-Main-Momo-Sto/cat/4/sub/14/product/1022regards, Erik |
|
|
|
Post by slugshot on Jul 2, 2012 21:33:26 GMT
Hi Eric, yes i had the same friction problem with my first cable, I got a 1.5mm nylon lined kit from venhill and made sure the rooting of the cable had no tight bends, i also used the original yam pre bent outer cable fitting that fixes to the carb cable holder.
I don't use any extra return spring,it shuts good enough just using the one fitted to the carbs.
I suppose fitting a throttle stop would be a good thing, it would stop you pulling the end off the cable if you pressed it to hard.
My clutch cable is also a nylon lined kit from venhill.
|
|
vtR1k
Full
   I'm a trike lover...
Posts: 398
|
Post by vtR1k on Jul 3, 2012 4:16:02 GMT
Had also problems with the cable, but this was more because of the trottle pedal mount. Since I discarded that and replaced it for another one, I had no problems anymore. I used a SS, flexible type inner cable and normal outer cable.
Sent from my HTC EVO 3D X515m using ProBoards
|
|
Noah
Junior
 
Posts: 25
|
Post by Noah on Jul 3, 2012 17:30:33 GMT
Biggest problem is the bearings will get wet in rain. Hopw about Delrin (acetal plastic) bushings? |
|


