|
|
Post by Stiggy on Apr 2, 2012 9:39:56 GMT
I have no idea who is who in the main on the forum. However there are 2 rear covers. The ones we normally supply for the race cars do not have the double bubble rear cover and are narrower.
The wider cover can be reduced in height to overcome the problem provided you have enough room under for the tank. This depends how you mount the tank. The other solution is to send the bar back and we can modify it making it wider. Reducing the height may work as it is narrower higher up of course.
|
|
|
|
Post by stevieboy on Apr 2, 2012 11:01:59 GMT
Thanks for all the help on this matter guys, we now have a plan, thanks to a chat with stuart this am, the decision is to stretch the hoop outwards, by cutting 12mm off the outer fixing plates it should be possible to jack out the bar enough to gain the inch i need. There is enough room to do this while the bar is in situ, i don't want to reduce the height of the panel or change to the race one as i like the double bubble look, also this would effect the planned central fuel filler.
|
|
|
|
Post by stevieboy on Apr 3, 2012 9:24:32 GMT
Got my wheels delivered today, 16"x7j, it would be ashame to fit anything less than 215/40/16 tyres, on the matia tyre guide these wheels/tyres give a 0.1% speed difference, so no problem there. My question is, has anyone got these fitted and are they still inside the wings for the iva test. Your help is invaluable guys, as you know rubber costs money so i want to get it right without a fail at iva and an...i told you so off her that knows everything...except wheel sizes  |
|
|
|
Post by John B on Apr 3, 2012 14:15:16 GMT
No idea about the fit but given that the recommended tyre size is 195/45/16 i'd be tempted to stick with that. Is the slightly wider tyre going to make much difference?
|
|
Deleted
Deleted Member
Posts: 0
|
Post by Deleted on Apr 4, 2012 12:20:54 GMT
The 215/40/17 is pretty much the biggest you can fit. An it just scrapes in under the arches both width wise and also front to back coverage, as the arch has to cover the whole wheel if looked at from directly above 215/40/17 are a tad tough on the steering when stationary, but pretty solid on grip and speed
|
|
|
|
Post by stevieboy on Apr 7, 2012 19:51:40 GMT
Got the rollbar sorted finally, stuart gave afew suggestions of what might help, in the end took it off and gently pulled it with the discovery until i got the width needed, then ground out the mounting plate to fit. The only problem then was lining up the rear support plate which mounts to the suspension points, this proved a little difficult due to having to use clamps to get them lined up again. I wanted this to be easily removable so i could put the car in the locker space in an rv. I think i will have to remake this at some stage. Got my wheels fitted, well two of them anyway, have got some part worn 215/45/16s on them, dont want to put new rubber on yet until i know the tracking and camber are all ok, then i'll do a track day and burn them off.  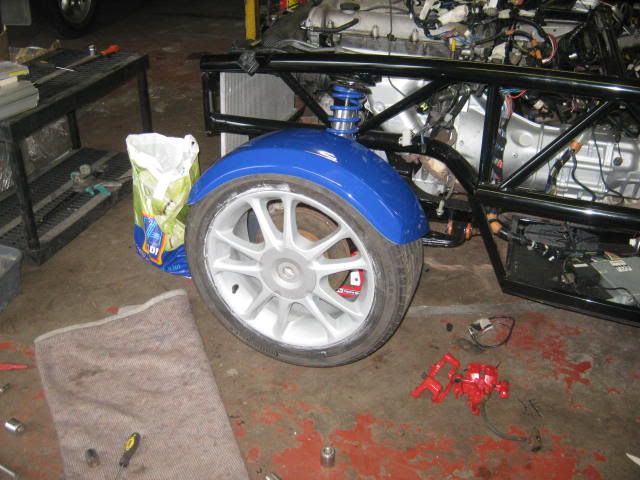   |
|
|
|
Post by John B on Apr 7, 2012 22:13:22 GMT
Looking very good. Coming along nicely. I'll have to pop over when I get back off holidays and have a good look.
|
|
|
|
Post by red5 on Apr 8, 2012 9:21:57 GMT
looks good mate -
have at look at ecowindmans ( geoffs) wheel arches , he mounted some 22mm pipe in the wings that the stays pass into - these are fixed with grub screws through the wing itself.
Think it would be handy for some rapid changes??
|
|
|
|
Post by stevieboy on Apr 9, 2012 20:01:03 GMT
Thanks for the info red, looks interesting, think i might pinch the idea if he hasn't got copyright through yet  |
|
|
|
Post by ecowindman on Apr 9, 2012 23:34:32 GMT
Hi stevieboy
I used 17inch alloys with 205 45 tyres so I had to add a 30mm on to all the stays,when I was happy with the clearance I marked the arches and cut then to fit the stays . I then drilled a hole through the arch & the stay bar treaded with a M5 tap and fitted a small bolt with a plastic cap . To make sure it stayed I used some tread lock had it out a few times and they are tight no movement
I did not like the idea of using fiber glass or adhesive to stick the arch to stay bar, with the bolt I can remove them if needed
Your kit coming along nicely
Geoff
|
|
|
|
Post by stevieboy on Apr 9, 2012 23:55:58 GMT
Thanks geoff, i have to change the length of mine to, will most prob use your idea on the wings, seems a good option and easy to remove to.
Steve
|
|
|
|
Post by stevieboy on Apr 28, 2012 19:46:40 GMT
Got the tank sorted this week, some of you will have seen this in a new thread i started last week. it will help every exocet owner that wants a full tank of fuel. Before fitting the tank turn it round 180 Degrees so the fuel filler is at the front drivers side. 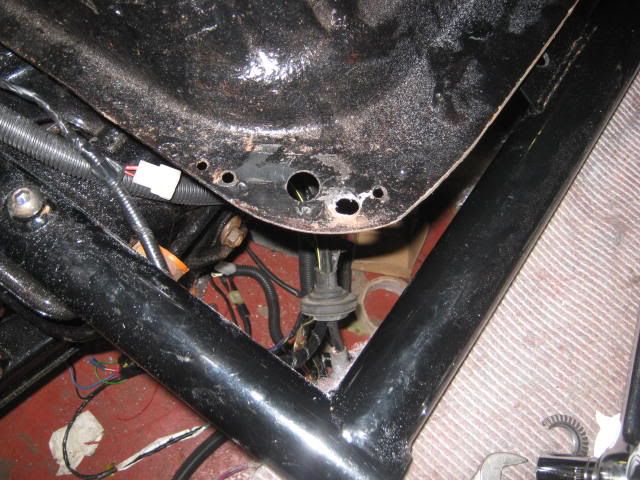 you will have memfast your own crossmember on the left corner of the frame to bolt the tank to, and cut off the middle lug. 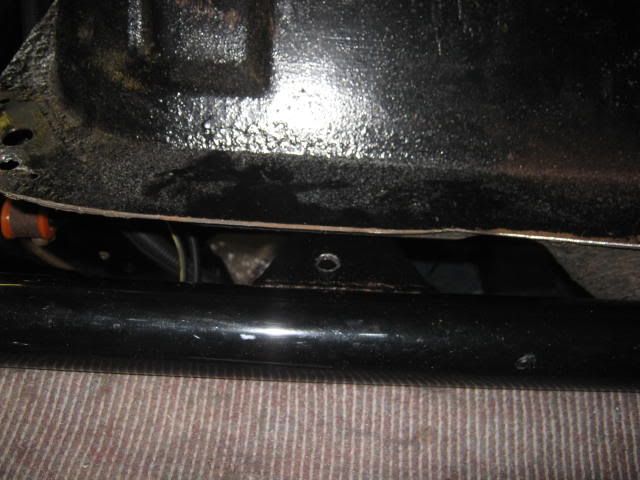 The lower bump on the tank that causes all the problems is then in the rear right corner and is clear of everything. This also gives good access to the tank drain plug. You will have to cut a small corner off the rear offside lug,...pictured.. to clear the tank. 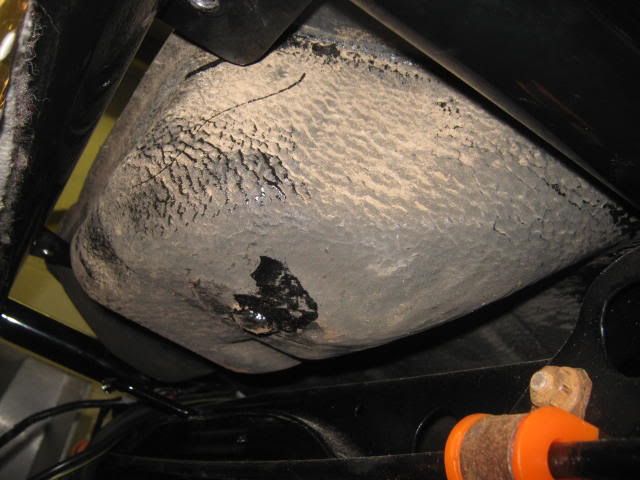 Put 15mm spacers under each corner and bolt the tank down on all but the front filler corner, on the filler corner put some threaded bar about 9" long, this will be used later to clamp the filler to. 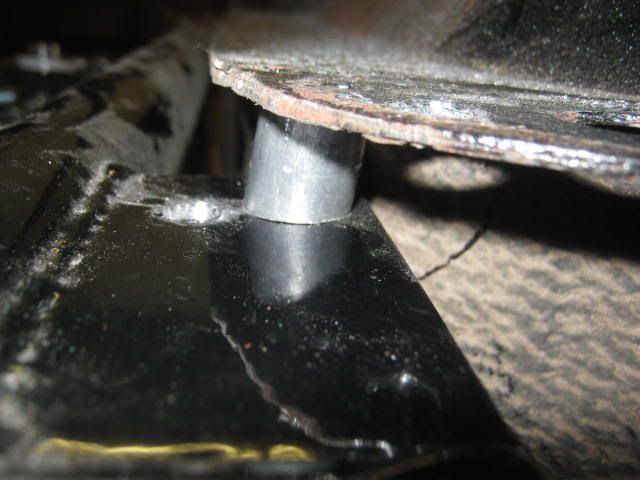 The filler will be somewhere in this position, you will lose the lug when you cut the pipe to length. 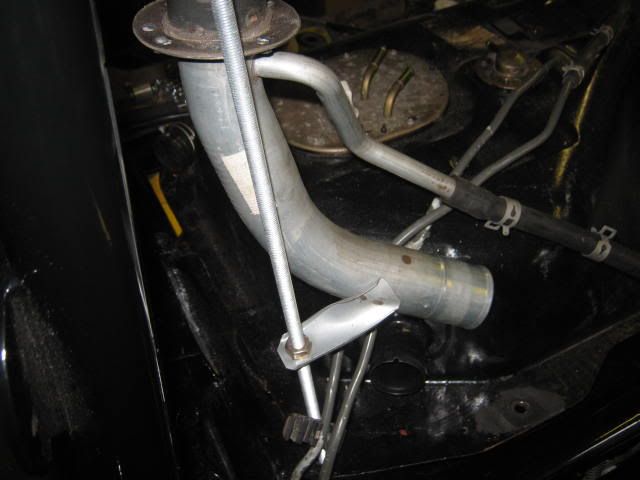 All that is needed is to cut out a section of the metal filler pipe, this is about 40mm from the the breather pipe and just below the lug pictured and rejoin with some of the rubber filler pipe, this is so you can turn the lower end to mate up with the tank filler, it also means you retain the non return valve in the pipe. You then need to buy a 90 degree bend to jointo the tank, the breather is the same, cut and rejoin to original fixing. The filler needs to stick up about 14" from the tank crossmember mount as the rear hood is 15" high internally. You need to keep the mazda fuel filler flap and the release cable and lever, this can be mounted in the rear behind seat...iva pass... What is then left to do is cut a hole in the top of the hood and fit the fuel flap, this will need a bit of panel beating, or if you get a good cut you can bond the original grp to the flap. Very easy to do, a small cut with a thin grinder/cutter then slide in a craft saw blade and take it out in one. 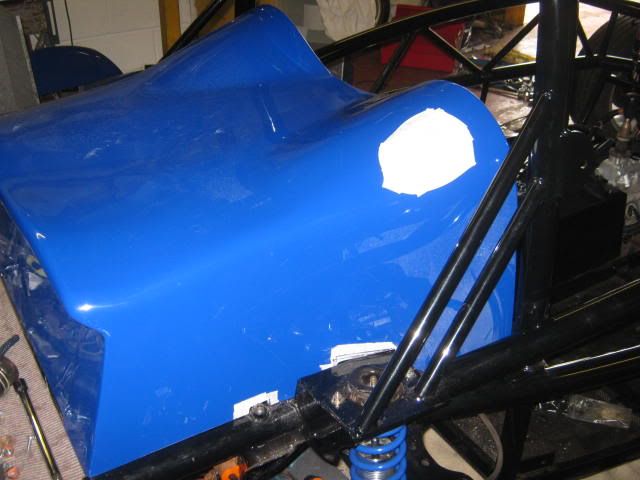 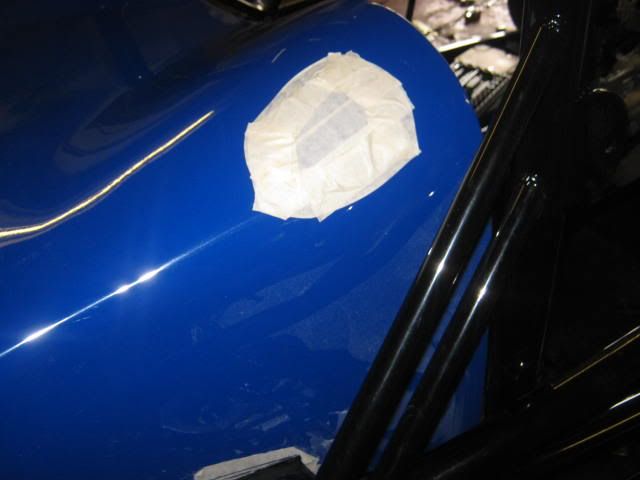 When you pull the flap release your original filler is just inside and 4" above the tank. 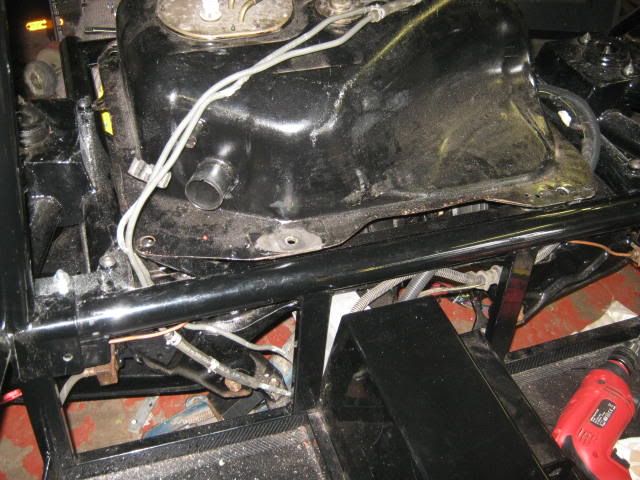 The void in the tank where the spare wheel used to go is now behind the passenger seat which is a great space to now lose all the spare wires in,they can be coiled up and cable tied out the way to save chopping them down. I have also measured this area and found that with a small mod to the battery tray would make it possible to fit in snug, giving more room for a storage locker behind the passenger seat. This means you can now have a full tank of fuel and it also improves the looks. Steve |
|
|
|
Post by stevieboy on Apr 28, 2012 20:07:17 GMT
Right this is how its done, the total length of the filler pipe is 9". The pics show where the cuts should be and then cut the 90 degree bend to suit the height of your hood. First plumb line the hood, just fix other end to garage roof and do not adjust the length once hood is plumbed. 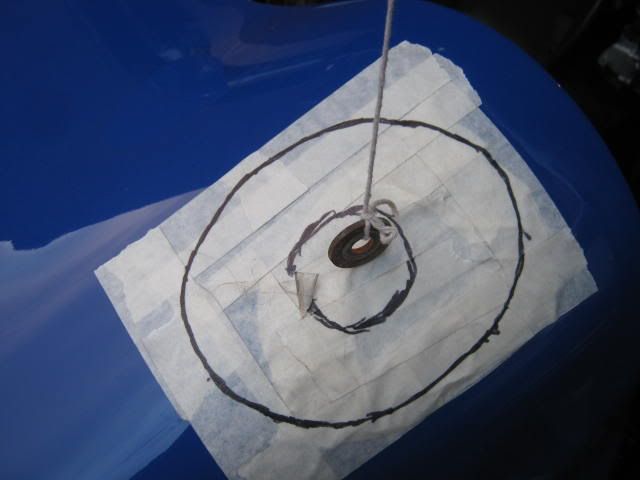 Second make and fit filler, 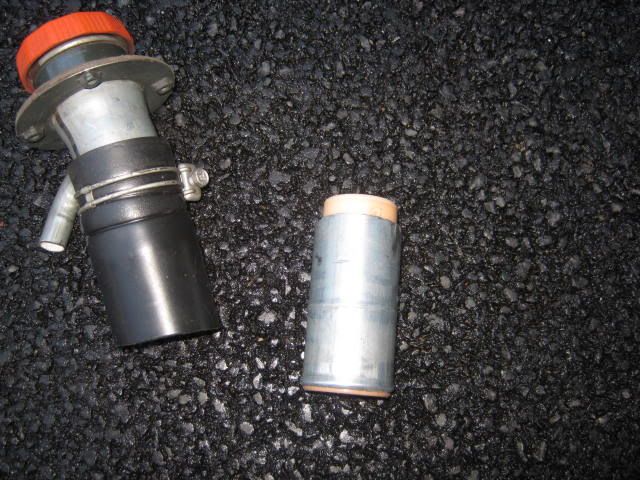 Cut breather to length 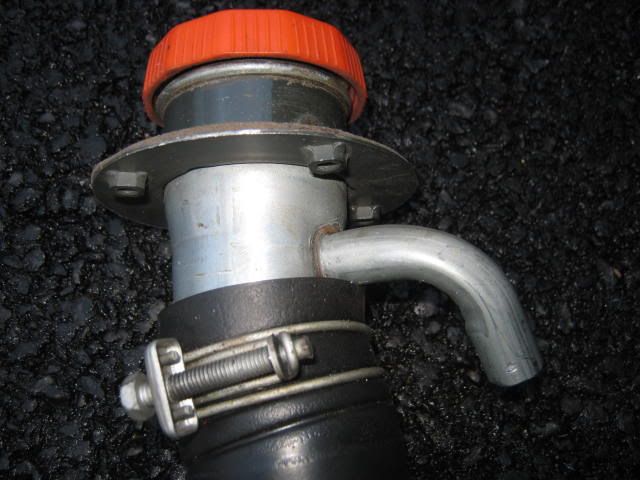 Put all together and re- plumb, remember you need to be about 25mm lower than the plumb to allow the flap fitment. 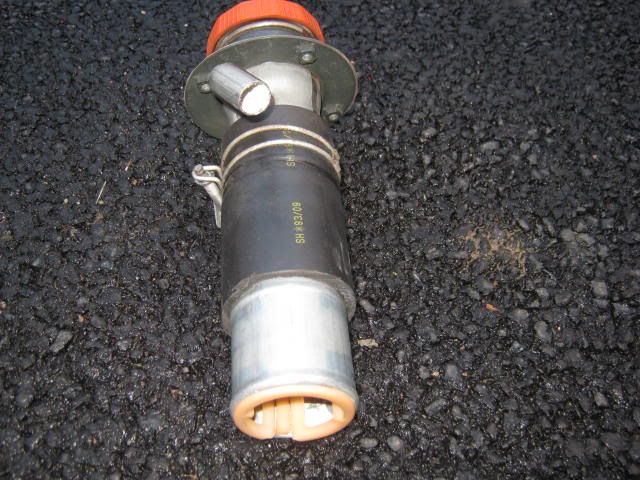 Conect to 90 degree bend 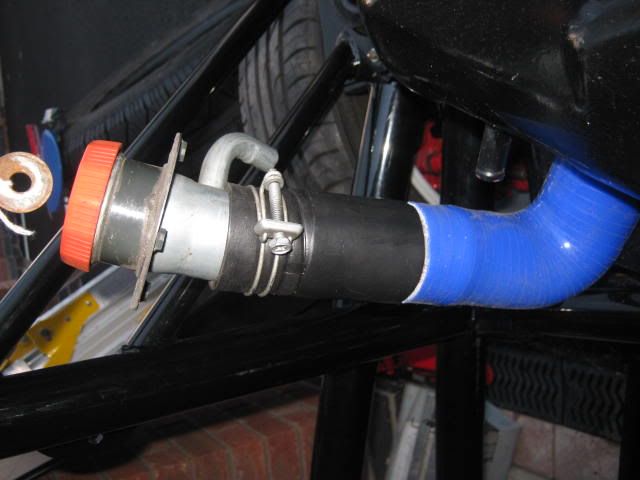 Fully fitted all that is left is to clamp to threaded bar 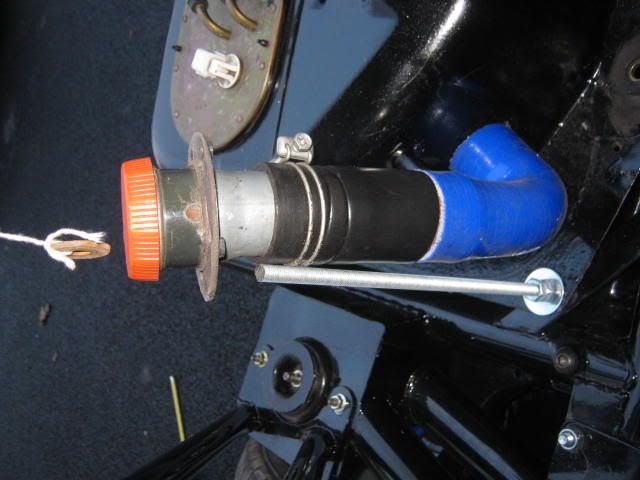 will show the flap as soon as i've finished it Steve |
|
|
|
Post by stevieboy on Jun 5, 2012 15:48:34 GMT
Well its been a while since my last post, i havn't done much until today due to having a bad accident on my pushbike of all things. Got my last xray coming up on friday, lost alot of flesh and stuff and split my helmet along one side. Rule of thumb is.. when you go down the same hill at about 38 mph every day always expect the council to have dug a hole and not had time to put signs up yet. One big cartwheel and 40ft down the road on your side does actually hurt.
|
|
|
|
Post by PardonWhat on Jun 5, 2012 17:33:56 GMT
Wowzerrrz, good job you had your helmet on!!!! I hope you're not too bashed up.
Great solution to the fuel tank issue. I'm thinking about turning my tank round and going with your solution.
Apologies if this is silly question but is the fuel filling issue to do with the height of the filler alone or is the angle of the tank part of it?
If the filler hole was higher would it cure the problem.?
The reason I ask is I was considering a flexy hose running round the front of the tank and installing the fuel cap centrally in the rear tub. (as alex has done on his second exocet)
Cheers
PW
|
|