Deleted
Deleted Member
Posts: 0
|
Post by Deleted on May 15, 2016 6:29:13 GMT
Hi John
The MX5 headlights were shot, loads of rust. I bought a set of MGB bowls and lights that were upgraded to halogen. I cut them out using the many drill holes option, finished up with the Dremmel. Getting the rear lights in today. My dog keeps stealing the lights from the bottom of my tool box so I want to fit them before they get damaged. I have also come up with an alternative to the fog light in the kit which is different from the rest of the lights. i have ordered another glass light with a clear lens and ordered a red bulb. It should look good and will keep the lights uniform. I also have some nifty number plate lights I got at Stoneleigh to try. Now remember, not too much time munching biscuits today.
|
|
Deleted
Deleted Member
Posts: 0
|
Post by Deleted on May 15, 2016 16:27:48 GMT
Bit of help and advise required. Fitting the rear lights. Got the holes drilled no problem 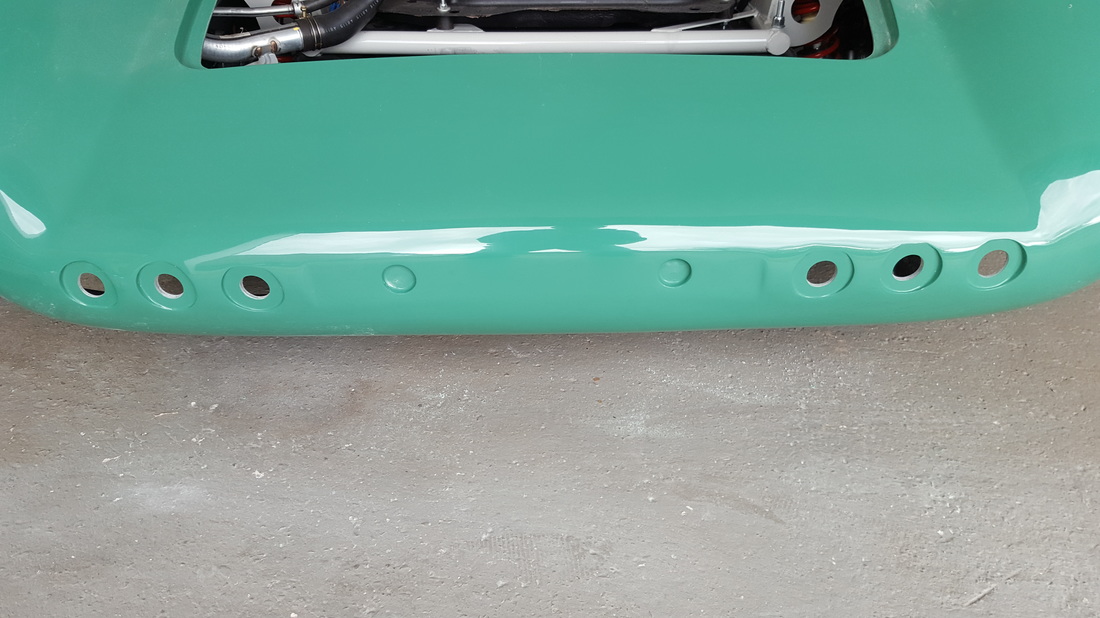 When it came to fitting the lights I have a bit of an issue. You can push the lights in, all assembled, although a very tight squeeze for the rubber. But, after fitting the backplate the glass will go in but the chrome bezel does not have the space needed to get the rubber pulled around the sides. You can get one side in but the other is mega tight to the side of the recess. Is there a technique to this? Have added a couple more photos to try and show the issue. 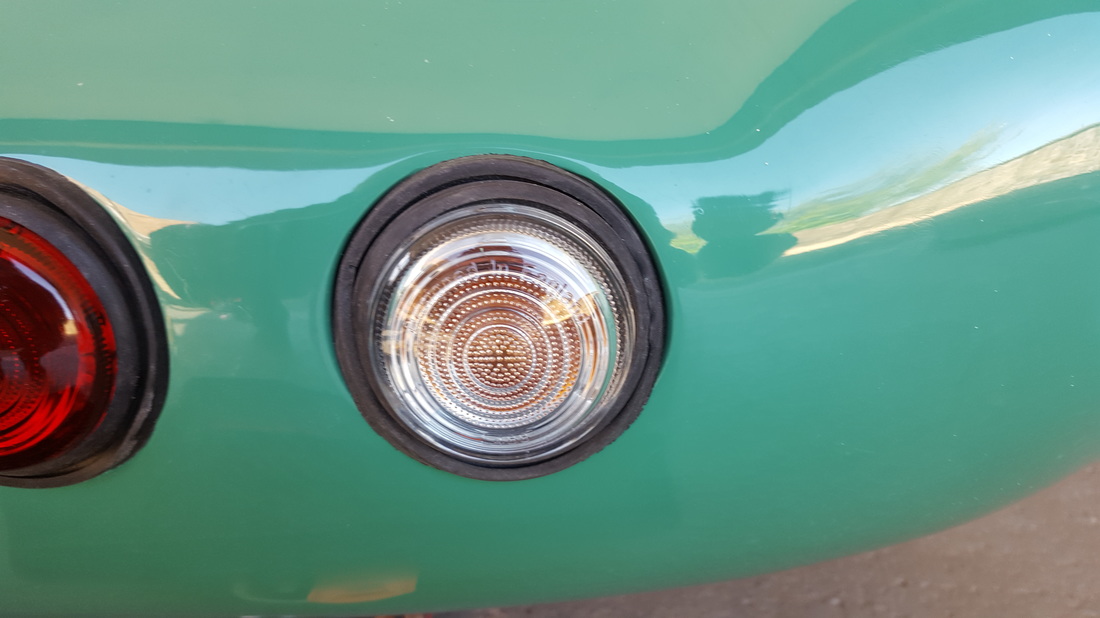  |
|
|
|
Post by gwnwar on May 15, 2016 20:09:17 GMT
Can you install lamps with center of car radius of the rubber in and bottomed out and leave the outer to sides of car popped up
to square the lamps more flat across the back.. Also the bottom radius out more then the top.. If your lamps are stud mounted you could add a couple of wasters to one stud before installing on the side with more rubber showing and you can still tighten down snug.
Hope that makes sense.
|
|
Deleted
Deleted Member
Posts: 0
|
Post by Deleted on May 16, 2016 5:29:19 GMT
Bits of it make sense  No studs, just fixing holes. Studs is an option as the lights will fit fully assembled. I am going to get some small bolts today and make up some studs which will space the lights away from the body slightly but I will see how it fits. I also thought of using the window fitting technique with some thin cord to pull the rubber around the trim. I will try again today but if anyone has done this and come up with a solution please let me know. |
|
|
|
Post by R2S on May 16, 2016 11:58:26 GMT
Haven't done this particular job before but have spent many hours trying to fit rubber into tight spaces (no smutty comments please), have you tried applying some washing up liquid to the rubber faces before install? This normally does the trick.
|
|
|
|
Post by snowbird1 on May 16, 2016 14:26:55 GMT
|
|
|
|
Post by R2S on May 16, 2016 15:00:28 GMT
Could you use the same trick as fitting a windscreen rubber namely plant a loop of cord behind and pull it through the gap?
Just had a look at my lights and they are different; there is no rubber to rubber interface, its just a chrome ring that sits in the rubber backing face/fitting.
|
|
|
|
Post by marmot0 on May 16, 2016 15:10:46 GMT
This was such a pita that I gave up and spaced rhe lights out about 5mm. In hindsight I would have filed the recess in a touch. You could make some backplates for the lights to sit on.
|
|
|
|
Post by Stiggy on May 16, 2016 22:00:54 GMT
best trick is to use a 50mm bobbin sander to clean the edges of the hole slightly, does not matter about scratching as it is not seen with the light installed. Use small counter sunk screws to hold unit back as larger heads cause the glass to sit proud. Corner of a credit card helps to get the rubber levered back to let the ring seat.
|
|
Deleted
Deleted Member
Posts: 0
|
Post by Deleted on May 20, 2016 16:46:12 GMT
Little update. Firstly the lights are going in. I am sanding the sides down and using a lube and countersunk bolts and everything else suggested. As it is taking ages I decided to make up some mounts for the body. I looked at the options of hard mounting the shell or using a rubber bobbin and decided I was going to bolt directly to the frame, via a little bracket I have made up. So far I have the front two bolts in and secure, with the limited space it took all day for two brackets, should be quicker for the next two.
No pics today but will post some next time.
|
|
Deleted
Deleted Member
Posts: 0
|
Post by Deleted on May 29, 2016 9:30:10 GMT
A few pics before I start today. Won't get much done as have some other work to do and the F1 is on. Firstly trying to level up the rear before fixing the support bars, the rear lights are at about 320mm from the ground but I need to lift it up on the suspension anyway so fairly happy I can get the required 350mm by the end. 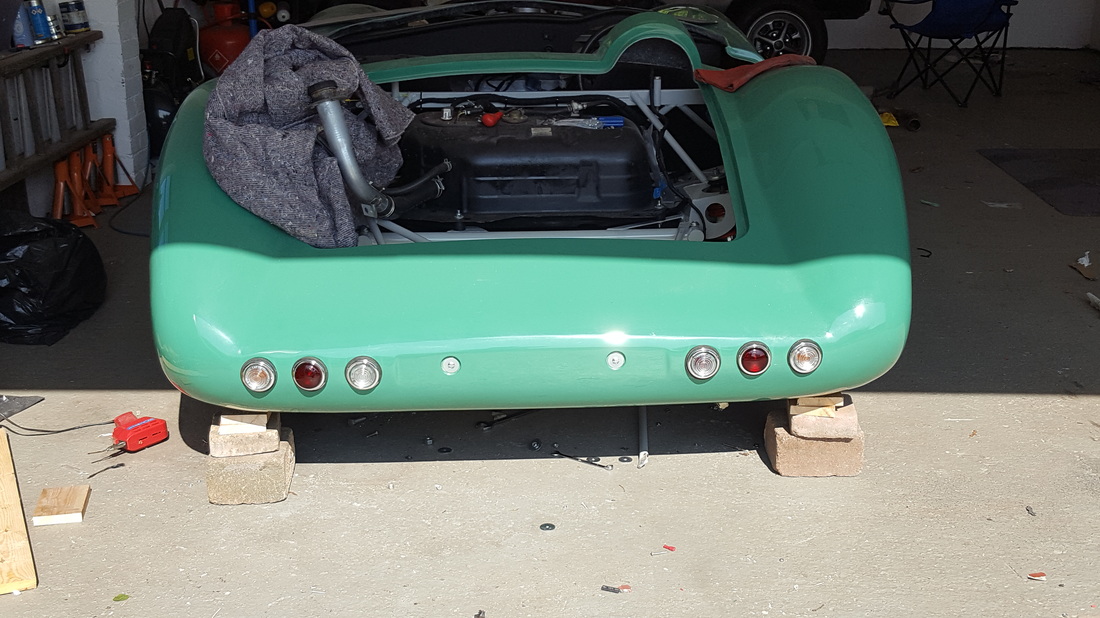 Got the four corners of the bonnet bracketed up, took ages due to the tight space. There is a much larger plate above the metalwork in the photo so a nice big footprint to spread the load on the grp. When the body comes off again these will be cleaned up and painted. 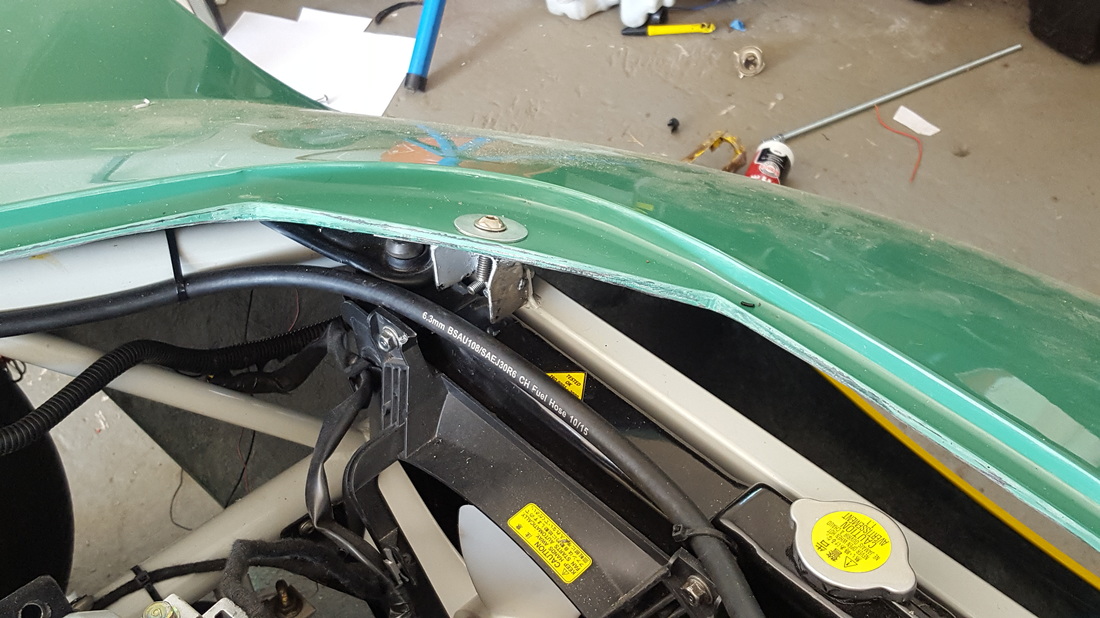 Also started getting the dash lined up. Looks like it will need lifting a little to reduce the gap to the body. 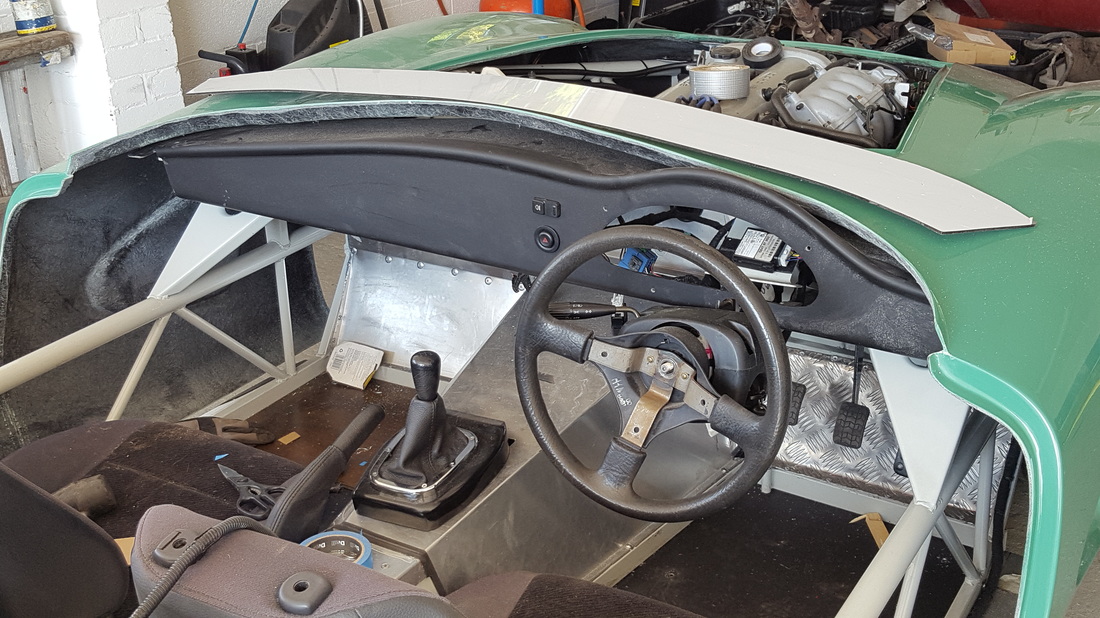 On the list of other jobs, the rear lights are now wired, the fronts are done on one side, the hyperflash indicators are fixed, the wood for the floor is ready for fixing and I think that is it. |
|
Deleted
Deleted Member
Posts: 0
|
Post by Deleted on May 29, 2016 9:38:27 GMT
Was thinking along these lines for fixing the bonnet. Anyone else put any thought into this? clicky |
|
|
|
Post by R2S on May 29, 2016 18:34:50 GMT
Yep Im going with Dzuz Fasteners, easy to install, easy to operate, and look period.
Difficult to see from the angle of the photo but would the dash come all the way back to line up with the door opening (not an issue for me as I have a pre-door body).
Are the body mounts solid or is there a rubber interface?
On the number plate lights I was thinking of going with an illuminated plate using led lights planted within a perspex cover over number plate so clear perspex lights up number plate behind (hope this makes sense). I also note others have said IVA testers have asked for a number plate 'back plate' for the test.
|
|
Deleted
Deleted Member
Posts: 0
|
Post by Deleted on May 30, 2016 7:36:40 GMT
The doors are a little behind you. I got the body so the rad is lined up with the front of the bonnet opening and I have had to cut the rear stays down to get them in. Main thing is the wheels are ok in the arches.
The body mounts are solid, I know from my other GRP car that a little movement causes crazing in the gelcoat over time, I appreciate that some of the bobbins use a hard rubber and will probably not move but I have a welder so it made sense to make them from steel, I have also been able to create a large surface area for the mounts although you can't see that in the photo.
Your number plate idea sounds good, there is limited space at the back to mount everything so incorporating lights to the holder will help. I have small LED lights but not fitted yet.
|
|
|
|
Post by R2S on May 30, 2016 13:28:27 GMT
The LEDs are what I am going to use, think I'll need six, one at each corner and one top and bottom in middle.
|
|


