|
|
Post by p5curly on Feb 4, 2017 20:24:24 GMT
Are you trying to bleed the brakes on your own .Let me know if you need a extra pair of hands and I could help you out one weekend
|
|
|
|
Post by R2S on Feb 4, 2017 23:16:34 GMT
Are you trying to bleed the brakes on your own .Let me know if you need a extra pair of hands and I could help you out one weekend Cheers matey might just do that, watch this space  |
|
|
|
Post by john on Feb 5, 2017 0:33:57 GMT
I used a quite cheap bleed kit off e bay a small reservoir with a magnet and one way valve screws onto bleed nipple.
Worked ok and I doubt it was £10 maybe worth trying one of them see how it goes.
Glad to see progress mate.
|
|
|
|
Post by p5curly on Feb 5, 2017 8:08:54 GMT
I bought one of those Eze bleed kits when we did ours and it wouldn't fit the cap and hold pressure
Nothing wrong with the 2 man operation
|
|
|
|
Post by tojeiro on Feb 5, 2017 12:30:08 GMT
For the eze bleed a round steel or aluminium disc clamped down with a g-clamp works, you just drill the hole for the pipe off centre and there is a seal the right size in the kit. I also had pressure containment issues when I first used it on the brakes on my other MX5 but found doing the clutch on the Replicar that the key is to use only 10-15psi max. It's I bit of a faf and I nearly binned mine after the first hour but once mastered it works great and saves massive amount of time. Might pick up a 2nd hand cap if I can't find the disc I made before, its in the garage somewhere |
|
|
|
Post by R2S on Feb 18, 2017 17:54:05 GMT
Brakes sorted, daughter providing the pedal power, took all of 15mins! All joints checked and initial indication everything ok, will check again later in the week when fuel pipes will be fitted.
Anyone know of a reason why shouldn't run the charcoal canister pipe, tank to canister, along floor (the bit that sticks out 75mm) outside of driver in cill? This reduces pipes in transmission tunnel and is a shorter route keeping things much tidier.
|
|
|
|
Post by p5curly on Feb 18, 2017 20:31:05 GMT
We removed ours completely following a guide off the net it does not make any difference to performance
|
|
|
|
Post by R2S on Feb 20, 2017 14:46:48 GMT
We removed ours completely following a guide off the net it does not make any difference to performance Did you just blank off ends on engine components? Also what did you do with pipe from petrol tank? Are other builders junking this system? |
|
|
|
Post by stevednorris on Feb 20, 2017 16:33:13 GMT
I got rid of mine, blanked off the pipe at the engine end, left the pipe at the fuel,tank end open (after the roll over valve).
|
|
|
|
Post by R2S on Feb 22, 2017 15:53:59 GMT
Ok had an hour this morning so fabricated some radiator brackets. 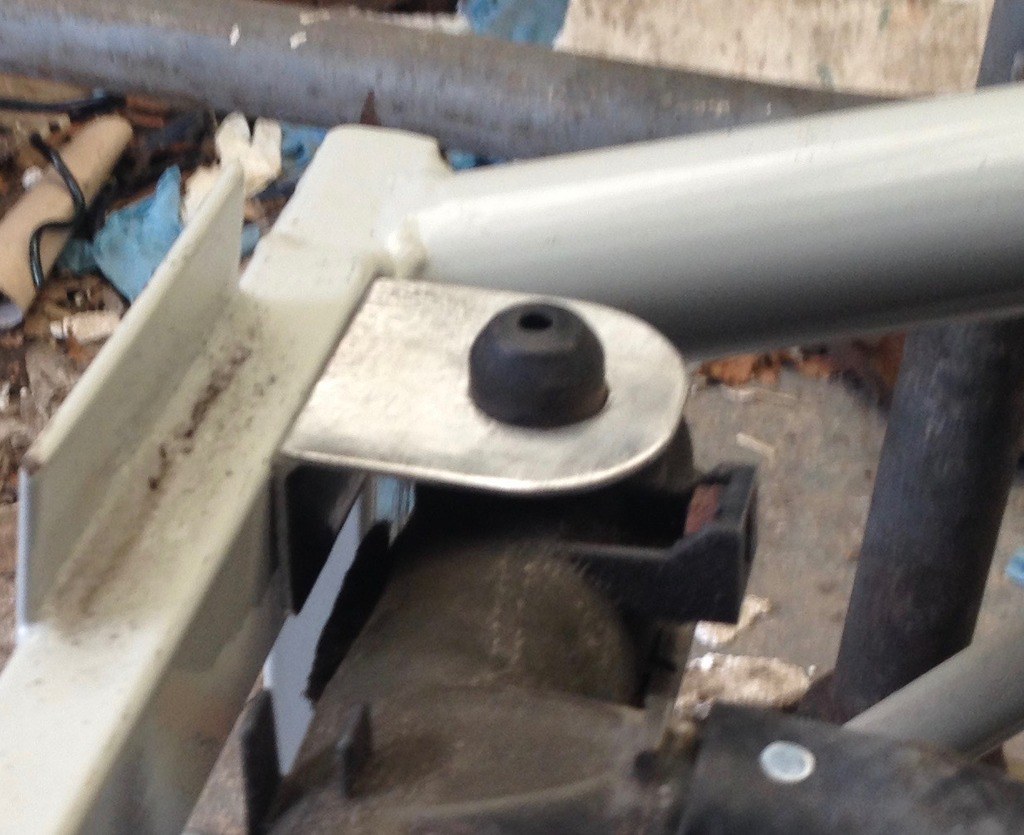 Cant position radiator as I am uncertain re level of same, despite placing a help request in the HELP forum no one has replied. Can someone who has built or is building a Replicar please tell me at what height they set the radiator cap above the chassis front top rail? 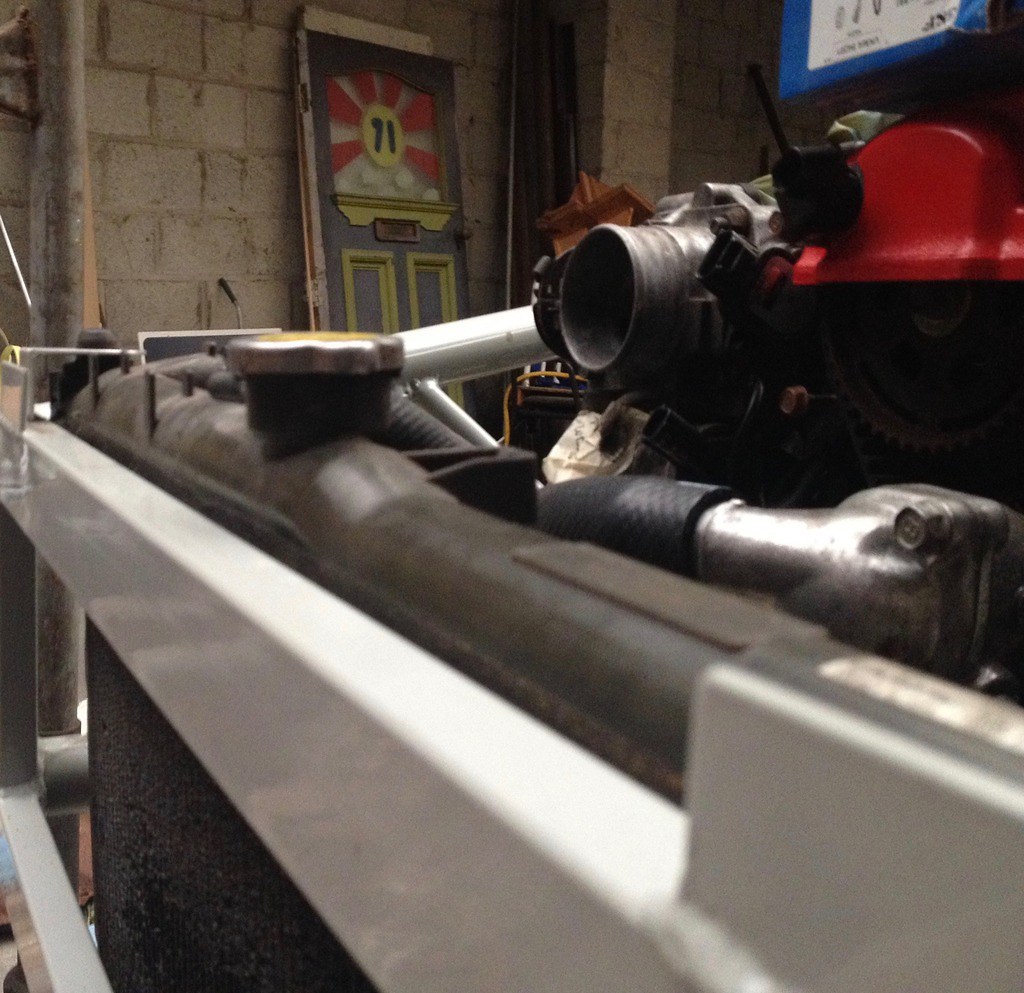 The last thing I want to do is set the radiator then find the body, when fitted, hits it! |
|
|
|
Post by gwnwar on Feb 22, 2017 20:45:13 GMT
That radiator doesn't look to be in good condition.. Tank is turning green and the core looks to be falling apart to a fingers
touch.. I have not built one but I would get all the air flow over the core that I could.. up high like you have it it is blocking about 3" of core. But you don't want it to low to be hit on the lower tank.. Hopefully John Snowbird 1 will jump in here with an answer.. If you do go for an OEM type replacement get one for and automatic transmission car it has a large core with the same size tanks. NA radiators mount different (bolt on) then NB units..
|
|
|
|
Post by R2S on Feb 22, 2017 22:31:18 GMT
That radiator doesn't look to be in good condition.. Tank is turning green and the core looks to be falling apart to a fingers touch.. I have not built one but I would get all the air flow over the core that I could.. up high like you have it it is blocking about 3" of core. But you don't want it to low to be hit on the lower tank.. Hopefully John Snowbird 1 will jump in here with an answer.. If you do go for an OEM type replacement get one for and automatic transmission car it has a large core with the same size tanks. NA radiators mount different (bolt on) then NB units.. Already have a replacement one in picture is purely being used to sort brackets (I know how easy it is to damage a rad!). If I dont have any success on the site Im going to track someone down with a Mk2 MX5 and simply take their dimension from top of cam cover! |
|
|
|
Post by tojeiro on Feb 23, 2017 10:04:43 GMT
I'll measure my MX5 for you (once the snow stops), not sure if it helps as body is different.
I positioned mine same as westies build (http://mevowners.proboards.com/thread/7505/cheshire-build?page=10
)
using the existing cleaned up Mazda brackets.
I haven't tried the body on yet but westie has, and no clearance issue posted.
I suppose it depends also on the brackets you use to mount the body.
1st photo with top of bracket looks fine but watch the space between radiator and engine, it is quite tight if you are planning to use the standard air intake pipe with resonator chamber, might want to do a quick fitment check.
|
|
|
|
Post by snowbird1 on Feb 23, 2017 14:45:22 GMT
I used the OE lower brackets and attached the under tray and radiator ducting to it. Can't remember the fitted height but the upper bolts in the picture fitted into the original radiator mounts.  As 'gwnwar' mentioned the lower chassis cross member appears to restrict the airflow to the rad, I would like to see a round tube in that location - that being said the car AZ car cooled fine at 40 deg C - once I sorted other problems with the cooling system - good tip from 'gwnwar' 'use only a genuine Mazda thermostat'. Another picture of the rad location: 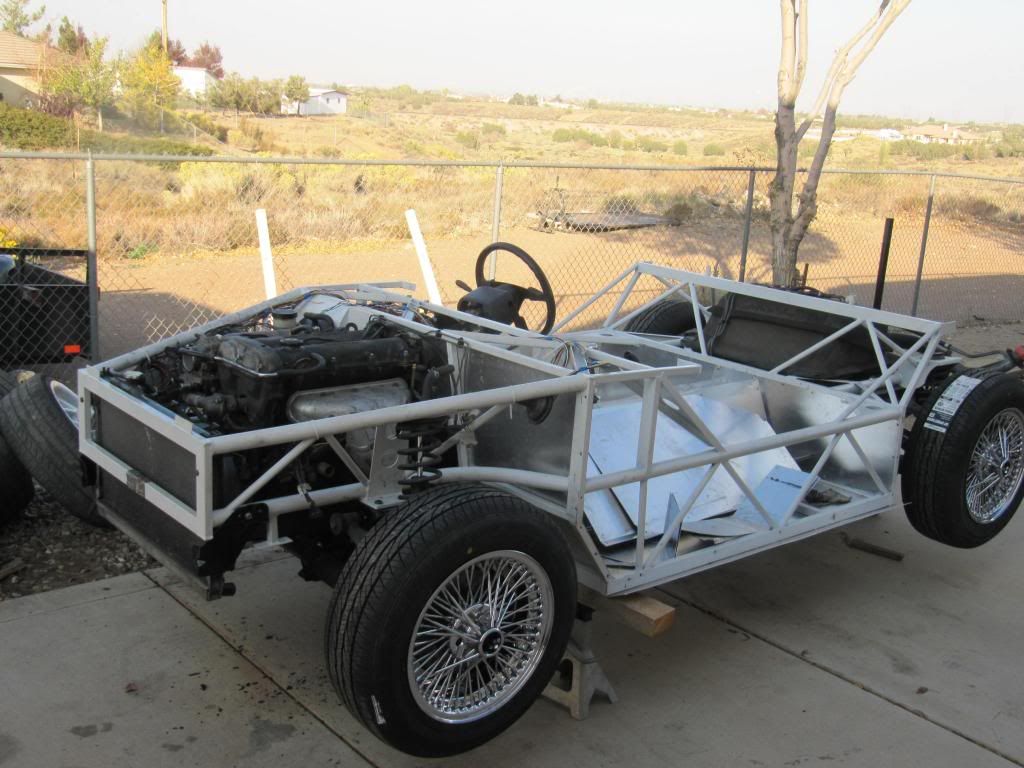 Looks low but never in danger of grounding even over some steep curbs around here. |
|
|
|
Post by R2S on Feb 23, 2017 15:38:59 GMT
snowbird 1, thanks for the pic, where is the header tank on your build? I conscious that the size of bonnet opening hides quite a lot of what during build is readily accessible and I dont want to start lifting body on and off (its that one man build thing again!)
Main reason I was hesitating on install is Im sure that during may many hours reading on the site Id seen something about top of radiator cap position being important to avoid cooling issues? Hence my fall back position of using position on MX5 (relative to rocker cover) if all else failed. Height you have used seems to work well when trialling on mine as it doesn't create any twist in standard hoses and leaves clearance for standard airbox pipe.
As per advice from you and gwnwar many moons ago I have a genuine mazda thermo ready for install.
Im avoiding fixing to round tubes (with flats or nearly flats) it just feels wrong so my fixing are on front square sections. Not sure it will help airflow that much but Im trying to set the rad off the chassis a little and tilt bottom toward rear of car thereby minimising potential hot spot
On the lower cross bar if I were building again rather than a round section Id lower bar to suit standard MX5 rad (a thought for Stuart?).
|
|


