|
|
Post by R2S on Nov 26, 2018 6:40:39 GMT
I used original fittings, filled centres with moly metal, no pressure in rack so don't anticipate any problems.
|
|
|
|
Post by lemans75 on Dec 10, 2018 18:05:58 GMT
Finally a productive day, blasted and powder-coated front subframe is in along with new control arms, ball joints, calipers, rotors and wheels. Next step is to bolt on the de-powered steering rack and front suspension.  |
|
|
|
Post by lemans75 on Dec 12, 2018 12:48:30 GMT
Floor panels are in! Couple of notes for others to consider. I used an Arrow branded hand rivet puller but if I had to do it again I would buy a pneumatic rivet puller for these bigger rivets. My hands were aching after a couple dozen rivets and I had about a dozen rivet shafts break on me prematurely, leaving a short stub sticking out. The solution here is to remove the adapter screw on the end of the puller, thereby giving you an extra 1/4 inch and go at the stub a second time. I put a small bead of seam sealer (SEM 29372 Gray Seam Sealer) on the frame and used my finger to spread it. You don't want the seam sealer to cause there to be a gap between the floor panel and the frame.  |
|
|
|
Post by roger32849 on Dec 13, 2018 3:57:13 GMT
I know we are not just supposed to say things like “Nice” and then leave, but hey, “Nice”.... I was looking at your suspension prep and progress. You have a good start. I would like to ask if this is your first kit build, or have you done a few before Replicar? I have not followed a lot of builds on the forum but have been curious about this particular kit. It looks quite detailed, and shares a lot with the Exomotive Exocet.
I feel your pain on the rivets. My arms were on fire sinking those stainless steel guys into my frame. Anyway, looks good and enjoy the build. I am a neighbor.. as it is.... I live in Worcester and built the TR1ke and the Eco-Exo-R. All fun toys...
Best of luck at the DOT....
Roger
Worcester, Massachusetts
|
|
|
|
Post by ancsportscars on Dec 13, 2018 9:31:07 GMT
James,
a couple of jobs to consider whilst you have the chassis upside down and easily accessible: Firstly, decide upon what clips you are going to use for the front/rear brake and fuel lines and fix them along the inside of the r/h trans tunnel member (otherwise access is considerably restricted once the chassis is mounted on the 'roller skate.') If you look on my website's build blog entry 'December 2017', you will see my solution was to retain and modify the 4-way clips from the donor which leads to a very neat installation.
Also, it is worth trial fitting, marking out and pre-drilling all the front bulkhead panels and chassis for the rivets. However, don't permanently fit them at this stage, as a little later in the build, you will need to make large holes in the panels to take the grommets for the wiring loom to pass from the cockpit to engine bay - which is far easier to do off the car.
|
|
|
|
Post by lemans75 on Dec 13, 2018 17:47:11 GMT
Put the front and rear suspension in. I could not find my carefully squirreled away lower suspension bolts so having to wait for a set from flea-bay. That should give me time to plumb in the new stainless brake lines and run a couple of cupranickel lines to get it all plumbed up to the front. I'm thinking of keeping the old but clean fuel lines but that may change once I test fit the frame...  |
|
|
|
Post by lemans75 on Dec 13, 2018 18:01:51 GMT
Thanks for the advice Andrew, I'm following your blog quite closely (http://ancsportscars.co.uk/Blog/).
I think I might do a quick test fit to decide whether to keep the old lines since I'll have some extra muscle around this weekend and then straight back off to do as you suggested.
|
|
|
|
Post by R2S on Dec 15, 2018 9:53:42 GMT
In an effort to reduce the number of holes, no matter how small the diameter, I drilled in the chassis I formed brackets to hold my single kunifer brake line and fuel feed/return pipes, fixed via the floor rivets located adjacent to the transmission tunnel.
|
|
|
|
Post by lemans75 on Dec 17, 2018 17:39:47 GMT
@rs2 - I'm with you on reducing the number of holes in the frame.
My donor has a wiring harness clipped on to the PPF and I'm sure there's a good reason not to, but I was toying with the idea of adding the fuel return lines and brake line next to it, instead of on the chassis. Thoughts?
|
|
|
|
Post by lemans75 on Dec 17, 2018 17:59:32 GMT
I plumbed in my rear brake hard line over the weekend. I couldn't find any metric M10 fittings so bought a section of straight steel line that had a pair of fittings on it and planned to rob the line of them and use cupronickel lines. I tried hand bending the steel line and it went surprisingly well. So well in fact that I decided to keep it! I did have to shorten one end a little so had to give double flaring a go. My double flare looks awfully like a single but I can see that there is a folded edge so hopefully it's good to go.  |
|
|
|
Post by tojeiro on Dec 17, 2018 19:44:57 GMT
@rs2 - I'm with you on reducing the number of holes in the frame. My donor has a wiring harness clipped on to the PPF and I'm sure there's a good reason not to, but I was toying with the idea of adding the fuel return lines and brake line next to it, instead of on the chassis. Thoughts? I had similar thoughts but was advised otherwise by others for reasons you can find on my page below. Probably possible if you use flexible joints but I decided easier just to follow normal process of clipping to chassis. mevowners.proboards.com/thread/7875/east-kilbride-build?page=4 |
|
|
|
Post by lemans75 on Dec 17, 2018 20:48:36 GMT
Yes, thanks for pointing that out, that's clearly the reason.
I had planned to put a flexible joint at the rear but I now realize I would need one up front too.
|
|
|
|
Post by R2S on Dec 17, 2018 23:03:37 GMT
Found a photo showing the brackets I made, view is from under trans tunnel with tunnel removed. 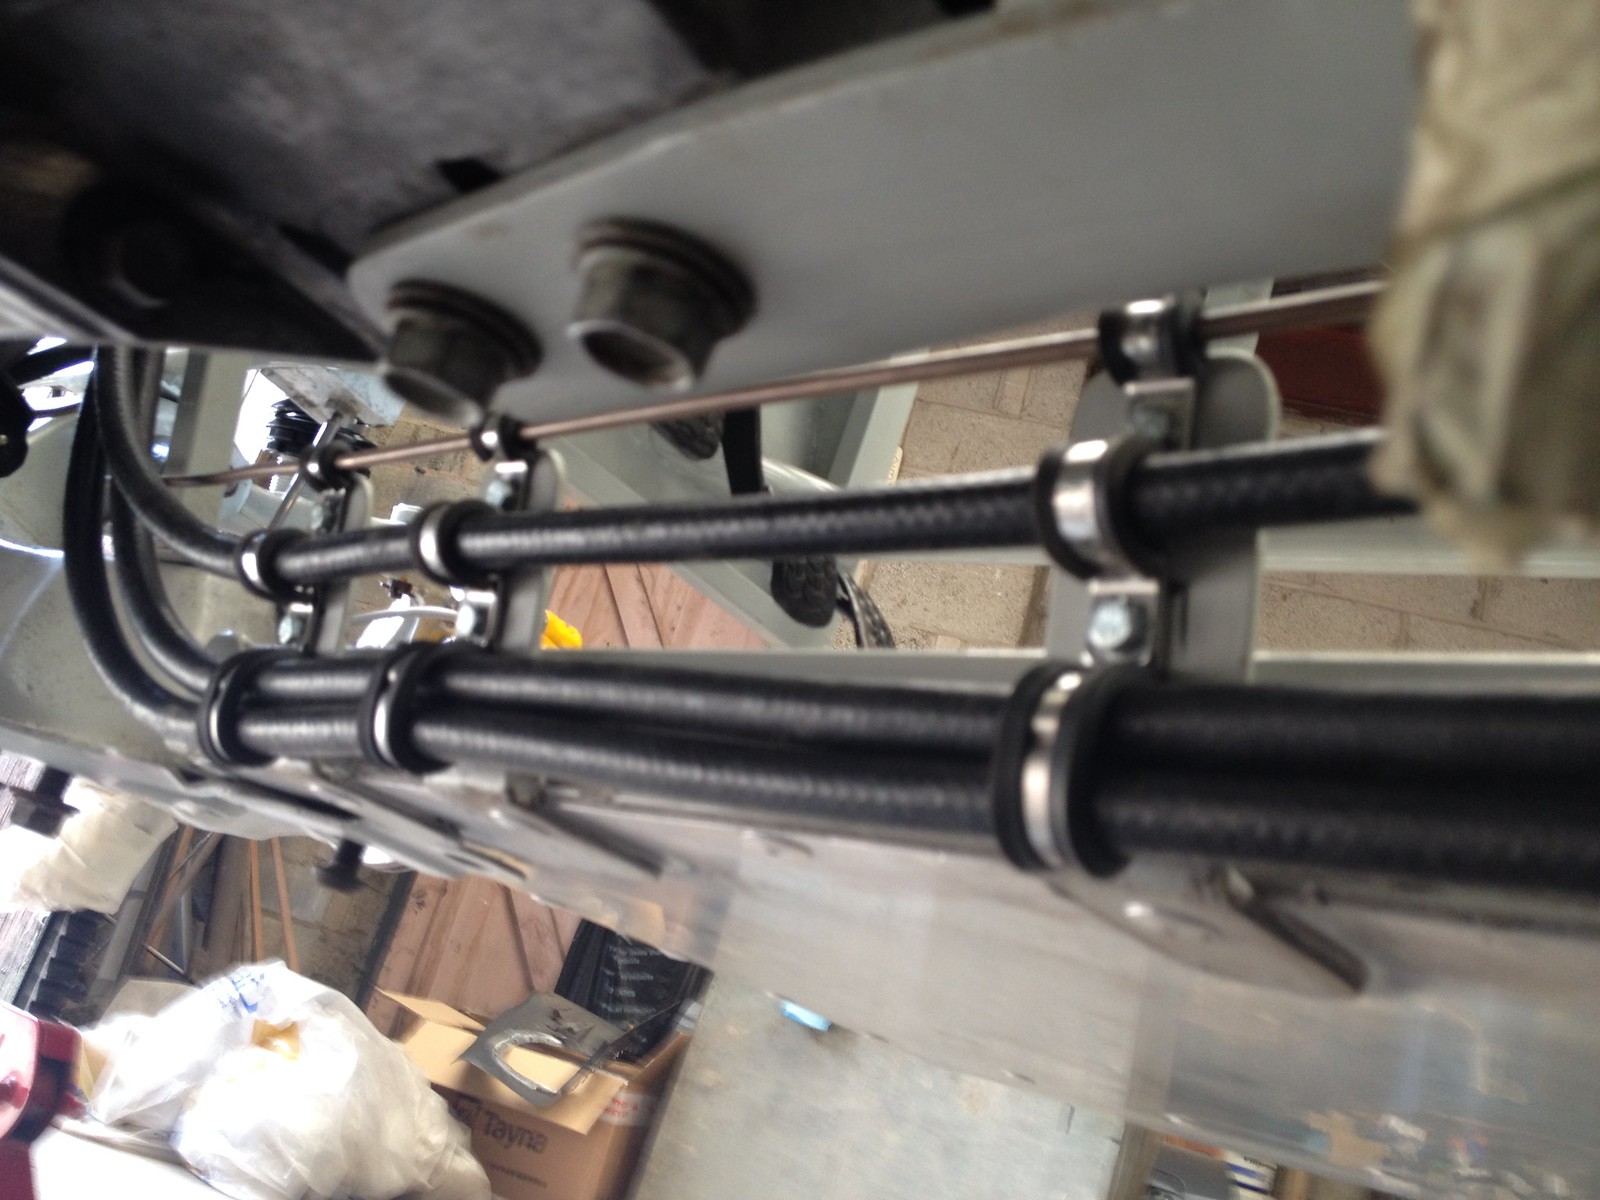 |
|
|
|
Post by lemans75 on Dec 18, 2018 19:33:38 GMT
Ah I see, very nice and thank you, very helpful.
I could indeed just drill out a couple of the rivets since I do have a handful left over from the floor panels.
|
|
|
|
Post by lemans75 on Dec 21, 2018 18:28:22 GMT
Bulkhead pieces are finally trimmed and massaged into place. Looking closely at other builds to get an idea of how to get a nice rounded trans tunnel.  |
|


