|
|
Post by Raj'sDad on Jan 5, 2015 16:49:59 GMT
Thanks Mark
Do you have a build diary here as I could not find yours under the sonic's section.
|
|
|
|
Post by davef on Jan 5, 2015 20:46:12 GMT
Hi Harminder, Mark is right about the bracket being for the old MEV throttle but if you have the Joker's pedal you won't need it.
|
|
|
|
Post by Raj'sDad on Jan 5, 2015 22:19:34 GMT
Thank you Dave. Based on the advice, I plan to bend it inwards slightly as mentioned above so thatI can easily fix the ally panel without needing to cut a hole to allow for the mount.
|
|
|
|
Post by welshmarks7 on Jan 6, 2015 1:56:57 GMT
Hi Harminder, no build diary as such yet, various threads and questions tho.
I was fully intending to start from day one, I got carried away with the shiny parts and boxes of bits . Although I do have the photos from all stages of the build, I have no excuse really not to do a build thread albeit with pics perhaps, giving my 2 peneth worth on problems I came across.
My latest almost final part now is a front hinge for the bonnet. Watch this space for pics possibly video(if I can get one to upload).
Mark
|
|
|
|
Post by Raj'sDad on Jan 6, 2015 15:20:00 GMT
Hi Mark
no probs, I totally understand, myself and Raj (my son) are in a similar situation as we did start and we do have loads of photo's, but due to work travel and trying desperately to fit some work in whenever possible, its been difficult.
If you have a photo's though on photobucket or other, I would love to see them for inspiration and ideas as we
continue to get through our build...still a fair bit off.
Thanks
|
|
|
|
Post by davef on Jan 11, 2015 9:21:21 GMT
Hi Harminder, no build diary as such yet, various threads and questions tho. I was fully intending to start from day one, I got carried away with the shiny parts and boxes of bits . Although I do have the photos from all stages of the build, I have no excuse really not to do a build thread albeit with pics perhaps, giving my 2 peneth worth on problems I came across. My latest almost final part now is a front hinge for the bonnet. Watch this space for pics possibly video(if I can get one to upload). Mark
Regards
Dave |
|
|
|
Post by welshmarks7 on Jan 12, 2015 3:48:41 GMT
Hi Dave/Harminder, almost kind of finished the bonnet hinges, just final adjustments. Will try and post video/photos of completed hinges. Unless it all goes catastrophically wrong. Looking promising at the moment.
Mark
|
|
|
|
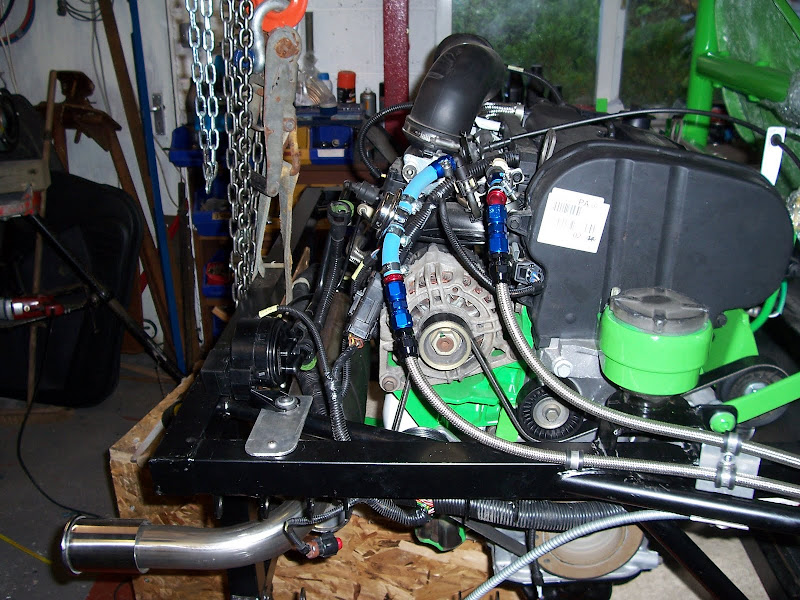
Post by daydreamer on Jan 28, 2015 21:14:17 GMT
Hi Harminder,
This post is just to capture the info that I sent to you by email and text messages over the last few days. It may be of interest to others.
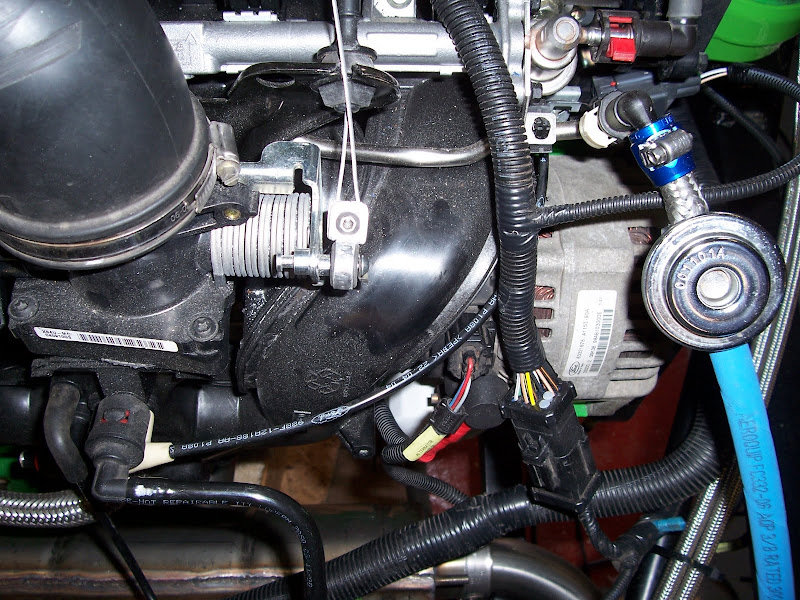
You asked about fuel lines and connectors.
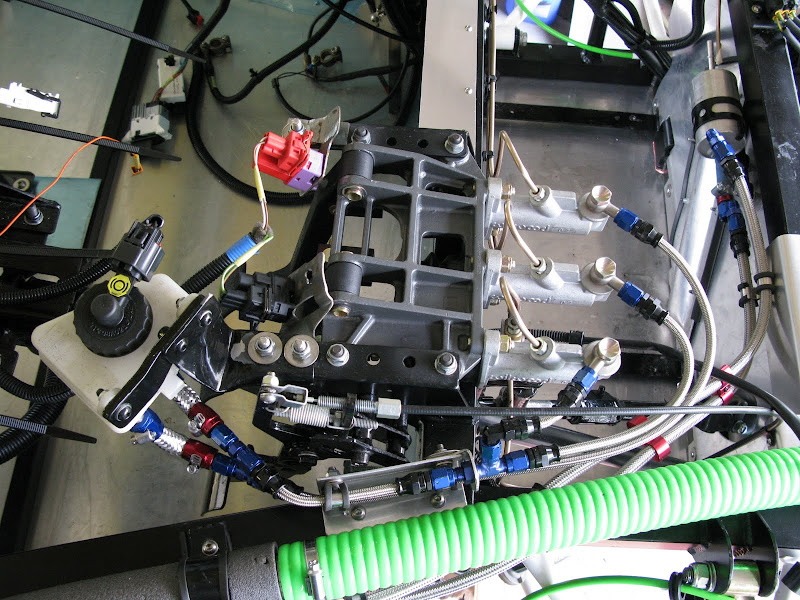
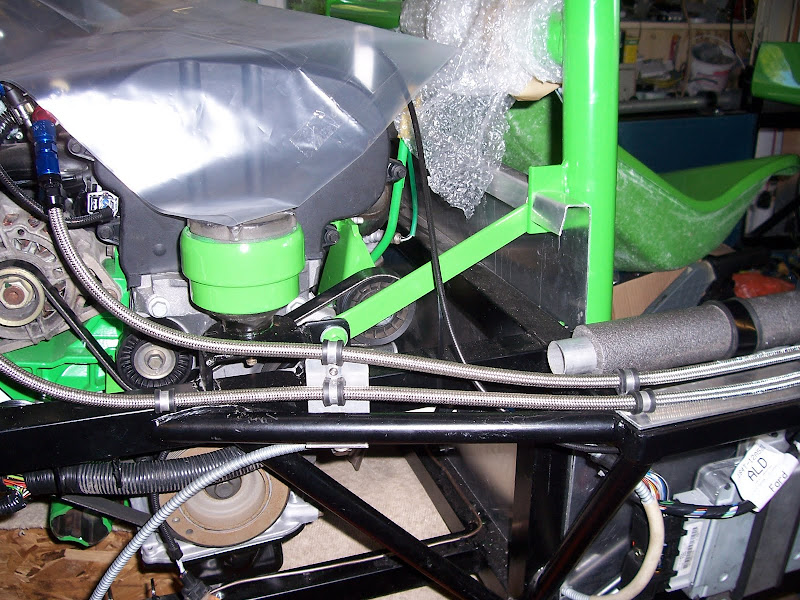
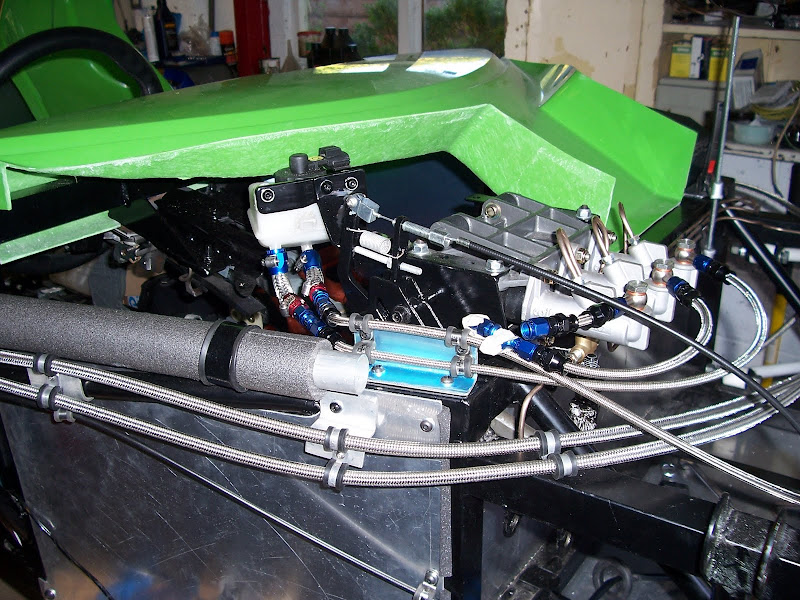
On my build I've used PTFE/Teflon/Braided fuel lines in a dash 6 size. Not the cheapest, I paid about £14.68 a meter from speedflow a couple of years ago. They called it 200 series at that time. I ordered 8 meters which was enough for Feed and Return lines to the tank installed at the front. Others fitting the tank at the rear will need much shorter lengths.
I have changed to a ST170 engine and you have a 1.8. The only notable difference is that the ST170 has no Return fuel line.
Connecting Teflon hose requires special connectors, it cannot simply be crimped on. I know from our conversations that you have now decided to go with rubber braided hose and that should be fine. I went with a PTFE/Teflon hose as I am just being cautious about the changing fuel specs that include higher Ethanol contents. Ethanol in higher concentrations can be problematic for rubber and copper fuel lines over time.
Worth reading www.hotrod.com/how-to/engine/hrdp-1101-performance-fuel-hoses/
You asked how I connected all the fuel plumbing up.
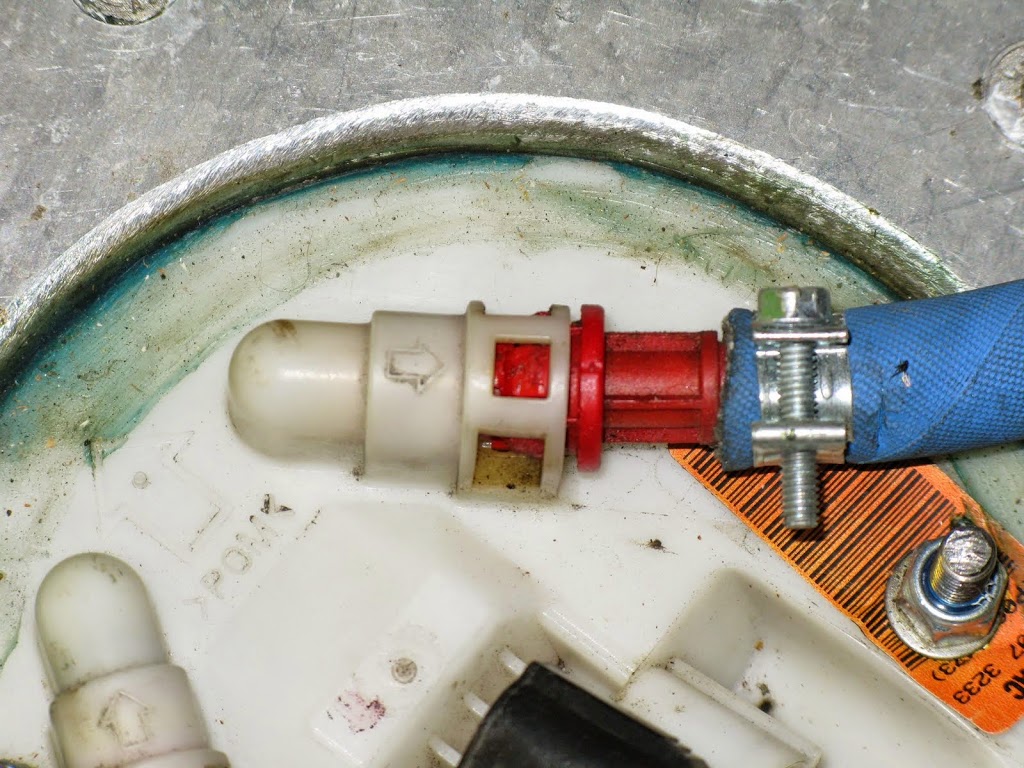
I’ve taken some photos of my fuel line joints, they are on the links below.

This shows Hardline fitting into AN-6 male to AN-6 male adaptor into Teflon hose AN-6 end.
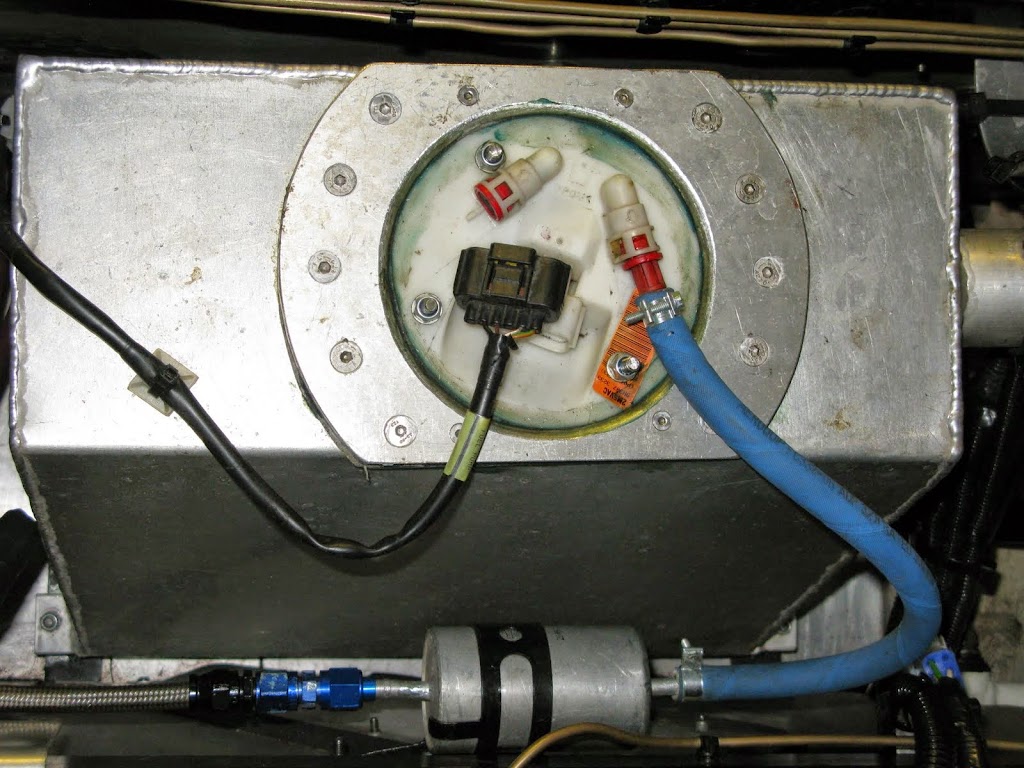
shows rubber hose and fuel line crimps ( Available from Halfords. )
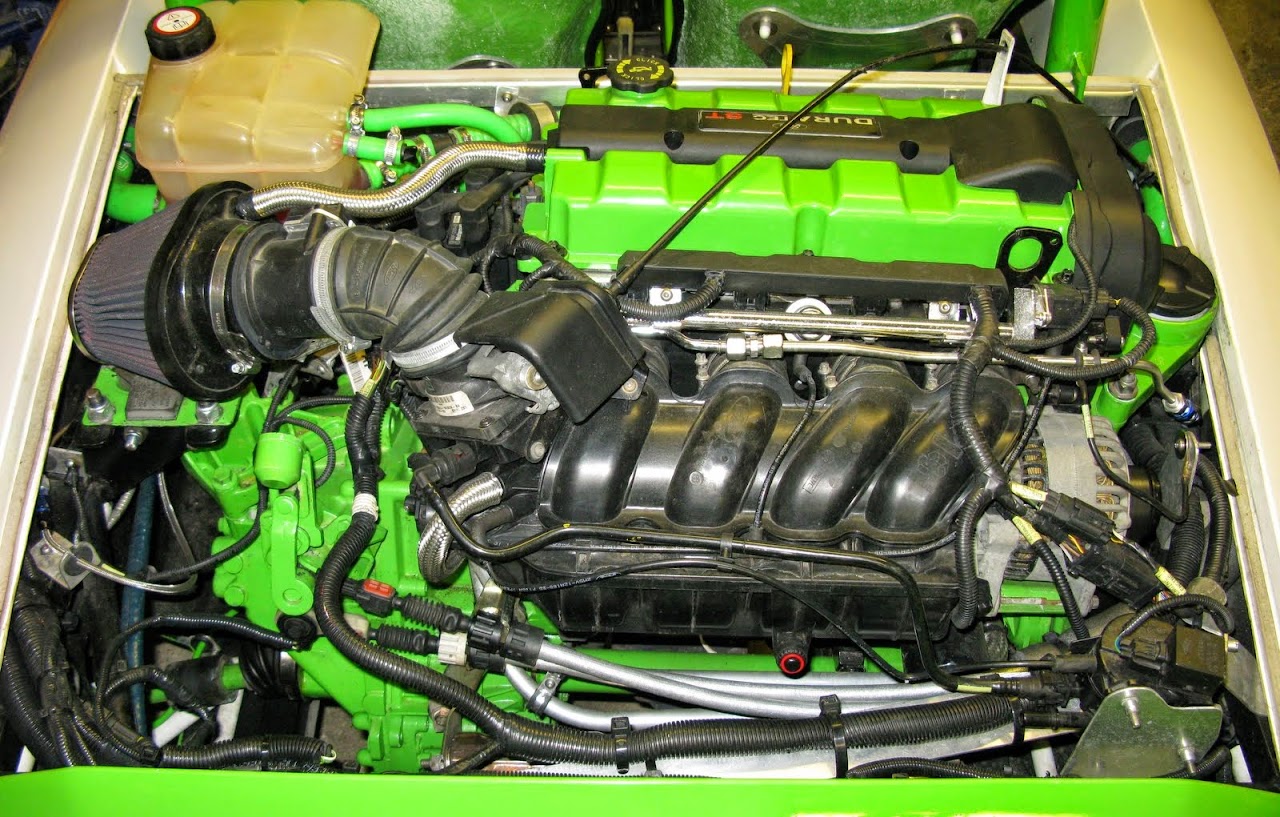
Shows engine bay hard line fittings on ST170 engine. No rubber here.
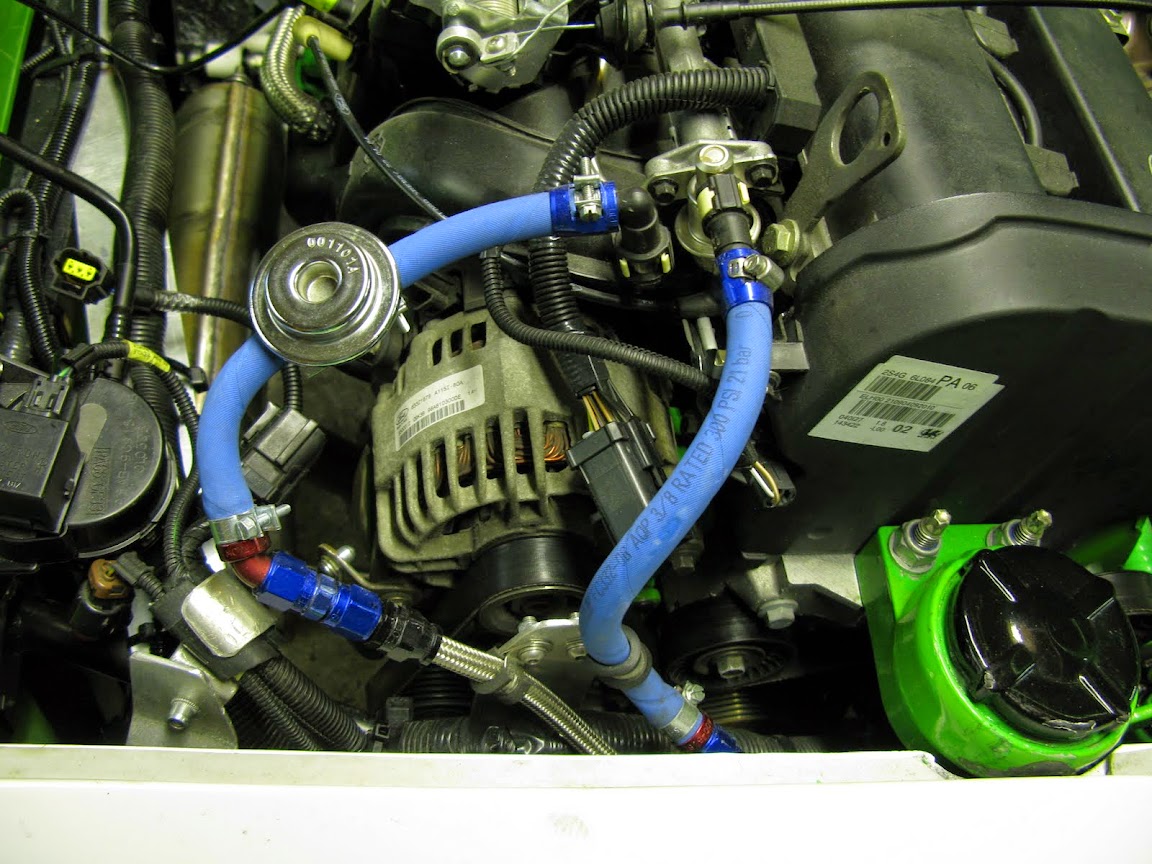
This is what I used to have on the 1.8.
You can see rubber hoses crimped onto the ford rail adaptors.
The other end of the rubber hoses have rubber hose ends fitting into AN-6 male to AN-6 male adaptor into Teflon hose AN-6 end.
Where the Teflon hose goes onto steel pipe , the injector rail, or aluminium pipe , the fuel filter My brother used hard line fitting from speedflow and flared the pipe on the injector rail and fuel filter using the brake flaring tool. Hard work but he managed it.
If I was to do it now, I’d have no rubber and take the Teflon hose all the way to the fuel rail pipes, which I would flare and use hard line fittings to connect. For the tank I'd look at dispensing with the ford plastic tank cap and fabricate my own with AN-6 connectors and a some suitable electrical connection ( yet to be identified but perhaps butchered from the Ford item )
While considering Teflon hose you asked about connector prices. I used Speedflow items and it certainly added up.
I can see cheaper connectors now on ebay.
stores.ebay.co.uk/Torques-U-K/TEFLON-P-T-F-E-/_i.html?_fsub=933025012&_sid=81447352&_trksid=p4634.c0.m322
stores.ebay.co.uk/Torques-U-K/AN-6-TEFLON-PTFE-Hose-Fittings-/_i.html?_fsub=742411012&_sid=81447352&_trksid=p4634.c0.m322
www.ebay.co.uk/itm/AN-6-AN6-AN-06-to-AN-6-Straight-Flare-Union-Adapter-/360760262329?pt=UK_CarsParts_Vehicles_CarParts_SM&hash=item53fefcbeb9
I have no idea how they compare to the Speedflow kit.
Hardline fittings are a bit line copper brake unions in that they are a compression type joint. They require a flare to be put on the end of the pipe after passing the nut and sleeve on.
stores.ebay.co.uk/Torques-U-K/Hardline-Tube-Nuts-Sleeves-/_i.html?_fsub=3398262012&_sid=81447352&_trksid=p4634.c0.m322
stores.ebay.co.uk/Torques-U-K/AN-6-Adapters-/_i.html?_fsub=582624012&_sid=81447352&_trksid=p4634.c0.m322
Specs are AN-something ( typically AN-3 / AN-4/ AN-6 or AN-8 ) and then in a Male or Female interface.
Where you have different size tubes then an adapter is needed to step up or down eg Male AN-3 to Male AN-6.
There are other size specs such as JIC and the same principles apply , you can mix standards but adaptors are needed and they typically make joints longer than desirable and expensive.
Inc hoses, I spent £250 with speed flow for the fuel plumbing and flexible braided brake lines to carry brake fluid from the reservoir to the pedals. I used a lot of Teflon hose and connectors, made somebody rich. These pics are from when the 1.8 engine was installed.
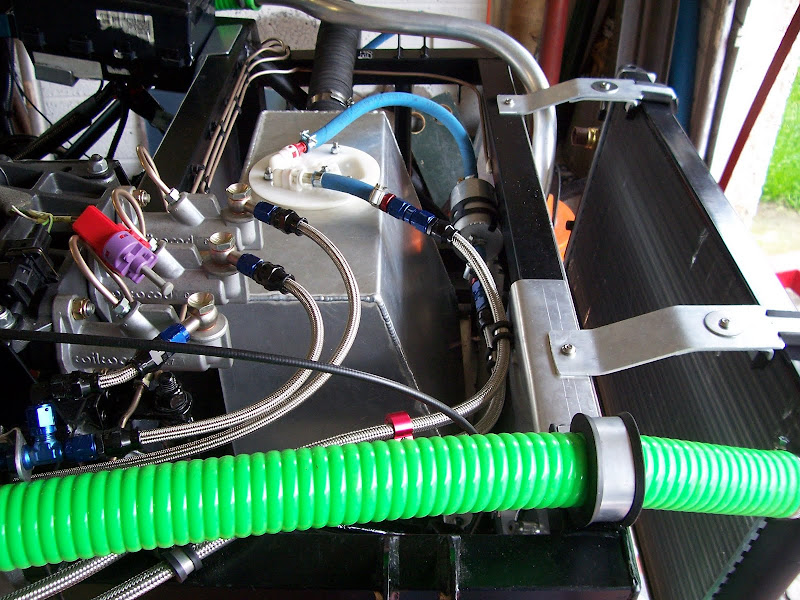
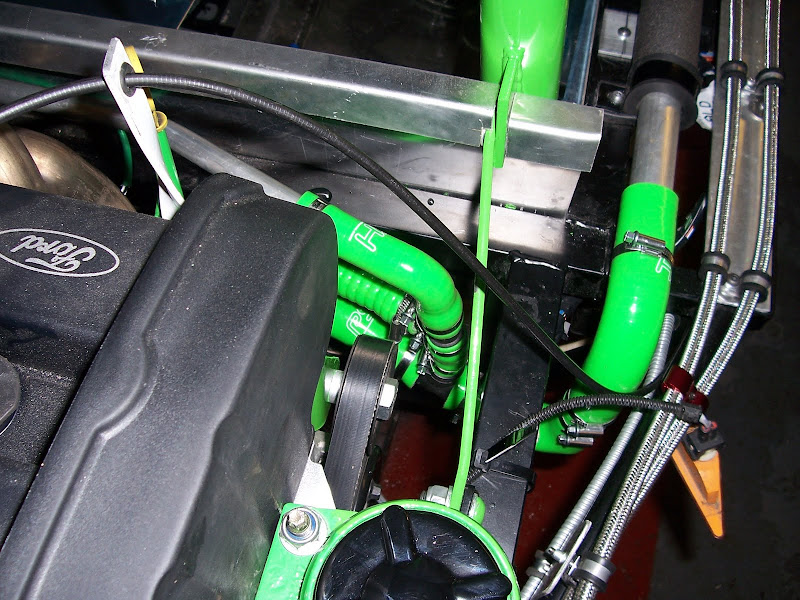
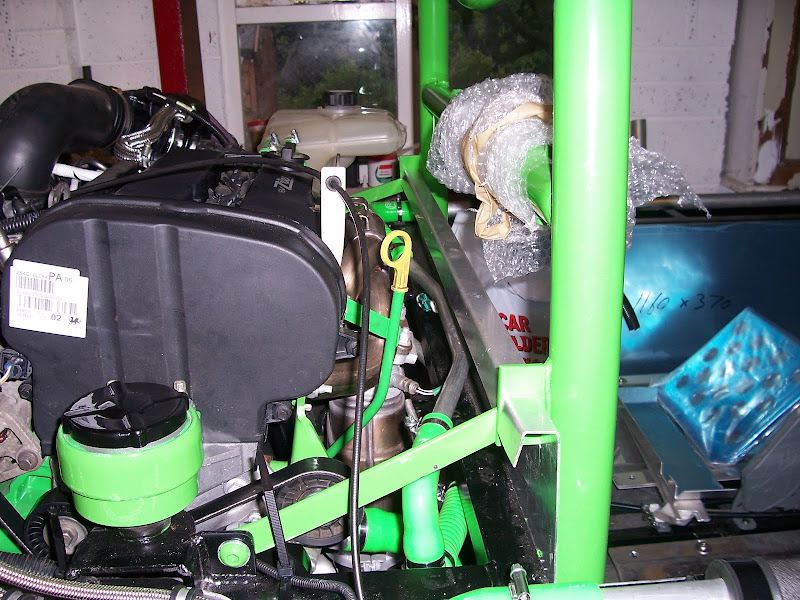
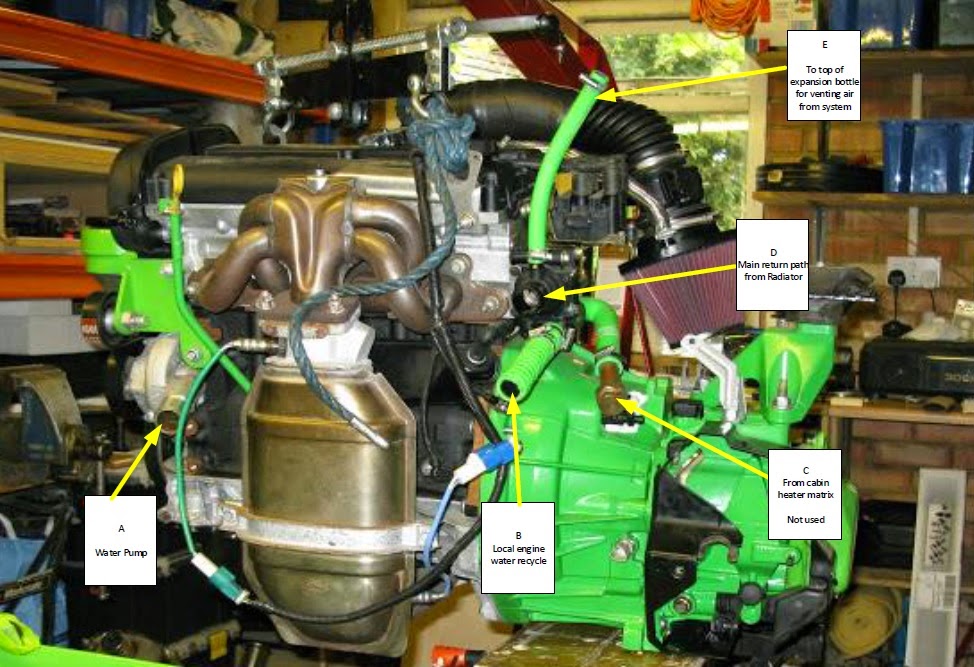
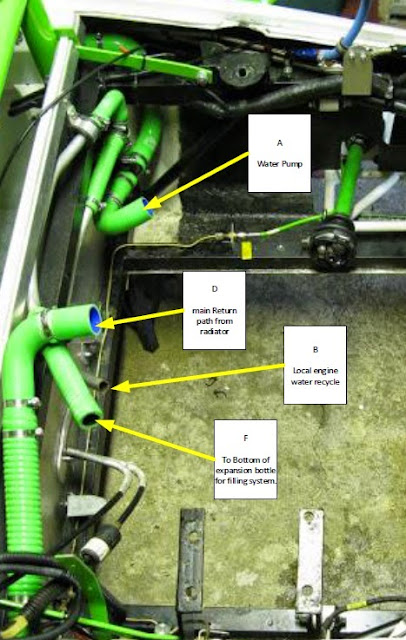
You asked about the cooling plumping 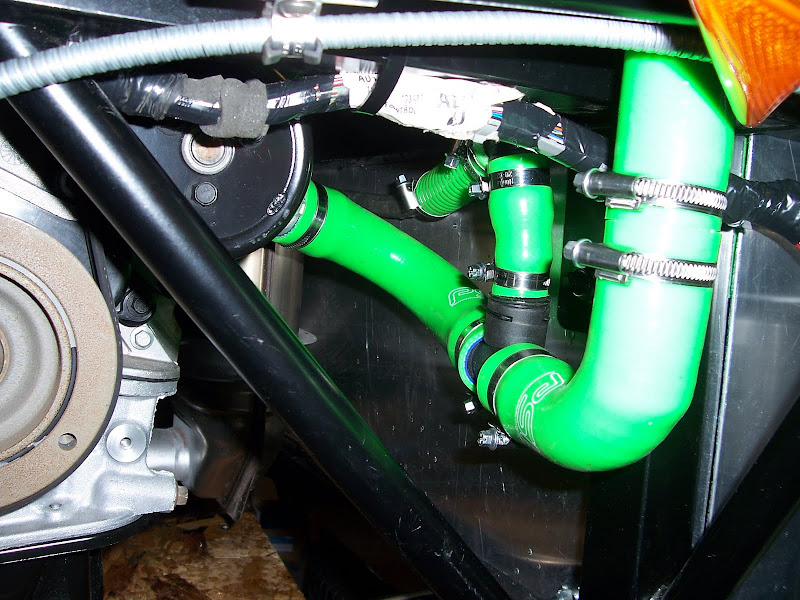

And the throttle linkage - I used the "Joker" pedal which is just perfect. 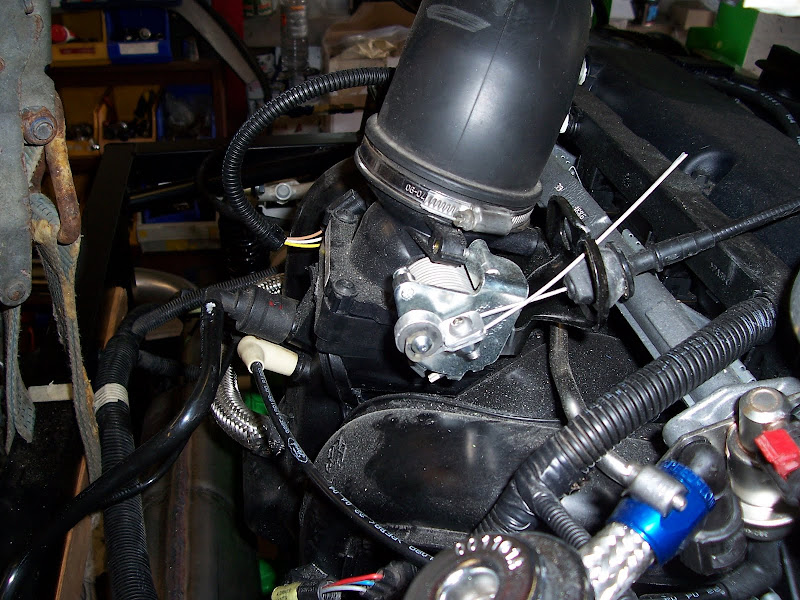
Used donor rubber bits fitted to CBS throttle cable, made crmp holder for rubber bit from off cut of alu sheet which goes around rubber on bar and crimps to hold throttle cable around m4 bolt and nylock nut.
|
|
|
|
Post by monk on Jan 28, 2015 22:07:04 GMT
Worth remembering to use a tube cutter for the lines not a hack saw, last thing you want is tiny bits of swarf in the injectors. A standard flaring tool will flare the end of the aluminium fuel filter, remember also to file the rib off the fuel filter connecting pipe and fit the nut and compression ring before flaring. The -06 is not an exact fit for the Aluminium tails but the flare works well and has proved trouble free.
|
|
|
|
Post by daydreamer on Jan 30, 2015 19:57:34 GMT
Welcome Monk, After 4 years of lurking in the shadows of the forum, your first post.
For those who don't know, Monk is my brother and build buddy without whom I'm sure my green and white sonic would never have completed. His newbie status is very misleading as he has built and rebuilt and upgraded my sonic many times. He has many many hours invested in stripping, cleaning, painting and rebuilding everything. I generally do the electrics and lightweight stuff. That said I have changed the engine and gearbox twice on my own. I think he does bolts up too tight (gorilla) and he thinks I don't do things up tight enough ( wuss ). It's a constant debate with us.
When I say "I did it this way" it often means either me or Monk. |
|
|
|
Post by howard on Feb 16, 2015 18:37:47 GMT
Hi good to see your build progressing well, what did you finalise with your steering column from the rack
The original has an adaptor fitted that goes straight onto the rack which isn't curcular and is short what did you buy to extend?
|
|
|
|
Post by jfrench78 on Mar 23, 2015 20:04:08 GMT
I had an extention bar machined out of 20mm ss rod with a 17mm Hex on one end and a 19mm with two opposing sides made flat 16mm (I think) apart. A little filing (tiny amount) and they slid into the steering U joint and OEM steering mount perfectly.
I did cut about 60mm off the steering column end so that the steering column could be fully extended, at a good high ofset angle and with round bar at the bulkhead for my bearing support. Drilled through the steering section and Rod for a bolt to replace the crimping section I had cut off and there you go.
|
|