|
|
Post by airforceone on Aug 24, 2014 8:35:12 GMT
Unfortunately getting discs that fit these stupid hubs is a real pain, biggest solid disc I have found
is 260mm which I think is the same as the crossed/drilled ones.
Sorry Anton for hijacking your thread a bit mate..
|
|
|
|
Post by kingofthetwisties on Aug 24, 2014 9:33:07 GMT
Unfortunately getting discs that fit these stupid hubs is a real pain, biggest solid disc I have found is 260mm which I think is the same as the crossed/drilled ones. Sorry Anton for hijacking your thread a bit mate.. Hey don't worry about hijacking the thread. It's great reading and I'm learning stuff I didn't know. Sent from my iPad using Tapatalk |
|
|
|
Post by kingofthetwisties on Aug 24, 2014 9:35:01 GMT
To be honest I am not sure the exact technical reason but I feel that with the groove trailing there is less chance of gouging the pads, whether this is true or complete boll0cks I am not sure. Whatever the reason I am sure I have this is right plus my rear disks were marked left and right in the box. Perhaps someone who knows can shed light on the real reason for this orientation. Thanks I wasn't aware there was a left and right disc. Before I put on the wheels I'll change them round just to be on the safe side Sent from my iPad using Tapatalk |
|
|
|
Post by kingofthetwisties on Aug 24, 2014 9:51:46 GMT
Your discs are on correctly, I don't think you can put them on the other way round as the alloy hub won't fit inside the disc bell. You mentioned that you put a spacer behind the gold caliper bracket, does that not move it closer to the disc usually to space the disc out and fit more centrally to the caliper, spacers are put on the spindle. Don't know if your way will affect anything. As far as I remember the spindle goes thru the gold bracket so the disc has stayed in the same position you have just moved the caliper out more. Just check your clearance beteen the caliper bracket and you disc.. If you go for 16 inch wheels you can get a bit more rubber on them. I went for the 17 inch wolfrace assassins, unfortunately at the time they only came in that size, they now do them in 15 and 18 inch, so going for some 15's and Toyo tyres. your right, the spacer moves the calliper away from the car by a 1.5 mm but this is enough to give the the clearance I needed. (See attached pic) 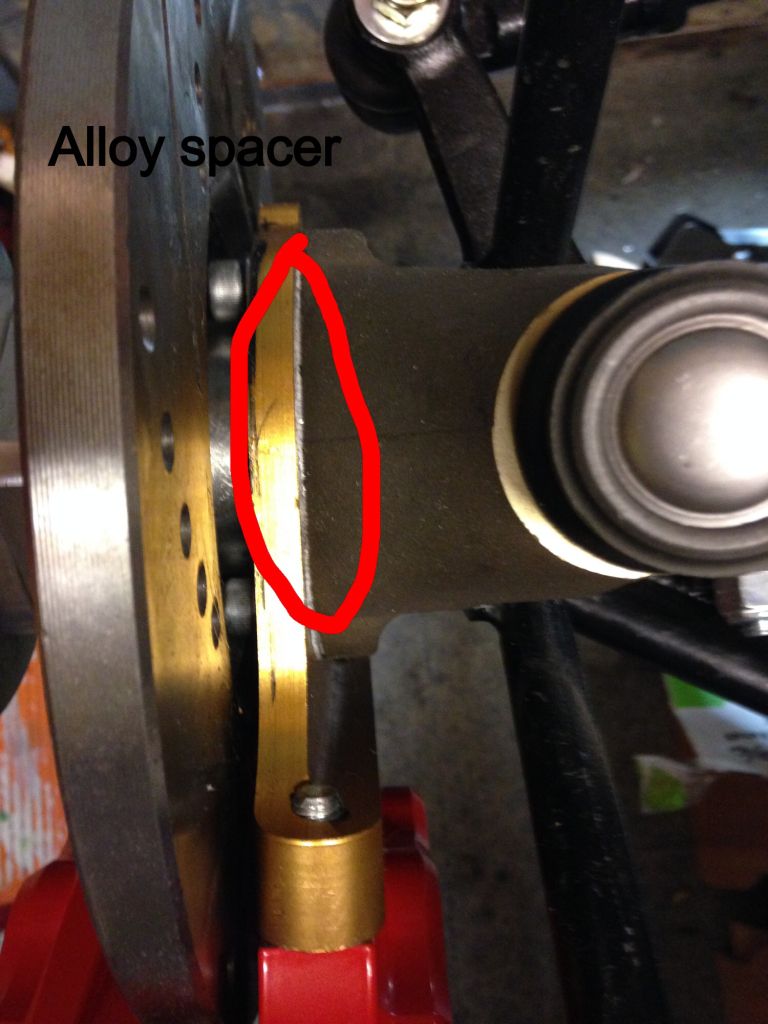 |
|
|
|
Post by kingofthetwisties on Aug 25, 2014 21:35:35 GMT
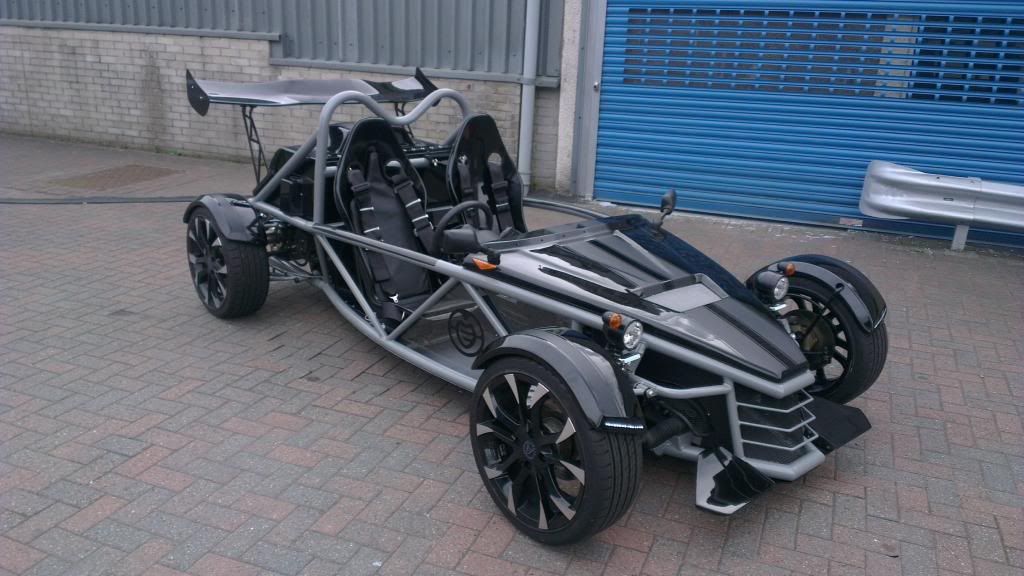
So today I decided to work on the front side panels, after a full day at this it feels like I havnt got a lot done but it took a lot of templates and shaping to get it right. I think it looks the part now though. I started with the a carboard template (well a few actually) in order to get the basic outline in place. 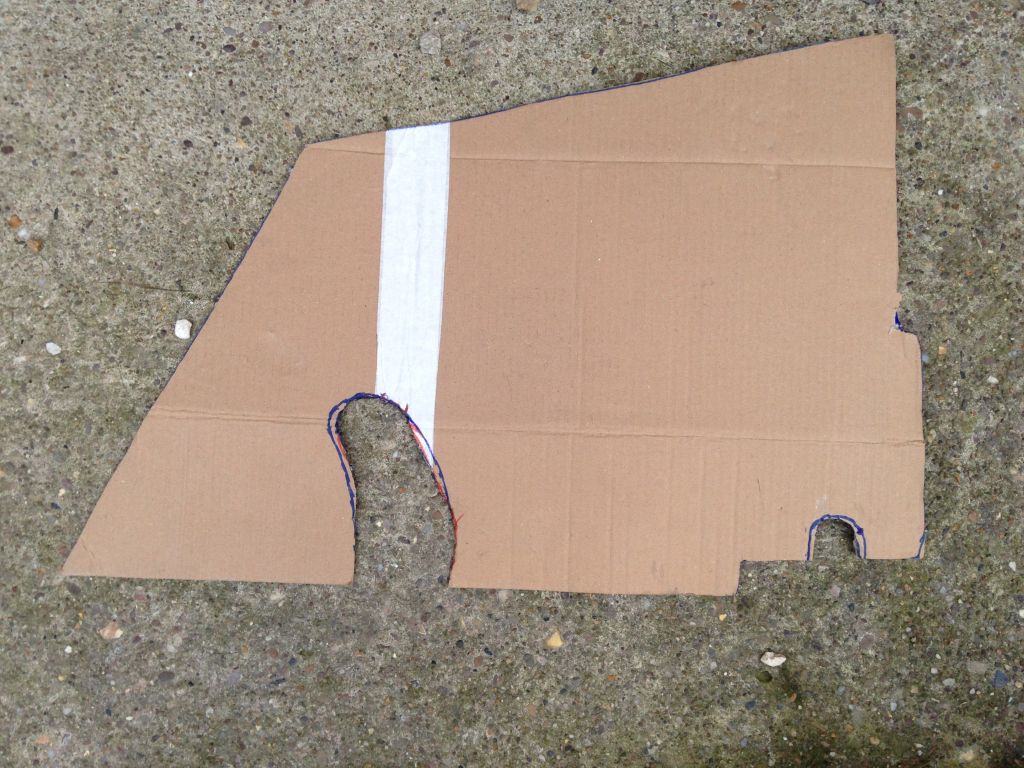 After it lookes right in cardboard I went for a wooden template to be sure I had it right and it would go into place. Glad I did this as without the flex that the cardboard had it was not as easy to get it into place and I had to make a few tweaks  After this I was brave enough tomcut the Alloy panel. However, at this point I reralised the panels provided were not big enough to fit in the size I had made up. I now have to buy a new pice of alloy sheet to make a new rear bulkhead as I used tis to make the side panel. 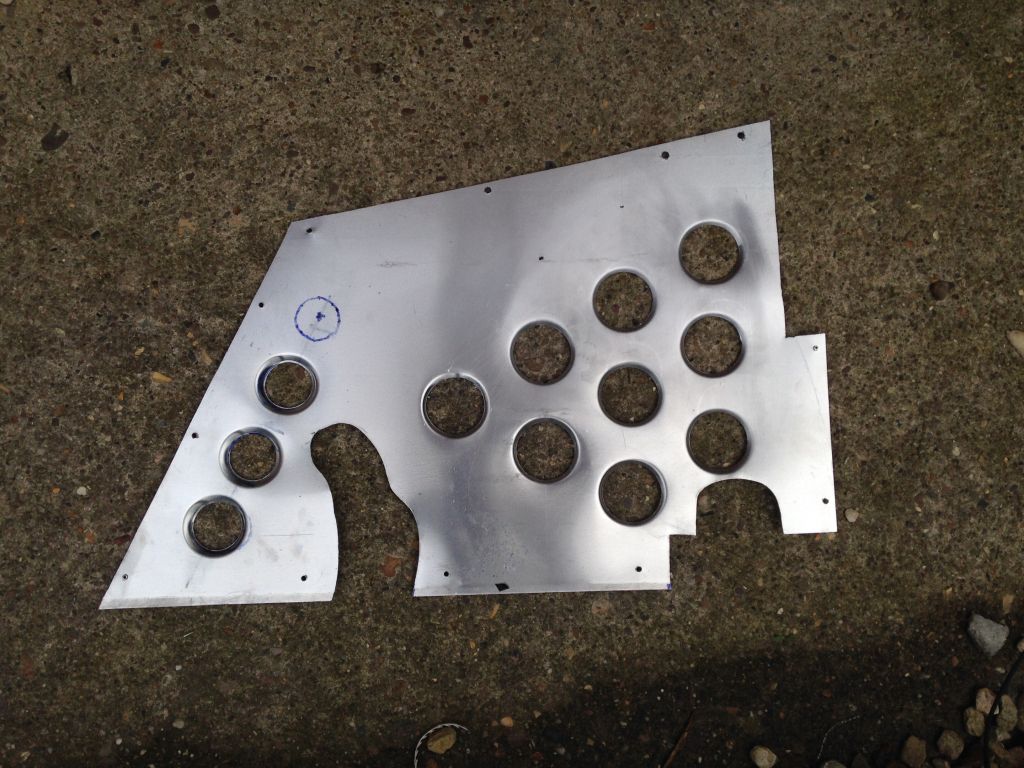 I decided to add the holes with and pressd in the edges as I think this will stiffen the panel and aid the airflow into the radiator and out of the front bulkhead again after its passed through the radiator ( I alos think it looks pretty cool). |
|
|
|
Post by kingofthetwisties on Aug 25, 2014 21:43:41 GMT
Ive also decided to paint them black as the car will be black. They are only painted to a amature level at present but when I take the bonnet and engine cover in to be painted Ill also take the pannels in to be done by a pro. Below are a few pics of them fitted to the car (I am stil waiting for the edge trim to arive to finish off the look). 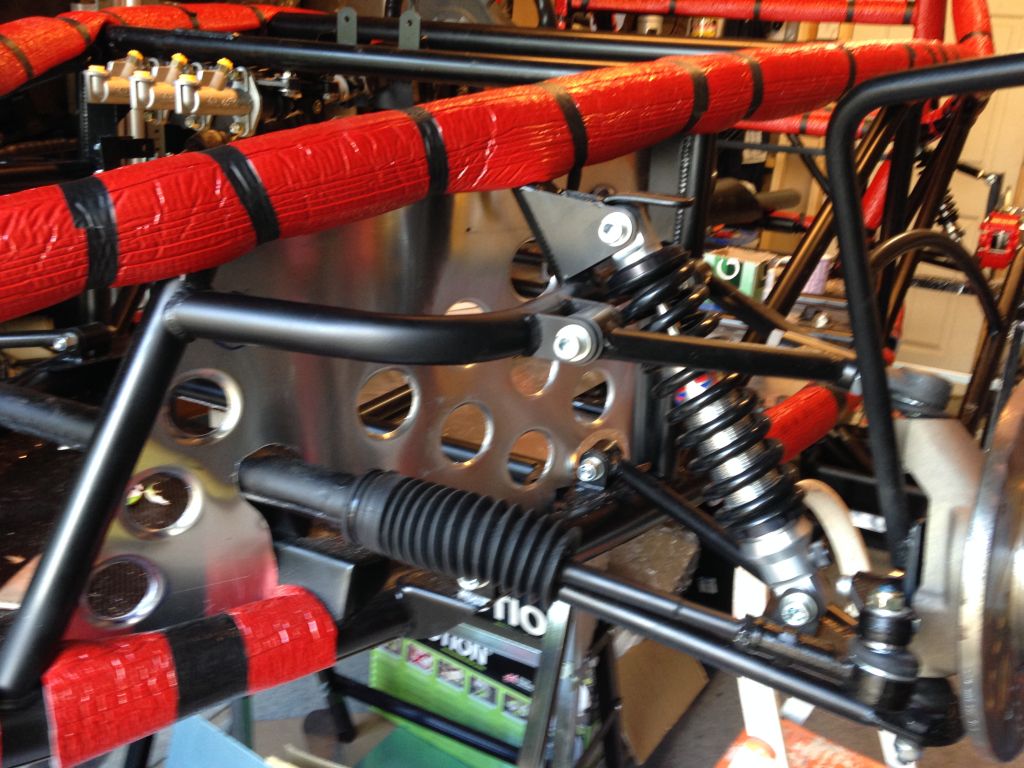  and the other side   |
|
|
|
Post by kingofthetwisties on Aug 25, 2014 21:46:31 GMT
Then to finish off I decided to put the fron grill in place again after painting it black.  Hve to say I may be biased but im pretty pleased with the outcome 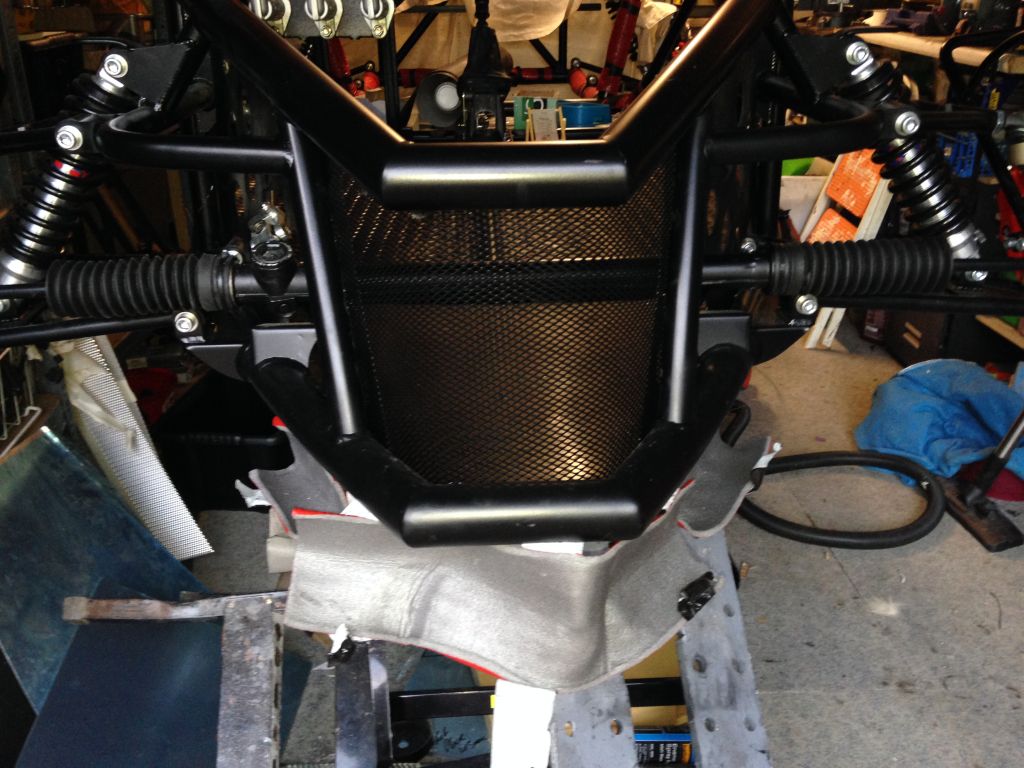 |
|
|
|
Post by kingofthetwisties on Aug 25, 2014 21:50:52 GMT
One frustration I have is the use of Riv nuts, this is the first time I have worked with them and I now regret going down this route and not just tapping a thread into the chassis.
I have had numerous that have not really fixed well into the cchassis and when attempting to screw in a butrton head M5 bolt the riv nut has slipped and started to spin in the chassis. I now can't go back and use a tap and a few self tapping bolts due to the 7mm holes I will be left with if I move away from riv nuts.
Not sure if I'm not using them right or if others have had similar problems but for anyone that has not started on this yet, think twice and go for a self tapper.
|
|
|
|
Post by kingofthetwisties on Aug 25, 2014 21:55:23 GMT
I also got the time today to switch the disc round today just in case it makes a difference (see earlier threads). Better to be safe than sorry and thanks all for the advice.
|
|
|
|
Post by kiwicanfly on Aug 25, 2014 21:58:49 GMT
Try re-pulling the rivnuts, if they are put into hollow tube and correctly pulled there will be no way to spin as the back of the rivnut will distort somewhat to follow the shape of the tube.
I have pulled M5 into a flat panel using only a vice (lost the M5 spindle) and had no trouble with spinning.
Might pay to have a practice into an offcut piece of tube that you can see into to get your settings correct.
|
|
|
|
Post by kingofthetwisties on Aug 25, 2014 22:02:05 GMT
Try re-pulling the rivnuts, if they are put into hollow tube and correctly pulled there will be no way to spin as the back of the rivnut will distort somewhat to follow the shape of the tube. I have pulled M5 into a flat panel using only a vice (lost the M5 spindle) and had no trouble with spinning. Might pay to have a practice into an offcut piece of tube that you can see into to get your settings correct. I tried this and found that there is a fine line when re pulling them between getting them fixed soundly in place and over pulling to the point where they won't come off the river nut tool or snapping. Probably just my inexperience but it's not been a pleasure working with them Sent from my iPad using Tapatalk |
|
|
|
Post by andychalmers on Aug 25, 2014 23:35:52 GMT
I've never had a problem with my riv nuts. My riv nuts have ribs on the back to stop them spinning. can you go 1/2 mm on the drill size? Thinking about it I had a cheap riv nut gun and it was crap, think some did spin. Purchased a new better quality gun & not had a problem.
|
|
|
|
Post by kiwicanfly on Aug 26, 2014 0:12:17 GMT
Also make sure you have the spindle screwed fully into the rivnut or it will strip the nut or the spindle, r at the very least distort the thread.
If you have trouble getting spindle out this is a sure sign something is wrong.
If the rivnut is in properly and threads not distorted there should almost be no toque on the rivnut and no reason to spin until the very end of the bolt tightening operation.
|
|
|
|
Post by Froggy on Aug 26, 2014 5:46:56 GMT
Don't know if it's just me but can't see your pics...says they've been moved or deleted.
|
|
|
|
Post by kingofthetwisties on Aug 26, 2014 7:15:18 GMT
Don't know if it's just me but can't see your pics...says they've been moved or deleted. They were there last night but I can't see them either. I'll have to log on from my laptop and take a look Sent from my iPhone using Tapatalk |
|