|
|
Post by marmot0 on Jan 2, 2016 14:45:44 GMT
After achieving precisely zero in the garage yesterday I turned my attention to the seats, here is the dismantled xk140 seat in the car, It completely changes the look of the car for the better I think. 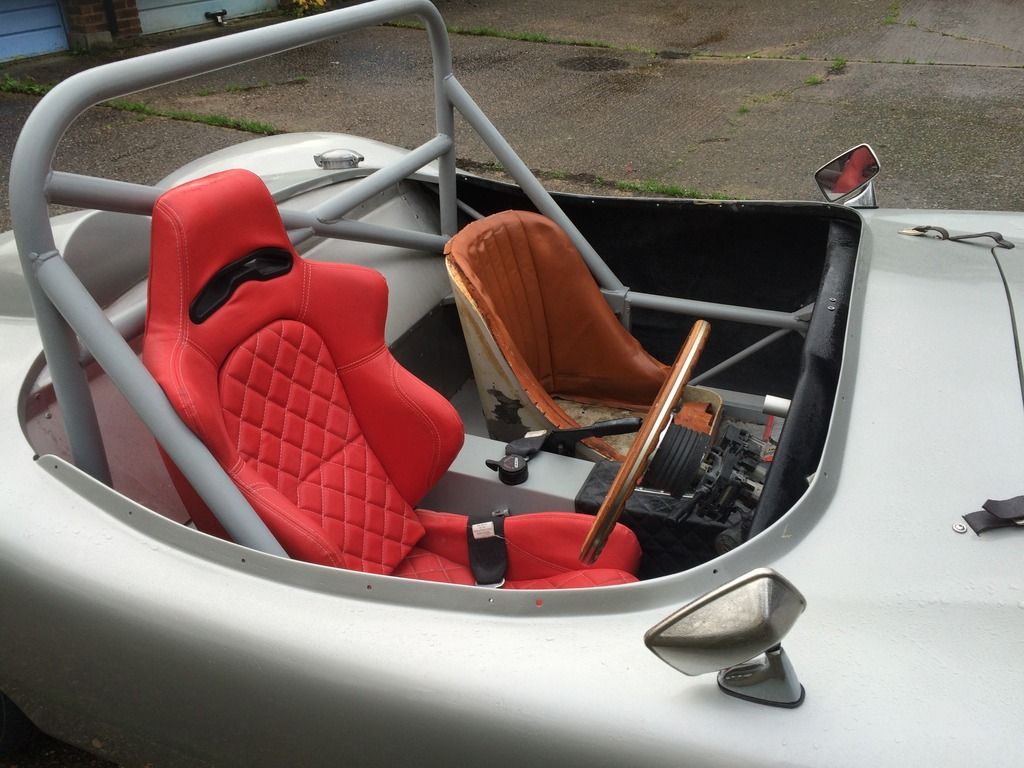 Using the old leather I was able to create templates to cut out the ali. 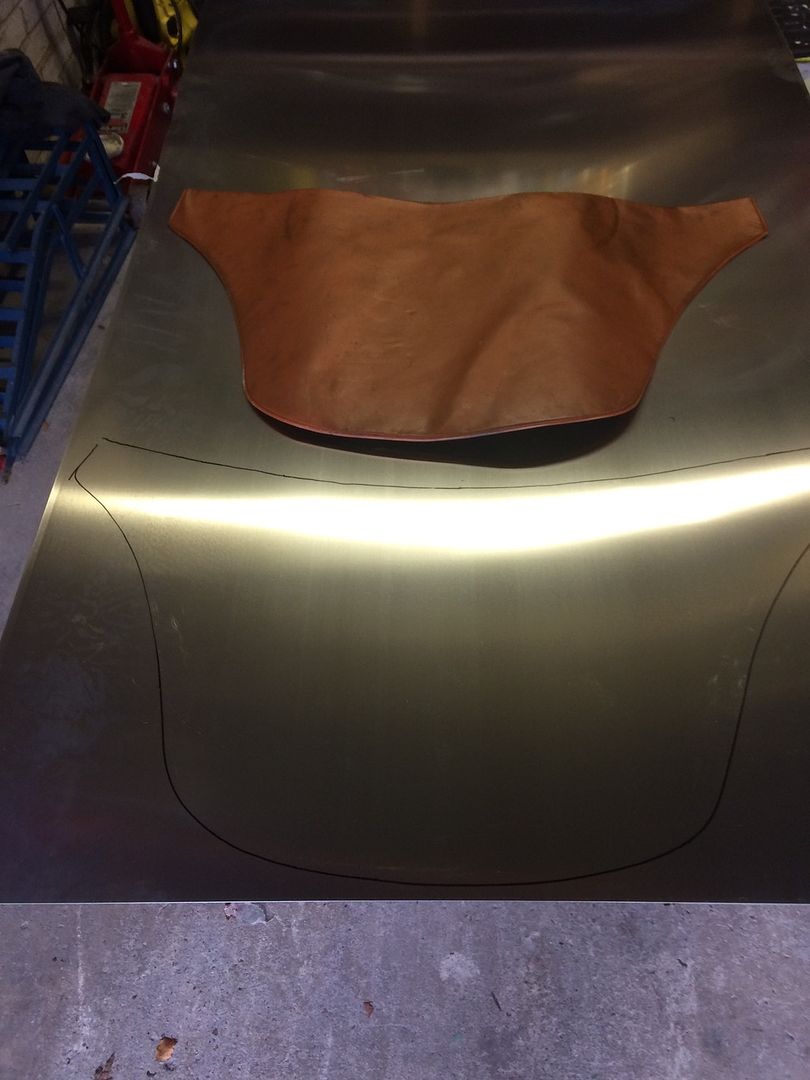 And here is my new favourite toy, a pair of air shears, a revelation after struggling for years with tin snips and jig saws. 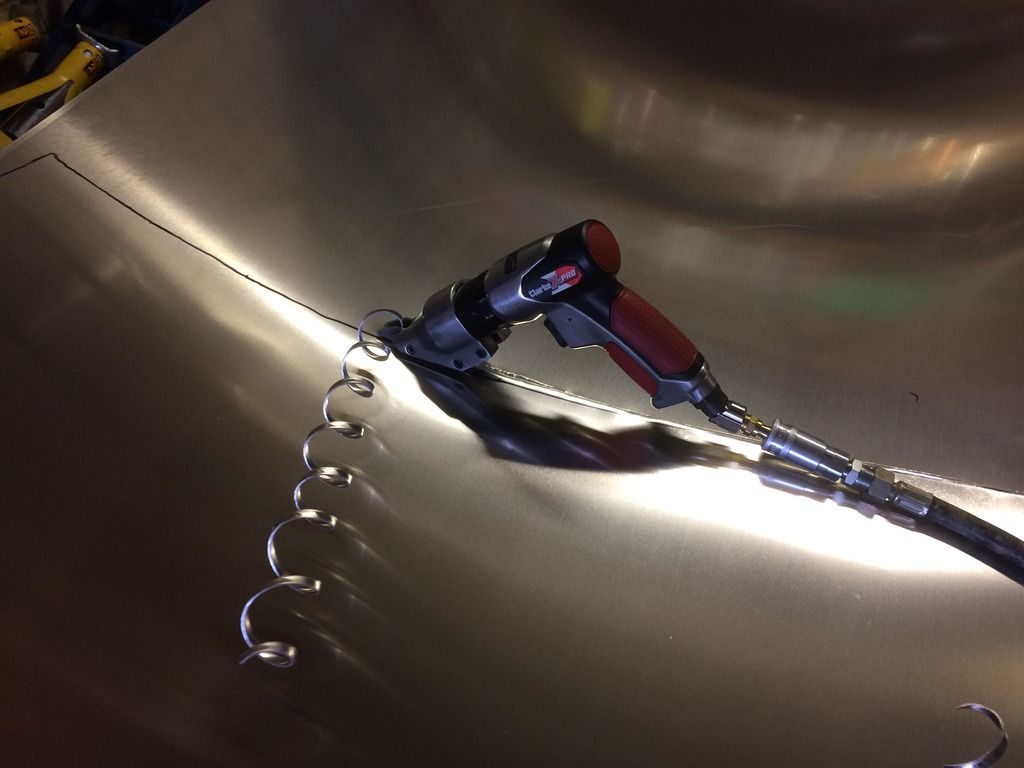 Using the old seat as a guide I was able to for the metal around it 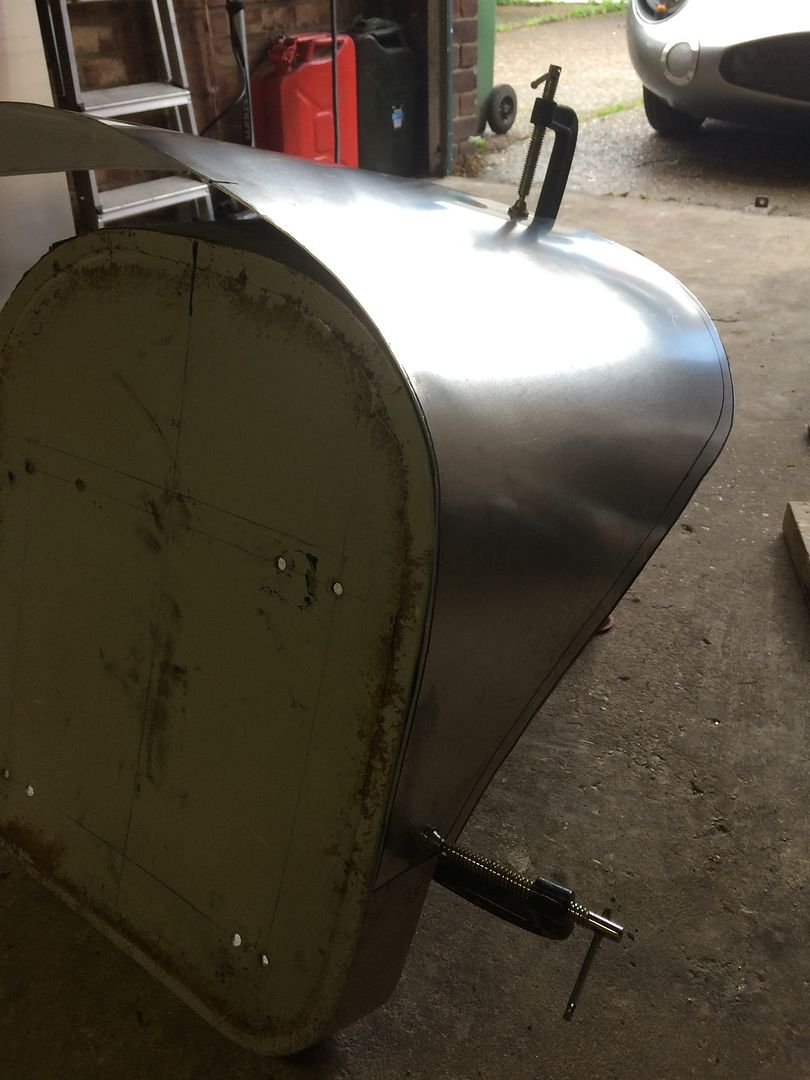 So here they are so far, I will use the bead roller to run a wire edge around the outside and to also run some strengthening beads along the base and seat back, not sure If I will Tig them or rivet yet, I think riveting might be a bit more authentic. 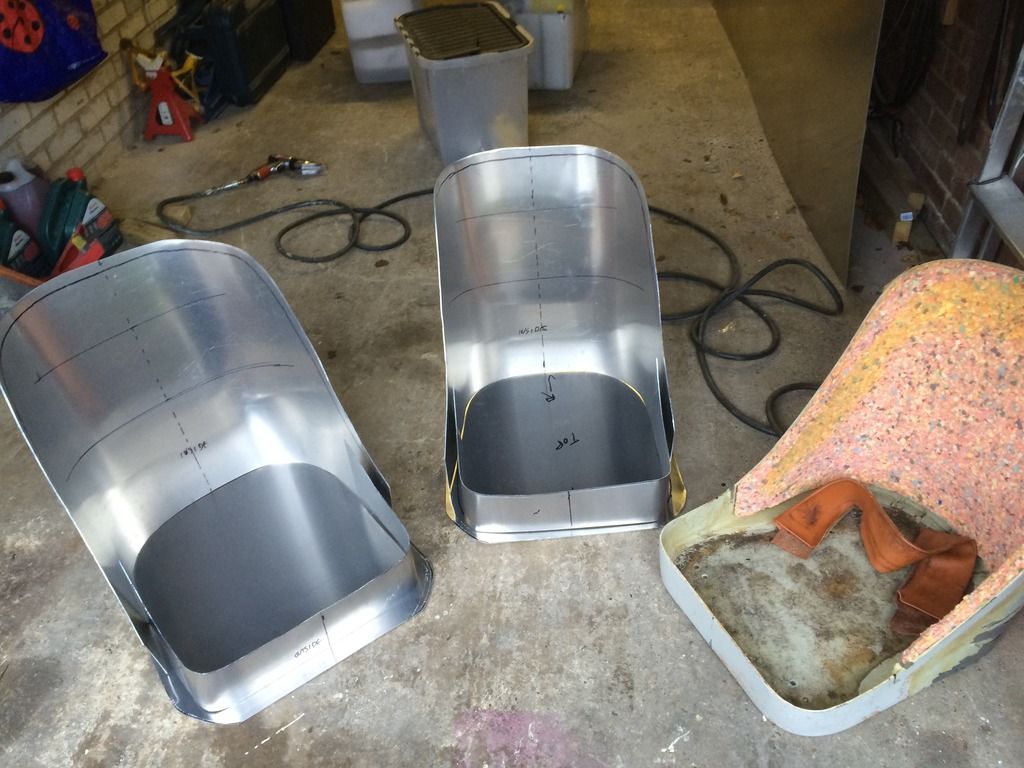 |
|
|
|
Post by marmot0 on Jan 2, 2016 19:35:43 GMT
The front of the car almost back together, I am trying to think of a way to make the headlight surrounds in a similar way to the intake surrounds maybe 3/4 inch wide, problem is I don't have a shrinker / stretcher so not sure how to get the metal to form. Any bright ideas welcome  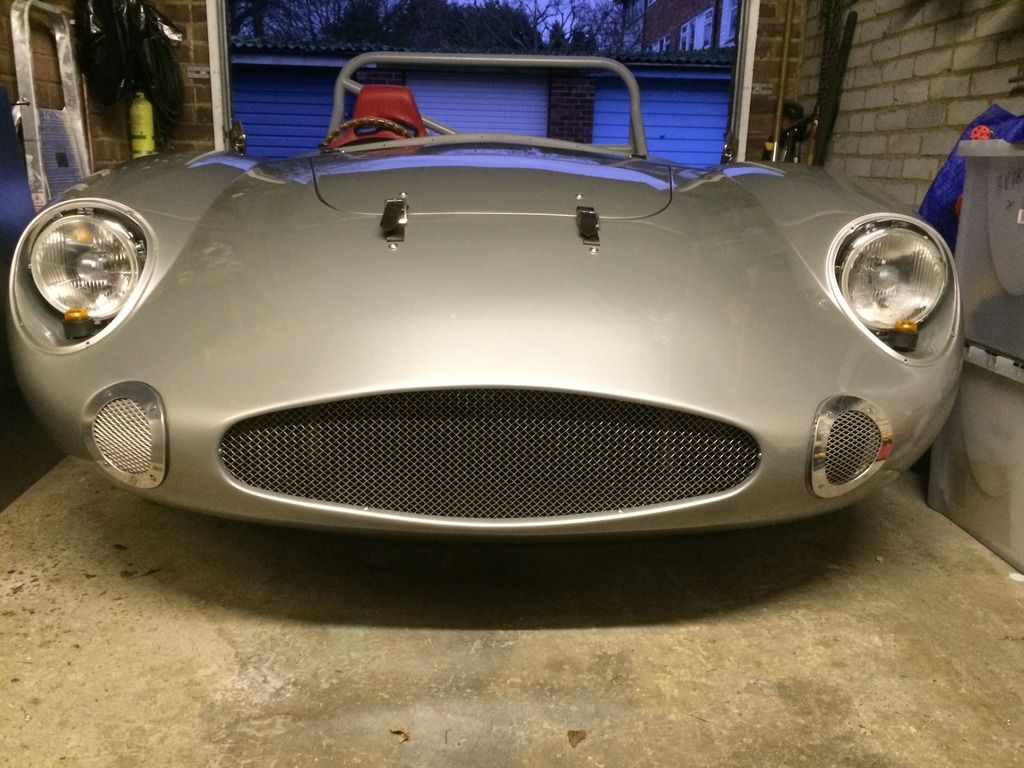 |
|
|
|
Post by marmot0 on Jan 2, 2016 19:41:13 GMT
Car is now taking shape with the red seats gone, they are going spare if anyone needs something for the IVA, they passed no issues with the MX5 runners 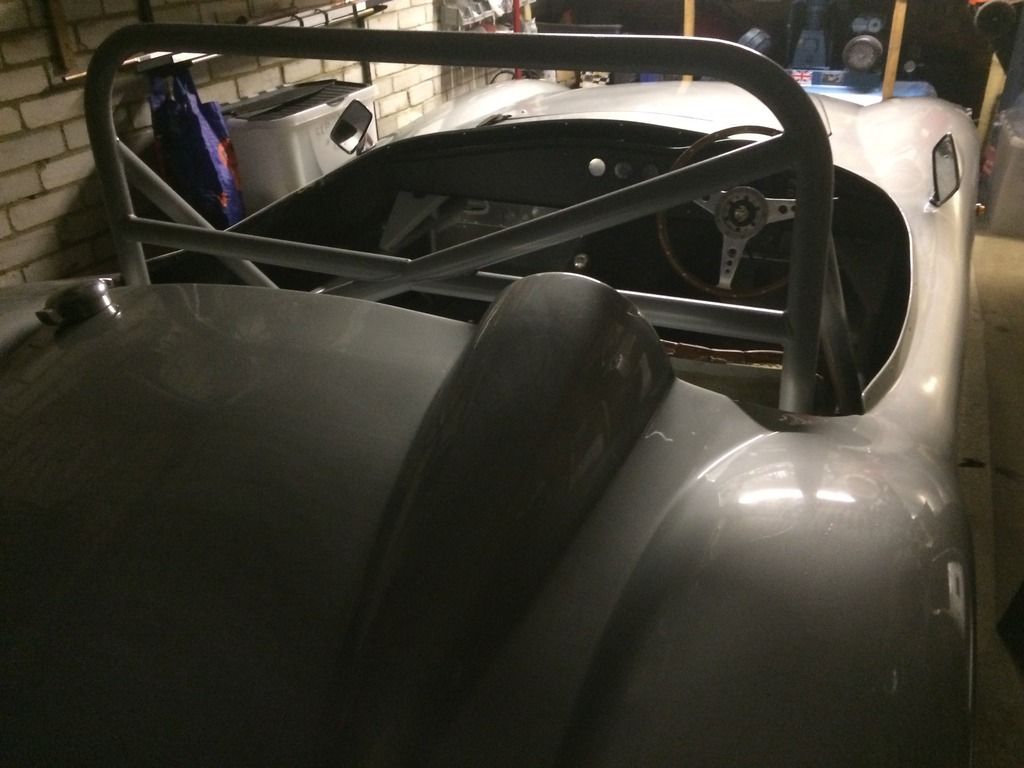 |
|
|
|
Post by R2S on Jan 3, 2016 0:37:29 GMT
The front of the car almost back together, I am trying to think of a way to make the headlight surrounds in a similar way to the intake surrounds maybe 3/4 inch wide, problem is I don't have a shrinker / stretcher so not sure how to get the metal to form. Any bright ideas welcome Wouldn't look as good as the vents but what about plastic chrome edging strip www.woolies-trim.co.uk/p-1579-self-adhesive-chrome-edge.aspxor similar |
|
|
|
Post by gwnwar on Jan 3, 2016 4:38:43 GMT
Was going to say same thing. it come in different sizes flat and 1/2 round. might be able to heat it with a hair dryer
and shape to size. Maybe small chrome round head screws to hold in place.
|
|
|
|
Post by marmot0 on Jan 4, 2016 19:23:49 GMT
Ah I had not seen that before, thanks very much.
|
|
|
|
Post by john on Jan 8, 2016 18:22:44 GMT
Great progress with the seats should look perfect.
|
|
|
|
Post by marmot0 on Jan 22, 2016 12:59:41 GMT
Alloy seats taking shape, I just need to run the final weld bead on the seat base, old covers draped over the top for fit, I have some matador red leather hides to make the new covers with although I do like the tan. 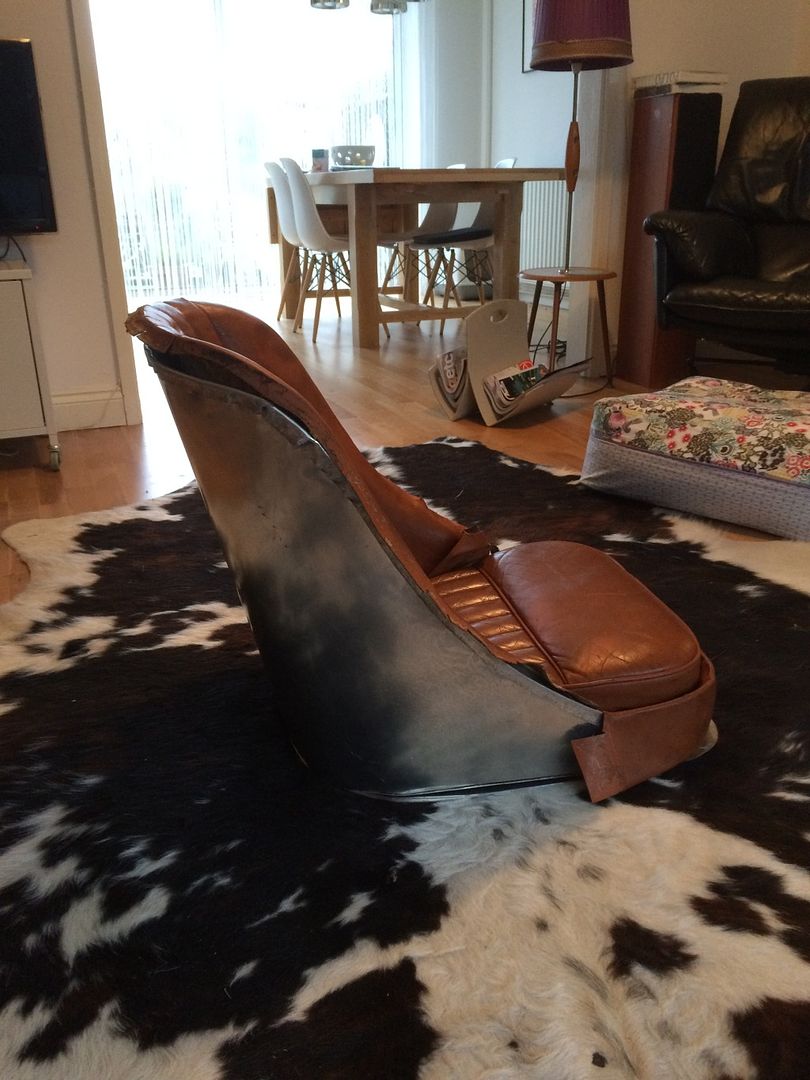 |
|
|
|
Post by R2S on Jan 22, 2016 13:15:25 GMT
Nope got to be red to go with that lovely silver finish on the car.
|
|
|
|
Post by john on Jan 22, 2016 23:52:29 GMT
I think the tan would suit some builds but your car would look better with new leather , will look great.
|
|
|
|
Post by marmot0 on Jan 24, 2016 18:36:03 GMT
I have made a start on paneling out the interior of the car, I will be covering up all the internal GRP with some lockable storage and smooth off the rear of the passenger compartment by curving alloy to match the curve behind the driver, so here is the first panel in place: 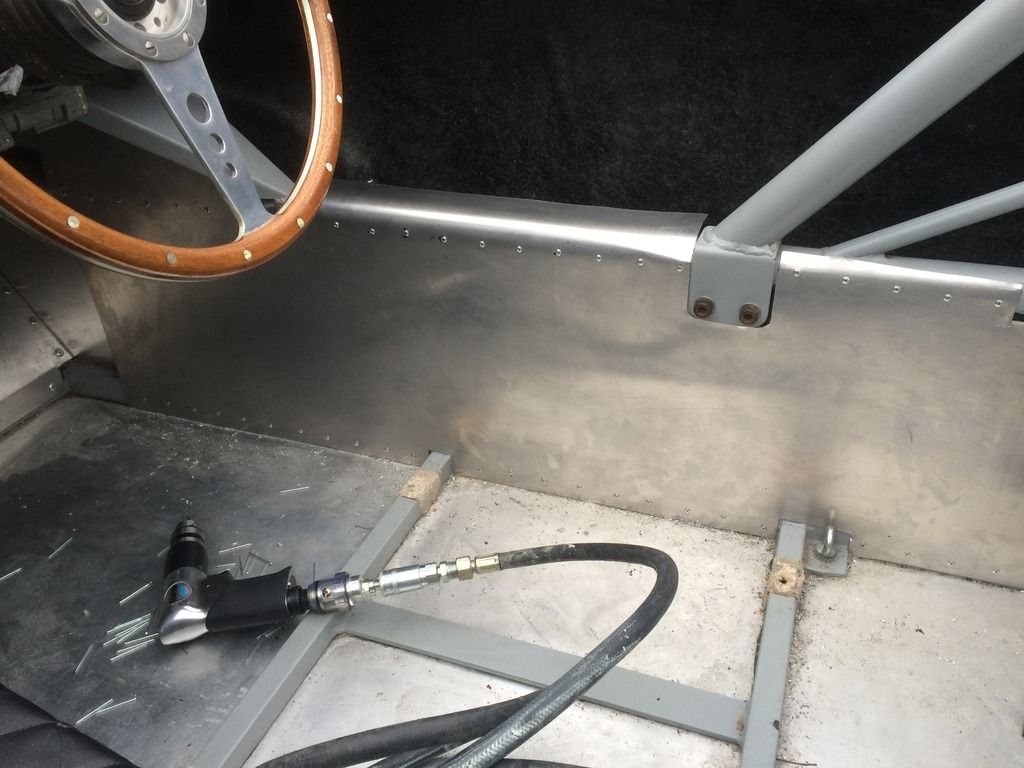 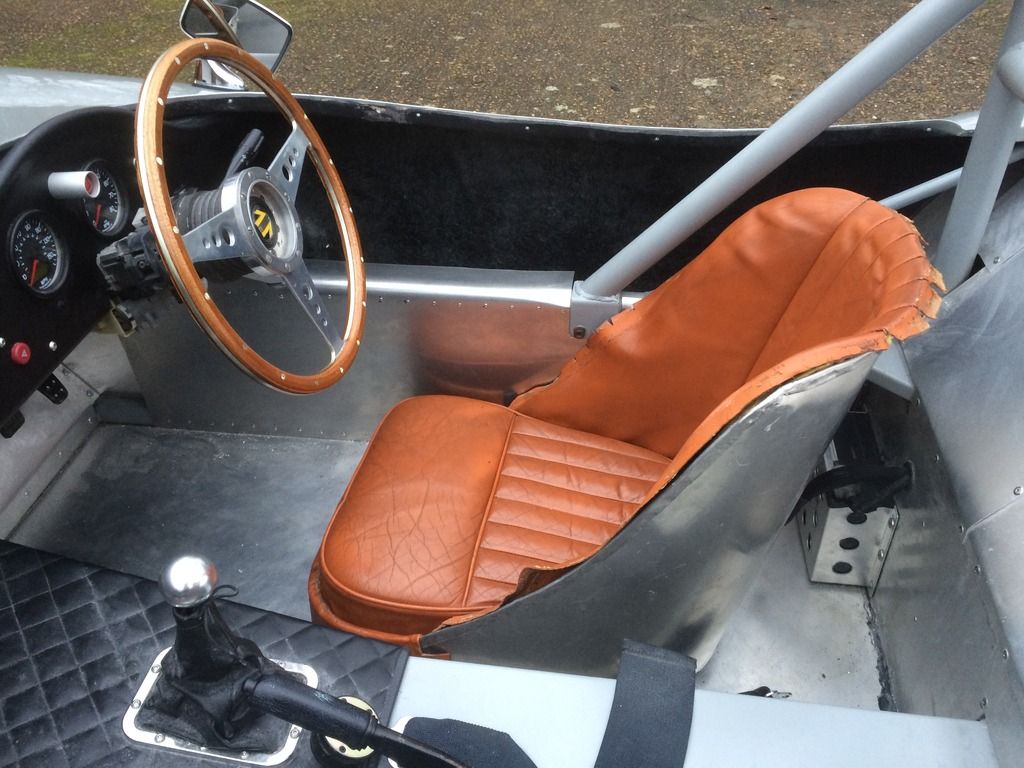 |
|
|
|
Post by marmot0 on Feb 5, 2016 17:16:39 GMT
I have now made a start on the new seat covers, using a blind stitch to create the foam channels 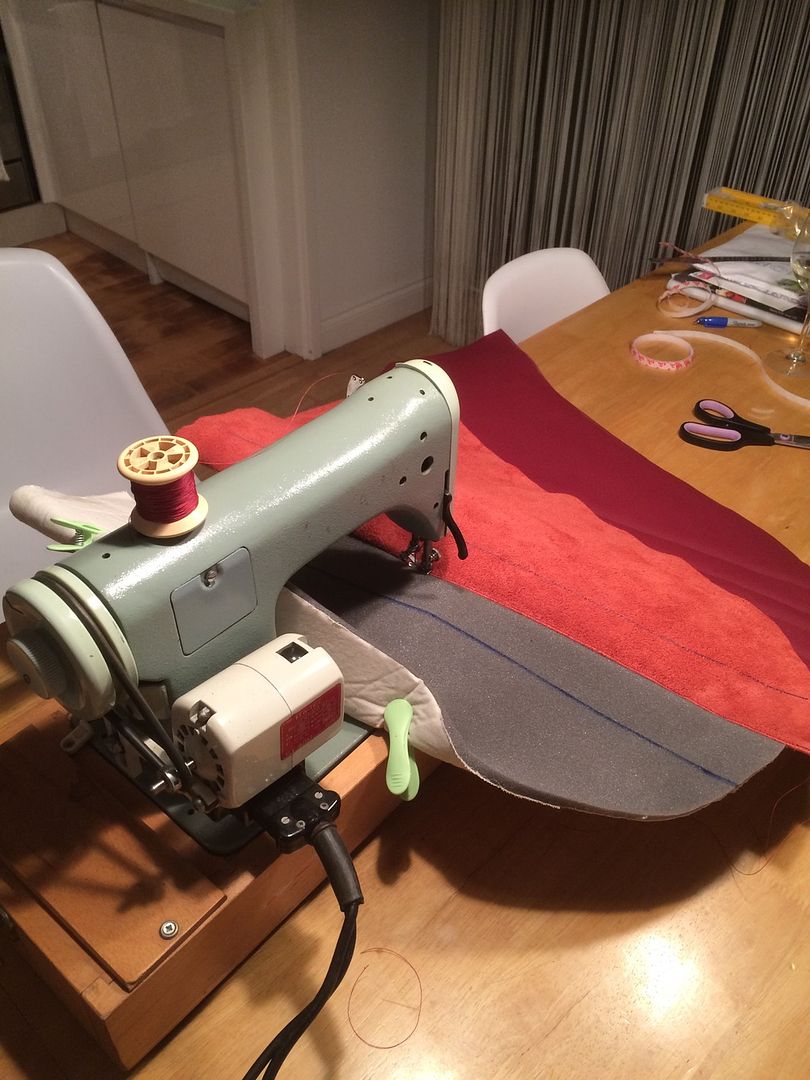 So from the front you end you with this 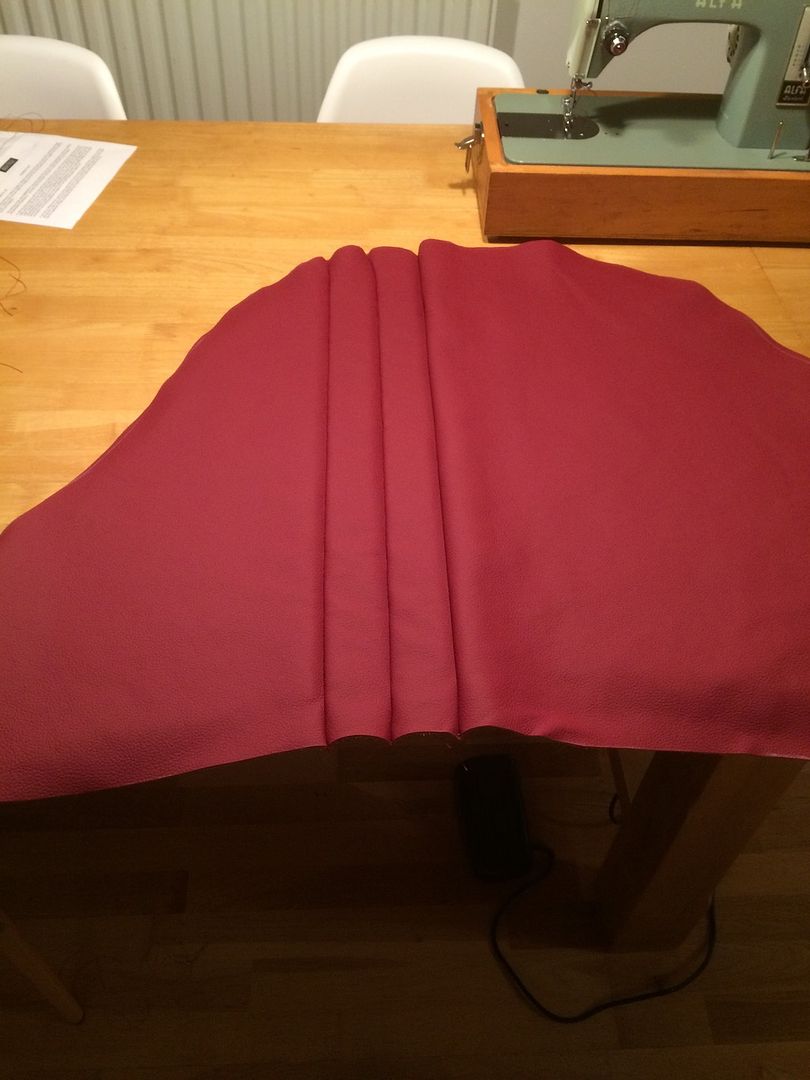 So I now have two backs ready to glue in place, so on with the seat bases although I think my machine will struggle with 4 layers of leather. 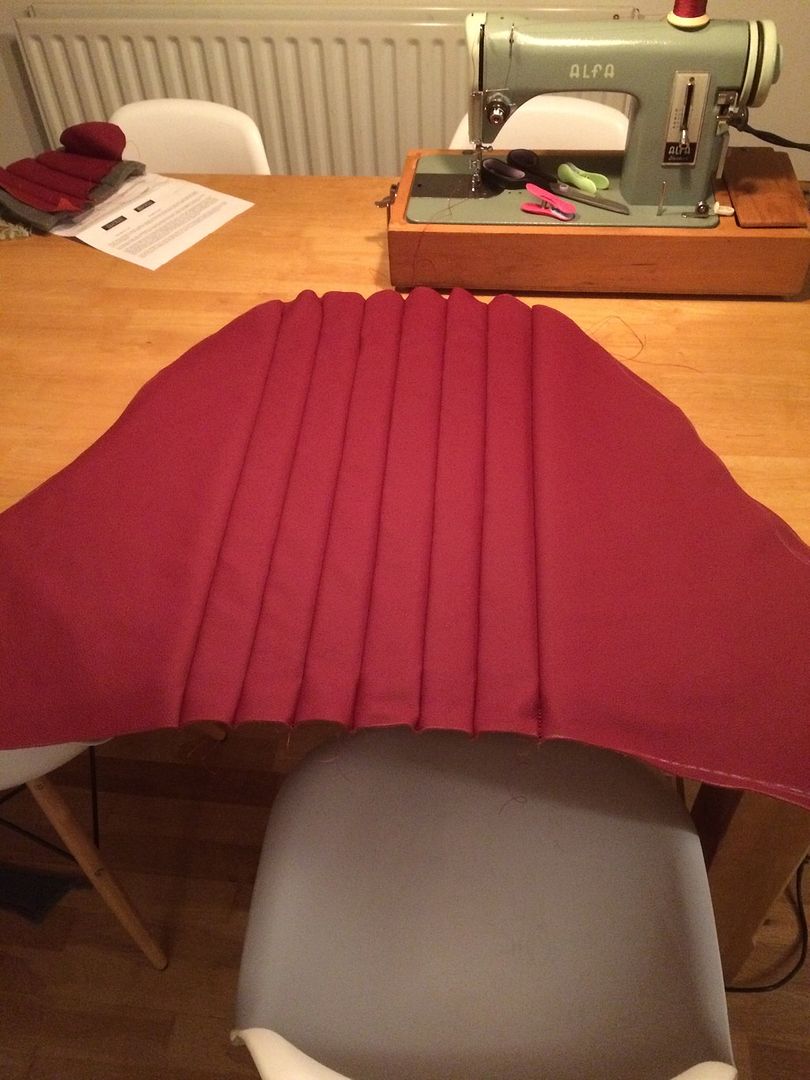 |
|
|
|
Post by marmot0 on Feb 19, 2016 20:46:45 GMT
Well after 6 weeks and 20 needles I have finally finished the seats, one more cow ordered to finish off the rest of the car. I never want to sew through 6 layers of leather again. 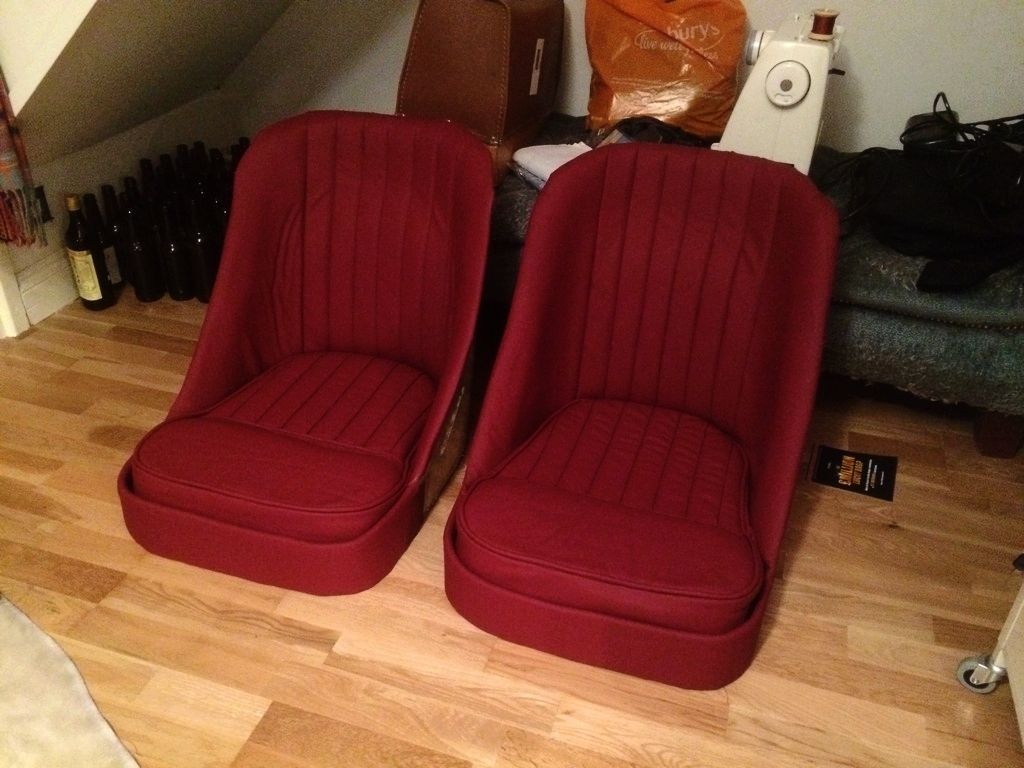 |
|
|
|
Post by gwnwar on Feb 19, 2016 21:10:12 GMT
Nice job it will really set the car apart from others..
|
|
|
|
Post by R2S on Feb 19, 2016 21:12:56 GMT
top job.
|
|


