|
|
Post by R2S on Mar 18, 2014 8:15:30 GMT
gwnar, had a look at the heater, as you say a bit pricey, and you get stung again with taxes when importing from US (been stung three times now you'd think i'd know better). Had a look on UK sites, Europa etc, and there are similar products (there is even an electrically powered one referred to as a back seat heater which does away with need for any plumbing and could be located adjacent to driver on the reoplicar side shelf) available so as you say may be a good idea.
|
|
|
|
Post by gwnwar on Mar 19, 2014 5:17:42 GMT
I would stay away from the electric ones. With one like I wrote (get it in UK)you just mount it to the under dash firewall and run the 2 heater hoses from rear of engine through firewall to unit.There are some you can even add flex hose to duct air closer to you.. I was even playing with using the MX5 blower motor and housing cutting it up some and scabbing the heater core to it and running hoses from it.. For cold weather and running along a cockpit cover would work great..
|
|
|
|
Post by R2S on Mar 25, 2014 9:20:37 GMT
Couldn't wait any longer had to test my paint sample so decided to give the bonnet a quick blast over.  Close up using flash. Contrast to gel coat 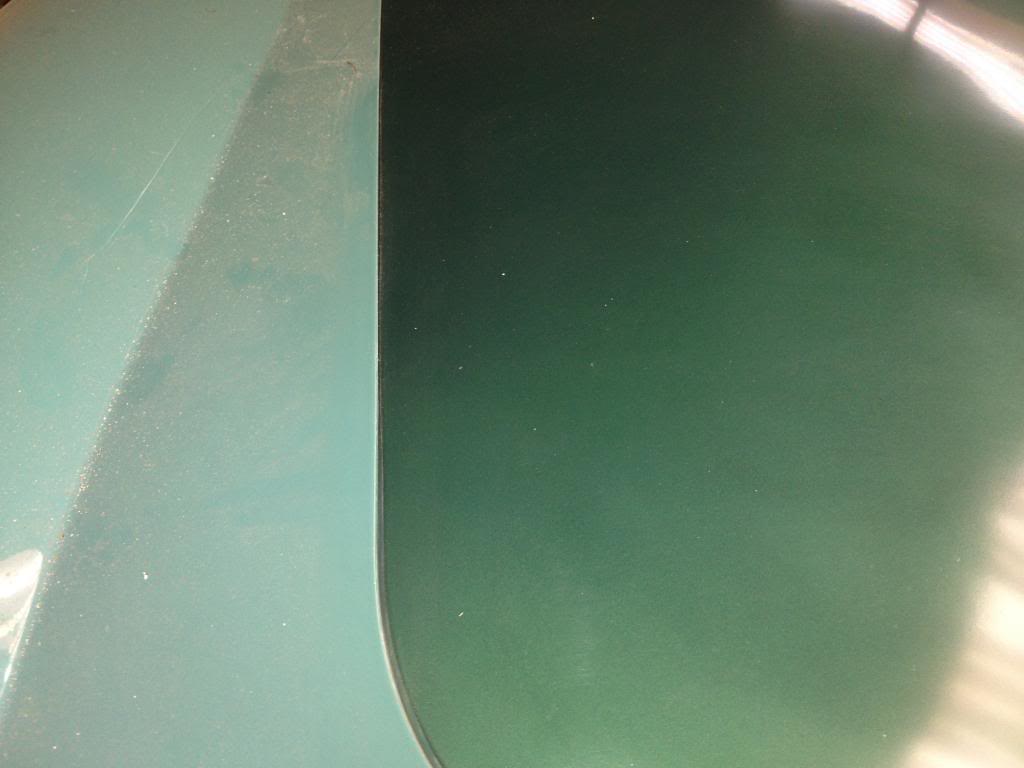 Colour changes dramatically when viewed from varying angles, looks quite dark in picture below which suggests it will be perfect for all the various curves. Anyone wondering whats going on at the front - creating a one off grill and the bead used to establish curve of central 'beam'. |
|
|
|
Post by R2S on Mar 31, 2014 15:05:56 GMT
What a frustrating day, set out early to strip down the running gear, have removed four bolts, destroyed two sockets and used up a gallon of releasing agent.
Decided to separate the rear suspension and subframe so I could invert and strip more easily. The two bolts holding the ladder, that go through the diff front cover, are refusing to budge and I daren't put too much pressure on as I don't want them to break. Now discovering just how neglected the donor was. ANY IDEAS welcome.
|
|
|
|
Post by R2S on Mar 31, 2014 18:34:12 GMT
And this is the first stage of the grill, egg crate section to follow but first trial fit of 'Aston' element. Side view shows why i was using the beading taped to the front. 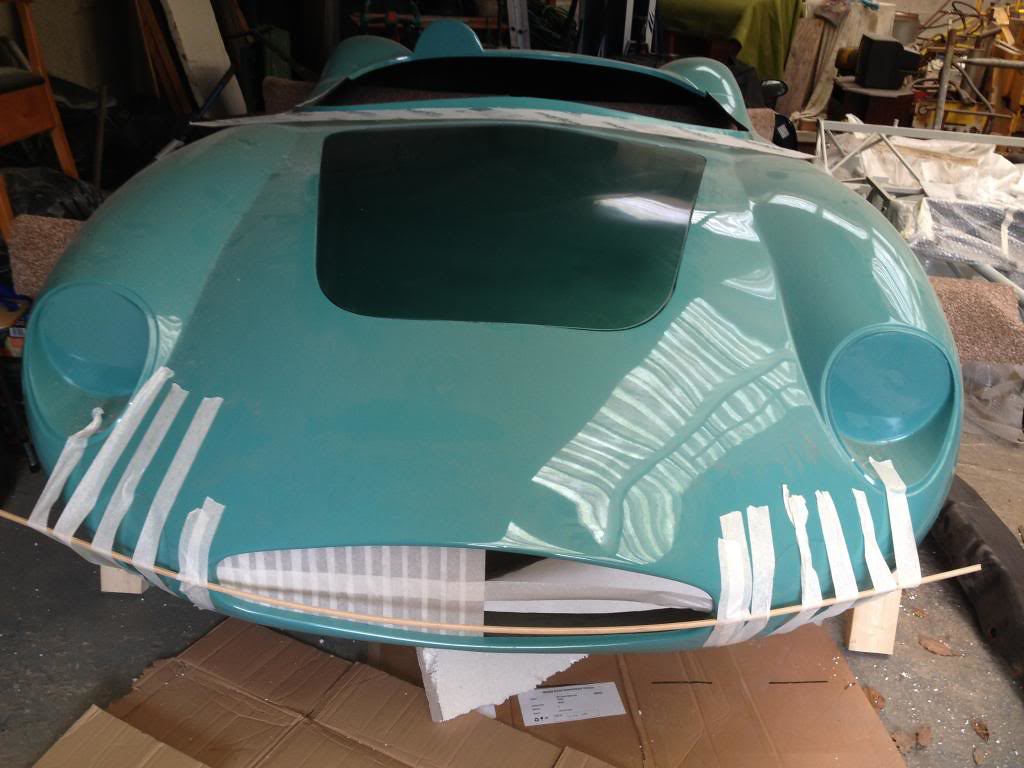 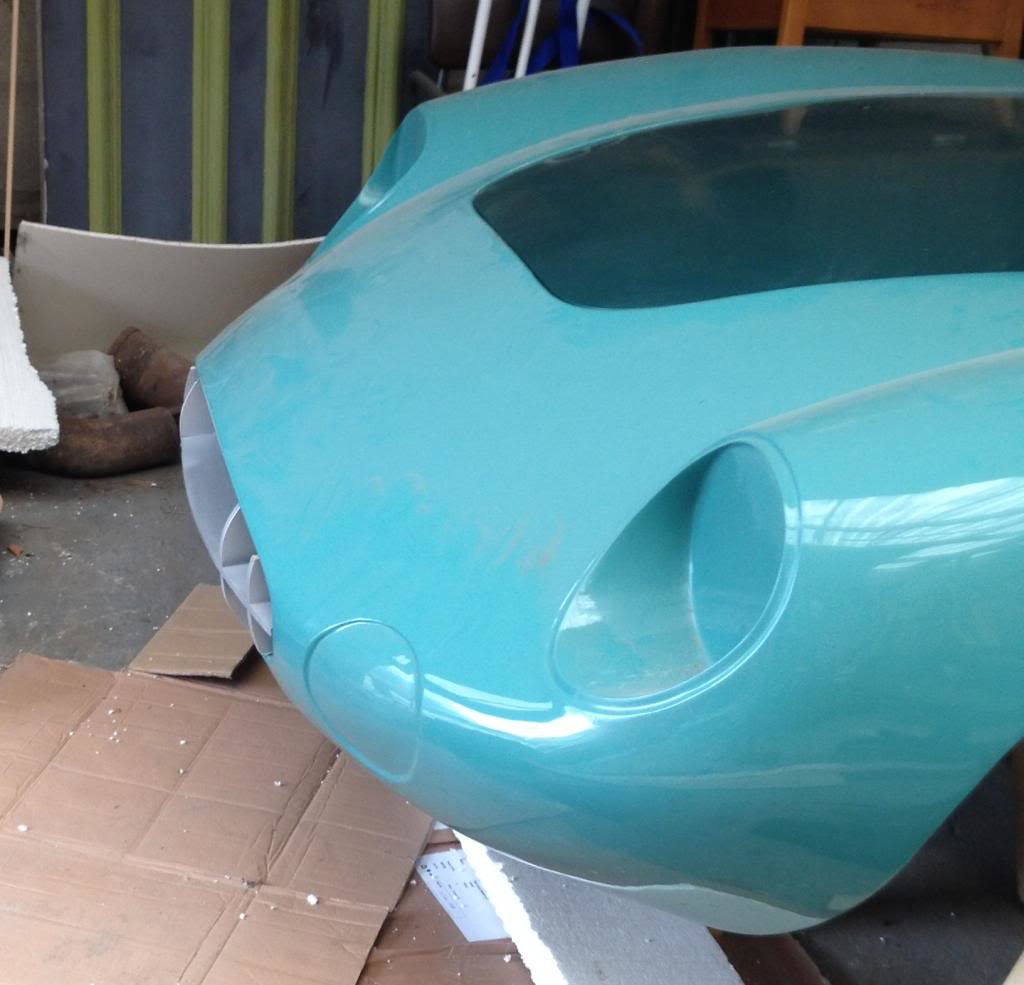 Oh and as for the ladder there is more than one way of skinning a cat.  But i still don't have the rear two bolts out!!!! |
|
|
|
Post by gwnwar on Mar 31, 2014 18:56:51 GMT
R2S.. You got the front bolt out of PPF to diff.. Did you also get the sleeve to drop down from being pushed up to connect the PPF to the diff. Hold the bolt up to the outside of the PPF you will see were it would go into the sleeve and push it up.. Here is what I wrote before..
There is a sleeve inside the front bolt hole in the block.. with front bolt out get and turn a M14x1.5 bolt (long) into the sleeve from the bottom.(there are threads in the sleeve) Twist and pull the sleeve down (hammer and punch sometimes needed from top through hole in top of PPF to new bolt threaded into sleeve). after it is down and free install a bolt M6x1 into the hole in the side of the block/spacer to hold the sleeve in place so you can remove/turn out the long bolt M14x1.5.. After long bolt removed remove the small bolt you put in block to hold sleeve.. When you reinstall the front bolt it will push the sleeve back up in the block and center it..
DO NOT remove the block/spacer or the top round nuts.. You might want to spray a good penatrating oil up the bolt hole and let it sit while.. Front and rear PPF bolts torque to 77>91 ft lbs. Hope this helps..
Only use 6 point sockets and long pipe on the breaker bar.. Sometimes heat helps..
|
|
|
|
Post by R2S on Apr 1, 2014 7:30:20 GMT
gwnwar, thanks for the tip, haven't got either of the bolts connecting the PPF to the diff out but having read your thread i found a piece on youtube explaining the method you suggest (albeit the bolts in the video appear to have undone themselves).
Going to have another go on Friday. What i did manage to do yesterday was start cleaning up the rear frame using one of my latest toys, a needle gun, which as i am using a hammered finished paint for the frame should be an ideal base.
On a slightly different subject it looks like all the bushes are are shot, a supplier has told me the kit he supplies to fit the Mk1 will fit my MK2 but everywhere else they are listed as two different kits, do you know if the bushes are the same? (My donor is a very early, 98, Mk2).
|
|
|
|
Post by gwnwar on Apr 1, 2014 14:16:25 GMT
Yes they are the same..1990-2005..sway bar bushing are different..Sway end link on 98-05 not rebuildable.
|
|
|
|
Post by R2S on Apr 4, 2014 20:08:32 GMT
ok here is Fridays update:- PPF bolts won't move and even with a six point socket (17mm) i've managed to round the head of one bolt! 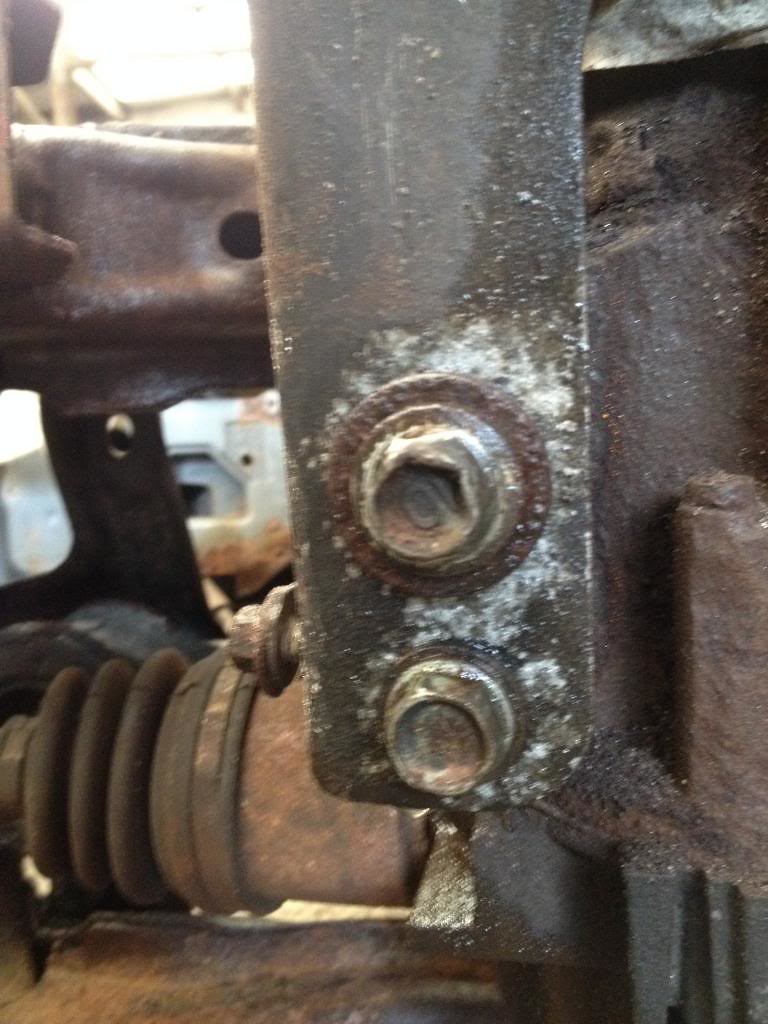 Monkey wrench and some heat tomorrow i think Bolt came out of bottom shock no problem so i moved on to outer lower arm bolt and nut, again no problem with nut but bolt is well and truly seized. Plenty of rust eze, WD 40 and Freeze Your Nutz Off but nothing, a little (a lot actually) of lump hammer application and I'm sure i saw a little movement so back on with socket and breaker bar. Result it moved but it wasn't the bolt the socket had exploded! Some more lump hammer and another socket later and i did get a little movement so loads of releasing agent and plan to have another go again with some heat tomorrow. Also marked up all four inner bolt locations to give me an initial set up on reassembly 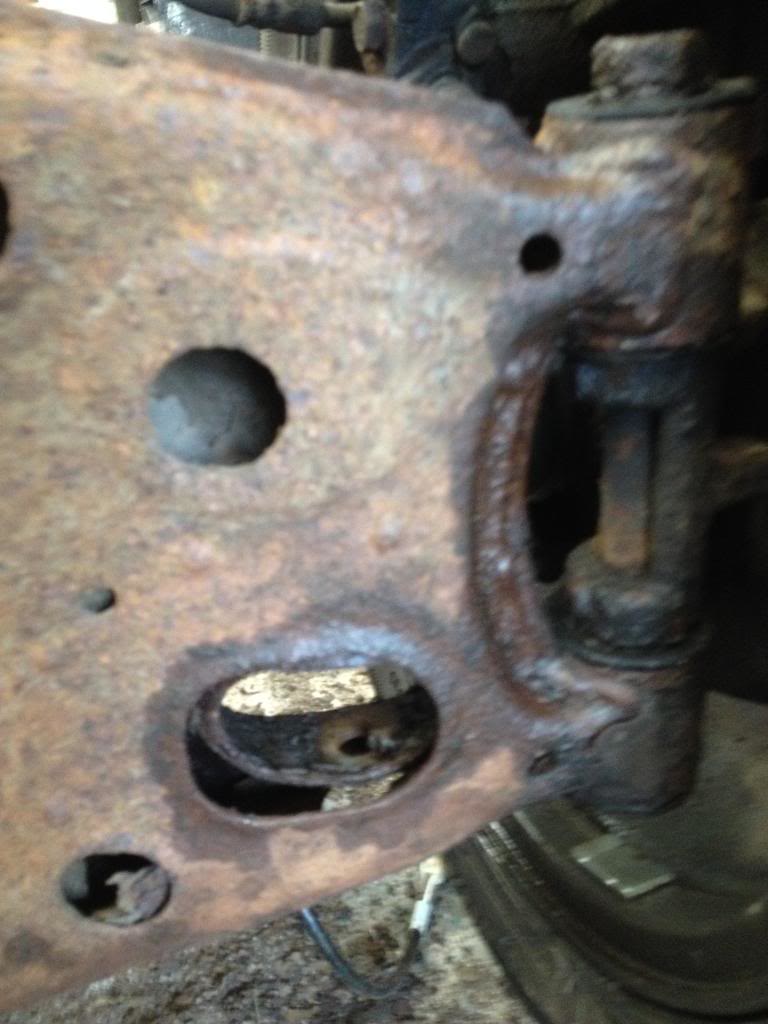 Continuing the theme of two steps forward and one step back I started to strip other pieces and went to remove the O/S calliper first bolt came free with small wrench other bolt won't move! I now recall why i stopped working on cars some 30 years ago! |
|
|
|
Post by gwnwar on Apr 5, 2014 6:34:35 GMT
On those lower outer bolts why not cut the bolts on both sides of the bushings.. That leaves just the small part of the
upright to get pieces out of.. Then burn out the bushings on the control arms an replace lower bolt and nut with a nice new one.. On the PPF/Diff are you using a 6 point socket.. lots of juice on the sleeve and down through the upper nut
plate.. Are the inner adjustment bolts turning a little.. I would replace them with new one too,,
|
|
|
|
Post by R2S on Apr 5, 2014 8:56:14 GMT
gwnwar, I'm sure i'll have the lower bolts out today, one way or another, as for the PPF bolts yes only using six sided sockets, and i couldn't get any more releasing agent on if i sat it in a bath of the stuff (never seen bolts this seized even thinking back to my old days of Lotus ownership) part of me is thinking i might just leave the ppf connected to the diff and take diff front cover off in order to clean both ppt and diff up for painting.
Adjustment bolts i plan to replace all four but have read some reviews re oem replacements not fitting in MK2 frames!
|
|
|
|
Post by spudman on Apr 5, 2014 16:11:48 GMT
On those lower outer bolts why not cut the bolts on both sides of the bushings.. That leaves just the small part of the upright to get pieces out of.. Then burn out the bushings on the control arms an replace lower bolt and nut with a nice new one.. On the PPF/Diff are you using a 6 point socket.. lots of juice on the sleeve and down through the upper nut plate.. Are the inner adjustment bolts turning a little.. I would replace them with new one too,, To get the old bushings out of my control arms I used a cheap B&Q hole cutter, which had appropriate sized cutters for both bushing sizes. Hole cutter is no good for anything else now, but it was only a pound or two and was an easy way to get them out without stressing the arms. Did all the bushings on the car in one afternoon, just look out for bits of molten rubber splattering about if you try this. I have a spare lower control arm bolt (the long one) for a mk1, yours if you want it... |
|
|
|
Post by russ69 on Apr 5, 2014 19:47:43 GMT
Had the same problem when I stripped front and rear sub frame on xj6 only way I could remove wish bones was with a gas axe but it set fireto the bushes .i am also looking at buying the replicar can you tell me has it got inner wheel arches ,going to kit car show in couple of wk to have a look at kit and pos go to mev unit to look any advice would be greatfuly received ps love the colour
|
|
|
|
Post by R2S on Apr 6, 2014 9:38:58 GMT
Spudman - My donor is Mk2, still struggling to get the lower bolt out of the near side, got the other out yesterday, and looking to replace both with new, assuming i stock with my Mk2 rear end (found problems with a number of components.
Russ 69 - Replicar doesn't have wheel arch liners as part of the kit but nothing stopping the builder adding these, one of the kits that was taken to South Africa from uk has plastic liners which are fixed to the edge of the wheel arch much like production cars. My own plan, and its only a plan at this stage as completion looks to be moving even further away, is to go down the route of alloy much like those under flip up bonnets on frog eye sprites. As for the kit itself the more i work on the donor i realise how simple the kit ought to be (donor selection is important) MEV have a strong track record of good quality kits and this forum is an excellent source of info, and support (thanks guys). As more info gets uploaded from those of us building the replicar life should be simpler for those who follow. I tend to use the experience of the other MX5 donor forum (Exocet) and have picked up some great tips.
What have a learnt from my personal experience? don't buy a donor thats stood for any time low mileage is not necessarily a good thing, a high mileage car with good history and an owner who is enthusiastic driver is more likely a better bet. Oh and be prepared for the wiring and sensors, i didn't realise how much there was on such a little car. If you are based reasonably close and you go for a kit i'd be more than happy to give you first hand benefit of my experience providing you supply the beer.
|
|
|
|
Post by russ69 on Apr 6, 2014 11:27:51 GMT
Thanks for the info like the alloy arch,s food for thought .russ
|
|


