|
|
Post by p5curly on Feb 20, 2014 22:32:57 GMT
Are you using harnesses with them if so I am curious to see how you bolt the belts in .the seat does look cool with the orange
|
|
|
|
Post by mrjingles705 on Feb 21, 2014 9:49:19 GMT
Yep, the plan is for harnesses; although I want to use it for a daily driver and inertia reels would be more convenient for this I can harness up almost as quickly and it will support you much better should the worse ever happen (I've tested this myself in a Formula Ford on several occasions!).
I'm going to wrap the shoulder belts over the bar (height should be fine for IVA if I've done my numbers right). There are plates welded into the chassis already which I can use for the waist belts.
|
|
|
|
Post by biggunz on Feb 21, 2014 9:58:47 GMT
Is it IVA ok to wrap the harnesses? If it is that'll make life much easier!
|
|
|
|
Post by mrjingles705 on Feb 21, 2014 10:34:36 GMT
Wrapping is fine, providing it is done correctly (correct feeding of the belt, location etc); just make sure your harness is designed to be wrappped (sounds obvious, but I've seen people cut stitched-on buckles off of harnesses before, destroying a perfectly good harness in the process!).
|
|
|
|
Post by mrjingles705 on Feb 21, 2014 11:48:46 GMT
21/02/2014 - MeasurementsA few guys have asked me about the measurements I did for the seats - so here goes: 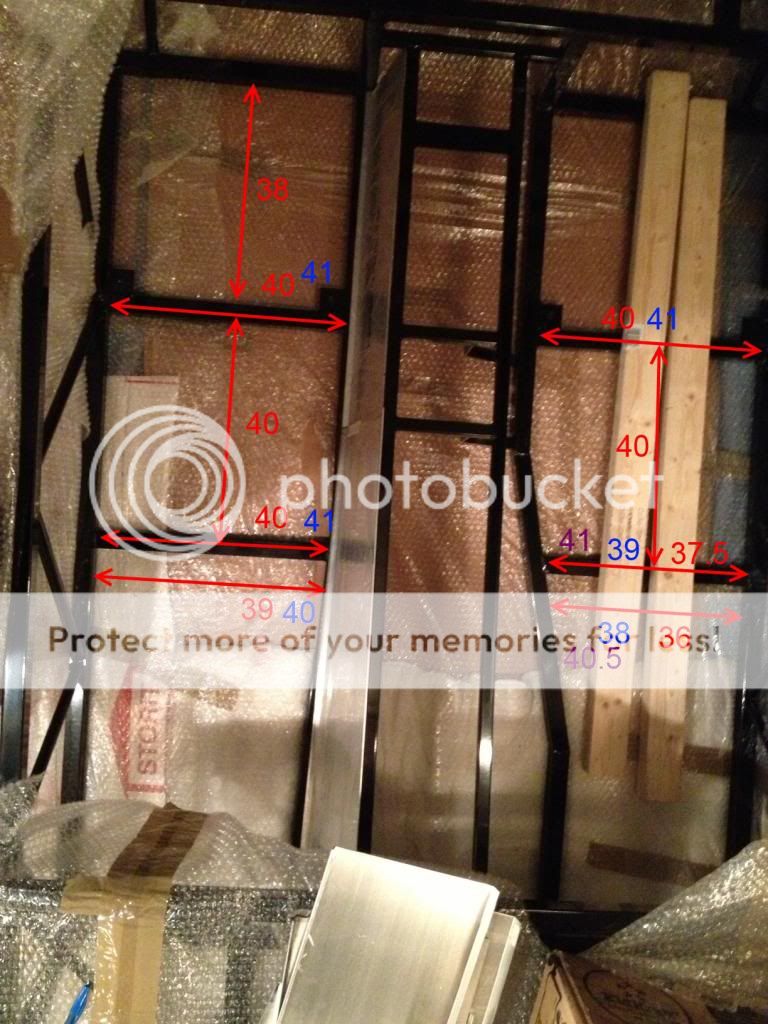  All the measurements in red were taken at/from the top of the lower chassis tubes (base level). The two cross rails are the 'inside' measurement (inside edges) the front-to-back measurements were centre to centre. The measurement towards the rear bulkhead was to figure out seat travel, hence why it comes up a little short. Blue numbers are 4cm above tube height (where I orginally guessed the seats would sit on runners + spaced off to clear adjuster mechanism). The Purple numbers (on the passenger side only) are at 6cm up (to try and figure it out at the widest point on the seat that would clash, the 'flare' around your thighs). The seats I went for in the end are JK's N4042 - this size is not on their web site but but it's basically the N3942 +1cm wider at the front and at the hips. So 40cm front width, 39cm hips. See: www.jkcomposites.com/7s-page.htmlThe JK guys have put in captive nuts to suit OMP runners for me - OMPHC665 to be precise (you can get these from various places, including demontweaks). P.S The lines in front of the front seat rails are approx 5cm towards the front bulkhead. Thought they would be useful as a reference for any seat overhang/forward adjustment, but not so much in hindsight. P.P.S. Please ignore the placement of the alloy sheets.... they were only put in to give me a very rough idea of clearances.
|
|
|
|
Post by mrjingles705 on Feb 21, 2014 13:13:49 GMT
ONE IMPORTANT NOTE ON THE OMP RUNNERS - THEY ARE SHORTER THAN THE MX-5 RUNNERS!Just in case anyone is going down the same route (and because the measurements aren't easy to check online) - please note that the OMP runners are shorter than the MX-5 ones and won't span the full gap: 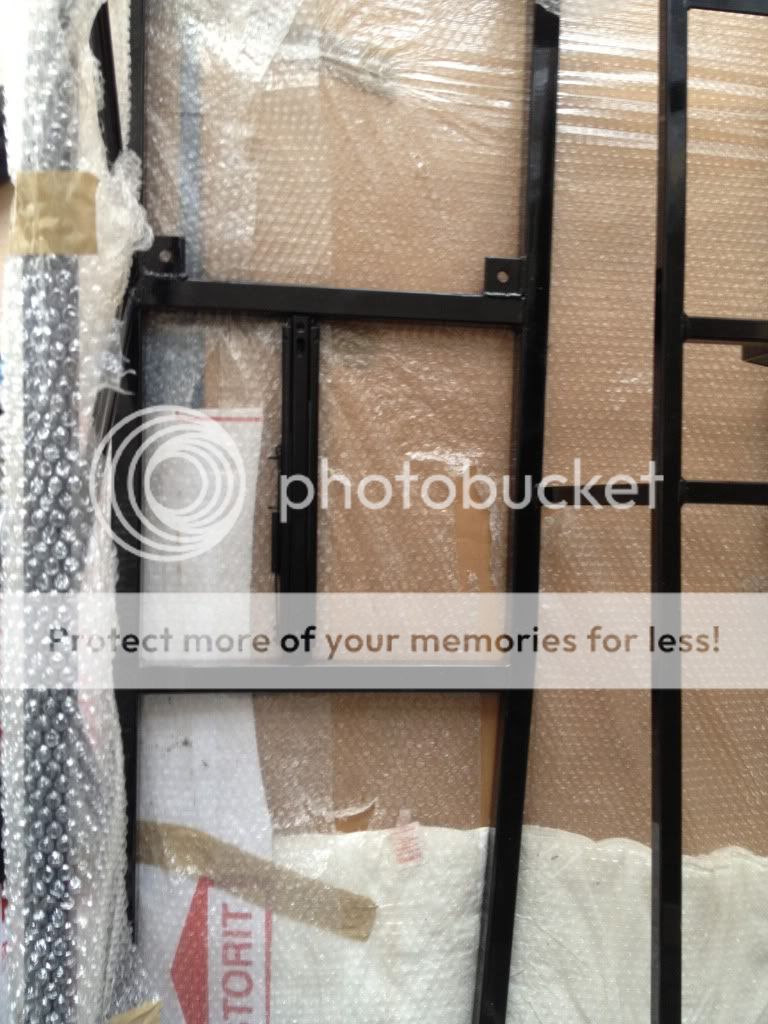 Not a problem for me as I'm going to be sticking these on top of bars spanning the gap, but I wanted to make it clear in case anyone decides to go down the same road that you'll need to come up with a solution for this. The alternative being re-drilling the MX-5 runners/asking JK to match the MX-5 pattern when ordering your seats.
|
|
|
|
Post by p5curly on Mar 13, 2014 16:39:12 GMT
How's your build going
|
|
|
|
Post by mrjingles705 on Mar 15, 2014 12:23:38 GMT
Badly  I've been working away during the week since the last week of Feb, so I've not had any time to move it forward. Really frustrating, but the money is good and will help with build costs so couldn't afford to turn the gig down. (also need to do some work on my road car - exhaust, full service, heat shield coming off etc) which I'm doing this weekend... time I'd normally have spent on the kit) |
|
|
|
Post by p5curly on Mar 15, 2014 19:01:11 GMT
I know the feeling mate my work car needs fixing but I keep putting it off
|
|
|
|
Post by mrjingles705 on Apr 27, 2014 23:35:11 GMT
27/04/2014 - Overdue an update....In case anyone is wondering why I've not been updating/making progress, here's a summary of my last month: 1) Vicki's nan was hospitalised (plenty of runs from Reading to Kent and back) 2) Then the battery failed on the ST170;replaced. 3) And the heatshield underneath rotted through; removed, shielded the tank, wiring etc with Zircoflex. 4) And then, just to add insult to injury, power steering failed (union on the piperwork). 5) AND THEN I had a (very minor) accident in the ST170 when I was breaktested by an idiot in traffic (minor scuff to bumper, broken headlight). At this point I thought the car was cursed, but no, more to come. 6) The day after the tensioner failed, taking out the belt and everything running on it. Including the cooling, on a stretch of dual carriageway where there was no way of getting over (no verge) for 1/2 mile. Result? Cooked head. 7) I bought a make do Ford Focus 1.6 (shed) whilst I weighed up what to do with the ST170. 8) That needed some odd jobs doing, which took more time. But I finally had a little run around that would tide me by. 9) But a week later, someone wrote that off (smashed into the left hand side,non-fault). 10) Now running a Ford Cougar - it too has a few niggles (like leaks through the pollen filter and passenger window) but I'm sorting these as I go. Still need to address a small tracking deviation, the known issues of the aircon drain and Wide-open-throttle 3rd set of injectors failing due to the box getting fired on the exhaust etc but getting there. Leaks fixed, battery fiexed, rust dealt with, electrics sorted, so progress. 11) Also - redoing house wiring, working til 11pm every weekday, fixing wifes Volvo XC90 etc etc... I've worked on 4 cars this month and not one was the kit car  Hopefully next month will see a return to working on the kit, but I fear my original plan (to have a rolling chassis with the major bits bolted on) by 4th June is rapidly becoming unobtainable.....
|
|
|
|
Post by mrjingles705 on Jun 4, 2014 12:27:54 GMT
04/06/2014 - Well, that was a bust OK, another quick check in - progress is barely measurable; it's still a pile of bits. Whenever I seem to get a window to do some work on it something goes wrong (case in point - Cougar alternator failed.... pig of a job to get that off). Birthdays, working away, no money, yadda yadda yadda. Thoroughly monked off TBH. I had planned to have it in rolling chassis by today, my 34th Birthday, but alas, missed that target. I think I'm going to need to get creative to get this finished - maybe start doing a half day Friday. Any and all suggestions welcome on this front.
|
|
|
|
Post by gwnwar on Jun 4, 2014 16:54:45 GMT
Happy Birthday.. Start back doing little thing that don't take alot of time.. they add up.. make a list (short one to start with) check them off..
|
|
|
|
Post by mrjingles705 on Jun 9, 2014 1:47:52 GMT
07 & 08/06/2014 - a little progress does a man goodReally productive weekend; I was given a garage-pass by the other half so I could spend some real time on the kit, and I learned a few things along the way. Headline items: * Ordered a bunch of servicing bits (cambelt, water pump, oil filter etc, gaskets), a new cas o ring that I think will sort the leak and a new clutch (current one showing signs of heavy wear on the fingers) * stripped the engine (almost) enough to do the clean & paint.... just need to get flywheel and front pulleys/covers off * Tried (and failed) to get the hubs out of the driveshafts using a puller.... gave in and arranged for a local garage to do them for me for a few beers next week * Did manage to get the diff bushes out mind * Prepped and painted a few bits * Realised I suck at prep & paintwork My Dad's a roofer - this giant steel tray goes under his pot, but I borrowed it to keep the gunk going all over the patio (couldn't do this on the driveway as gunk eats tarmac, even a tarp is no gaurentee apparently). NOTE: I covered the electricals, gearstick & seal, speedo output etc before cleaning/ 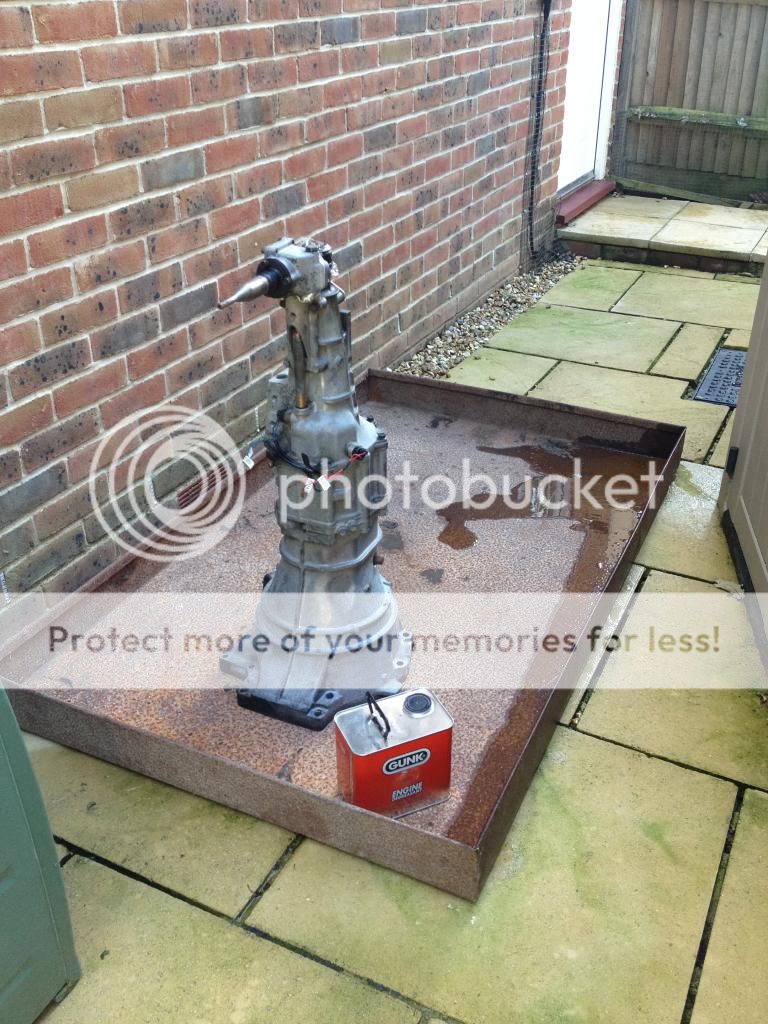 The inside of the gearbox was covered in a combo of Oil (from the CAS leak) and clutch dust.... it cleaned up pretty well. 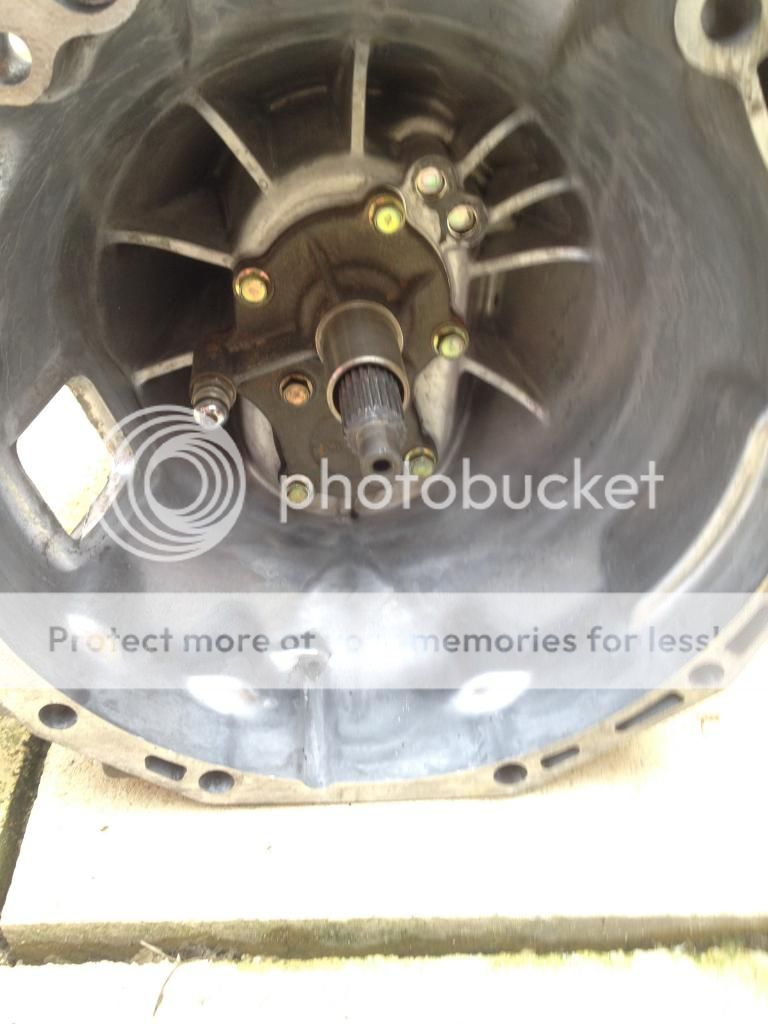 Extracted the diff bushes; the trick (as others have said) is to cut out the middle and then bend one of the two halves of the metail outer sections inward. Without the pressure from pushing against each other they can be knthingyed out relatively easily. 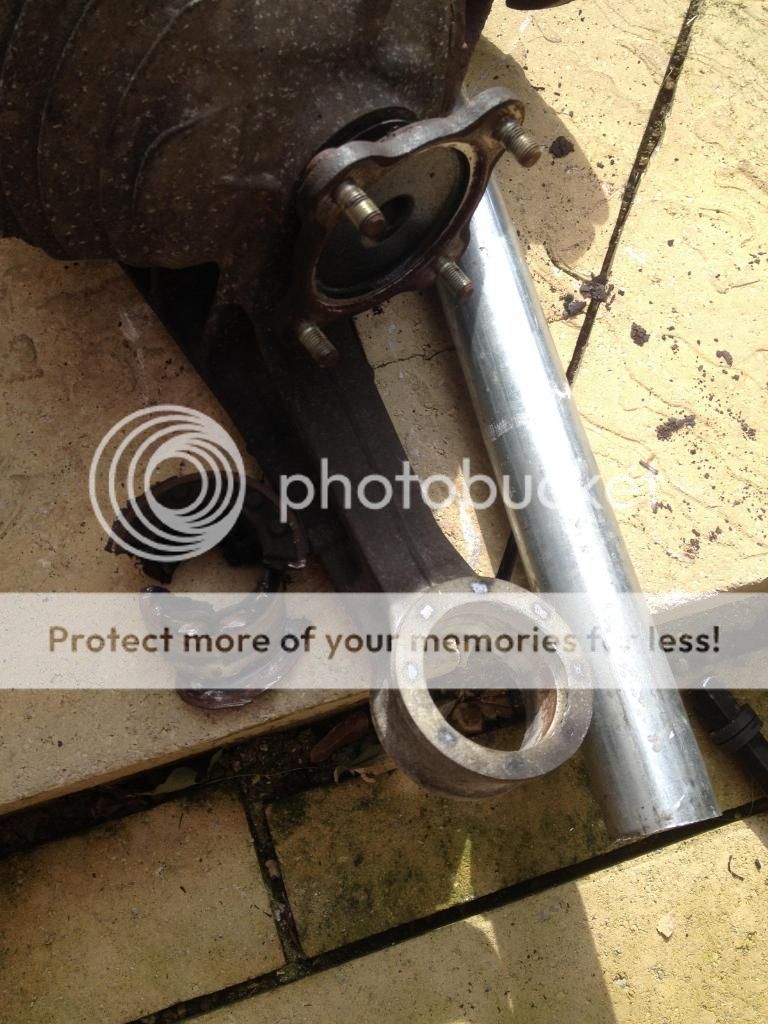 And how I left the engine this afternoon before cracking on with a BBQ 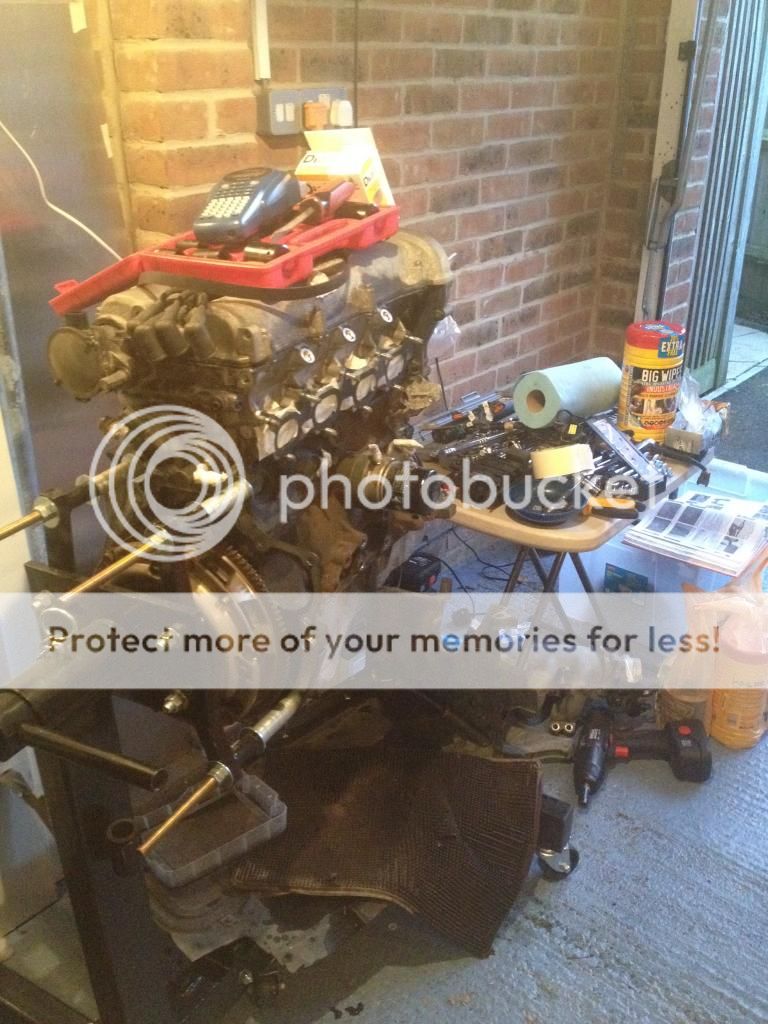
|
|
|
|
Post by mrjingles705 on Jun 9, 2014 2:02:49 GMT
P.S. This is the closest that I'm going to let you guys get to seeing my paintjob on the diff.... it wasn't pretty.  I gunked it, wirebrushed it, sanded it, got the rotary drill brush/wheel on it.... but it still looked pretty rough. I'm not overly surprised TBH (painting has never been one of my strong points) and with all the fins, nooks and crannies I'm surprised I got fiarly even coverage I've decided to follow KISS on this: * I'm going to clean and degrease everything * Wishbones and subframes will get powdercoating as they are on show * Anything else that will rust is going to get paint (within reason); but I'll probably enlist the wife, as she can paint worth a damn * The ally bits will be left bare.... I'll clean them up, and the more visible bits might be brought up to a beter finish, but I'm not painting/powdercoating them. I'm looking for a clean finish that'll show up any oil leaks etc, rather than a show-quality finish. Don't get me wrong, part of me would love to have everything at a high shine but it's a combo of a) cost and b) time (especially time - painting and prep done well takes time). I'd rather have something in mechanical good order than something which looks great but doesn't deliver on the promise. I don't have the time or money to do everything, so I have to prioritise. |
|
|
|
Post by p5curly on Jun 9, 2014 16:13:12 GMT
Good to see your cracking on mate it looks really good
|
|


