|
|
Post by Toed64 on Jun 24, 2014 22:16:46 GMT
I thought long and hard about the engine bay sides...so long and hard that I didn't bother meshing or paneling at all... except for the front triangle into the thingypit on the driver's side. It passed IVA.
Edit:
I typed c o c k p i t - not thingypit. it's NOT sexist, it is a genuine noun!
|
|
trident
Senior
   Improvise, Adapt and Overcome
Posts: 629
|
Post by trident on Jun 26, 2014 20:54:32 GMT
I thought long and hard about the engine bay sides...so long and hard that I didn't bother meshing or paneling at all... except for the front triangle into the thingypit on the driver's side. It passed IVA. Edit: I typed c o c k p i t - not thingypit. it's NOT sexist, it is a genuine noun! Did the examiner use the 100mm ball to test the engine bay area? I've seen a few cars now that seem to have passed with out it but not sure I want to take the risk. I will make them as they also hide some of the clutter in the engine bay but leave them off for the test and see if it passes just out of interest. If it fails on that part I can then just add them as I understand you get time to sort small problems. The covers will only need 4 bolts to fit them. just got a new tool off e-bay at a cost of £2.43 which should show what has a min of 2.5mm radius and what need attention. www.ebay.co.uk/itm/190984491589?ssPageName=STRK:MEWNX:IT&_trksid=p3984.m1439.l2649 |
|
|
|
Post by Toed64 on Jun 26, 2014 21:52:42 GMT
I was not at the IVA, so I don't know if the engine bay was checked. However, I know that the ball was used on the sides as it failed on the inner-tube rubber that I had covered the sharp edges on my mirror mounts...they were deemed too temporary. I'm not sure that was fair, but it was an accurate opinion!
|
|
trident
Senior
   Improvise, Adapt and Overcome
Posts: 629
|
Post by trident on Jul 1, 2014 18:47:08 GMT
Managed to weld in the side plates on both side of the car. I'm only welding on the inside so that I have nice clean lines on the outside face. Not me … but my 7 year old son pretending he is a master welder and showing me how to do it right !! 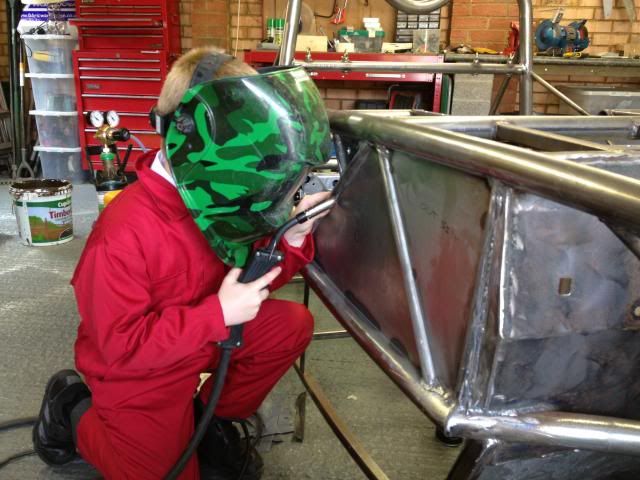 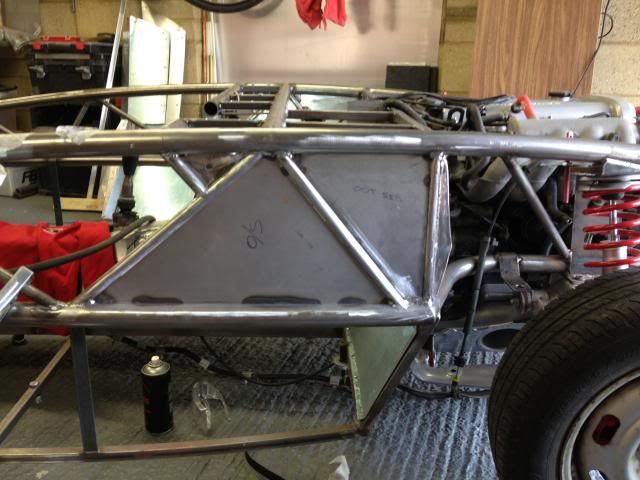 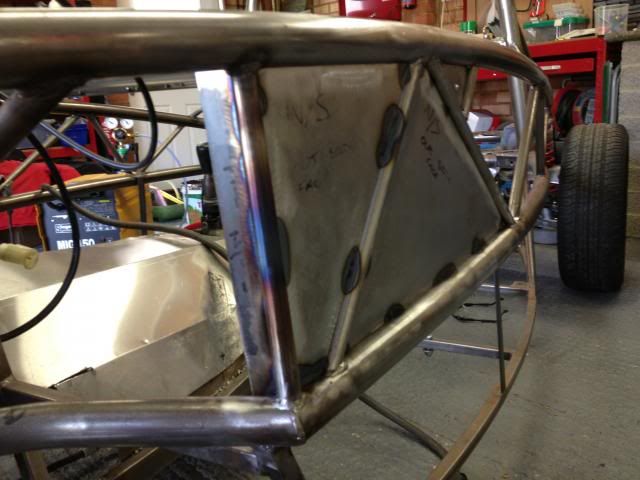 Also welded on the front plate that I made so I have a flat surface to fix my passenger side bulkhead panel to. Need to finish the welds off once I remove the chassis so I can turn it upside sown and do the top edges etc. Welding is all well and good but when you make a mistake it's a right pain in the rear to clean it up… especially on the round edges and in tight spaces where you can't fit a grinder. Found some nice indicators as well for the side repeaters. Designed for a motorbike but I think they suit the car very well. There are two LED's front and rear and two on the side. 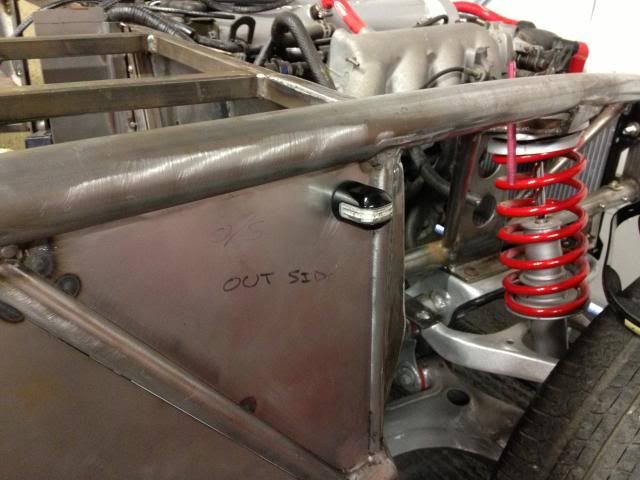 Nearly ready to remove the chassis…... |
|
|
|
Post by doubletrouble on Jul 1, 2014 19:02:31 GMT
Nice work........... last time i saw him he had a big bad nerf gun!
Are you planning to have it all painted the same colour or the infills different for a contrast?
|
|
|
|
Post by nitram on Jul 1, 2014 19:57:51 GMT
Make sure your side repeaters can be seen at an angle of 5 deg down to ground level. There are a number of threads reporting failures until the repeaters have been put out on stalks.
|
|
trident
Senior
   Improvise, Adapt and Overcome
Posts: 629
|
Post by trident on Jul 1, 2014 21:30:39 GMT
doubletrouble -- The infill panels will probably have a black gloss wrap applied to match the fibreglass panels.
Nitram - cheers, I have had a look at the manual and was going to try and work out the 5deg mark in relation to the rear wheel blocking the view. How far did your side indicators come out ? I will probably knock something up to be on the safe side for IVA..
|
|
|
|
Post by nitram on Jul 2, 2014 9:57:05 GMT
About 150mm - 5deg is very shallow. Photos on my thread page 6, 15 April. I cut a couple of lengths off a broom stick to mount the repeaters for IVA but will get round to putting them back on the side grill at some stage.
|
|
trident
Senior
   Improvise, Adapt and Overcome
Posts: 629
|
Post by trident on Jul 7, 2014 18:45:27 GMT
|
|
|
|
Post by jgilbert on Jul 7, 2014 21:41:32 GMT
Chris, it can feel like going backwards but once the powder coating is on you will suddenly see the light at the end of the tunnel. Can't wait to see the chassis once it's coated.
|
|
trident
Senior
   Improvise, Adapt and Overcome
Posts: 629
|
Post by trident on Jul 9, 2014 17:03:24 GMT
So with the chassis off again I set about finishing the welding that I couldn't do when it was on the subframes. I had loads of bits to do so it took a little bit of time. I also set about grinding down some go the original welds that were a bit messy. 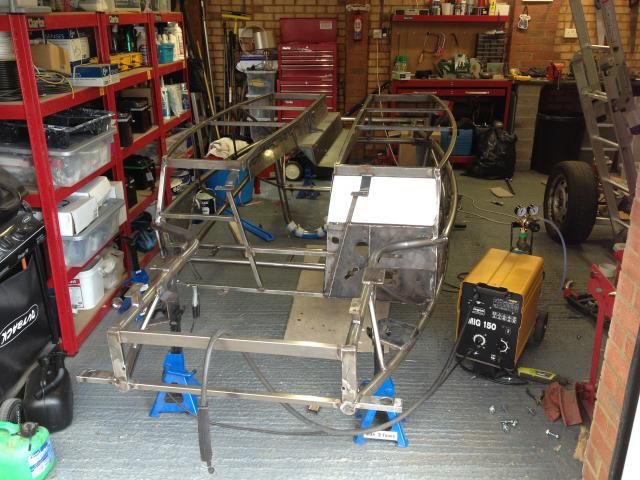 I also fixed the problem that most people with a 1.8 have had with the rear lower fixing point. Copied John Gilbert's idea with a removable bracket. Cheers John for sharing. Having first removed the original mount I then used it for the plate that will sit against the chassis. Having marked the hole I drilled all the way through and removed all the metal left over from drilling that was sat inside the box section. small telescopic magnet that you use to recover bolts etc from hard to reach areas did the job. 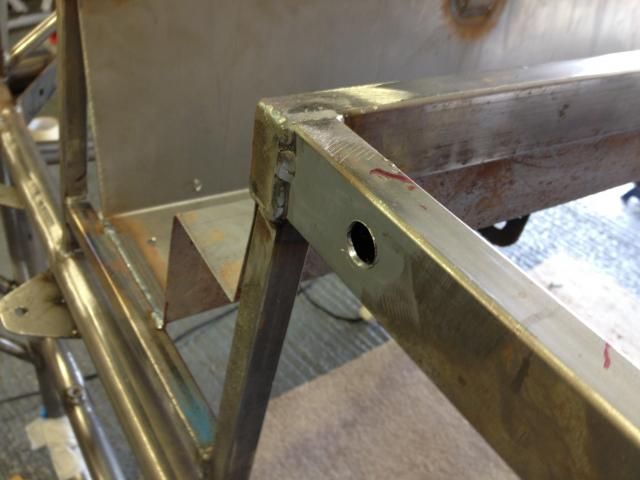 Add a bit of tubing. 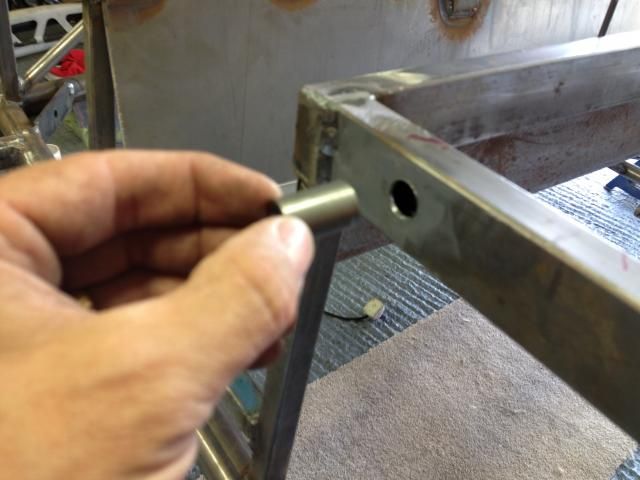 Weld it in a grind it down. 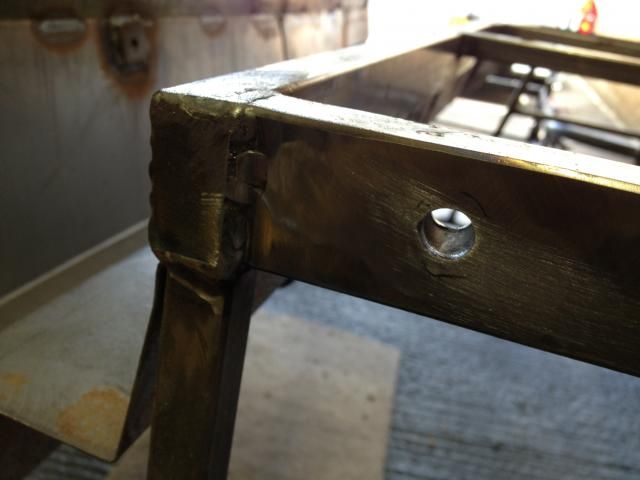 Then use a M10 bolt to fix the original bracket to the chassis. I still need to weld another bit of metal from this bracket to the original MX5 brace that were fitted to the 1.8. but that will be done once the chassis is re installed so that every thing fits nice. 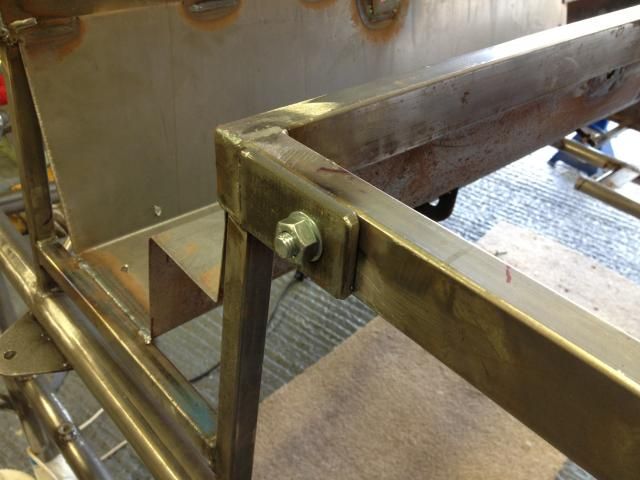 Also needed to make an end plate for the new rear tubing on my car. Don't want water getting in a rotting it from the inside out. Weld will be flattened off later. 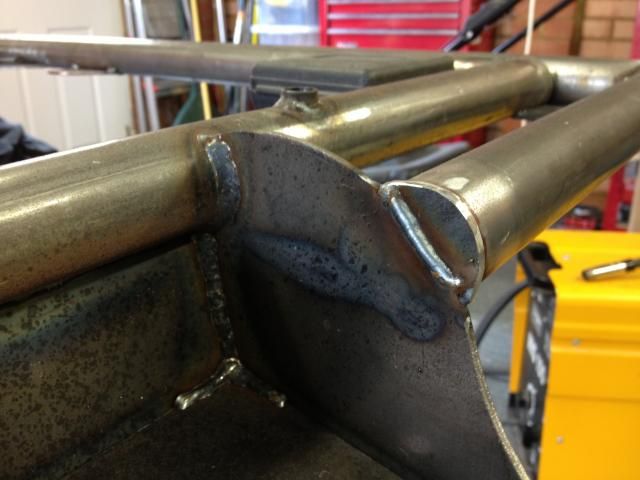 And finally I got the floor out from storage to begin the marking and cutting. having done the marking I decided to leave this for another day. 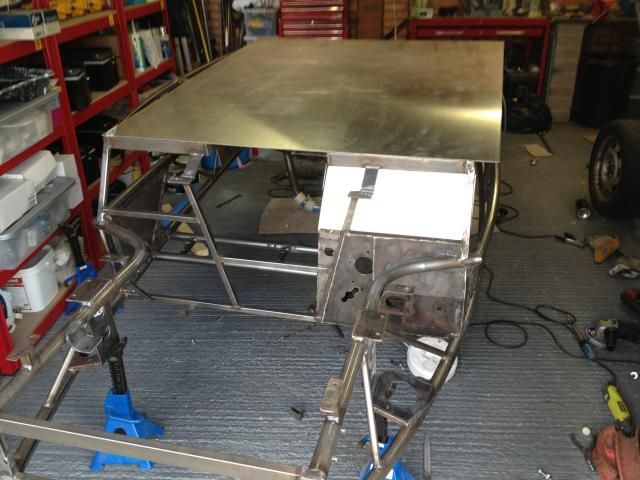 |
|
trident
Senior
   Improvise, Adapt and Overcome
Posts: 629
|
Post by trident on Jul 19, 2014 22:15:11 GMT
No photos to update with at the moment as Ive been busy at work looking after a few American fighter jets amongst other things. Must say they are just awesome.    Any way I have managed to do a few more little bits on the car. The floors are now cut, Lower side panels cut and fixings in place. Centre console panels all bolted in and nuts welded to chassis to allow me to re fit them much easier once powder coated. Nitram - Got some indicators to over come the issue of clear view from the floor at 5 deg point. ( basically with your head right behind the rear wheel  ? If i'm reading the manual correctly ) With a 5" stem and then the indicator it self ...If these don't do the trick then I don't know what will… www.ebay.co.uk/itm/390431461922?ssPageName=STRK:MEWNX:IT&_trksid=p3984.m1439.l2649 Quick question and some advice required from those that have finished their cars or got the handbrake cables connected…. Will the cables fit without cutting a whole in the side of the rear tunnel. I know a few have done this but I also believe that others have not. I forgot to do this before removing the chassis….I don't want to have to reconnect the chassis to find out so any help and advice gratefully accepted . Cheers Trident |
|
|
|
Post by nitram on Jul 20, 2014 7:24:53 GMT
Mr IVA definitely wanted to see the repeaters operating when the car was up on the hydraulic lift and his head was at "ground" level. Don't ask me why the manual was written this way.
I struggled to fit the handbrake cables without cutting the transmission tunnel. Couldn't do it. In the end I cut a slot, rather than a circular hole, as the cable wants to go through at an angle. But my donor was a Mk2 and the Mk1 has different rear handbrake cables and they are handed (according to the MX5Parts catalogue).
|
|
|
|
Post by jgilbert on Jul 20, 2014 8:21:47 GMT
Quick question and some advice required from those that have finished their cars or got the handbrake cables connected…. Will the cables fit without cutting a whole in the side of the rear tunnel. I know a few have done this but I also believe that others have not. I forgot to do this before removing the chassis….I don't want to have to reconnect the chassis to find out so any help and advice gratefully accepted . Cheers Trident Trident, I did end up cutting a slot in the rear of the trans tunnel for the handbrake. As yours is covered by the console I would recommend it. I ended up cutting two holes (about 32mm if I remember correctly) and then jointing them with a jigsaw to make an elongated hole. I found that the drivers side benefited from going through the hole where as the passenger side was better just run against the tunnel. Will look for some photos. |
|
|
|
Post by jgilbert on Jul 20, 2014 8:33:32 GMT
Photos for reference. 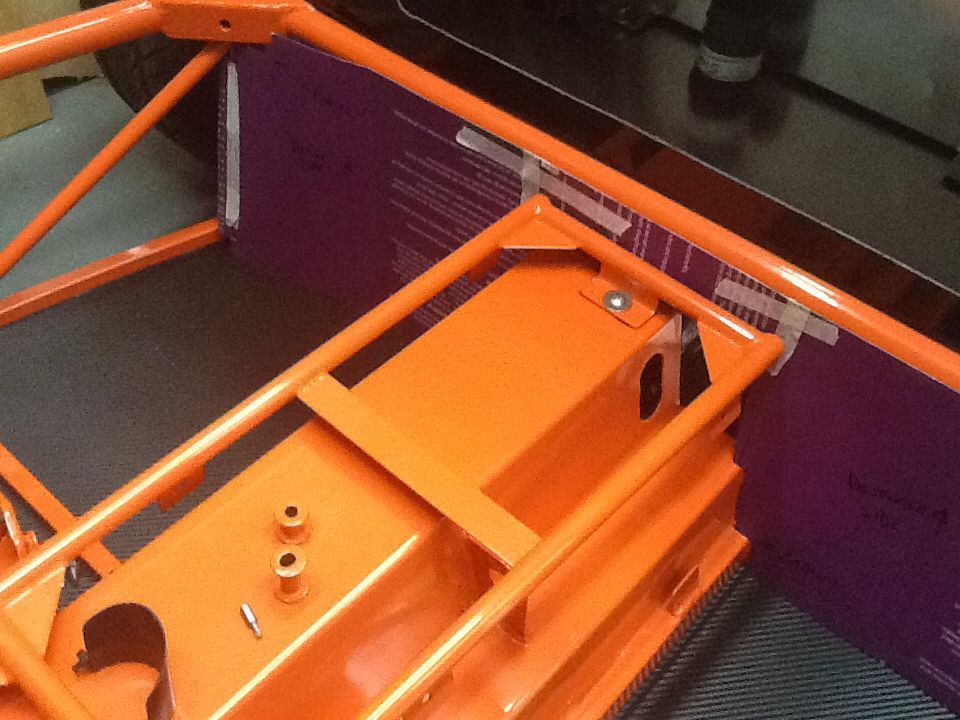 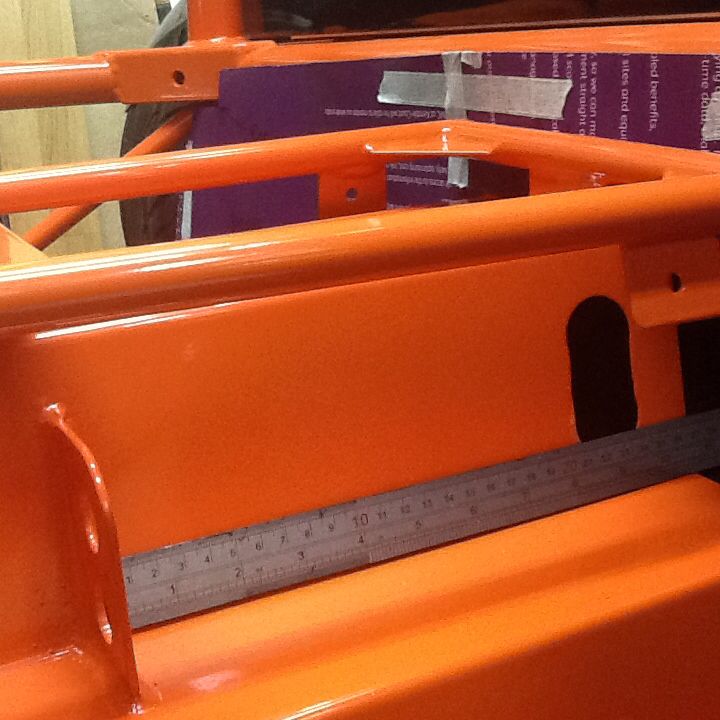 Sorry about the quality taken with my ipad. Hope this helps. |
|