|
|
Post by airforceone on Jul 24, 2012 11:19:29 GMT
That looks like the front hub assembly bracket from the focus, you don't use that on the build.
RTR supply the bracket for the front in the kit, you just need the rear stub axle from the focus
To fit to it. That will complete the front.
The rear, again RTR supply the bracket you just need the hub and bearings to fit to it.
If you don't have you kit yet it may be worth while upgrading to the alloy uprights, they are
Quite a bit lighter and look really good. Most seem to upgrade to them at a later date anyway.
Ned.
|
|
|
|
Post by Paul (madeye) on Jul 24, 2012 11:35:06 GMT
haha, i read the book a little closer,
SMALLER pair to the FRONT, allows for camber,
larger to the REAR
|
|
|
|
Post by BobN on Jul 25, 2012 9:30:09 GMT
Hi Ned
I have the kit already so will stick with the RTR brackets etc for now to save on costs. I have the stub axles, hubs and bearings and will look at build diaries to see how they go together.
I will dispose of the hub assembly bracket (pic was showing how we took out the stud axle).
Paul when do you think you will get the wishbones on as I will also have a look at your pictures.
Bob
|
|
|
|
Post by airforceone on Jul 25, 2012 9:35:30 GMT
If you have the space try an keep any of the extra parts you have, the focus spares
market isn't to great at the minute, I sold one of those brackets for £40 to a guy
that had hit a pot hole and cracked his.
Your local garage may buy some of the parts aswell, to buy that thing new is expensive.
If he won't buy it swap it for some welding work in the future.
Ned.
|
|
|
|
Post by BobN on Jul 25, 2012 9:38:06 GMT
Good point thanks.
|
|
|
|
Post by Paul (madeye) on Jul 25, 2012 11:46:54 GMT
my chassis is going to be having a lot of work done before i even get it to powder, im also possibly having some other bits replacated to use to do some research.
ill be a while yet
|
|
|
|
Post by BobN on Jul 28, 2012 12:11:39 GMT
In the process of doing the quick rack conversion. Posted a question in the technical section. Basically I cannot get the pinion nut out. Hammer and screw driver would not budge it and don't have tool a to fabricate a special part. Ideas welcome.
|
|
Deleted
Deleted Member
Posts: 0
|
Post by Deleted on Jul 28, 2012 12:27:52 GMT
I tried a 24mm bolt, about 30mm long, with another 24mm headed but welded on top. This sat in the pinion nut nicely, and may undo it. I said may undo, as mine was made of an exotic form of cheese. It then fell to bits. I had to make an adjuster from alloy in order to re assemble. IMHO it is now easier to adjust the tension. If you need the details, let me know.  |
|
|
|
Post by BobN on Jul 28, 2012 13:07:37 GMT
Thanks. I don't have welding equipment though. Might see if my local garages can do something.
|
|
Deleted
Deleted Member
Posts: 0
|
Post by Deleted on Jul 28, 2012 13:20:18 GMT
You can always double nut the bolt, then centre pop the bolt thread. That should stop it coming undone.
|
|
|
|
Post by BobN on Jul 28, 2012 13:27:55 GMT
what do you mean double nut the bolt?
|
|
|
|
Post by BobN on Jul 28, 2012 13:32:08 GMT
pic of retaining nut. 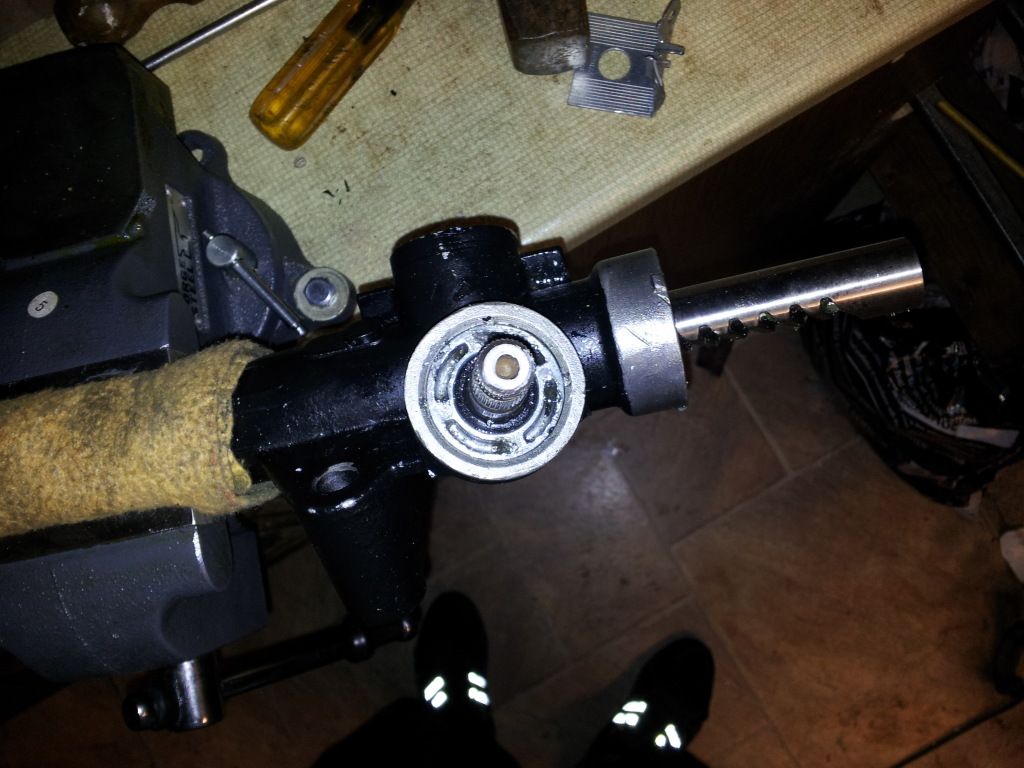 i am starting to strip the thread  |
|
Deleted
Deleted Member
Posts: 0
|
Post by Deleted on Jul 28, 2012 13:35:39 GMT
I may have confused you here sorry! Are you unfastening the tensioner part, or the nut that holds around the splined pinion and bearing. ? To undo the pinion and bearing, buy, or butcher an existing deep socket the right diameter. Mark made one on here, he listed it on his build I think. I used a deep, non-single hex socket on a 1/2" drive. Then cut and filed the top to make a castle pattern in it that fit like a key into the pinion nut. |
|
|
|
Post by BobN on Jul 28, 2012 13:44:43 GMT
Thanks. I am trying to remove the nut around the pinion. I will buy a socket and try to hack it.
|
|
Deleted
Deleted Member
Posts: 0
|
Post by Deleted on Jul 28, 2012 14:49:27 GMT
Try some gentle heat as well around the outside of the casting. Theres a threadlock substance on mine which this helps with. Dont go too crazy though:)
|
|