stubbers
Senior
 Exocet Number 306
Posts: 478
|
Post by stubbers on Jan 11, 2012 17:24:05 GMT
Hi all its been a while since i updated been a slow Christmas on the build so can hopefully get back into the swing of things now. I did some electrolysis to clean the parts up, planing on painting on them myself. 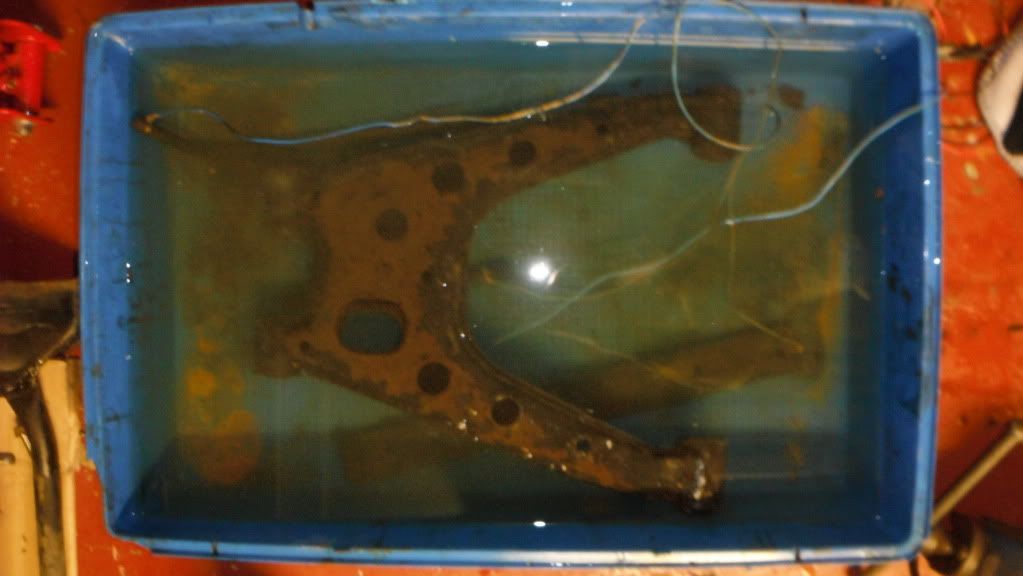 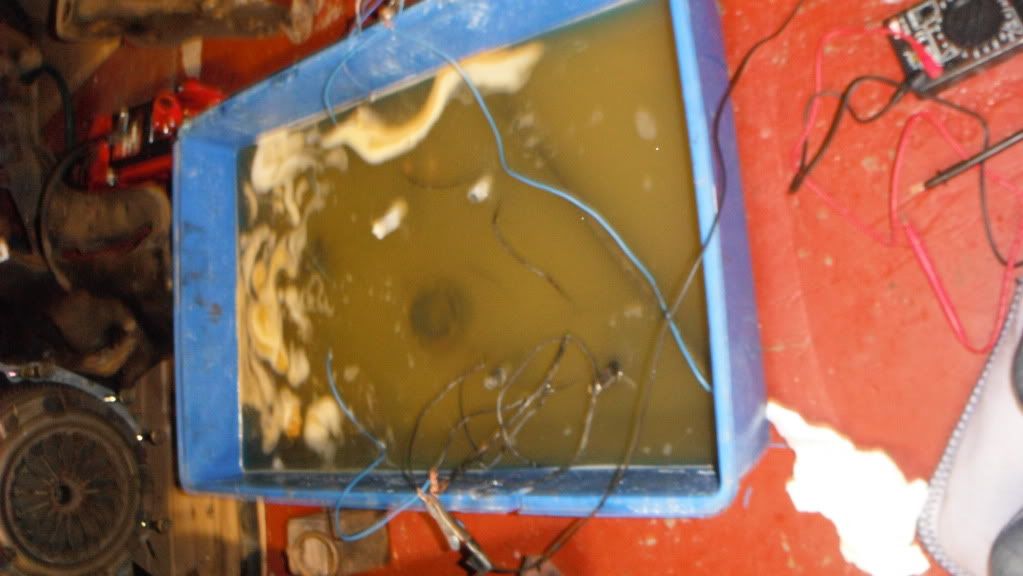 It actually cleaned them up really well, but most of all it did it while i was sleeping  Unfortunately i couldn't get the finish i wanted with painting so they will be off to the powder coaters soon. Here is one of my methods of removing the old bushes, plus you can see how well the electrolysis worked. 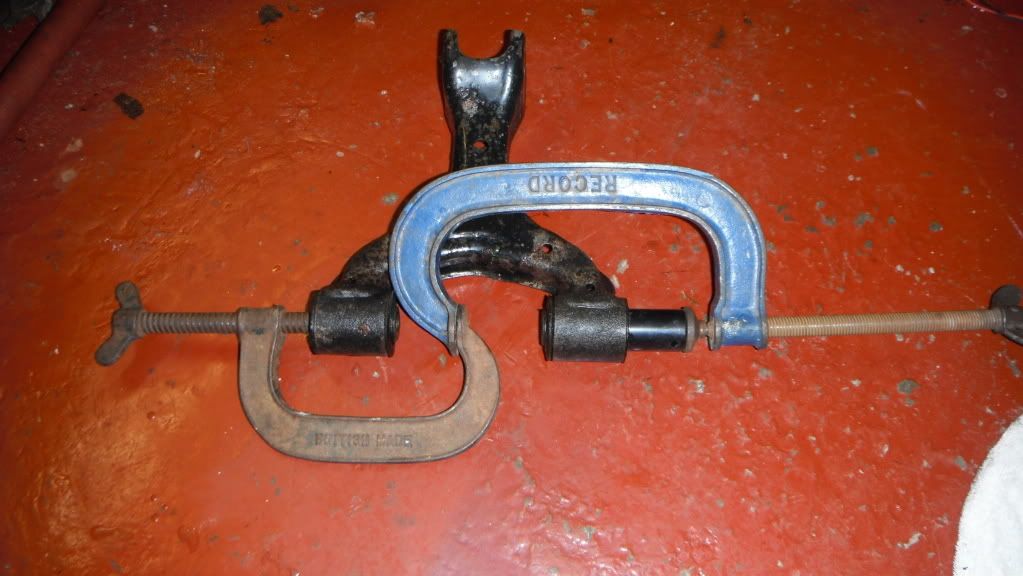 Here is my attempt at bush removal with a scissor jack, managed to get 2 of them out like this (yes of course it is the original mx5 jack ) 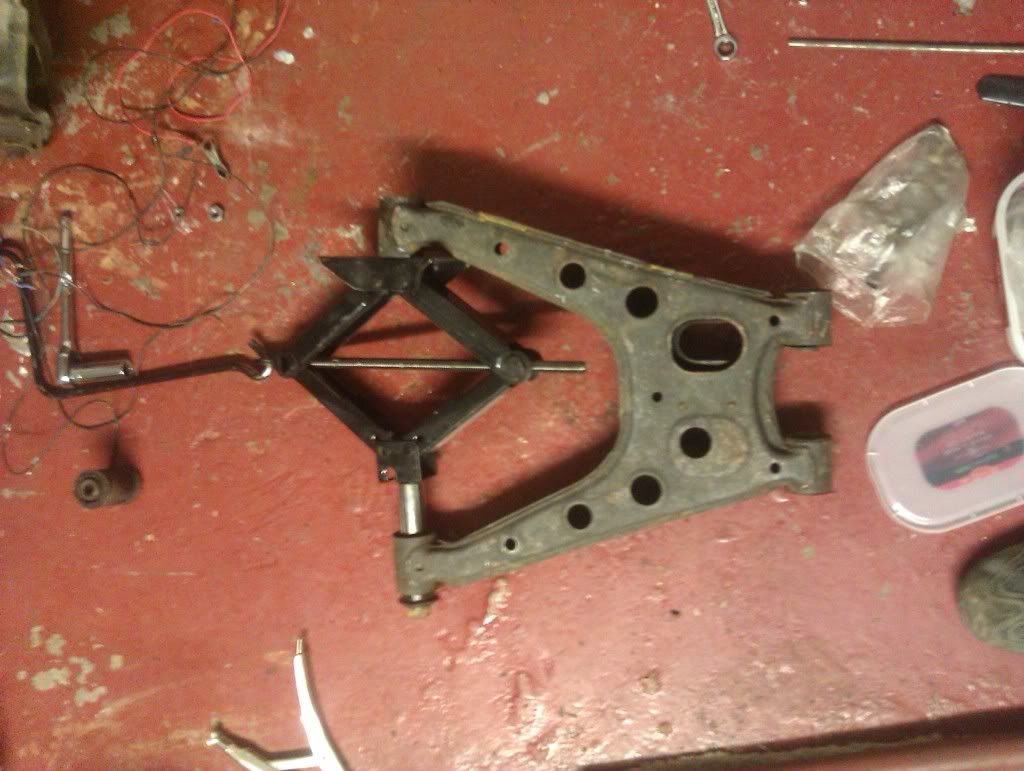 Now the lower wishbones are a little more, well tough i should say, i managed to bend the G clamps and a scissor jack. So i will be taking them to work tomorrow and using the 1000 ton press to get them out Next i tried to get the calliper pistons out, mainly to check as one of the boots had come off and i wasn't sure of the extent of rusting, the pistons were stuck so i re rigged up the callipers with the master servo and it worked perfectly 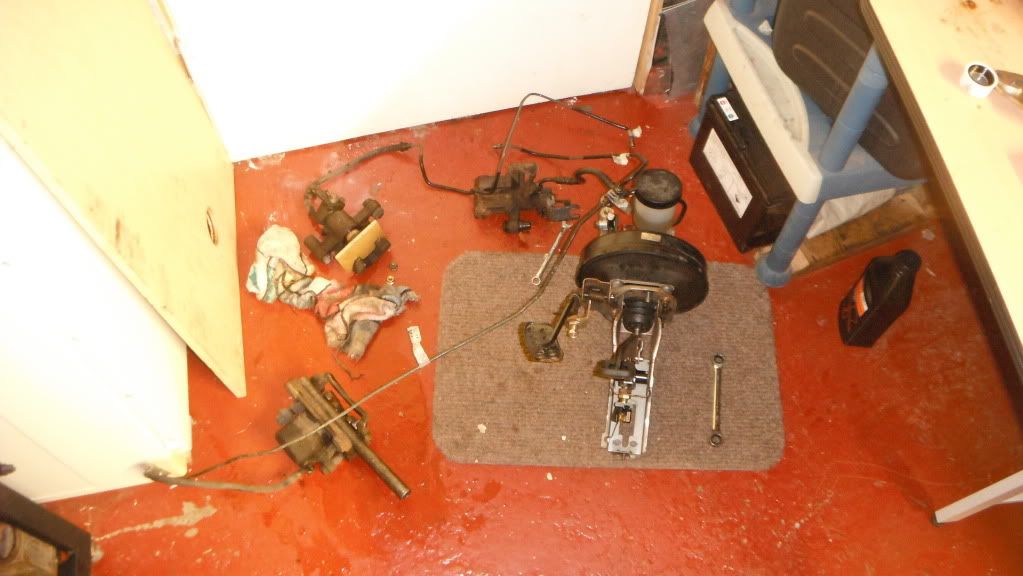 Unfortunately they are rather bad so im thinking on getting these, www.ebay.co.uk/itm/MAZDA-MX5-CALIPER-MX-5-EUNOS-MIATA-REAR-BRAKE-PAIR-NEW-/300623745765?pt=UK_CarsParts_Vehicles_CarParts_SM&hash=item45fe9252e5#ht_1185wt_1163 anyone got any other suggestions on callipers?? |
|
|
|
Post by racingdave on Jan 11, 2012 17:35:55 GMT
Hi rich,
How do you think the electrolisis compares to sand blasting? (price and effectivness)
Friend is looking to do it for an mgb he's restoring.
your build looks like it coming on well. Did you sell the parts on ebay?
|
|
stubbers
Senior
Exocet Number 306
Posts: 478
|
Post by stubbers on Jan 11, 2012 17:50:36 GMT
Its only effective on rust so it wont strip any of the old paint, but on the rust it works really well a 12 hour bath got all the rust off the wishbones, but I mainly rigged it for the calliper pistons so it would get rid of the rust without damaging them unfortunately they were badly pitted anyway. Price wise it didn't cost me anything www.instructables.com/id/Electrolytic-Rust-Removal-aka-Magic/ This is where I learned the basics. Yeah all ebay on a free listing weekend to keep the fees down |
|
stubbers
Senior
Exocet Number 306
Posts: 478
|
Post by stubbers on Mar 13, 2012 21:53:54 GMT
Right, after a very slow few weeks well months I've really stuck back into the build, and loving it again Here is how things are on the ebay front Tonneau Cover £25.00 Aerial Motor £45.00 Electric Window Switch £10.00 O/S Rear Light Cluster £8.00 Rear View Mirror £5.50 Rear Fog Switch £8.70 Speakers £8.00 Door cards Pair £20.00 Numberplate surround £16.55 Vynl Dash Trim £0.99 Original Seats £52.00 Bonnet £10.00 N/S Door £40.00 O/S Door £50.00 O/S front indicator £10.00 N/s Front Indicator £10.00 Interior light Dimmer £5.80 Front Bumper £30.00 Rear Bumper £7.50 Kick Plates £20.00 Boot release cable £2.00 Boot Latch £2.00 Boot and fuel release lever £10.00 washer bottle £10.00 Rear fog light £8.00 Bonnet Latch £2.00 N/S Rear Light Custer £8.00 Wing Mirror Switch £8.00 Boot £10.00 N/S Headlight £10.00 Door open sensor £1.00 Total £454.04 Ive unfortunately got the dreaded rear drive shafts stuck into the hubs. I took them to a friend who has a 20T shop press, unfortunately the big one at work hasn't got a hole in the bed  anyway the one came out lovely but the other was a bit more difficult and ended up snapping the casting, so will have to get a replacement at some point.   The hub has painted up really nice though  The side shafts and callipers are going to be red, just trying out colours at the moment.   Found a nice way to press out the upper ball joint from the front wishbone. Using something to brace against the wishbone (in my case the knackered pistons from the rear brakes) then a 30mm socket on the ball joint (I removed the boot so I can re pack with grease) i also used another socket as the thread from the ball joint was very close to the face of the socket and i didn't want to be pushing against the actual joint just the casing.  A quick once over with the electric wire brush has really cleaned up the PPF and I've given it a quick spray with clear lacquer just to see what the finish may be like. will either go for that or black to match the rear diff. My local powder coater has suggested i get the parts professionally shot blast as they don't think they could get the thick rust off, so will be taking the parts to the shot blasters tomorrow. |
|
stubbers
Senior
Exocet Number 306
Posts: 478
|
Post by stubbers on Jun 24, 2012 20:08:21 GMT
Right now its been a very long time since my last update. i don't want to get depressed and look at exactly how long. I had all my rear "stuff" powder coated a few months back and in fitting the bushes realised there were some centre tubes missing this is being sorted out by Stuart and i should hopefully receive the missing parts at some point. I then had a slow and steady few weeks in dismantling the front sub frames, 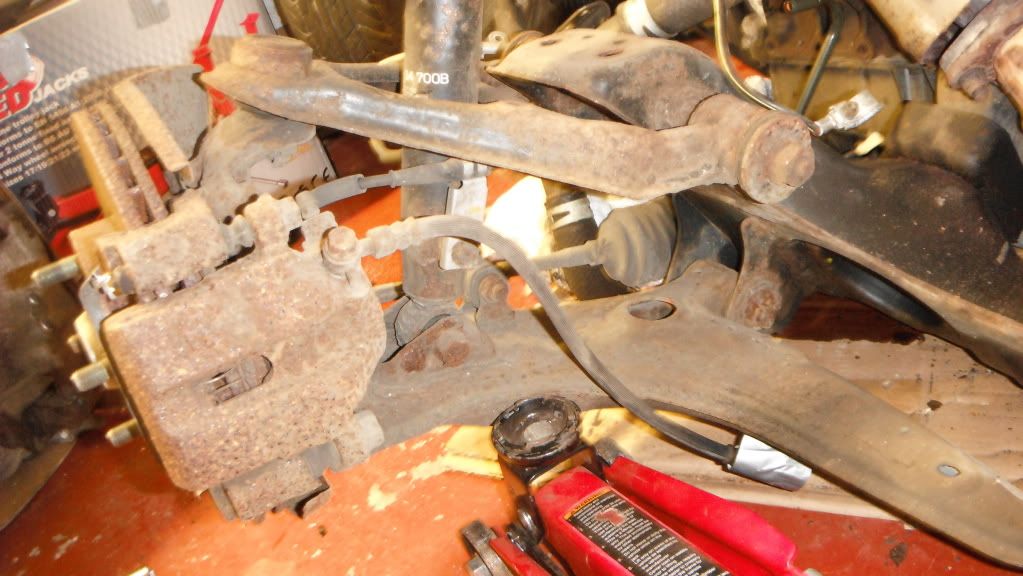 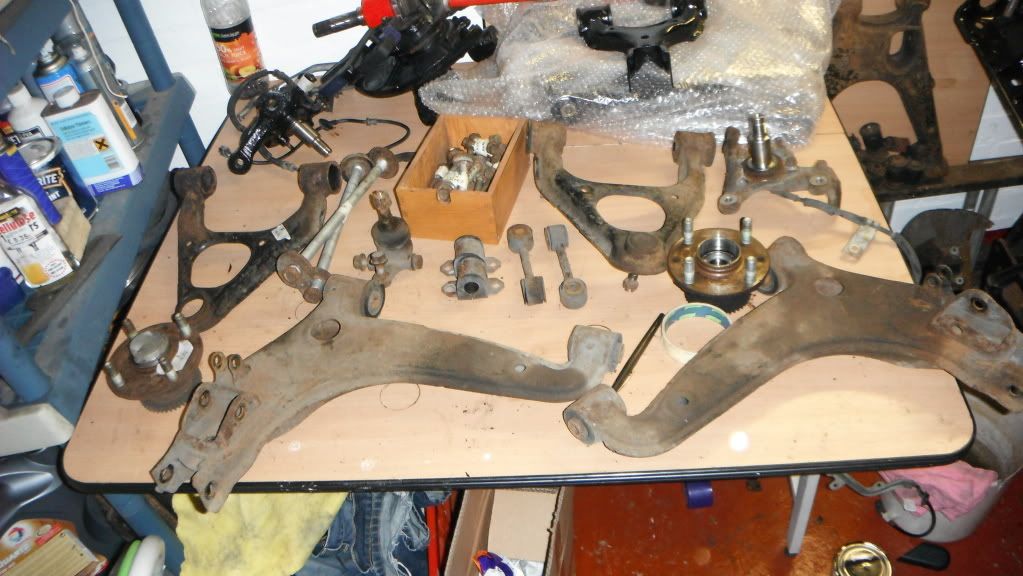 Rusting heck!!! managed to fill bags of rust from the floor! 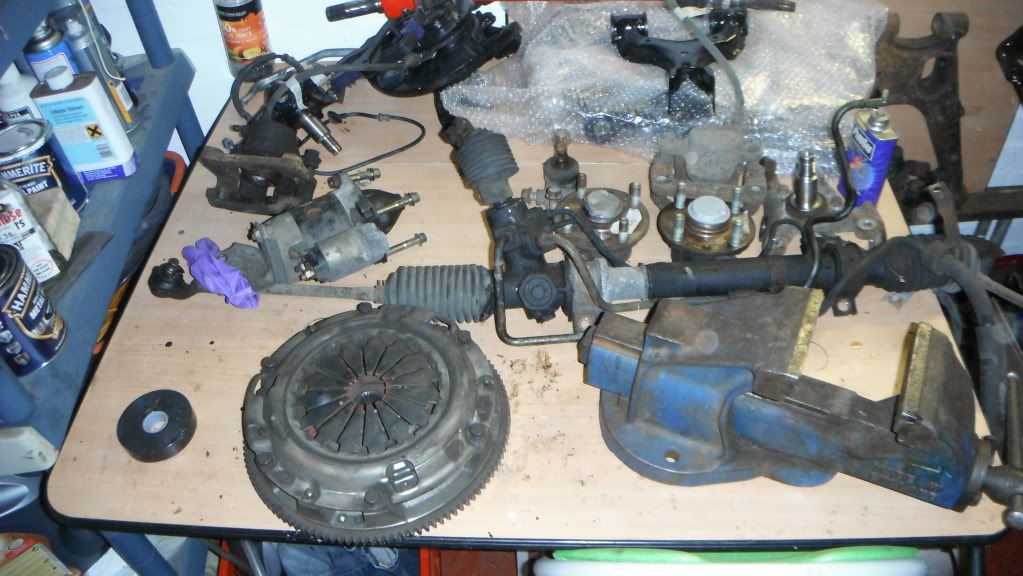 I then rigged up an A frame in the garage to lift the engine onto the stand using our chain hoist, sorry there were no pics i was running through everything that could go wrong and se my engine bouncing off the floor so pictures were the last thing on my mind Thankfully it all worked as planned. 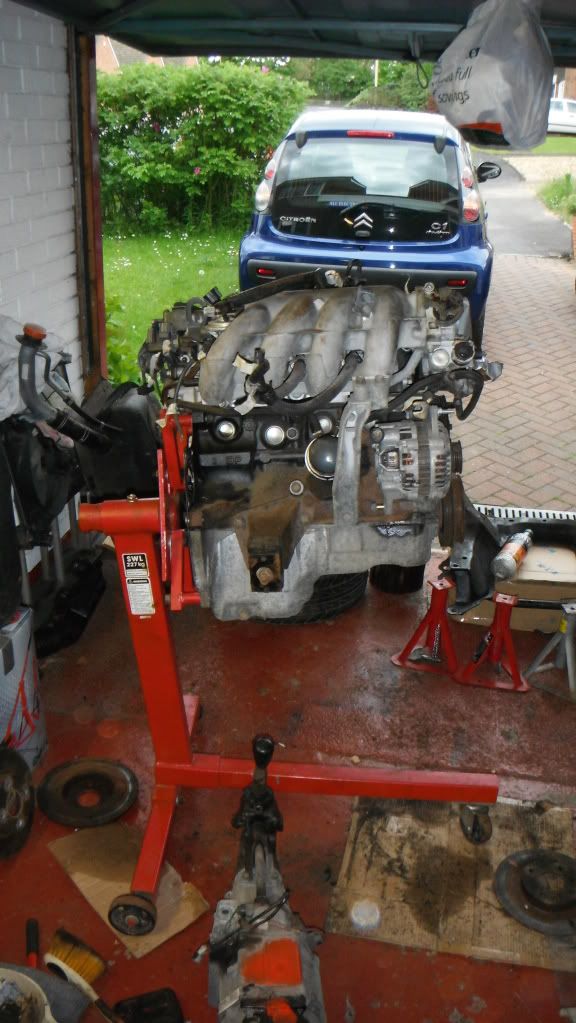 I managed to pick up a cheap exhaust can off eBay so couldn't pass the opportunity, not sure exactly where its going to be mounted yet. 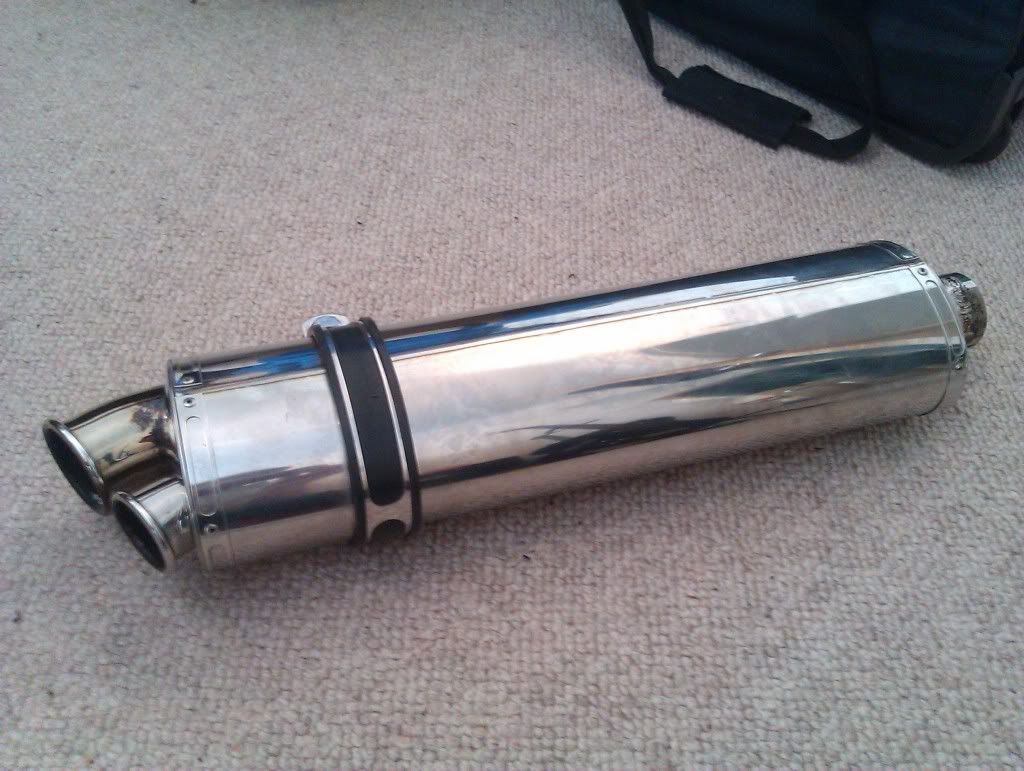 Parts before painting 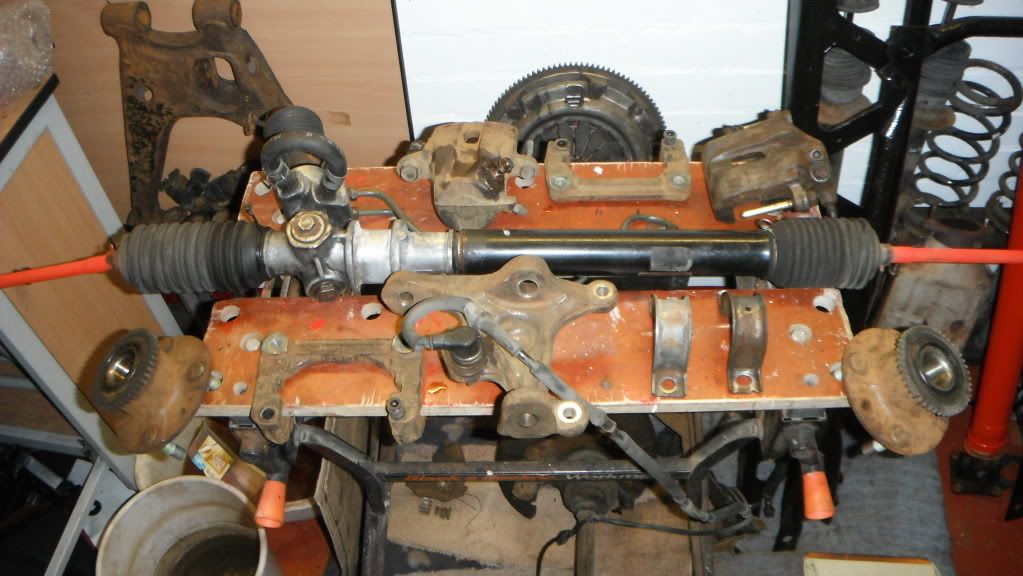 Parts after painting  Gearbox and prop 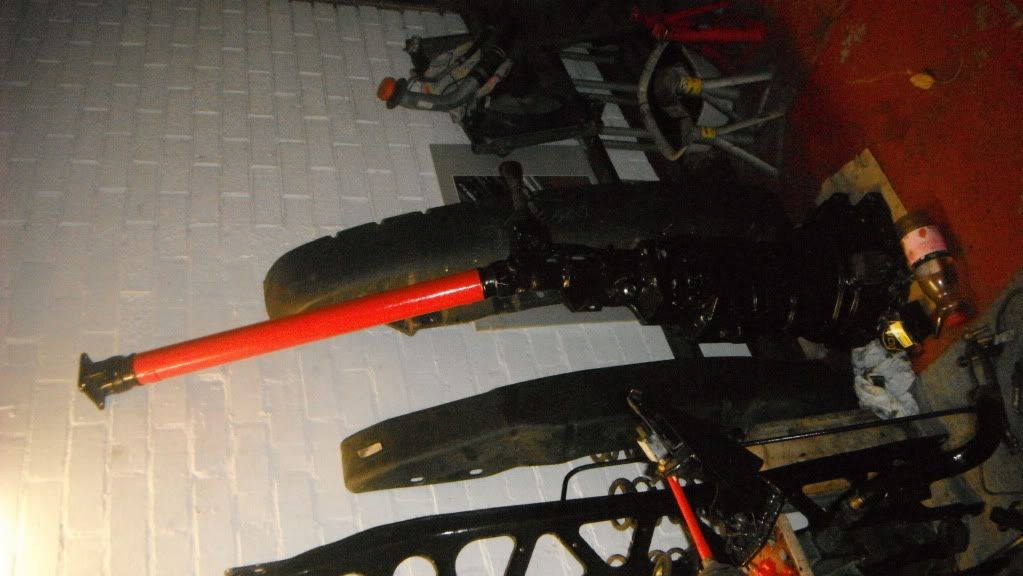 I finally managed to get the stuck side shaft from the hub, as i broke one of the lugs off in previous attempts i took an angle grinder and dremel to it and after about 4 hours of grinding banging and many cuts/bashed thumbs i managed to set it free without damaging it.  What the engine looks like now after a bit of TLC 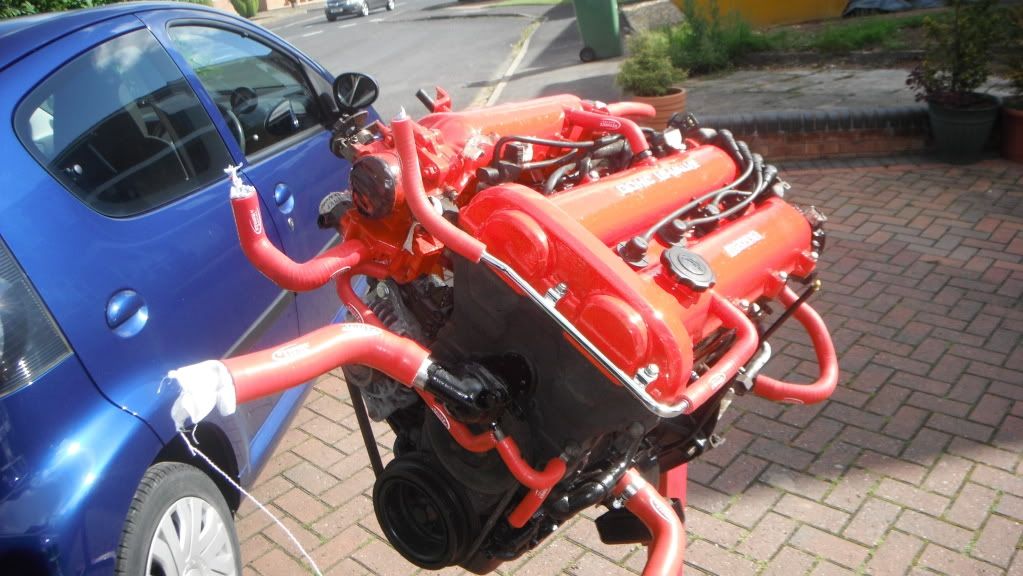 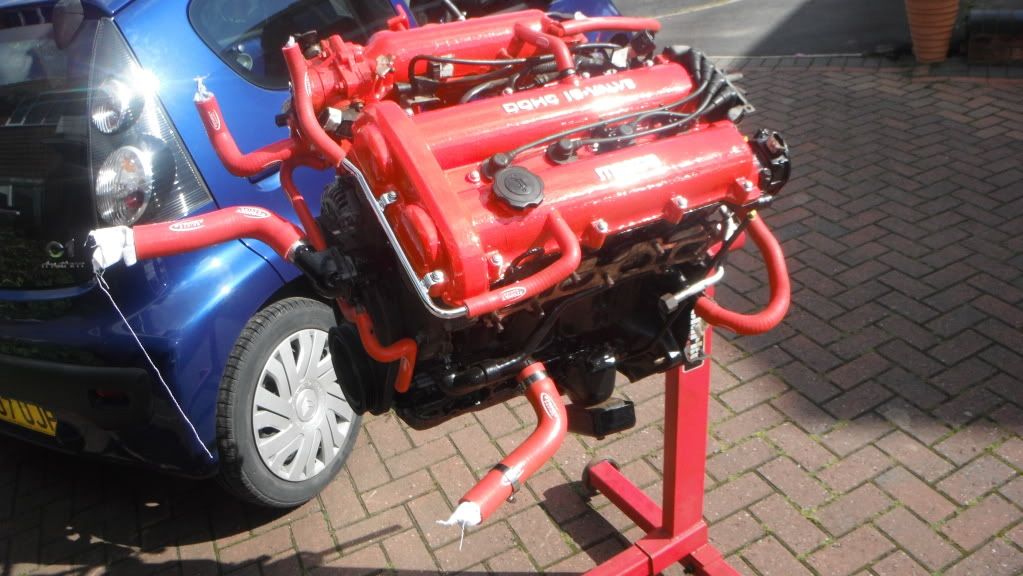 Shot blasters will be finished tomorrow then off to the powder coaters with all the front sub frames. Just ordered a set of track rod ends and ball joints, just going to re pack and new boot the uppers as i cant find anywhere that just does the upper joints. Rich |
|
|
|
Post by johnbrunt on Jun 25, 2012 22:46:46 GMT
Hi, did you remove the ball joint from the front upper wishbones?.....I'm just at the stage of getting everything dropped off at shot blasters....but have yet to remove the uppers and can't really see how this can be achieved..thanks
|
|
|
|
Post by adam1001 on Jun 25, 2012 23:05:17 GMT
I left mine in. The powder coaters left the boots on for the shotblasting and masked the threads, then removed the boots and masked for coating. Then you just need to buy a couple of new boots, pack them with grease and carefully press fit. It is possible to remove the balljoints from the wishbones (they press in) but far easier to leave them. Just make sure there's no chance of grit getting inside them during blasting.
|
|
stubbers
Senior
Exocet Number 306
Posts: 478
|
Post by stubbers on Jun 26, 2012 7:09:11 GMT
Yeah, you can see near the top of the page how i did it (the photo under the painted diff)
Rich
|
|
stubbers
Senior
Exocet Number 306
Posts: 478
|
Post by stubbers on Jun 30, 2012 19:47:14 GMT
 A SWB Exocet anyone?? |
|
|
|
Post by gwnwar on Jun 30, 2012 20:15:19 GMT
Great for those tight parking spots and wheelies. don't forget the wheely bars out back..
|
|
stubbers
Senior
Exocet Number 306
Posts: 478
|
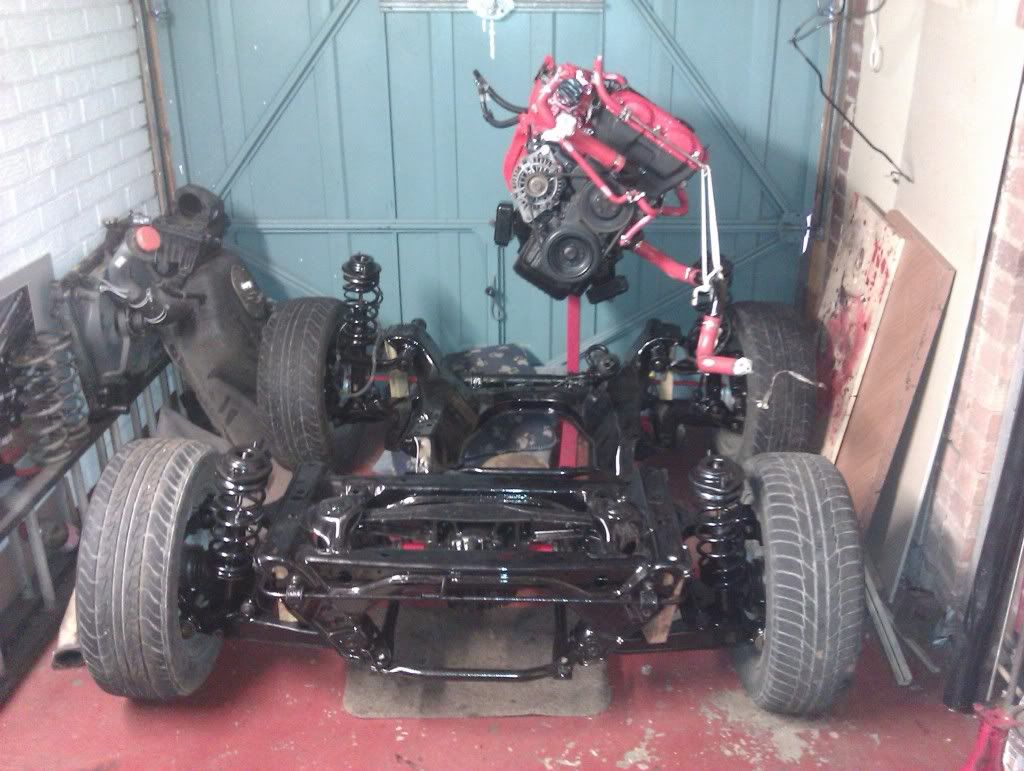
Post by stubbers on Jul 1, 2012 19:53:51 GMT
Forgot to post photos of the fresh powder coat so here they are.  Using the original shocks atm, just untill i can afford a different set of coil-overs.  Put the engine in today  Used the engine stand to hover the gearbox while i lined it up. Managed to align the clutch by eye quite easily.  Finally the PPF all assembled!!   |
|
stubbers
Senior
Exocet Number 306
Posts: 478
|
Post by stubbers on Sept 18, 2012 19:30:03 GMT
I finally picked up my kit today Got there quite early as i had a busy day ahead, i borrowed a friends trailer and as my Dad's car is the only one with a tow bar he offered to drive up, the trailer worked really well with the exocet fitting nicely, the floor pan fitted on the bottom then all of the bodywork fitted in my Dad's x-trail. 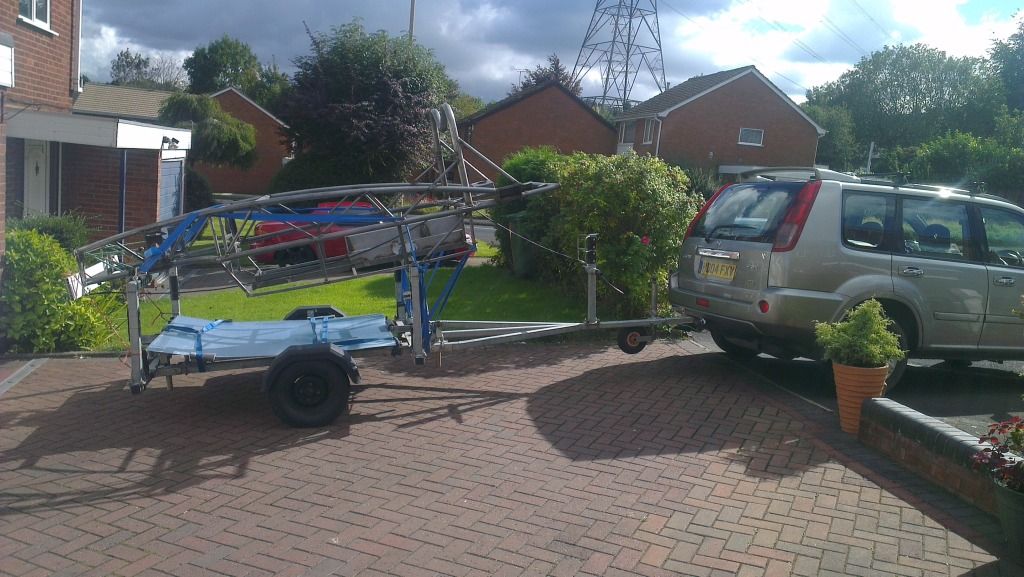 Couldn't help myself 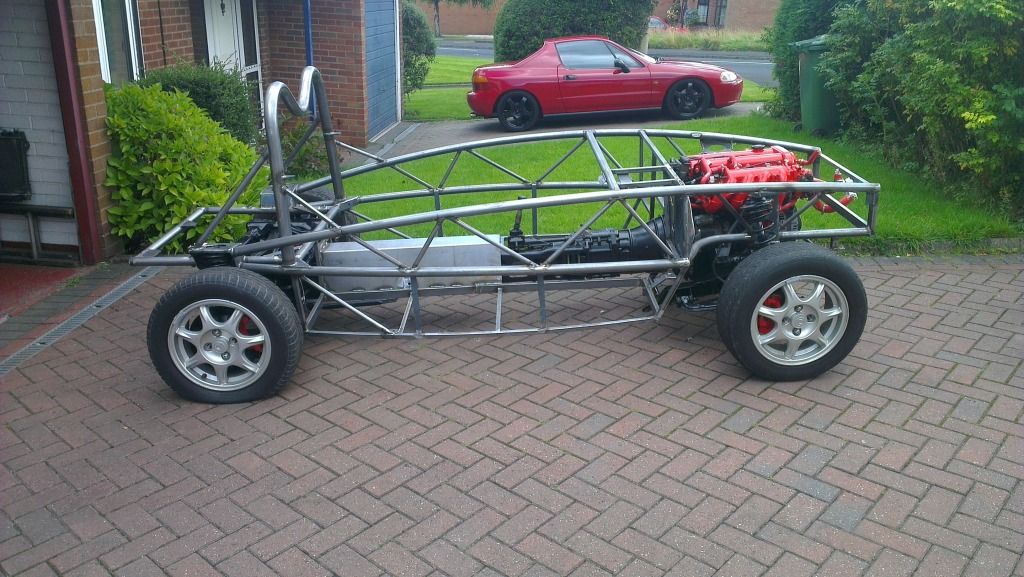 Got the week off work so hopefully will be able to get a fair bit done. Rich |
|
|
|
Post by h5ngs on Sept 18, 2012 20:53:42 GMT
Looking good mate, like the progress on the honda too gone from crappy arches to all painted and black wheels the fun now really being with the fiddly time consuming work. |
|
stubbers
Senior
Exocet Number 306
Posts: 478
|
Post by stubbers on Sept 19, 2012 22:00:53 GMT
A quick mock up of the body work  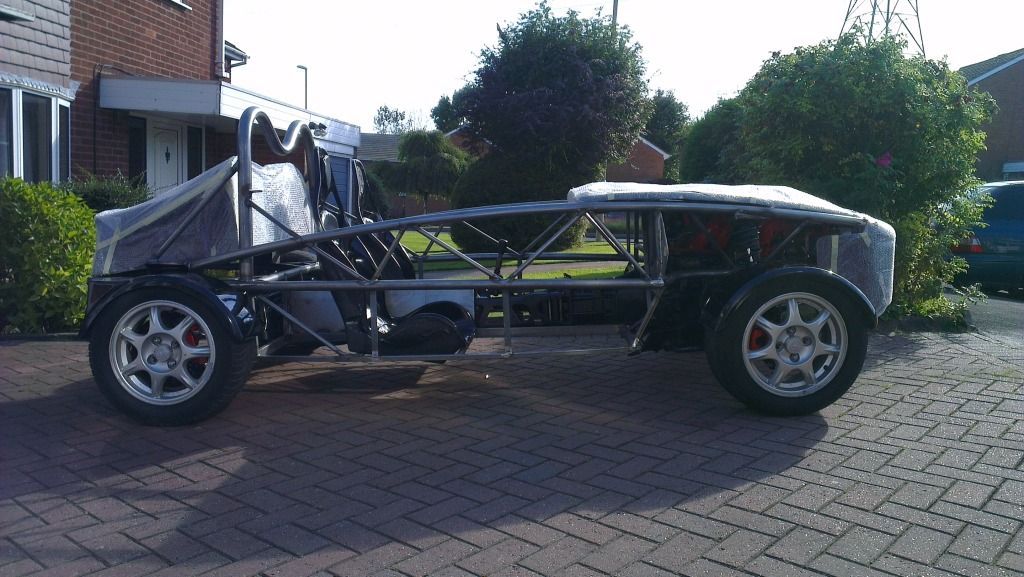 Well spent the morning with the dremel and blended in all welds that are going to be visable, im sure my neighbours now love me as the frame seems to amplify the noise Once that was done i marked and cut out the floor pans, then gave all the edges a sand down before i lost some fingers!!  Marked all the holes out, drilled them. I will have to clear them out after powder coating but this will all hopefully reduce the risk of damaging the powder coat. 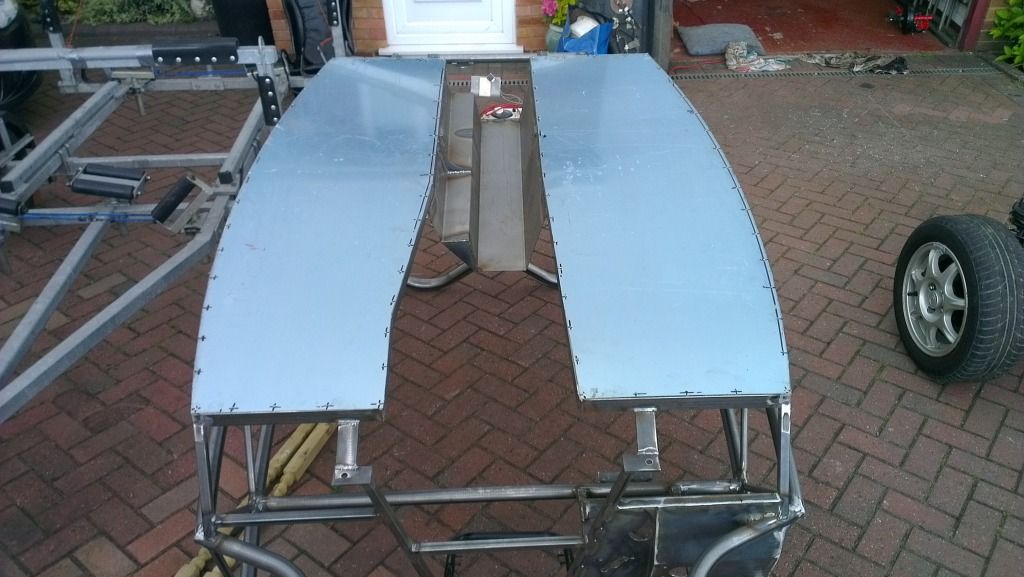 Now it was all going far to well, I tried to align the chassis to the PPF frame and the rear supports were fouling like has been mentioned before, now after a large amount of swearing it still wouldn't align under the supports so i decided to call it a day. After reading up on the forum it looks like the best option is to remove the PPF so you can tilt the subframe back and hopefully get them under. 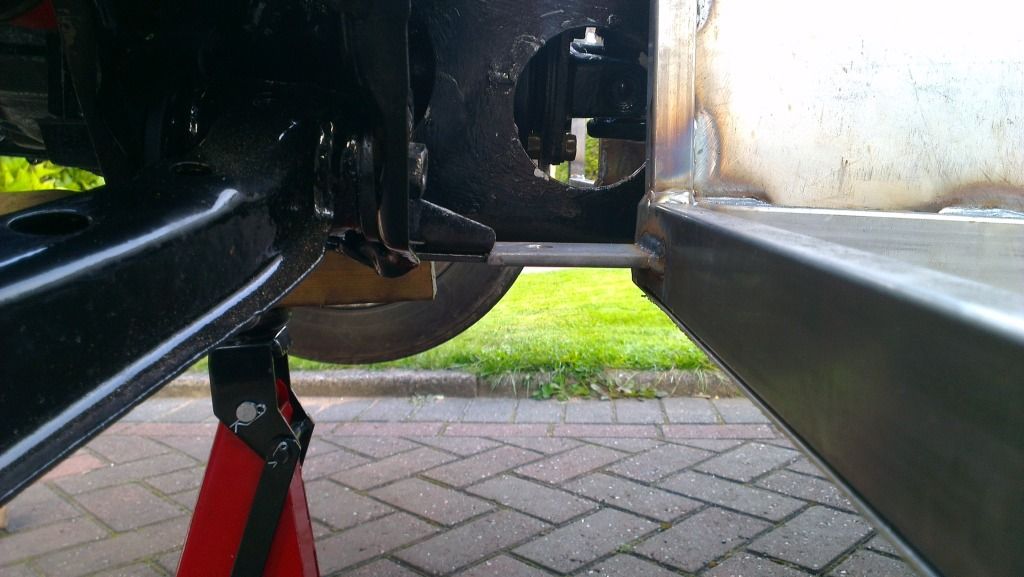 Rich |
|
|
|
Post by h5ngs on Sept 19, 2012 22:07:19 GMT
Give them a little tap with a hammer to bend them down and then retry saves alot of time pulling the ppf off thats all i did on mine mate
|
|


 anyway the one came out lovely but the other was a bit more difficult and ended up snapping the casting, so will have to get a replacement at some point.

