|
|
Post by adam1001 on Nov 17, 2011 10:32:23 GMT
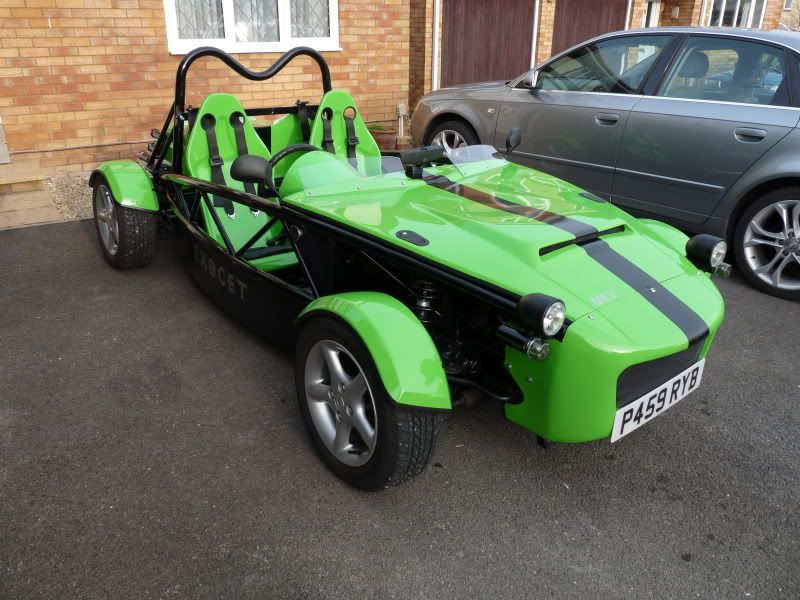
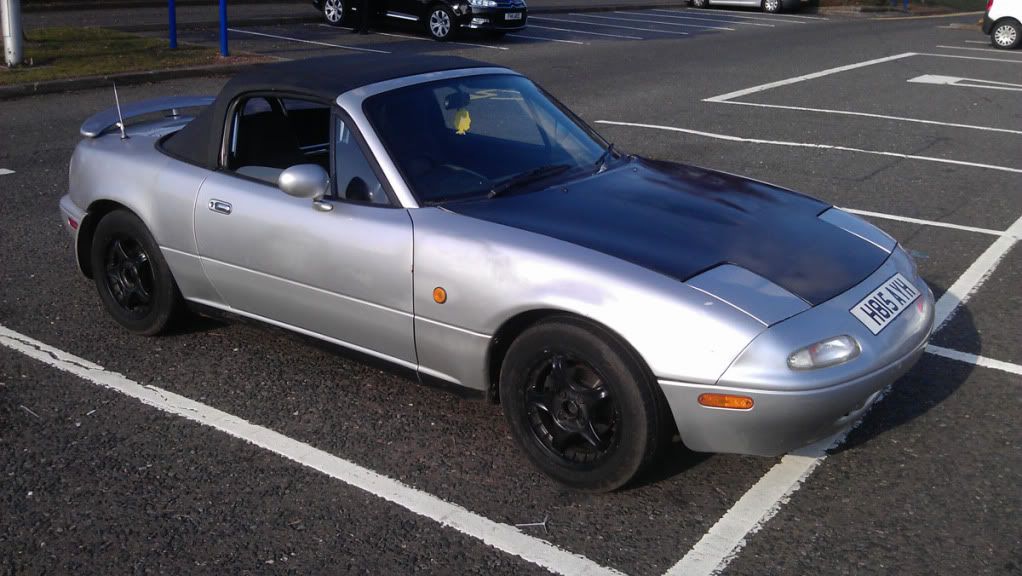
It all began when a friend who I never do car things with, invited me to the Britcar 24 at Silverstone on the 1st October. It sounded kind of interesting and improbable at the same time so I said yes. I buy and sell cars quite frequently and the current car, a Lancia Delta Integrale was on the way to being sold. I always get itchy feet around this point and spend countless hours looking on Ebay for the next one. But I couldn't think of a single car. At the end of last year I had a 350Z, the beginning of this year a Range Rover Vogue and then the Integrale. A TVR was a possibility but I was undecided. Plus I was having trouble shifting the 'Grale so there wasn't much money to invest. Simon arrived on the Friday evening with his son, we had a bbq and a good evening putting the world to rights, then bright and early on Saturday morning the three of us plus my five year old son set off for Silverstone. It was only about 20 minutes after arriving that we stumbled on the MEV stand and I was immediately struck by the cars, particularly the Sonic 7. By the end of the day I'd pretty much decided I was going to build a MEV. I spent the next few days pondering, and soon discounted the Sonic 7 on grounds of time and cost. This left the Exocet, not so pretty in my eyes, but a far easier project and something I could get well underway if the Grale still didn't sell. The next question was which MX-5 to buy. On the 10th October I won one in Wakefield for £385 on Ebay. I didn't expect it to sell so cheaply, and in retrospect I'd probably have paid more and got more money back selling parts, but this was the one! This was the description: 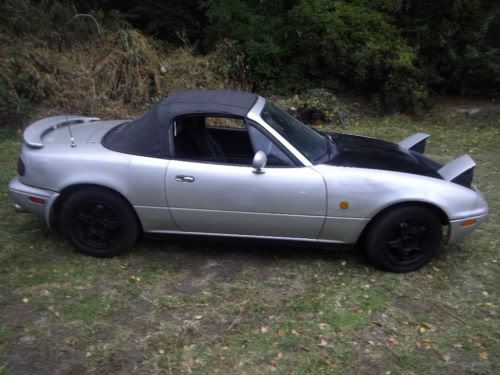 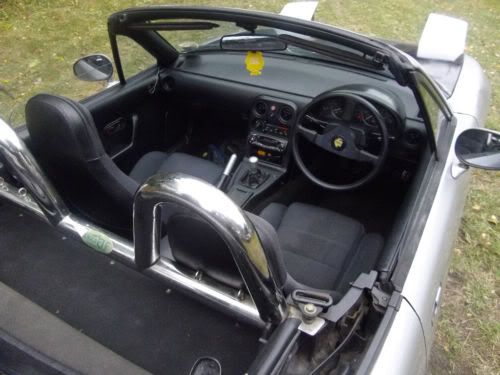 1991 MAZDA MX5 1.6 16V EUNOS ROADSTER SILVER GOOD POINTS STARTS AND DRIVES (GOOD ENGINE AND GEARBOX) SOME GOOD AFTERMARKET PARTS ,EXHAUST,AIR FILTER, MOMO STEERING WHEEL,ALLOYS WITH GOOD TREAD, ROOF OPENS AND SHUTS BAD POINTS (WHERE DO I START !!!) EXHAUST BLOWING PAINT WORK ISNT THE BEST NEEDS A FRONT LENS IN BUMPER N/S DRIVERS WINDOW DOESNT OPEN ON SWITCH (IF YOU WANT IT OPEN ID SUGGEST TAKING A CROW BAR TO IT !! OR A HAMMER ! DRIVERS DOORCARD MISSING WOULD MAKE A PERFECT PROJECT FOR OVER THE WINTER ,AS THE ENGINE IS VERY GOOD ,THE GUY WHO P/XED IT SAID IT HAD BEEN TUNED ,IT IS PRETTY QUICK THOUGH ! ONLY GREEN SLIP OF V5 (BUT YOU CAN GET A FULL LOG BOOK WITH ONE MOT 15/10/11 .TAX 30/11/11 ANY QS TEL 07931505xxx NO RESERVE AUCTION CASH ON COLLECTION The next date I could get to Wakefield was Friday 14th. I booked the train ticket and three days later I set off early from Milton Keynes to Euston, Euston to King's X, King's X to Wakefield. Despite the seller's less than perfect feedback, the car was exactly as described and I paid the money, chucked some petrol in and set off. It was a glorious afternoon and a fantastic drive. It was the first time I'd ever driven an MX-5 and I was pleasantly amazed. I stopped at a services on the way down for a coffee and to have a look at the car. It wasn't pretty, but should be just what I needed. I drove it a bit at the weekend, picked my son up from his mum's (he loved it and decided we'd call it Miata - even though he didn't mind her dying and becoming a man very soon) and then on Sunday night that was it... the MOT ran out. I parked her in the garage for the last time. |
|
|
|
Post by adam1001 on Nov 17, 2011 11:41:44 GMT
 Unfortunately for my build I had a very busy week and then it was 10 days in Cornwall for half term so things were on hold. However Cornwall coincided nicely with the Exeter kit car show which gave me a chance to meet Stuart and Julie properly and put down my deposit. I'm going for a black standard Exocet with the detachable roll hoop and a pair of seats. On Tuesday 1st November, exactly a month after the first seed was planted I began the demolition. My garage is quite narrow so I drove the car out to remove the doors. It was straightforward apart from the checkstrap pins which caused my first injury, pinching two fingers in the pliers. Very painful. Doors off and it was very tempting to take the car for a spin, but without tax and MOT I decided on caution and drove it straight back into the garage. Next were the bonnet, bootlid, boot contents, seats and centre console. Only problem was one of the seat bolts which rounded. Time to finish for the day. 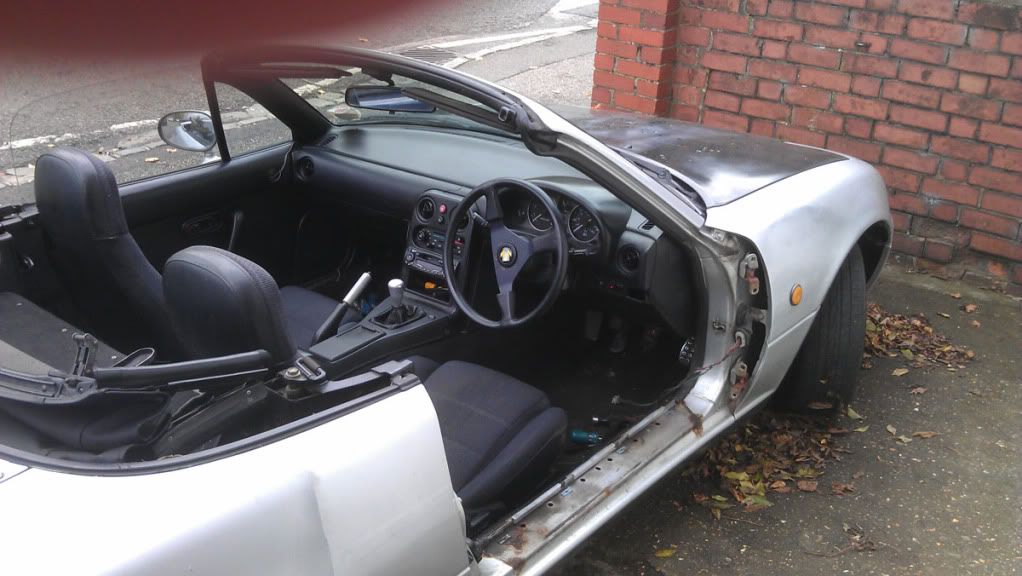 Next day was the hood and carpet at the back, fuel flap, rear trim, seatbelts, beginning the dashboard and attempting to remove the rounded bolt. Bought a breaker bar and grinder, both of which were useless. There wasn't enough on the bolt for the breaker bar to make any difference and the grinder wouldn't actually fit into the indent in the runner. Day 3 - seat bolt again. Tried a chisel this time to no avail. Finally spent about 20 minutes attacking it with a drill which did the job without any damage apart from the pulverised bolt. Carried on with the dashboard and tried to remove the steering wheel, but it was stuck solid. Eventually removed the whole column with the wheel. The next few days involved lights, wings, bumpers, electrics, stripping the doors down for sale, more electrics, lots of sheared bolts, a massive cut when the wiper motor finally let go and I banged my arm on the lip of the inner wing, the heater system (luckily the air con was empty), carpet, clutch pedal... and that brings us pretty much up to date. I'm being held up at the moment waiting for a 29mm socket to arrive. They don't exist in Halfords so I ordered one online but it's taking ages. I need it for the rear hubs - until I undo them I can't remove the brake system which is pretty much all I have to go apart from a few random pipes and the big bolts underneath. 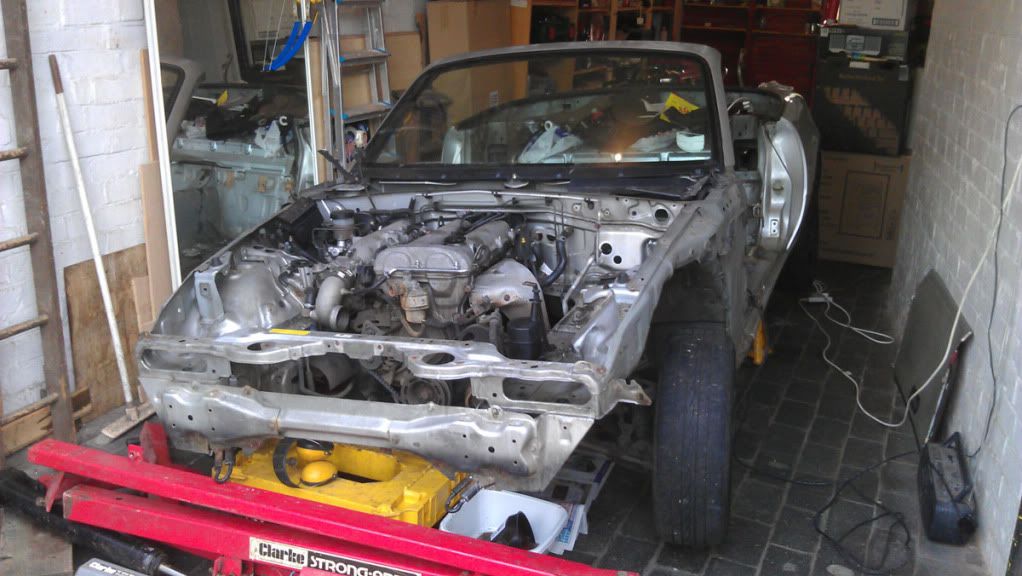 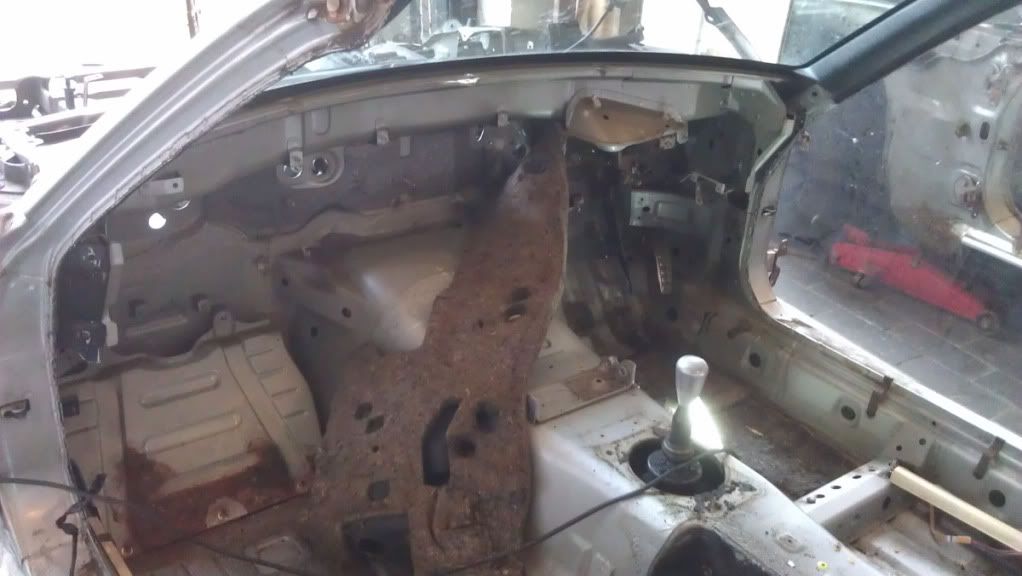 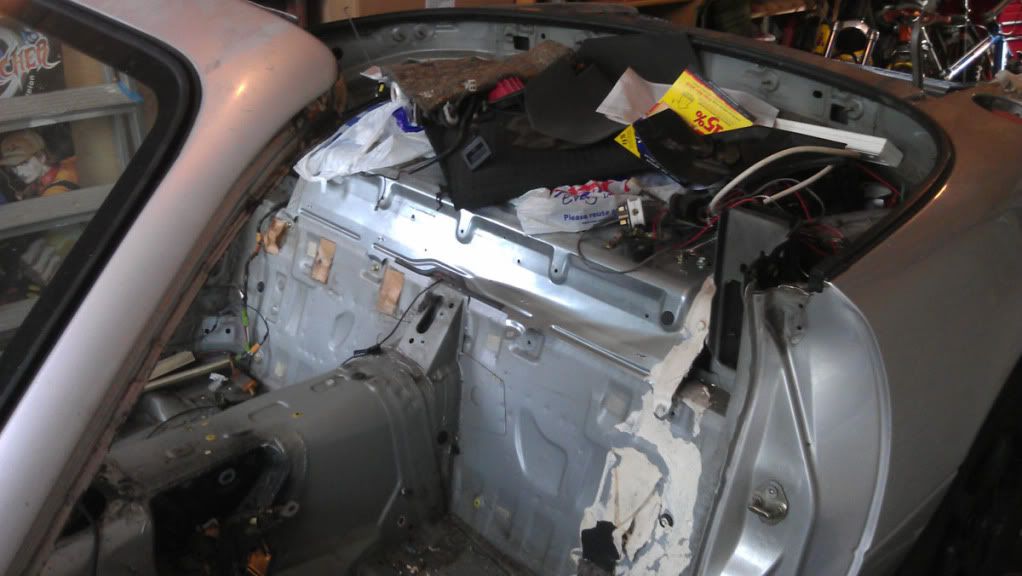 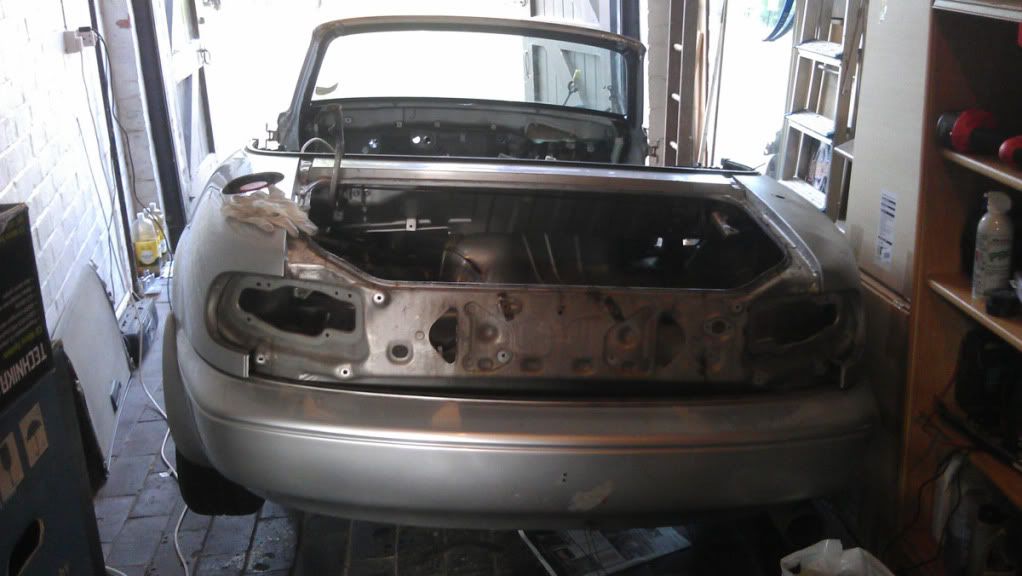 Selling stuff is going well: so far I've sold the roll hoop, seats, one wing, headlights, spotlights, spare wheel and hood. I did get ripped off on the spotlights which was upsetting - a 'Mazda specialist' from Sulston Hills Mazda came over for a few bits and ended up convincing me the spotlights weren't worth anything so I lost about £25 on those. Lesson learnt: don't trust anybody. As far as buying bits goes, I've bought a few tools to top up my already pretty good supply, a top rad hose (mine was repaired), an inlet manifold blank for the carbon filter pipe, a new seat bolt and a PAS plug kit from America. I'm keeping my eye open for some wheels on Ebay - what are people's thoughs on 16" vs 17"? |
|
Deleted
Deleted Member
Posts: 0
|
Post by Deleted on Nov 17, 2011 13:12:28 GMT
Adam, good choice going for an Exo. I'm on number 2!
I suck a set of 17s on the first one, and the larger wheel size caused the speedo to mis read and resulted in an IVA fail. if you want to stick larger wheels on, keep the originals for the test and then change it once passed. 17s are very big for this car, and some feel they look too big. take a look at my new build thread (alexs Exocet #2) as theres a pic of the first one on 17's. A wheel that size doesnt leave much room under the arch either!!
I'll be going for 16s this time round i think....
|
|
|
|
Post by adam1001 on Nov 17, 2011 14:07:17 GMT
Hi Alex, I couldn't make up my mind on colours but seeing pics of your first build a couple of weeks ago made me firmly decide on black - your one looks great. I love the look of the Wolfrac es on it as well but after what you've said I think 16s are probably the way to go.
|
|
Deleted
Deleted Member
Posts: 0
|
Post by Deleted on Nov 17, 2011 16:02:29 GMT
Thanks Adam. That one had to go to make room for number 2 (which is also black!)
As a general rule 17are slightly wider than 16s and it was a very close fit under the wings not to mention a full weight lifting workout to turn the wheels when the cars stationary!
16s won't be a great deal smaller in circumference, but should be thinner and thus easier to turn.
|
|
|
|
Post by adam1001 on Nov 18, 2011 20:59:23 GMT
*Finally* the 29mm socket arrived today. I was going to wait for my friend Jean to help me in the evening but I thought I'd give it a shot with my son Eden. So after we'd got back from school he sat on the floor and pushed the brake as hard as he could. 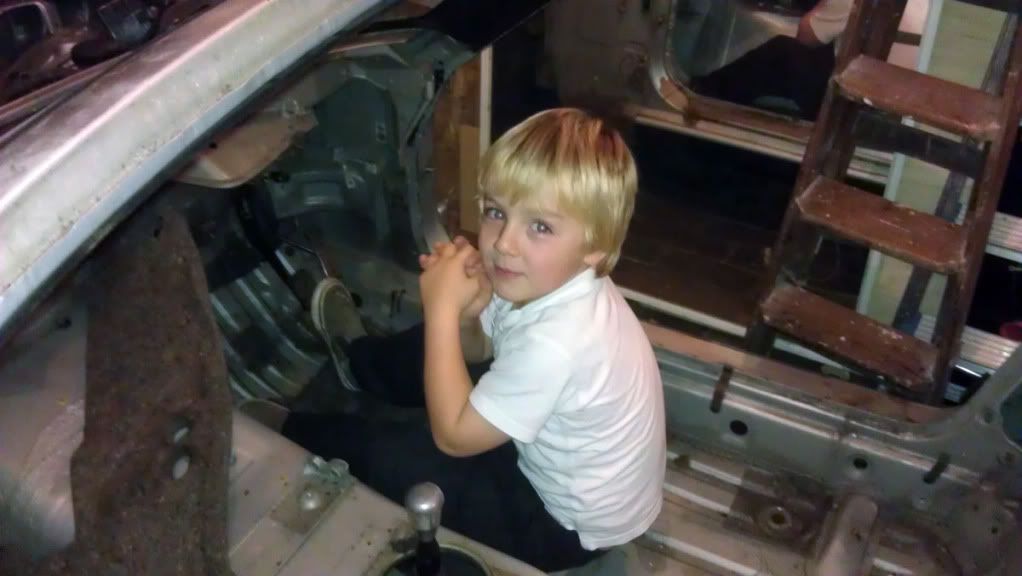 The wheel was holding fast, Eden was doing a great job, and I could feel it beginning to go. Then disaster. It wasn't the nut going, it was the breaker bar. So that's why it's called a breaker bar. 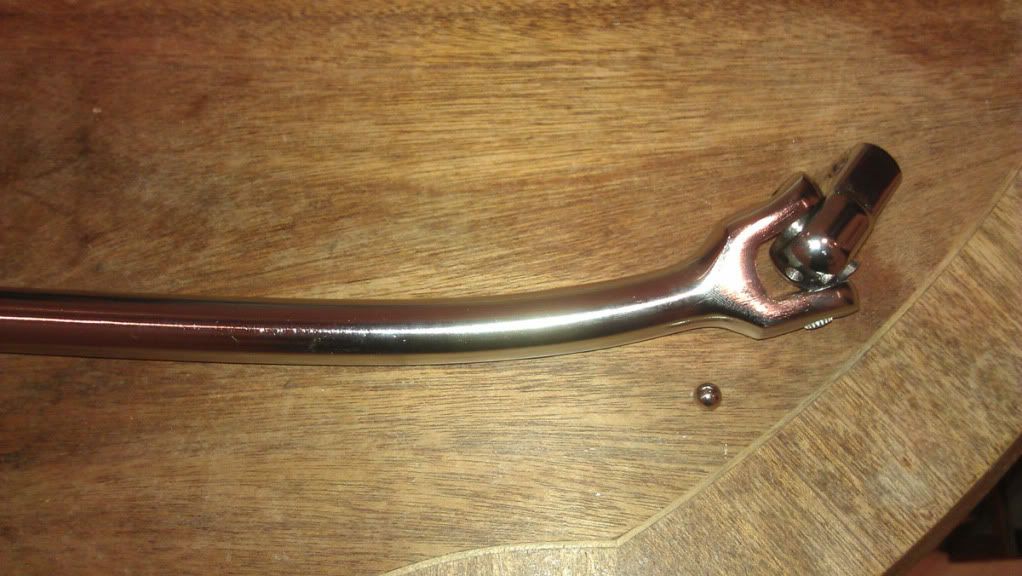 It's never worth buying cheap tools. So we headed to Halfords. I checked with the manager that their bar would work with a scaffold pole and he said yes, and if it broke he'd exchange it for a new one. Perfect. Unfortunately with a decent bar Eden couldn't hold the brake enough so now I'm waiting for Jean to give me a hand... |
|
|
|
Post by adam1001 on Nov 19, 2011 0:38:21 GMT
...which eventually he did. The o/s hub nut popped straight away but the brakes couldn't quite hold the n/s. After four attempts I removed the wheel and got the blowtorch out. Well actually I haven't got a blowtorch yet but the creme brulee torch is doing a cracking job in the meantime. I had to put the wheel back on again and suddenly it went! After that I drained the brakes through the nearside flexi hoses (disconnected them at the callipers and pumped the pedal), removed the pedal box, brake master cylinder, moved the clutch master out of the way, pulled through the accelerator cable and unbolted the PAS reservoir. Time for bed!
|
|
|
|
Post by adam1001 on Nov 20, 2011 0:09:55 GMT
Quick query - the front anti-roll bar bushes are mounted onto some weird sort of chassis extensions on the MX-5. I take it on the Exocet they're mounted straight onto the chassis and I don't need to keep the extensions?
If all goes well I should have the shell lifted off in the next day or two. I've loosened off 10 of the 14 joining bolts without any problem, haven't tried the last four yet. Just a few odds and ends to go now, front brake pipes, speedo cable, fuel pipes, shock bolts and 200mm wishbone tubes.
|
|
|
|
Post by adam1001 on Nov 23, 2011 18:51:53 GMT
Got the shell separated from the rolling chassis last night! Although I wanted to keep the base rolling I started by supporting the back and front subframes before removing the top as I figured this would be the simplest way to go: it's virtually impossible to insert the corner supports on your own without first supporting the centres. Separation worked first time! Even remembered to remove the exhaust supports. I wanted to get it all hooked up to the lift last night and to save late-night drilling ended up mounting the ropes a bit c0ck-eyed which caused the shell to be a bit crooked when lifting. This is where I started this morning. 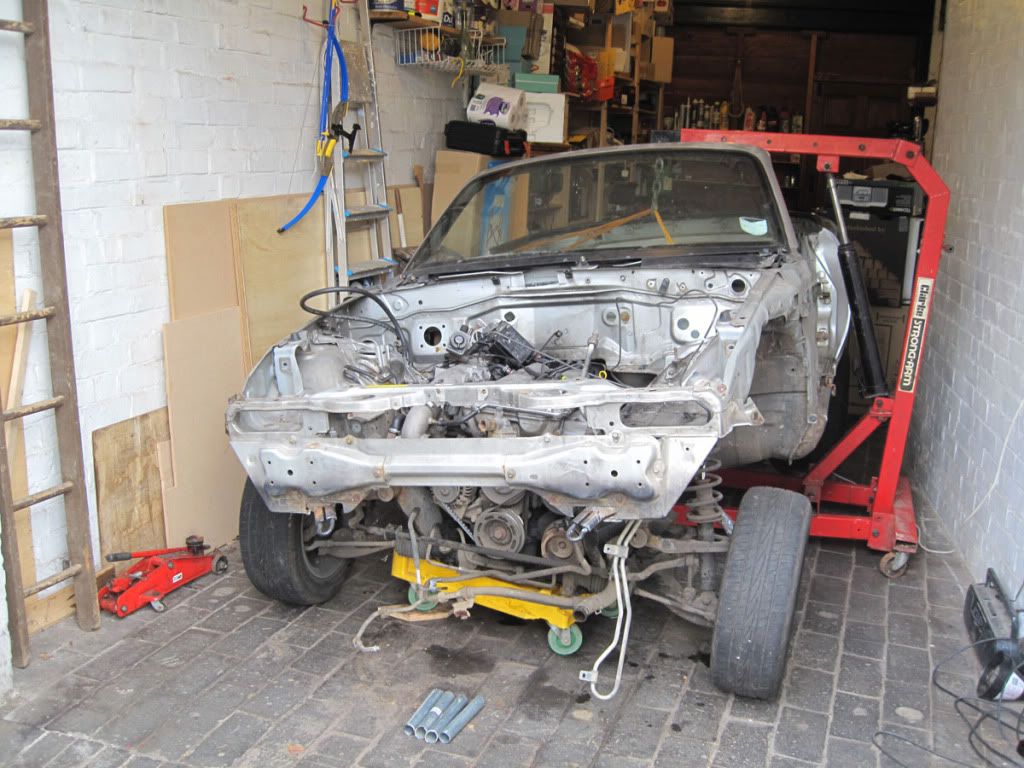 What followed is possibly one of the most convoluted methods of splitting the two, but it was the only way due to the fact that the engine lift would only move across the garage and the base would only move in and out... First I lifted the shell high enough to fully clear the base. 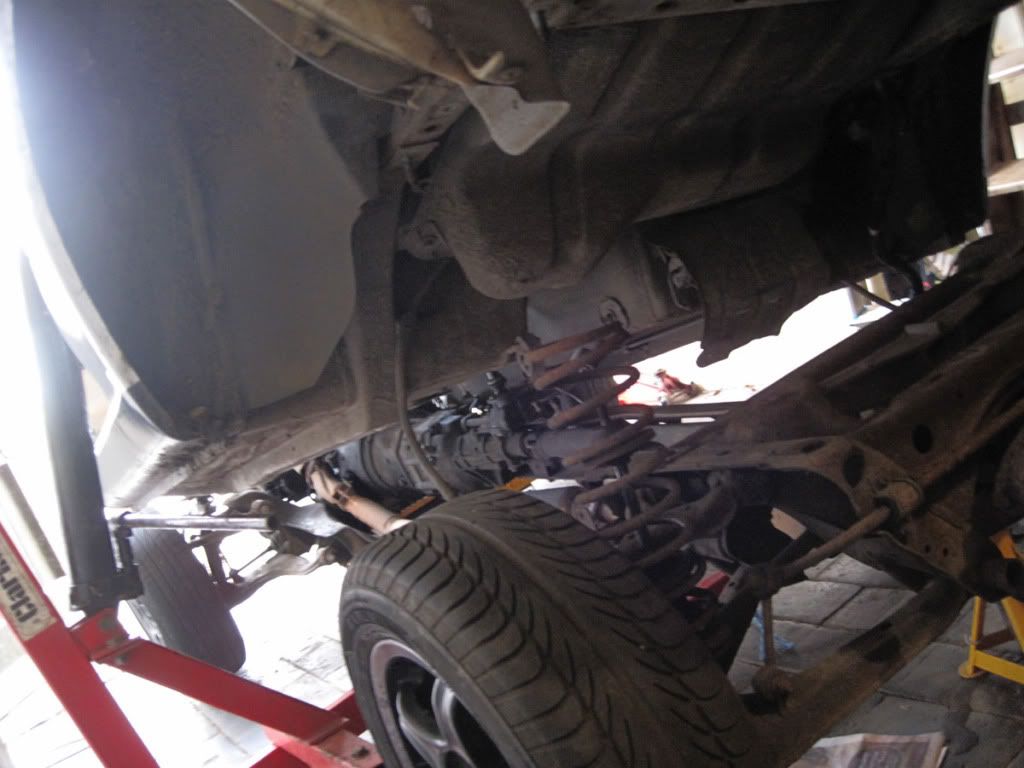 Next I jacked up the front enough to remove the centre support (one jack either side), then slowly let down one side while holding in the 200mm bar. The bar could have been a bit longer, but worked fine. Then the other side. Moved to the back, same procedure, although only one bar was needed to keep it buoyant. Next I had to manoeuvre the base *over the engine lift legs. 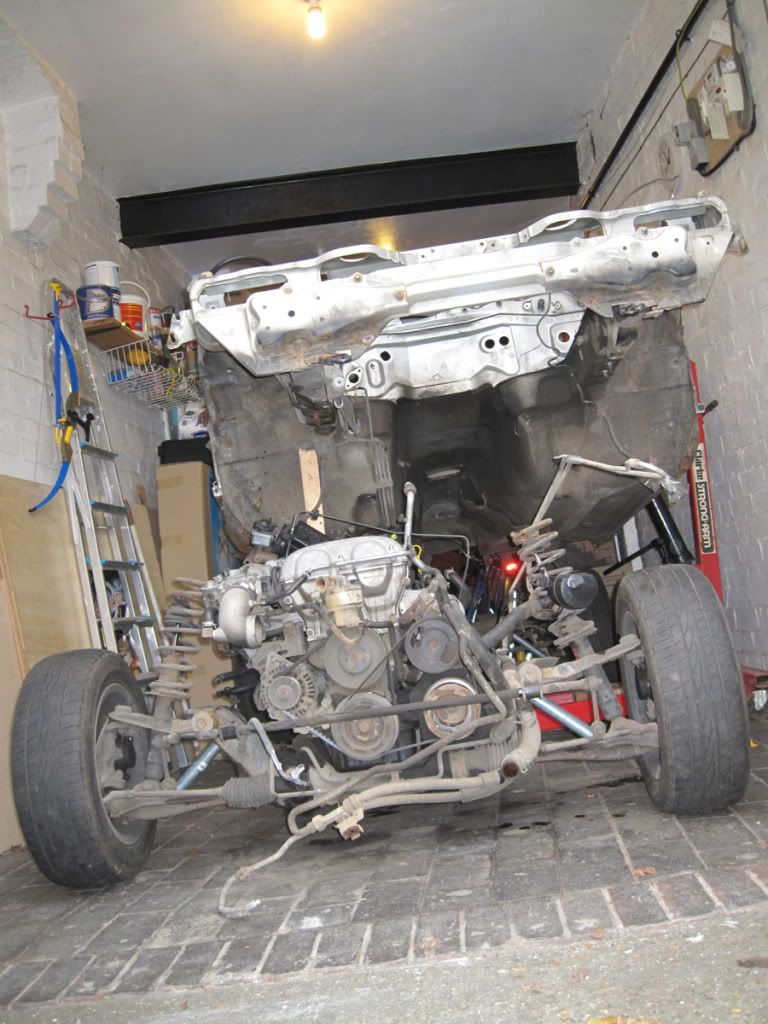 Stuck some bricks and a plank in between the two legs and rolled it slowly forwards. 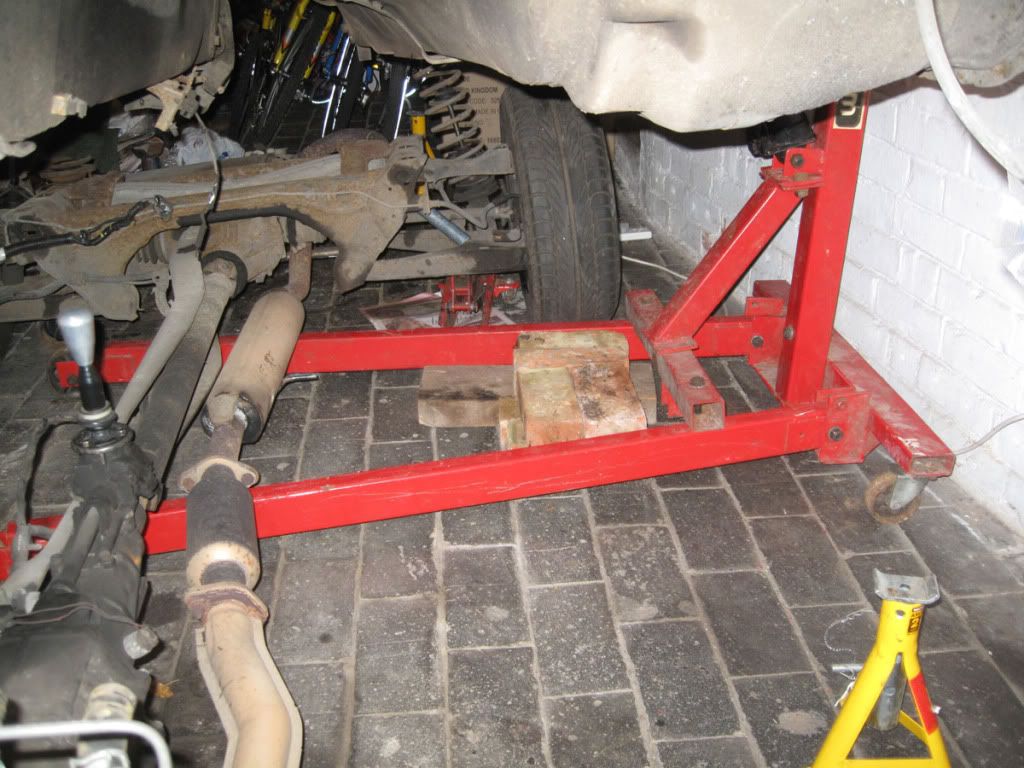 The first time the back pole popped, but the second time it worked and I got it over the engine lift. Now I was all clear and wheeled the base outside. 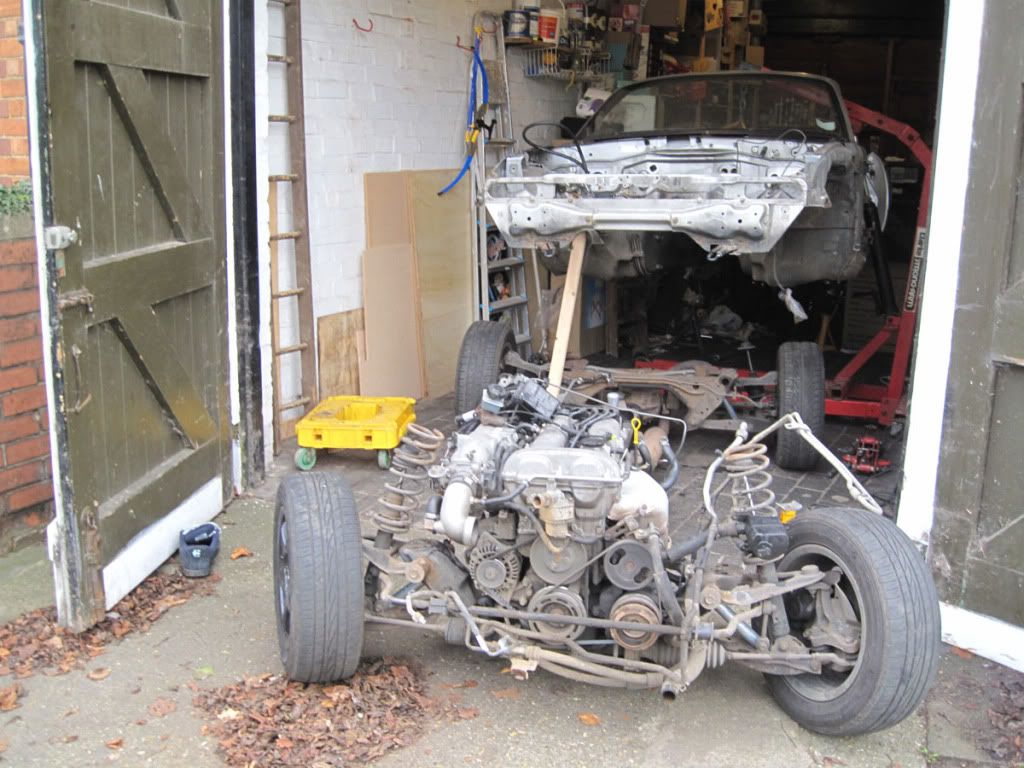 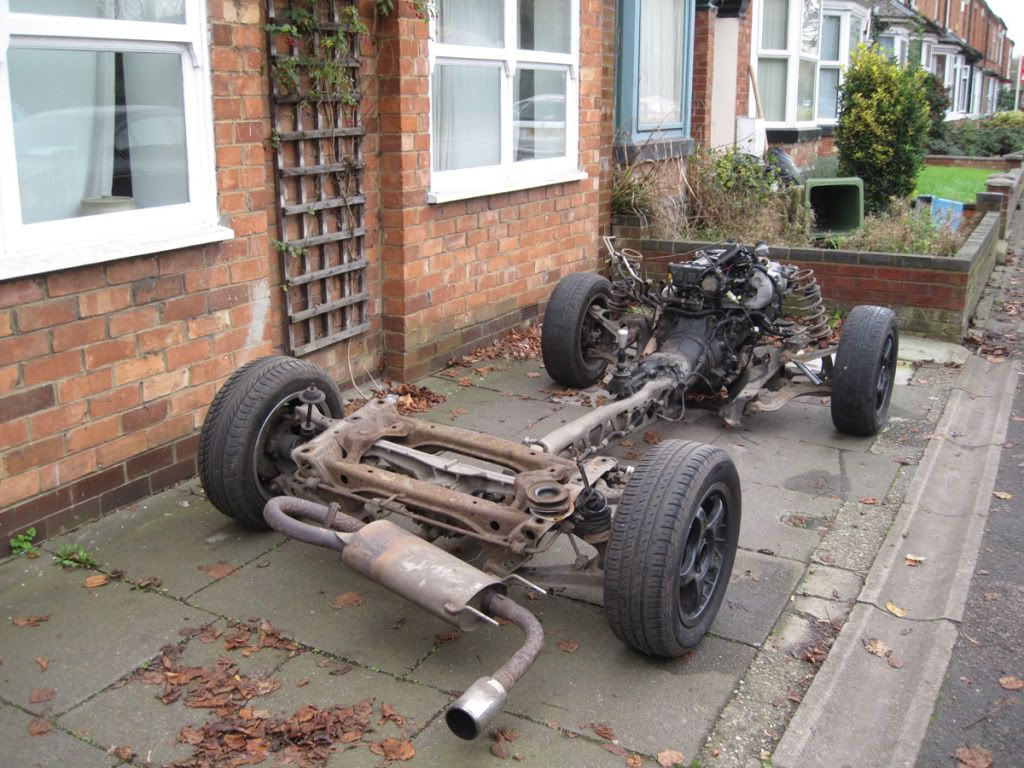 Next was the last few bits on the chassis. I moved it over so it was at a 40ish degree angle, took off the fuel tank, filter, shields, handbrake and cables, exhaust mounts, a few clips, and the last few bolts (already cut the vin off). Then I lowered the shell onto the engine trolley (which was way too far forward), jacked up the front, moved it back, and ended up with a perfect balance. 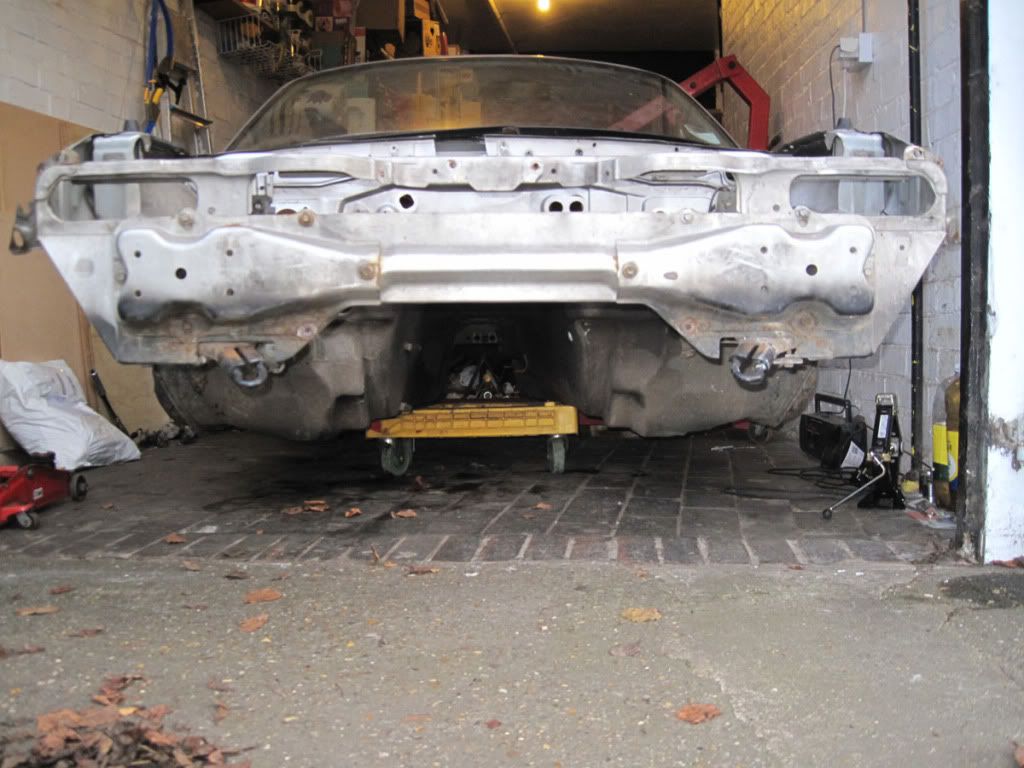 Wheeled the shell out, moved the rolling chassis onto the pavement and swapped them over. Deconstructed the engine lift and finally moved the base back into the garage. 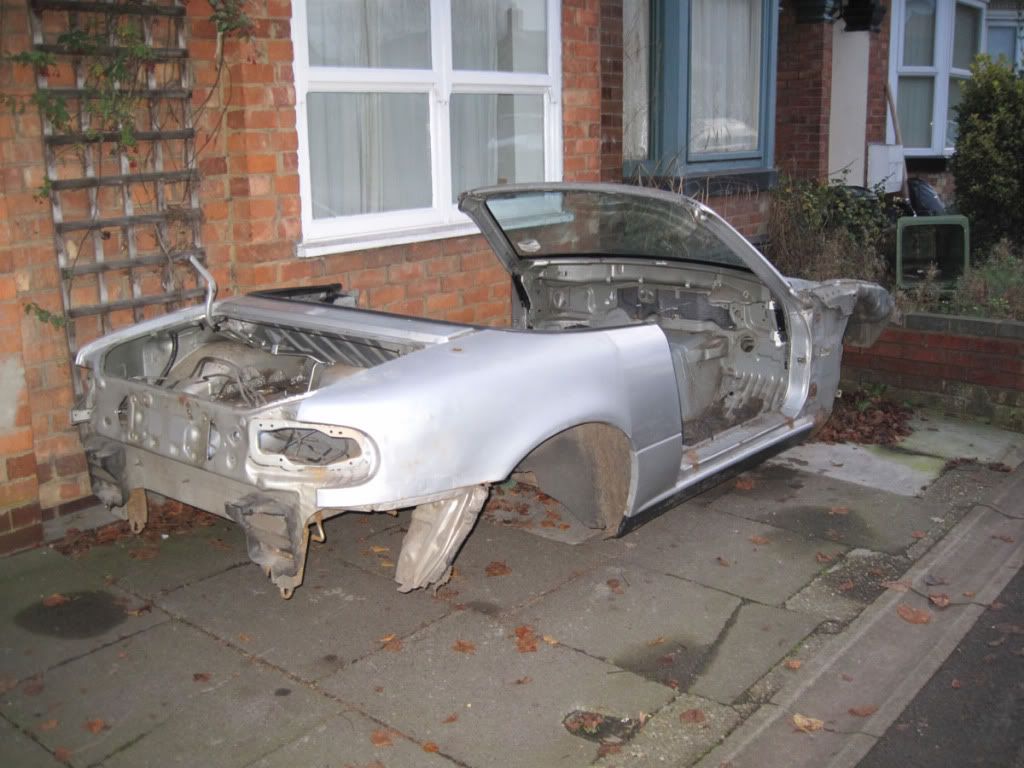 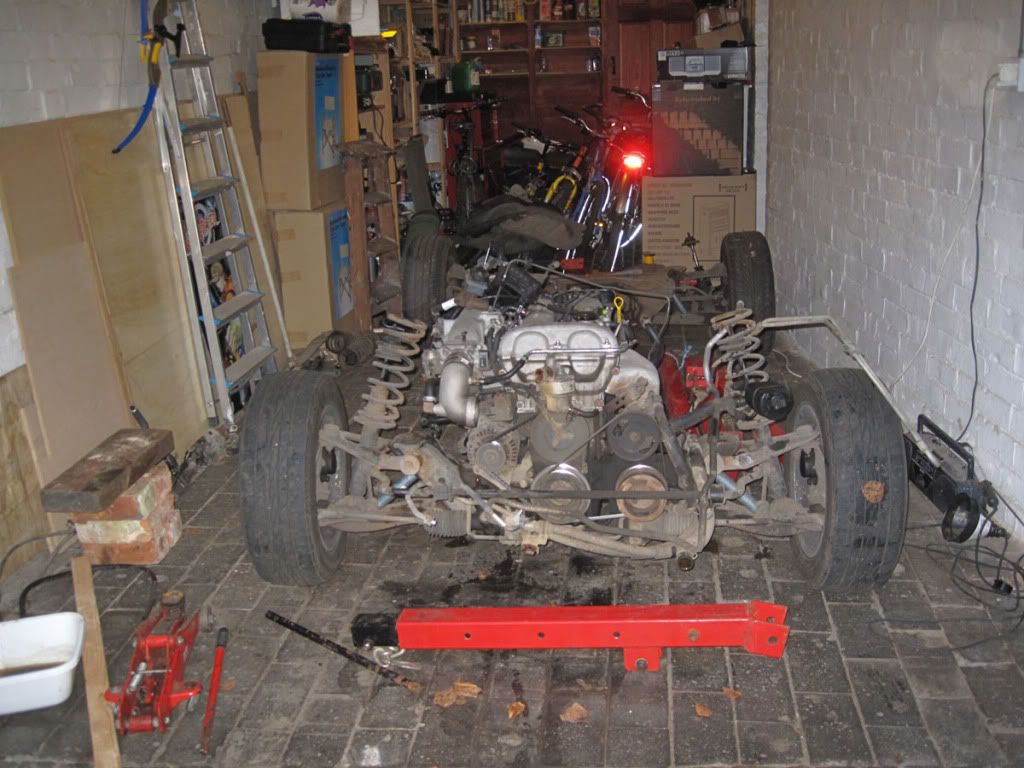 Sorted! |
|
|
|
Post by adam1001 on Nov 26, 2011 10:15:20 GMT
Looking at my accounts this morning I've just passed the cost of the car. I bought it for £385 and have sold £392 of parts so far (give or take PayPal and Ebay fees) with lots still to go. I've spent another £150 odd on bits and pieces which I should certainly make back when I get round to advertising more bits. Best seller so far was the seats (minus runners) which went for £82.
|
|
|
|
Post by adam1001 on Nov 27, 2011 9:30:16 GMT
I spent part of yesterday stripping the back end. Had some trouble with one of the PPF bolts but that's now resolved. So the diff is separate, but I've got a weird mass of seized bushes, shocks, subframe, driveshafts and wishbones to pull apart. The bottom shock bolts are stuck to the bushes, the long bottom wishbone to hub bolts are stuck in, and various other bolts are refusing to budge. I've ordered an electric wrench and a hub puller from Machine Mart which will hopefully help with all this. Meanwhile I'll crack on with the front.
|
|
|
|
Post by sspogman on Nov 27, 2011 13:39:24 GMT
I didn't separate the PPF from the subframes, or replace any bushes, when I built my kit however, I did encounter a number of seized bolts whilst stripping the donor. Fortunately I'm quite friendly with the owner of a local garage and he lent me his Snap-On cordless impact wrench - oh my god, what an amazing piece of kit! I didn 't have issues with any of the bolts when using this, nor did I need to use a breaker bar. Might be worth speaking to any friends that you may have in the trade to see if they can lend you one.  |
|
|
|
Post by adam1001 on Nov 27, 2011 19:07:25 GMT
Thanks, good advice. The wrench I've ordered from Machine Mart is a corded impact one so hopefully that'll be up to it...!
|
|
|
|
Post by adam1001 on Nov 29, 2011 20:55:45 GMT
Making pretty good progress - the engine's now up in the air on the lift, I've got the cam angle sensor gasket to cure the oil leak down the back of the engine and across the gearbox, and the front subframe is half stripped. A couple of the wishbone bolts have sheared (strangely things seem far more rusty on the o/s of the car) and I've gone and made a mess of the bracket at the front of the PPF. Normally it'd be approached from the bottom, but I approached it from the top and stupidly, not realising the nuts were captive, I've managed to mess up the plate. I wonder if someone could tell me if it's possible to detach the plate from the PPF? If so I can just get that rather than a complete new PPF.
|
|
|
|
Post by Stewart on Nov 29, 2011 23:54:37 GMT
The book seems to suggest if the PFF is damaged, it needs replacing. Not sure if it just means if it's bent or not?
|
|