|
|
Post by john on Feb 23, 2016 17:33:02 GMT
Few small backward steps, having fitted my fuel lines feed and return and plumbed them up I'm just not quite happy so have taken them all off and going to try and beaten them up or remake using these as templates. Bending and flaring while on the car was compromised so will give it another go. Possibly down to the fact its my first go at these things.
Also taking the tank off will make access easier for clipping lines and the rear brake pipe that runs across the rear subframe.
Few steps back and extra work but hopefully attempt two will be better.
|
|
|
|
Post by john on Feb 29, 2016 23:23:58 GMT
Much happier, tank and all fuel pipes off.
P-clipped the rear brake line across the top of the rear subframe, flared the fuel lines and refitted them on the car and joined them up with the rubber hoses feed and return and refitted my tank. P clipped the rear long brake pipe but not done the front yet.
Fitted using bead of sealant and rivets both the lower rear bulkhead panels.
For march I hope to fit the drivers/passengers footwell and transmission tunnel and fit the steering wheel (again hopefully getting it straight and bracket fitted my first fit ound it off to the side) and the front brake pipe into the cylinder.
|
|
|
|
Post by john on Mar 4, 2016 16:19:38 GMT
Just finished off the lower rear bulkhead panels, trimmed and fitted the front firewall middle section and drivers footwell.    Not looking forward to the passenger side panel, looks like may take a while I also enlarged the gear stick hole in the transmission tunnel a bit. |
|
|
|
Post by john on Mar 14, 2016 18:18:05 GMT
Update, have fitted the passenger side footwell (finally) The trans tunnel is 90% done just needs tweaking. Have redone my steering column with the bracket now below the chassis tube and also spaced out the right side bracket to get it sitting straight. Fitted my seat used some high tensile m10 bolts but need some better washers to get to clamping right as the seat runner holes are angled v the flat floor. Finally the dash, small notch at the bottom so sits flush with the steering column, have trimmed out a hole and cut down the plastic bezel and painted it to match the body colour and used some button head bolts to attach. Need a thin sheet or perspex to sandwich between but just need to buy some.   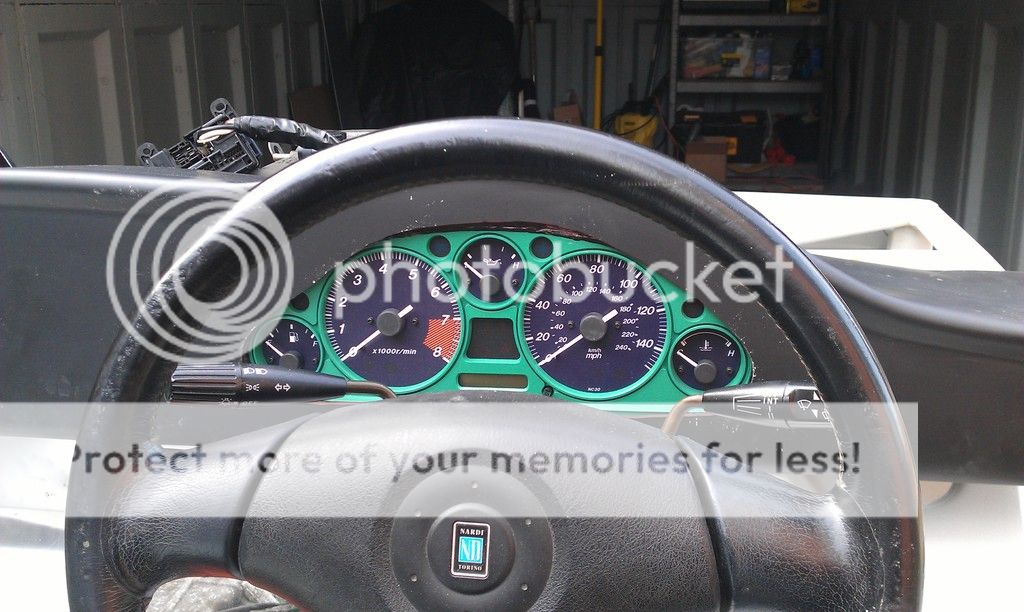 |
|
Deleted
Deleted Member
Posts: 0
|
Post by Deleted on Mar 20, 2016 15:49:50 GMT
Are you keeping the MX5 dash or looking to change after IVA like myself.
|
|
|
|
Post by john on Mar 20, 2016 19:48:25 GMT
Long term change to separate dials , today started on my new induction system but need another pipe so ordered a 70mm 45° pipe to link maf to filter in nice cool area.
Also tryed to fit perspex screen but the problem is the speedo and rev counter needle sits proud so rubs on the perspex need to find a way of spacing it a bit. Not much room though.
|
|
|
|
Post by gwnwar on Mar 20, 2016 23:24:56 GMT
How hard do they hit the plexy?? Maybe snip some off the stem for both needles and remove some plastic from top of the center of needles..
|
|
|
|
Post by john on Mar 22, 2016 23:41:30 GMT
Quite hard, the plexy bonded to the rear of the dash and with the OE dash binnacle tucked up its mega tight. I'm taking nearly 10mm space needed for some reason I don't know if mk1 or mk2 are different but the mk2 speedo and revs stand proud of the other dials.
I've spaced it at the bottom using an m10 nut and washer to give me clearance between the rear of the dash pnedl and binnacle I'll sort out final fit this week when some longer button head bolts turn up.
|
|
|
|
Post by john on Mar 30, 2016 12:53:08 GMT
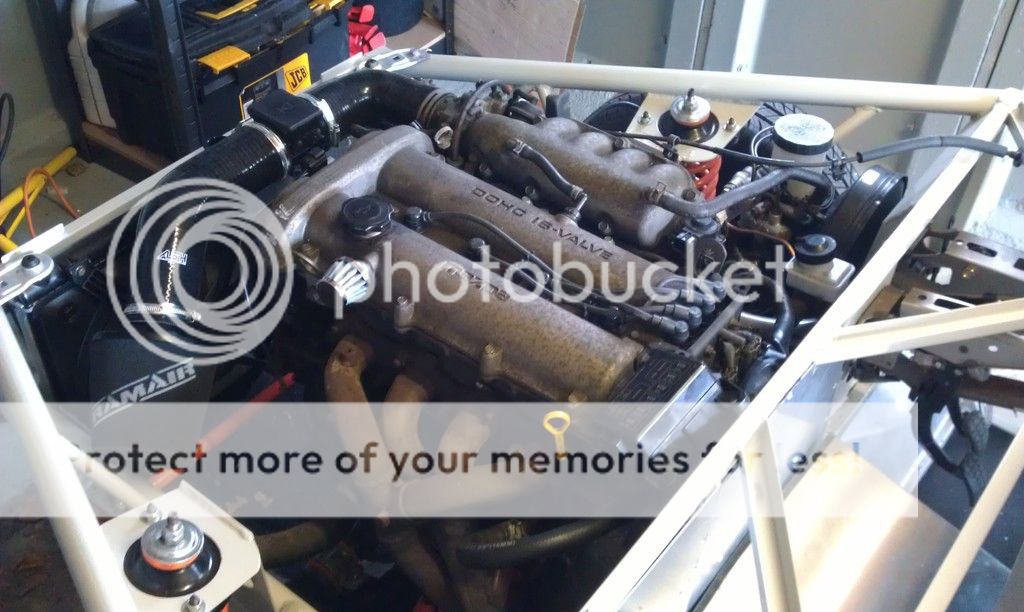
Perspex bonded on and drilled hole for dash trip reset button and finally binnacle spaced at the bottom so the face of the revs and Speedo don't catch. Finished new induction kit this morning (just need some new clips) needed three pieces a 70mm-64mm 90' reducer , then a 70mm 45' elbow and filter. Total cost was about £50 maybe a bit less. Drilled a 20mm hole in the elbow for sensor and made small bracket to hold it securely. Odd how my oe airbox wouldn't fit but happy with outcome. Oh and a 10mm breather. 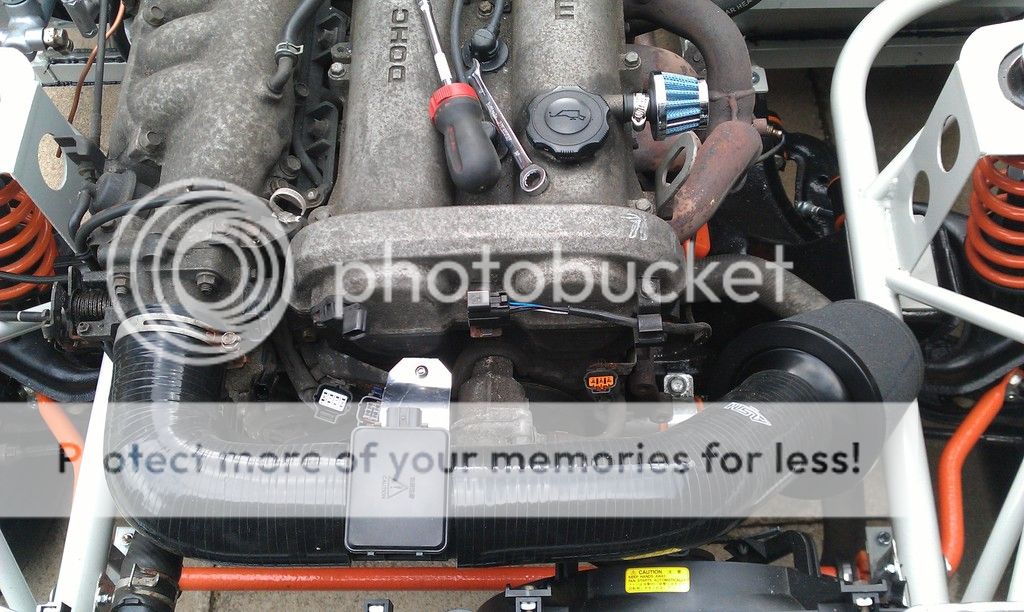 Going to hopefully finish the trans tunnel today but not got long till school run. |
|
|
|
Post by john on Mar 30, 2016 21:04:00 GMT
Trans tunnel fitted used rivnut to secure as advised not to rivet for maintenance etc
Need to figure out gearstick gaitor options but no rush and next onto handbrake assembly get it measured up and fit the lever before tackling the cables and routing.
|
|
Deleted
Deleted Member
Posts: 0
|
Post by Deleted on Mar 31, 2016 16:14:20 GMT
Hi john, yet again we are pondering the same issue at the same time. I guess you also have the high top to the gearbox that appears to come with the mk2 mx5. I am about to do my final fit on the trans tunnel although I have gone a different route on the mount to the bulkhead and I have so far come up with two ideas for the gearstick. I first thought of using some ali box section but now thinking some mdf might be easier, should be able to shape something with curves then cover in the same stuff I will be using on the rest of the tunnel and hold down with long bolts through a chrome surround to rivnuts in the tunnel. Yet to actually measure anything but would be interested if you have any other ideas on this.
|
|
|
|
Post by john on Mar 31, 2016 22:04:46 GMT
Yep it does stand quite proud, I had a mk2 upper boot rubber surrond which i planned on using to insulate between ground and cabin but with the gearbox sitting so high it won't fit. I had an escort mk2 alloy trans tunnel plate which is basically a piece of alloy with a 10cm hole pressed nicely in but that won't fit really either.
My plan is to actually fit a metal surround with a built in gaitor self tapped into the top of the tunnel with a cord etc to attach under the gearstick.
Other bits today was drilled and routed battery cables have decided to put them behind the passenger seat, as I'm just over 6 ft I thought would give me best chance of a comfy seat.
Finished my induction kit and that's finished also started the handbrake cables, those rear springs which tension the cable on the caliper were a nightmare. If I have to do that again I would rather set it on fire.
|
|
|
|
Post by john on Mar 31, 2016 22:14:26 GMT
 Working next few days but next is throttle cable, handbrake assembly inside cabin I need to look at what holes needed in bulkhead to feed cables through and basically a million other things. It's amazing how all the bits add up £ I'm glad to be taking summer off my build (was always the plan got a 4 year old don't want to miss out on any of that during summer) and to save up a bit more, I must be spending £50-100 a month on bits. |
|
|
|
Post by john on Apr 24, 2016 18:35:06 GMT
Few little bits made a bracket for the fuse box and bolted that up using a couple of rivnuts.
Fitted throttle pedal cable through bulkhead and connected up to pedal not to bad a job once I found a small square file.
Fitted handbrake assembly and cables.
|
|
Deleted
Deleted Member
Posts: 0
|
Post by Deleted on Apr 28, 2016 15:47:41 GMT
If you don't already know there is an adjuster screw behind a bolt on the rear calipers for the handbrake, tighten until it locks the wheel then back off half a turn. When you get it all rigged have a look at how much movement is there for each caliper handbrake arm, should be the same both sides. Got mine on three clicks to lock the wheels now. I also found that some spacers on the handbrake help as without them the handbrake lever was close to the gearstick and at a funny angle.
|
|


