|
|
Post by Kevin Patrick on Nov 15, 2010 20:48:27 GMT
Been out of town over the weekends so work on the donor has slowed. I did get a chance to finish off the body shell by removing the gas tank and the parking brake cables. 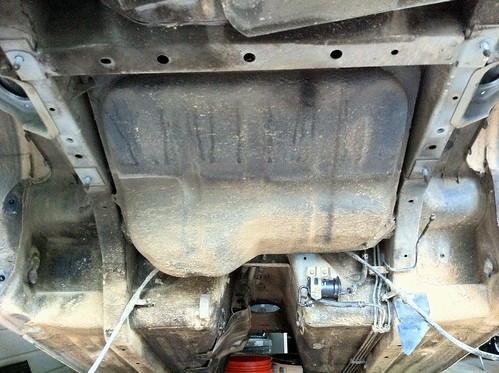 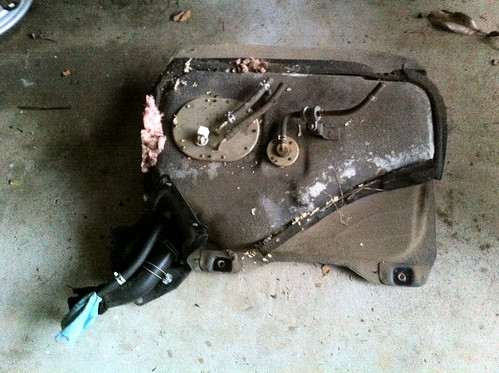 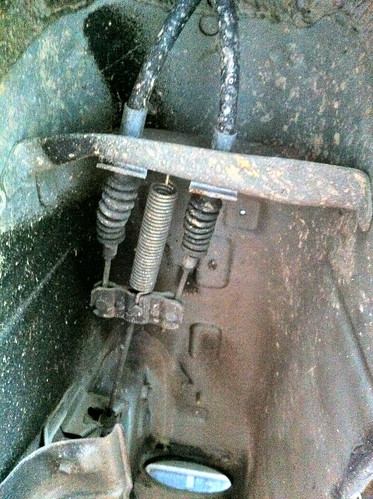 Aside from donor teardown, I have spent more time sorting out the unused items and getting them ready for sale on eBay. The soda blaster from Harbor Freight arrived along with 50 pounds of Armex blasting soda. I am interested to try it out this weekend on some of the donor parts that will be painted. Best news of all came today from Stuart - my kit is done and will ship within the next 10 days! That is over a month faster than I had planned! I'm excited because now I should be able to dedicate some additional time to the build over the xmas holidays next month. |
|
|
|
Post by Kevin Patrick on Nov 19, 2010 19:11:25 GMT
Look what arrived today: a Japanese domestic market 1.6L B6 engine & transmission with under 45k miles on it. Looks brand new compared to the donor. Super cheap too. 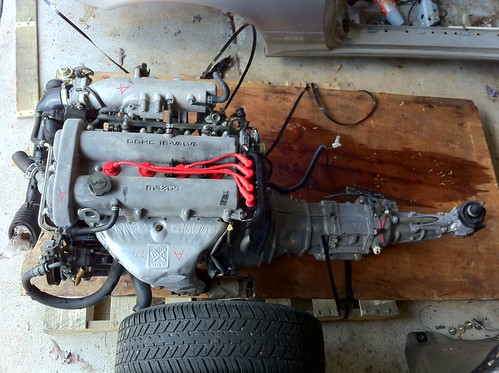 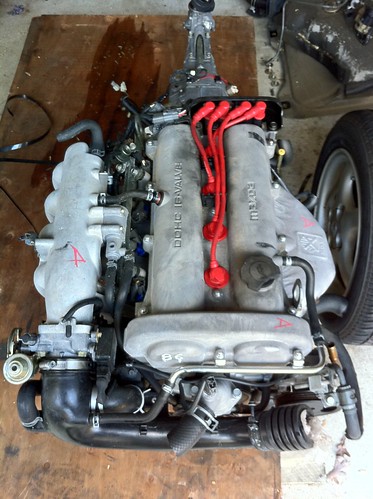 |
|
Andy888
Full
 Exocet Builder
Posts: 212
|
Post by Andy888 on Nov 20, 2010 0:29:05 GMT
Nice one!! I wish I'd power washed or steam cleaned our engine bay before we started stripping. Would have made things a bit less messy!
|
|
|
|
Post by Kevin Patrick on Nov 22, 2010 19:23:08 GMT
Made some more progress over the weekend: Driveshaft Removed 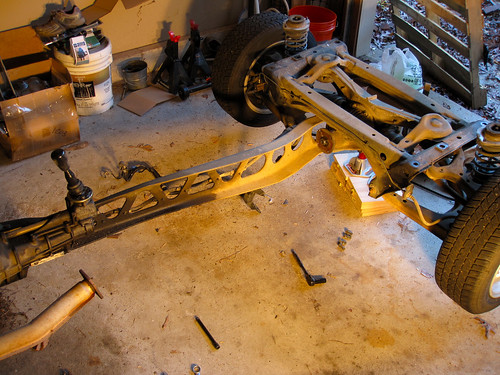 PPF Separated from the transmission 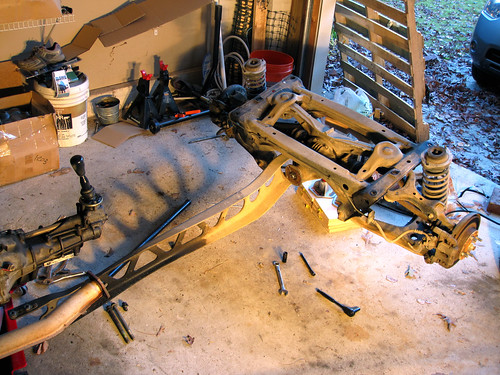 Engine/transmission removed 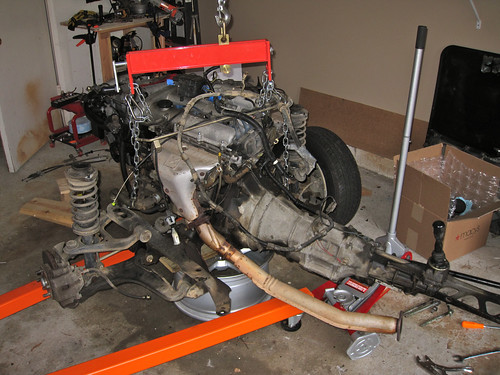 Disassembly of the front subframe/components 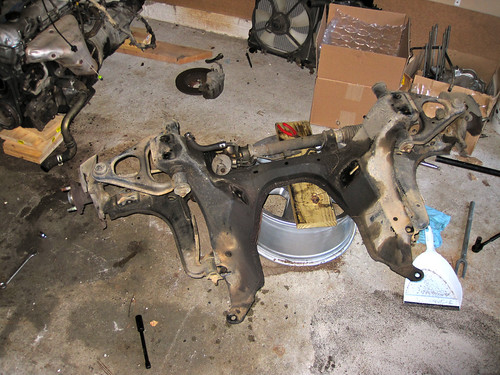 The new JDM engine next to the donor's engine 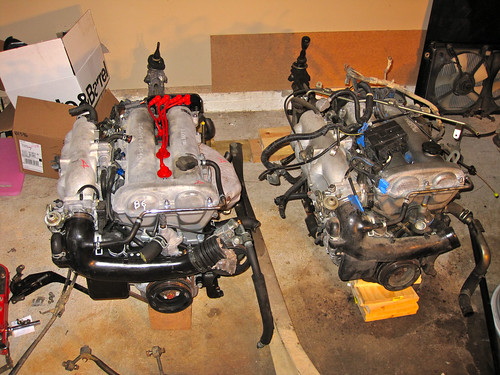 Current state of the garage 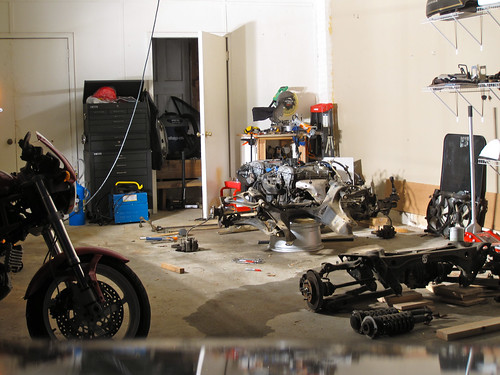 Only a few more bolts and the subframes should be completely disassembled. I have two days off for the Thanksgiving holiday this week and hope to finish them off and remove the old bushings. Assuming no hiccups and decent weather, the plan is to try soda blasting and painting some of the suspension pieces. Also need to get that body shell off to the scrap yard! |
|
Andy888
Full
Exocet Builder
Posts: 212
|
Post by Andy888 on Nov 22, 2010 22:57:58 GMT
Looking good. Nice to have space in your garage. Let us know how you get on with the soda blasting.
We've been doing a spot of electrolysis on a few rusty components before painting them. Seems to work ok, then we just rubbed them over with a wire brush.
|
|
|
|
Post by Kevin Patrick on Nov 22, 2010 23:07:26 GMT
We've been doing a spot of electrolysis on a few rusty components before painting them. Seems to work ok, then we just rubbed them over with a wire brush. That's good to know. If any of the items have moderate/heavy rust I have a feeling the soda blasting might not be enough. Are you using a specific product to prepare the part for painting after electrolysis? |
|
Andy888
Full
Exocet Builder
Posts: 212
|
Post by Andy888 on Nov 25, 2010 3:46:58 GMT
Nope, just washing them under clean water and drying off straight away, then painting maybe the next day or so. This is the best guide I came across antique-engines.com/electrol.aspAlso make sure you use washing soda and not caustic soda like some folk on the internet. Also use regular steel not stainless steel or you will get harmful/poisonous fumes coming off. |
|
|
|
Post by Kevin Patrick on Dec 8, 2010 16:10:55 GMT
Advice: if you plan on removing your axle nuts, do it before you remove the body and subframes. 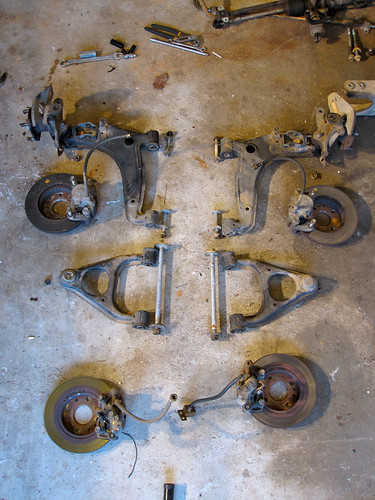 The front subframe and related components came apart with ease, but I ran into trouble removing the rear axle nuts. To hold the subframe and hub in place while attempting to remove the nut, I took a 3 foot section of 1/4" thick steel, drilled holes for the hub bolts and shaped down part of the bar to allow it to fit on the hub securely while being able to get the 29mm socket onto the nut. 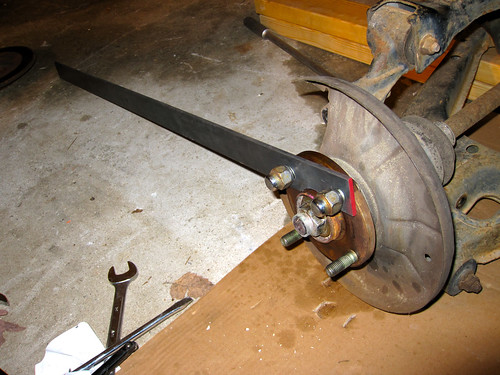 This method was flawed at best and the 1/4" thick steel bent like a wet noodle when I used my breaker bar. 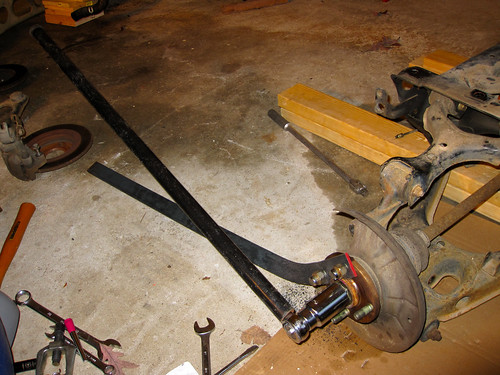 So I said "triple it" and used three sections of 3 foot long, 1/4" thick steel drilled, shaped and clamped together. 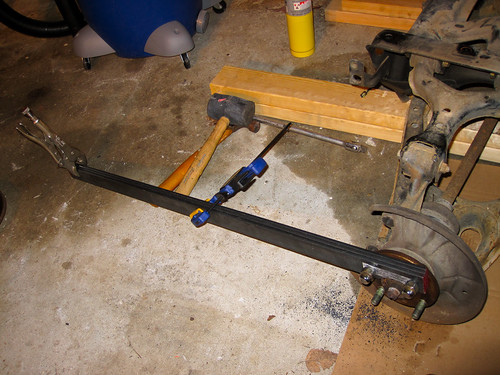 The left side came off with ease using the new hub holder. Went to do the right side and broke my ratchet. 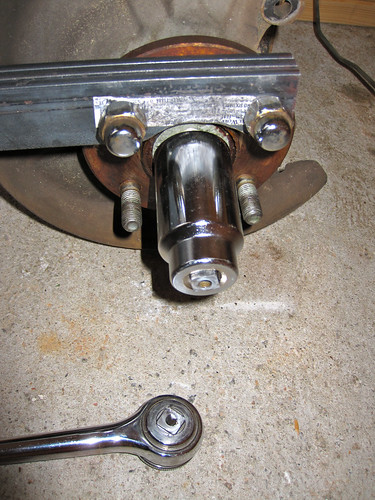 I grabbed another ratchet, but unfortunately my breaker bar did not fit over it. If you run into a similar situation, grab part of your engine crane and use that as the breaker bar. Finally, success. 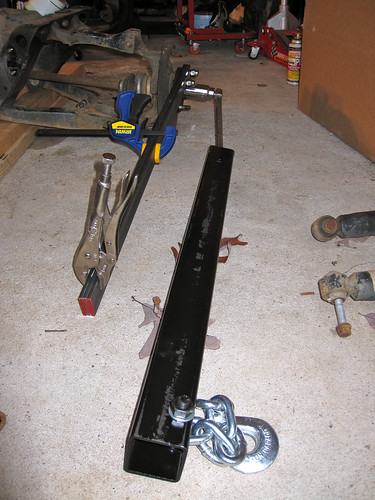 |
|
|
|
Post by chanmenie on Dec 8, 2010 16:45:43 GMT
good tip KP certainly looks like cracking them loose before stripping donor can save a lot of hassle.
|
|
|
|
Post by Kevin Patrick on Dec 31, 2010 13:56:56 GMT
This morning, a Georgia Tech student came by with his father to pick up the body shell for use in a V8-powered Miata project they are working on. Glad to see it get used for a project instead of being cut up for scrap. 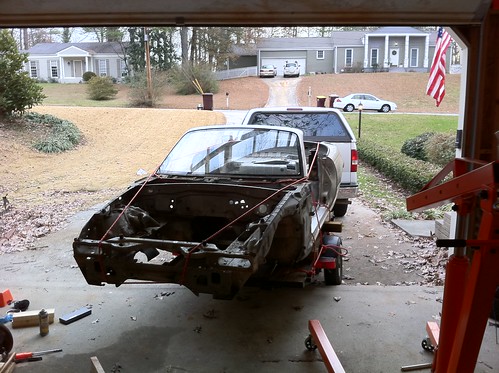 |
|
|
|
Post by Kevin Patrick on Jan 3, 2011 20:17:44 GMT
The kit is clearing US customs now and the shipping agent has stated it will arrive this week. I spent the weekend getting the garage cleaned out and finishing the stripping of the final donor items. I think I spent more time dreading the bushing removal in my head than it actually took. The Harbor Freight 3-in-1 Ball Joint/U-Joint/C-Frame Press Service Kit really made the whole process fairly easy. (Item# 38335) Link: www.harborfreight.com/3-in-1-ball-joint-u-joint-c-frame-press-service-kit-38335.html  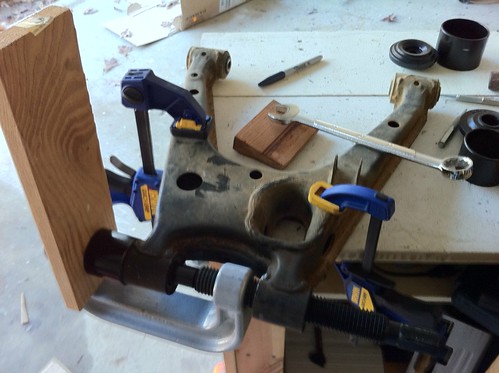 Also removed the front hubs as I will be replacing both. The vise was crucial since I did not remove the axle nut before taking the suspension off the car. I would recommend doing that before you pull the body. I removed the dust shields from the front and am considering removing the rear ones too - anyone have any advice on this for or against? 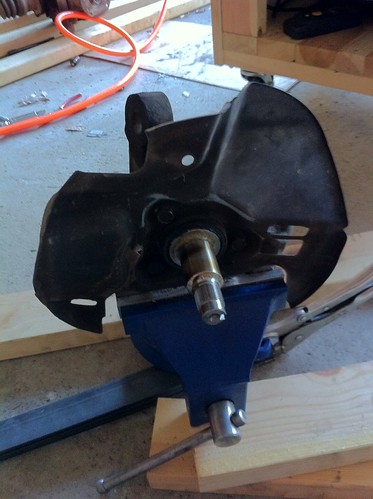 Burned off the differential bushings from the metal mount piece. A little messy but did the job. 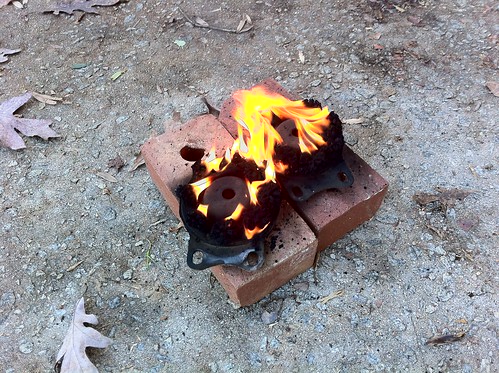 With the exception of the rear axles that are still seized to the rear uprights, teardown is complete. Time to clean, prep and paint. 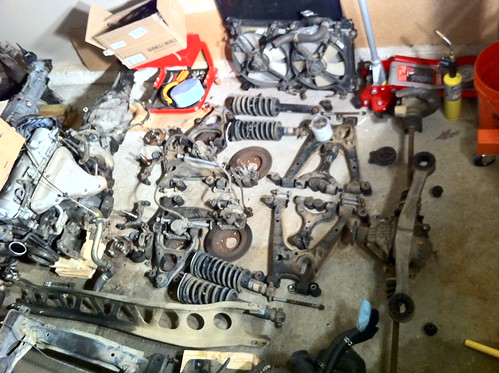 |
|
|
|
Post by Stiggy on Jan 3, 2011 22:14:17 GMT
Hi Kevin, so sorry to hear you did not get your kit for Christmas, I understand there was a delay at our sea port due to snow on loading. Any how you have lots of cleaning and painting to do so you will not get bored. I have to admit I just left all my suspension as was, saves a load of time and trouble and money but it is great to see everyone doing such a fine job on prep. I should be ashamed of myself. Regards Stiggy
|
|
|
|
Post by chanmenie on Jan 4, 2011 10:23:20 GMT
Well Stiggy as you feel so bad about it You could strip it down again and do it properley  ;D ;D |
|
Andy888
Full
Exocet Builder
Posts: 212
|
Post by Andy888 on Jan 6, 2011 0:23:35 GMT
Wow, that is a lot of cleaning and painting dude! Fair play. We started stripping and deciding to sod it and get on with the building so we can have some fun.
Also read about removing the brake heat shields on one of the Miata forums. Didn't seem to make any difference and the guy just cut them off in-situ with a dremel. Saved a fair bit of weight from what I remember.
|
|
|
|
Post by tlight on Jan 9, 2011 19:19:35 GMT
Kevin,
Just read the article on stripping the steering rack, think i'll join you on having ago. Looks fairly simple and will take away some of the pipework.
I wonder if you can get an engine pulley minus the power belt assisted portion to further reduce un-necessary engine load?
Tim
|
|


 ;D ;D
;D ;D