|
|
Post by snowbird1 on Apr 22, 2015 13:41:53 GMT
Do you mean the upper body supports or the extension frame?
|
|
|
|
Post by jimmypatch on Apr 22, 2015 15:32:40 GMT
Yeah the rear extension frame which then bolts to the chassis, also there are two "factory Mazda" support bars that go from the rear subframe towards the front, do these need to be retained?
|
|
|
|
Post by snowbird1 on Apr 24, 2015 20:56:50 GMT
By the 'factory support bars' I'm guessing you mean the frame that bolts to the subframe with 4 bolts and then 2 bolts to the body, they were added on the 1.8 cars to stiffen the rear subframe, I believe mainly to meet side impact regulations. It doesn't do any harm to keep them - cut off the front sections that connect to the body. As far as the rear body support I don't think there are any precise measurements, I adjusted the upper body supports to get the body sills level with the floor, I mounted the body as far forward as possible, that meant I had to shorten the rear body support frame. I elongated the upper holes to give some adjustment and bolted it to the body with the 2 bolts behind the number plate. These are my body mounts: 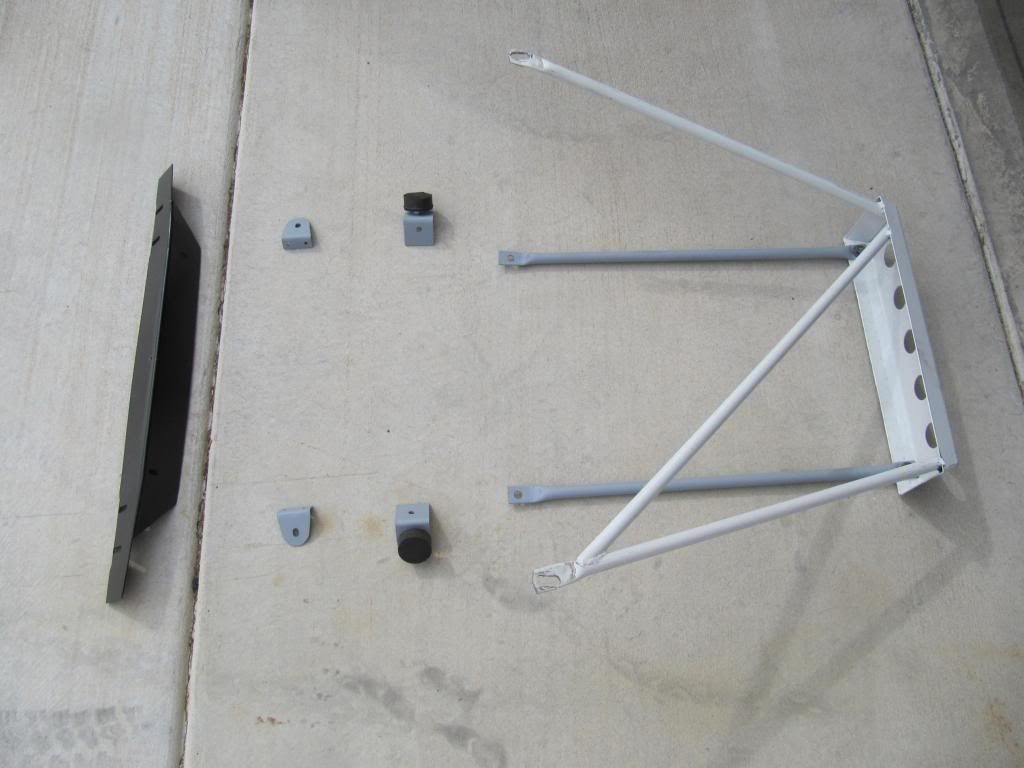 This is the upper body support: 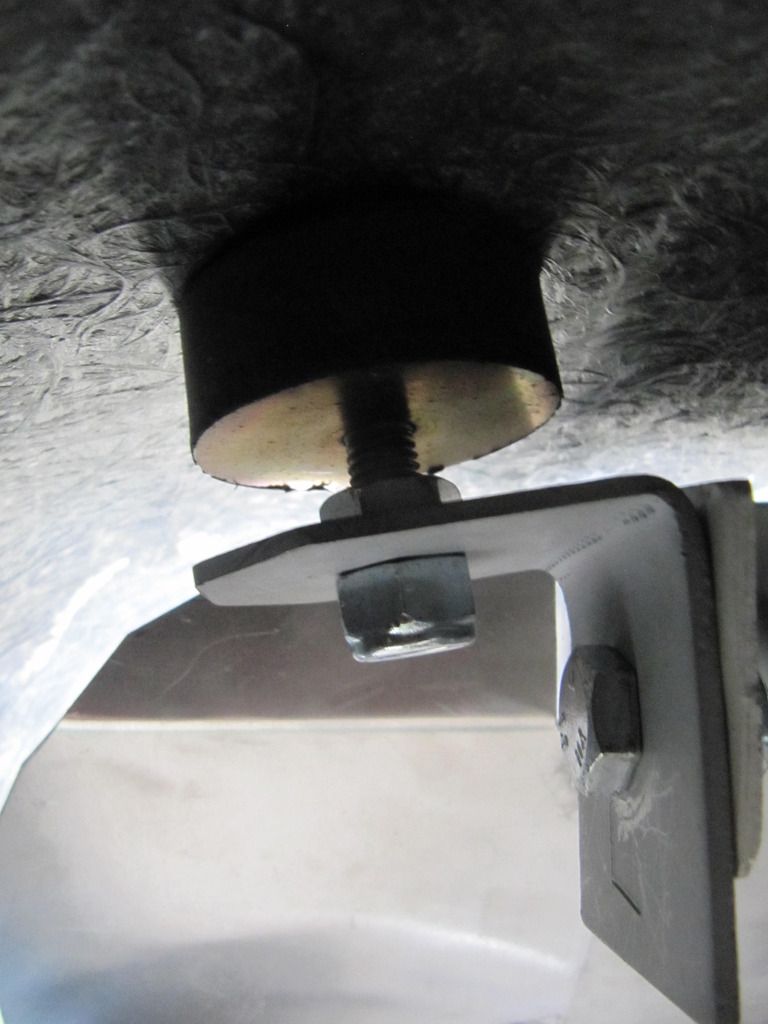 |
|
|
|
Post by jimmypatch on Apr 26, 2015 11:39:56 GMT
Nice clear pictures thank you
Ok so I think I will remove the mazda bars that go from the rear sub frame as there is no where on the MEV space frame for them to attach to. So I guess they were never intended to be kept?
|
|
|
|
Post by snowbird1 on Apr 26, 2015 14:06:51 GMT
I kept the Mazda OE frame, just cut off the front legs. It does add some strength to the rear sub frame and may provide a bit of protection in the unlikely event you ground out the rear end. The rear cross bar is also a useful jacking point.
|
|
|
|
Post by jimmypatch on May 27, 2015 13:23:45 GMT
I've not been doing many replicar jobs as my campers have been ruining my spare time
Does anybody have a suggested build sequence?
As I am very conscious of doing things in the wrong order
Jobs done so far:
Fuel tank in
Floor and firewall in
Handbrake bolted on
So I'm thinking that the wiring should come next?
And do you fit the dash before the body?
Thanks James
|
|
|
|
Post by snowbird1 on May 27, 2015 14:00:59 GMT
You can install all the wiring (except lights) and make the chassis drivable (Exocet mode!) before fitting the body. The dash is fitted before the body but you should test fit the body to get the positioning right before bolting it in place, I had the body on and off several times before finally bolting that down.
Also useful to do a basic wheel alignment before positioning the body as you will be checking wheel to body clearances and the wheels move back and fore and in and out somewhat as they are aligned.
|
|
|
|
Post by np4wicked on May 27, 2015 20:09:36 GMT
Are you stripping the loom before you fit it or just leaving off the items not needed?
|
|
|
|
Post by jimmypatch on Jun 4, 2015 14:26:23 GMT
My loom has been stripped, tidied, new loom tape, new plastic sleaving, I deleted the ABS and the airbag system. However I've not tested that the loom still works  ? |
|
|
|
Post by R2S on Jun 4, 2015 22:49:37 GMT
I'm clearly interested to see how things go with the abs (and associated electrical systems) removed, I now have a non abs servo ([plan to give it a strip down and service next) and all sensors removed from the axles so no going back for me.
|
|
|
|
Post by jimmypatch on Jun 6, 2015 10:18:10 GMT
As far as I could work out ABS is a totally independent system with its own ECU only one wire went to the engine ECU.
|
|
|
|
Post by jimmypatch on Jun 30, 2015 14:33:41 GMT
I noticed that a lot of builds are featuring side alloy panels and an upper side "shelf"
Is this part of the kit?
|
|
|
|
Post by R2S on Jun 30, 2015 21:29:01 GMT
I noticed that a lot of builds are featuring side alloy panels and an upper side "shelf" Is this part of the kit? Yes |
|
|
|
Post by jimmypatch on Jul 1, 2015 6:29:23 GMT
This is yet another item I am missing then
|
|
|
|
Post by snowbird1 on Jul 2, 2015 6:21:29 GMT
These are the panels that came with my kit: 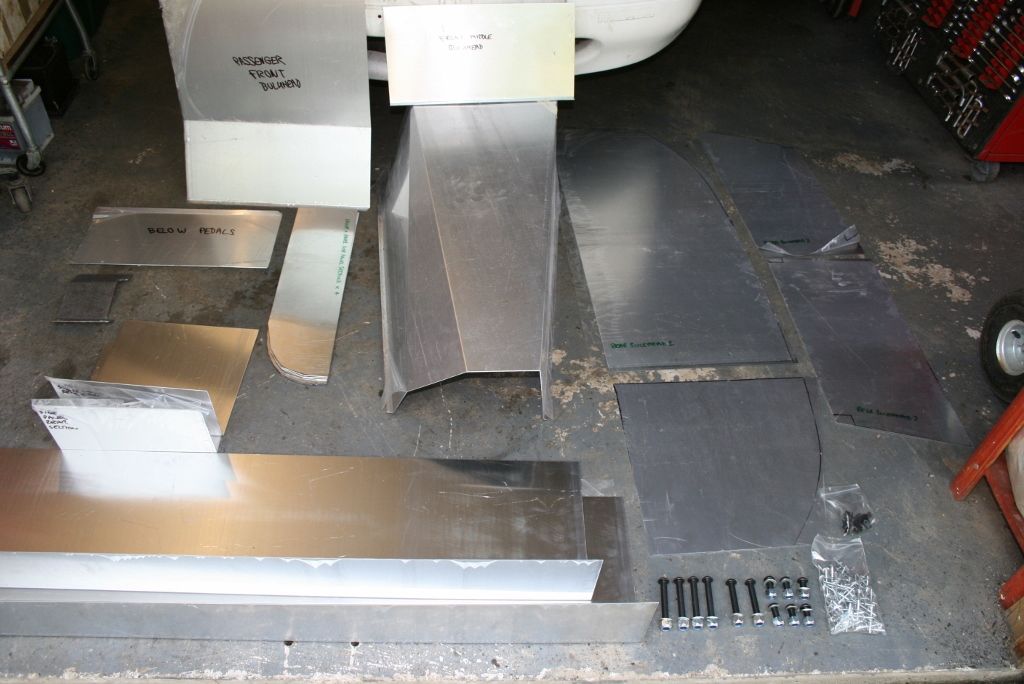 |
|


 ?
?
