|
|
Post by airforceone on Feb 18, 2014 13:33:16 GMT
I would delete the picture of your vin number mate just to be on the safe side.
|
|
|
|
Post by bingo on Feb 18, 2014 13:53:11 GMT
yeah I thought that when id posted, but I cant seem to delete it any ideas?  |
|
|
|
Post by bingo on Feb 18, 2014 13:54:57 GMT
NUMPTY try the edit button DOH!!!!!!!!!!
|
|
|
|
Post by bingo on Feb 18, 2014 14:33:36 GMT


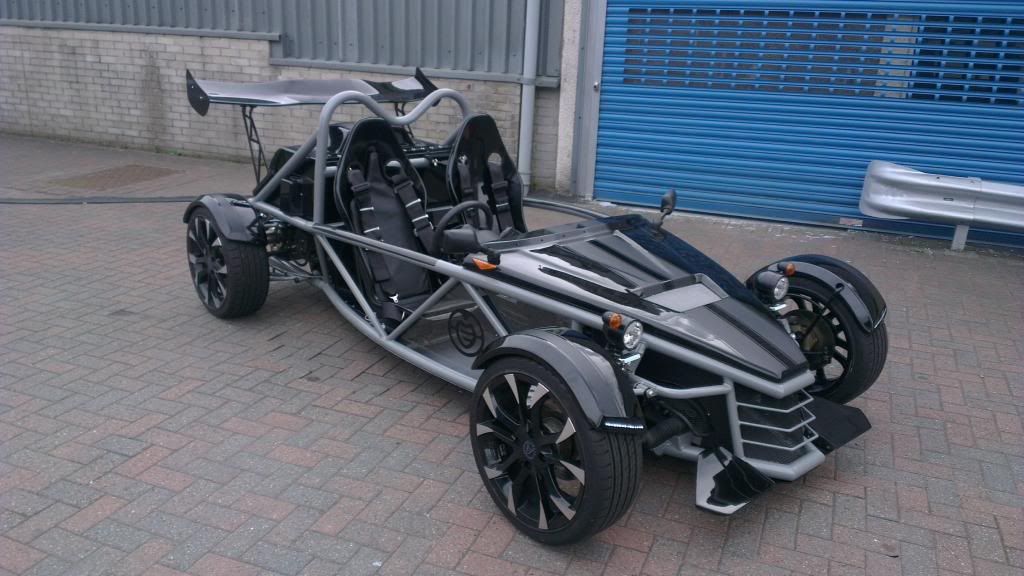
Installed the motor and the shell of the gearbox, the car is booked into RTR to have the exhaust fitted. Which I want fitted before the chassis is powder coated. |
|
|
|
Post by bingo on Feb 18, 2014 15:16:43 GMT

Decided to take the plunge and upgrade to vibra technic mounts, bought the ones specific for the rocket and they don't fit properly, some modifications needed |
|
|
|
Post by bingo on Feb 18, 2014 15:17:47 GMT

SHINEY!!!! |
|
|
|
Post by bingo on Feb 18, 2014 15:19:50 GMT

You will notice here the poor attempt by RTR to make the cut out.......rough as.....
RTR please stop making the cut outs and leave it to the builders |
|
|
|
Post by bingo on Feb 18, 2014 15:25:37 GMT
Bonnet fitting time. I bought a 2m stainless piano hinge from my local hardware place, so it will be used for both the bonnet and engine cover. I fixed the hinge to the bonnet first. I used M5 dome head screws with a penny washer on the back to give some rigidity. The down side was that due to the moulding on the inside of the bonnet I had to trim the penny washers to suit. 
The cut down washer

|
|
|
|
Post by airforceone on Feb 18, 2014 15:28:49 GMT
What TB's are you running.
Just be careful with the inlet manifold. If your fitting the original Alternator and bracket you may have
to cut the manifold bottom righthand corner off as it gets in the way of the bracket and it doesn't fit right,
well it did on mine.
|
|
|
|
Post by bingo on Feb 18, 2014 15:30:41 GMT
The bonnet was then placed in position and lined up, it was not too bad a fit considered. I marked around the edges hinge, removed the hinge from the bonnet and then fitted to the chassis. A job that I was absolutely dreading but didn't turn out too bad in the end
 Fixed to the chassis using M4 countersunk, very pleased with the outcome |
|
|
|
Post by bingo on Feb 18, 2014 15:31:49 GMT
LOOK AT ME IM NOW A FULL MEMBER.....watch out Paul I will be up there with you soon
|
|
|
|
Post by ncohen on Feb 18, 2014 20:32:00 GMT
Looking good mate! With the engine mounts I had the same issue. what you need to do is put some force to the side of the engine, if looking at it from the back, it needs moving over to the left until the mount lines up. It needs to be under tension otherwise it may move around too much under hard acceleration. There should be a pic in my build guide.. www.mevowners.proboards.com/thread/1749/naims-2-0l-rocket-build?page=23near the bottom of the page Others may haver a different opinion, but this is how I understand it should be fit |
|
|
|
Post by bingo on Feb 19, 2014 13:24:30 GMT
Not sure what you mean Naim
|
|
|
|
Post by bingo on Feb 19, 2014 13:27:49 GMT
Market out for the aero catch, masked the full area as will be cutting out using a jigsaw.
And after

|
|
|
|
Post by bingo on Feb 19, 2014 13:40:41 GMT
The seat have been a PITA to decide what is best way forward.
Don't like the idea of nuts sticking out the bottom, speed humps best friend.
Came up with the solution of welding on some 8mm thread tubes, only problem is that the seat sliders I bought from CBS have a slightly different centre to the chassis rails, so had fit slightly off centre, but the end result wasn't to bad.

There was no way I could have got a perfik hole with out the cone drill, one of the best things ever to grace the garage

The holes are such a good fit the inserts stay in place...not bad for a dumb spark!!!!

Just need to run a weld round top and bottom, but that will have to wait until I strip it for powder coating |
|