|
|
Post by spudman on Oct 28, 2014 22:19:45 GMT
I struggled with removing bushes as well, actually bent a wishbone using a long bolt with packers to try and pull them through. Eventually I used a cheap hole cutter (couple of pounds in B&Q, the type with a central guide bit and different sized cutters), which fitted snugly inside the housing, and usually left a reasonably clean surface. Did all the bushes on the car in one afternoon. Hole cutter is useless for anything else now, and by the end a lot of molten rubber was being thrown about, but job done. Cheers, Spud
|
|
|
|
Post by R2S on Nov 3, 2014 23:22:09 GMT
After a longer wait than expected I got my suspension parts back from powder coating and note two problems:-
1. Despite asking them not to powder coat the top front wishbones (but to simply blast and prime ready for brush painting) they have been powder coated (including the ball joint rubber!) so I'll have to remove the old rubber, pack with grease and replace (without damaging powder coating).
2. SOME THOUGHTS FROM OTHERS ON THIS ONE PLEASE. The lower rear wishbone is showing perforations (3 or 4 holes an about 2 square centi-metres) on the top face half way between the anti roll bar pick up and the inner bush housing, its also showing a very minor perforation (i hole 3mm dia) on the vertical face just inboard of the rear outer bush housing. Question is do I plate and re coat or should I bite the bullet and replace the whole thing? If I do to avoid more corroded items I will buy new and probably a pair!
|
|
|
|
Post by np4wicked on Nov 5, 2014 12:50:33 GMT
We had same problem passenger side rear and drivers side front wishbones decided to swap them and got some really good second hand ones from Suffolk Mazda At a good price, the guy there was Matthew Doe who was really helpfull. Can't find phone no but they are online.
|
|
|
|
Post by R2S on Nov 6, 2014 8:17:56 GMT
Not an Aston, and not part of my build, but a 50s racer and I simply couldn't resist providing this film that my brother found. vimeo.com/59410466#at=0 |
|
|
|
Post by R2S on Nov 6, 2014 17:37:22 GMT
Here is the complete subframe, wishbone etc powder coating in same colour (but silk rather than gloss) finish 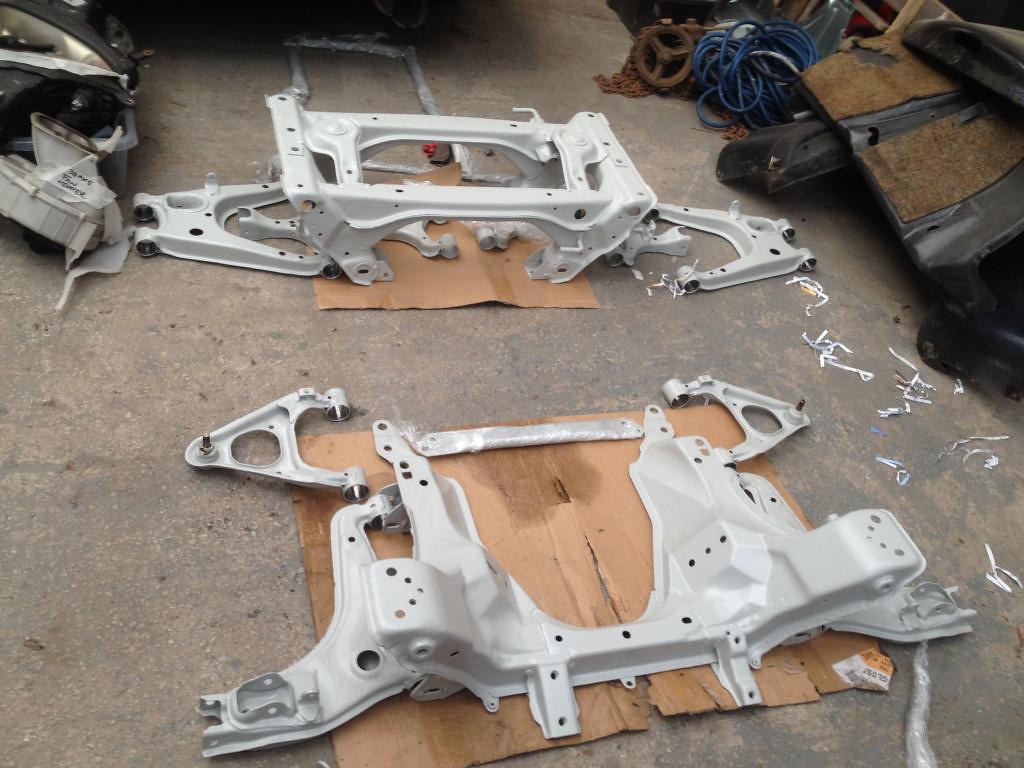 |
|
|
|
Post by R2S on Mar 10, 2015 7:28:04 GMT
Cant believe its five months since i last stepped in the workshop! Reasonable day yesterday, the de-powered rack is now back together and the various inlets blocked using the original fittings filled with moly metal (will post photo once painted). Stripped front hubs and one painted, other is awaiting paint as I need to put some heat on first to remove sheared bolt (Dust plate retainer). Anyone know if big brake (270mm)back plate will fit standard (255mm) brakes? Logic says they should but not sure if any of the holes are different (Reason for asking is standard left back plate no longer available and mine are like net curtains so would like to replace) Stripped one of the original coil overs to obtain parts required for my Gaz Gold Pros this is what it broke down to:- 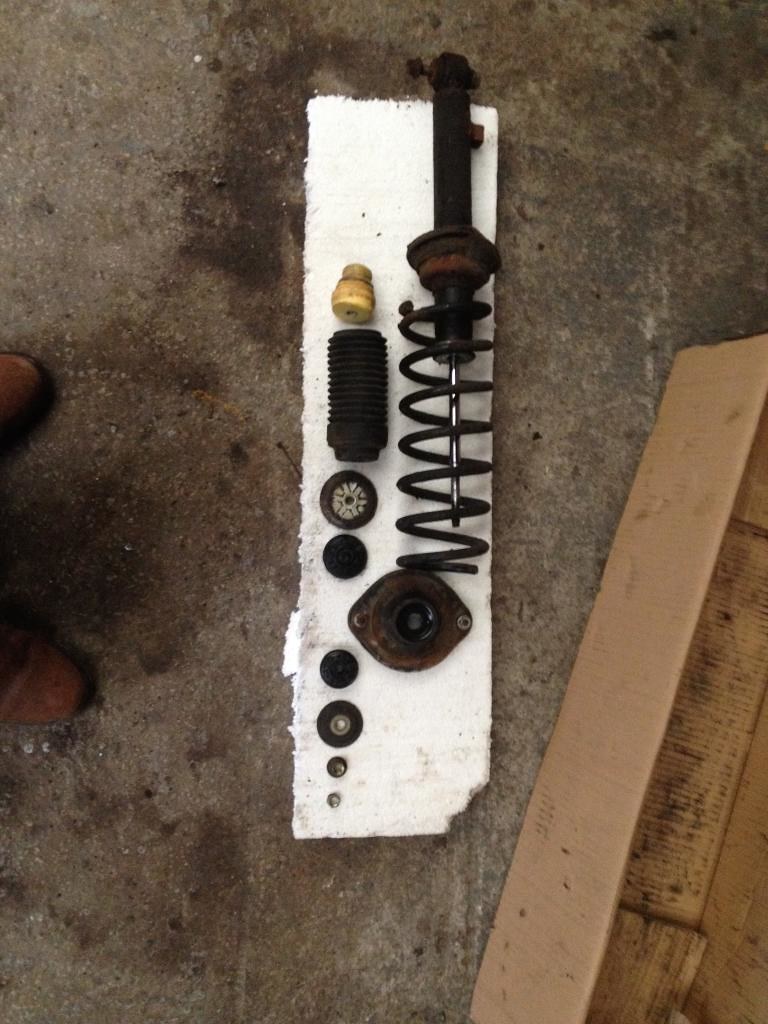 Also made a start on stripping rear callipers to install new rubbers etc. Struggled to undo the slide pin, any advice on how not to shear this welcome, wouldn't budge on either side, left to soak in penetrating fluid and planning another visit later in the week. |
|
|
|
Post by R2S on Mar 12, 2015 18:50:21 GMT
Ok had another short day at the workshop today.
Front stub axles dismantled and painted ~ not without incident. One of bolts for brake dust backing plate sheared off, no problem I thought stud extractor (recently purchased a set) will sort that out. Not so stud extractor snapped (clearly I bought a crap set ~ but they weren't cheap!) Tried to drill it out but those of you in the know will realise this is not going to work. Tried to use the old pursuader (hammer) to shatter the extractor but again no joy. So painted pending some thought on how to remove or leave in and either drill and tap a small hole next to original (thanks for that one gwnwar) or use modern metal to metal adhesive in lieu of the bolt.
Rear calipers stripped down for painting. Another shock as one of the callipers had clearly been reassembled previously by someone who didnt know (or didn't care) how to do the job properly. The internal workings of the piston that are connected to the Allen Key adjuster hadn't been fixed in the piston, the piston was corroded to hell and hadn't been changed even though all the rubbers and seals were new? Glad I stripped these as I suspect at best the defective caliper would have provided poor braking and at worst, who knows. Strange thing is in the month and a half I drove the MX5 there was no apparent issue with the rear brakes but I suppose this could be due to them having little to do.
Not wishing to make the callipers obvious behind the wires I will paint silver/aluminium, although there is a little niggle at the back of my mind saying 'paint them yellow' (why yellow and not red? well everyone does red don't they? and the nose of the car will be yellow so a couple of bits of detailing in yellow might just look the business, thoughts?).
Closing thought ~ its taken a while but its really good to be getting on with construction (no matter how small) and painting rather than stripping stuff.
|
|
|
|
Post by mawdo81 on Mar 12, 2015 19:16:13 GMT
Go yellow  ? |
|
|
|
Post by R2S on Mar 13, 2015 18:17:32 GMT
Have bought a can of yellow to test on one of the calipers if i get chance over the weekend.
|
|
|
|
Post by R2S on Mar 16, 2015 16:52:12 GMT
First two coats of yellow applied, another required, and i think its ok so all brakes will be yellow 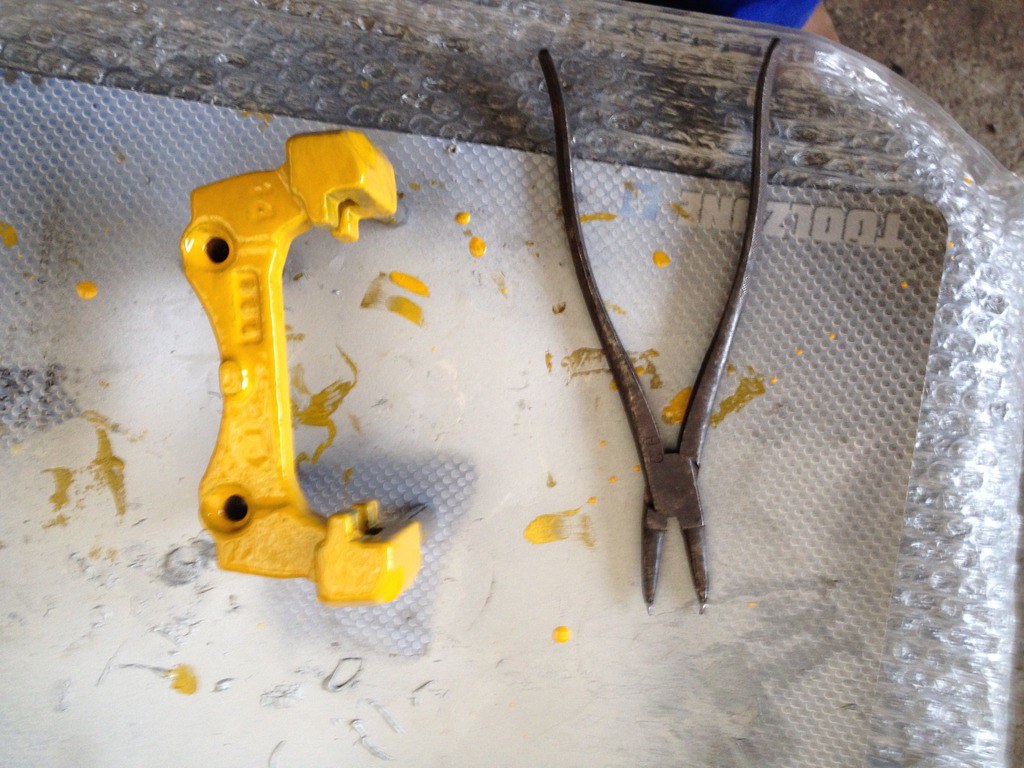 And the circlip pliers are in there because this is the only type that will fit in the rear brake cylinder to get out the brake adjuster circlip, the ones with changeable heads are a waste of time. Rest of rear brakes cleaned and awaiting paint, front brakes are new so a quick wipe down with thinners and they'll be getting the same treatment. Like the yellow so much I think I'm going to use it instead of satin black on de-powered steering rack, PPF, Diff (the cast part not the rear Alli section) drive shafts and prop. Next job is to clean the engine mounts (will replace if knockered), before cleaning and painting block and gearbox to allow me to put subframes and PPF back together as a rolling sub base. CANT BELIEVE I AM SO CLOSE TO BUILDING. |
|
|
|
Post by jimmypatch on Mar 25, 2015 8:44:08 GMT
Rear Calipers are a weak point on MX5's and they are very cheap to buy, £35 each, I just bought new ones.
|
|
|
|
Post by R2S on Mar 25, 2015 15:46:05 GMT
£80 each was cheapest price i could find for new rear callipers, so i bought new rubbers seals etc, one new piston and new sliders (which aren't included in the caliber price).
|
|
|
|
Post by jimmypatch on Mar 29, 2015 7:35:36 GMT
I found some ebay specials
They seem fine, but clearly I've not used them in anger yet!!
|
|
|
|
Post by R2S on Mar 29, 2015 17:20:55 GMT
I found some ebay specials They seem fine, but clearly I've not used them in anger yet!! originals have come up ok and the new seal/rubber kit has the circlip (internal) for the adjuster and a rubber seal for the end of the adjuster shaft. Plan to rebuild later this week once I have had the chance to 'bake' the painted callipers. Reason for baking is the yellow paint seems to still be slightly soft (even after 48hrs) in a number of places so rather than end up having to repaint I'll put them in oven at circa 100, don't want to damage the rubbers, for a couple of hours and fingers crossed this should harden paint. I'm surprised how well the paint finish has come out using a brush, I used a spray gun for the power steering rack and this has come out even better. (photos to follow). Planned to clean gearbox and block ready for paint last Friday only to find new air tools (cleaning bottle) and air gun had wrong fittings for my pipe so reverted to cleaning rear axle. |
|
|
|
Post by R2S on Mar 30, 2015 9:04:42 GMT
Just downloaded the free US mag with the article on Snowbird1's Replicar you can find the link in his post in Headlines, News and Articles.
|
|


 ?
?
