|
|
Post by np4wicked on Oct 1, 2013 21:17:20 GMT
Notice no cut out on top of rear wings as well. They didn't appear until after Le Mans because rear brakes had overheated during the race as they had put skirts over the rear wheels. Those boys averaged 112 mph over the 24 hours.
|
|
|
|
Post by R2S on Oct 2, 2013 13:37:52 GMT
Thanks for sharing the photos some excellent detail visible.
|
|
|
|
Post by James on Oct 6, 2013 7:41:13 GMT
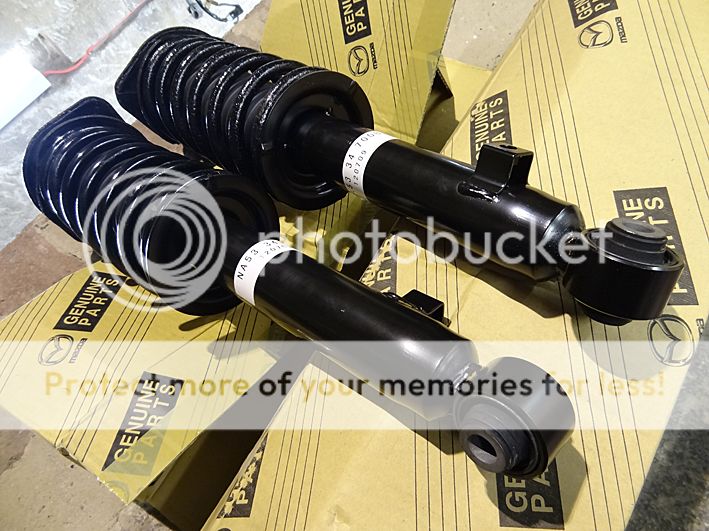 Finally gave up on two internet vendors who promised shocks at amazing prices and took the money and couldn't deliver. Went for genuine Mazda shocks from an MX5 parts site and got them next day for £20 extra. While Larry got to grips with the spring compressors, some new gaiters and built them up I played around with an idea for the floor pans.  3M aluminium tape. Using a soft seem roller I spent 45 minutes sealing the underside of the floor pans along the rivet lines and around the edges. We know the finished car will not be waterproof (Stirling Moss describes how the original DBR1 sprayed water everywhere through holes in the floor and bulkheads) - it hasn't got a roof for a start! If we need drain holes we'll make them I guess, we just don't want the water travelling into the space frame. 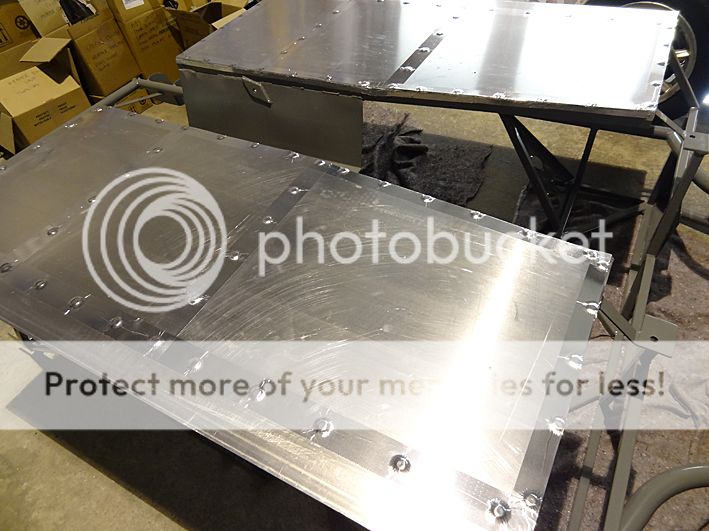 Quite an enjoyable job actually.  Also managed to get some grey plastic edging from the local rubber company. Looks great with the space frame and makes the whole thing nicer to handle. Don't know how the 'sills' will marry with the bodyshell but if they are rubbing up against each other then having the strip on should minimise wear and tear and help to make a seal of sorts.  At last we could flip the frame and marry it to the running gear permanently. Frame is just about the maximum weight for two people to slowly and accurately position (well two people of our age anyway!). We have a pit so we can sort out fuel and brake lines later from below. We've just nipped up all the nylocks provided for attaching the chassis to the sub-frames. Any suggestions for torque settings or should we just give them some welly? Glad you're enjoying the period photos guys. Thanks for letting me know. There'll be a few more along the way. It must be frustrating for you to see such slow progress with us only having one, four-hour session a week. Let me tell you, it's more frustrating for us, but work and life dictates. Oh, for a fortnight of solid building to finish it off! PLEASE let us know if there are glaring faults in our build - this is our first build and the prospect of IVA fills us with dread!  |
|
|
|
Post by red5 on Oct 6, 2013 8:19:44 GMT
James the quality of your work so far is not going to be an IVA snag.
For 4 hours a week you guys are smashing it very quickly as well!
Re Iva - as your lights and bits are all MEV prepositioned ( hopefully in IVA compliant areas) I would familiarize on the interior radius and safe zones section - before you start putting things together on the inside.
Is there any one close that has been through an IVA?
|
|
|
|
Post by R2S on Oct 7, 2013 22:11:16 GMT
James looks really tidy and the grey chassis looks the business. I'd be interested in the detail of the grey edging strip supplier and quantity required.
|
|
|
|
Post by James on Oct 9, 2013 13:35:55 GMT
Red5, thanks very much for the encouragement. I'm wondering whether we'll be the first to IVA a replicar? Probably not at this rate! Learning a lot from the other threads (Mevster etc.) about IVA. Brilliant resource and some impressive builds. I might make a nuisance of myself nearer the time. R2S, hi matey. Got the edging from Lancaster Rubber co. www.lancasterrubber.co.uk I got 10 metres for thirty quid inc. VAT. I can't tell whether that'll be enough but it looks so good I won't be holding back with the trim. |
|
|
|
Post by James on Oct 10, 2013 8:19:04 GMT
 Driver's footwell plate trimmed, fettled and popped into place. Relatively simple once the off-side had been scribed. We've left the tunnel side long until we know what's happening there. Clear silicone used to seal rivet lines this time. Also took the opportunity to run a bead along the extended 'sill'. 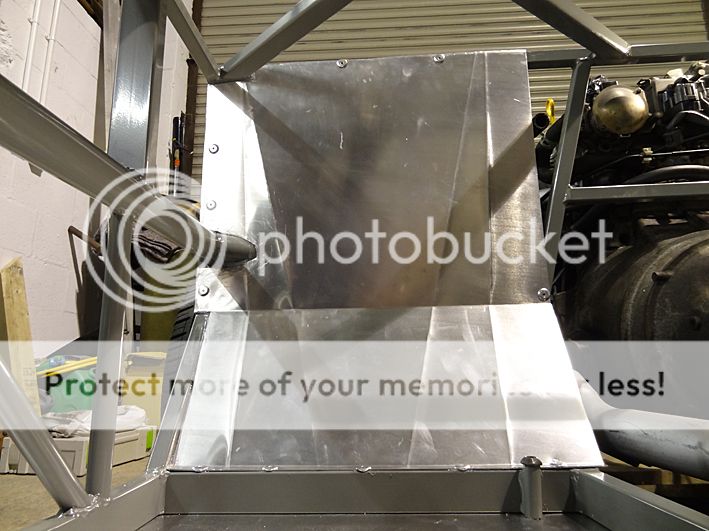 Passenger side took more time but some patience and plenty of offering up had it sorted. Again, tunnel side left long. 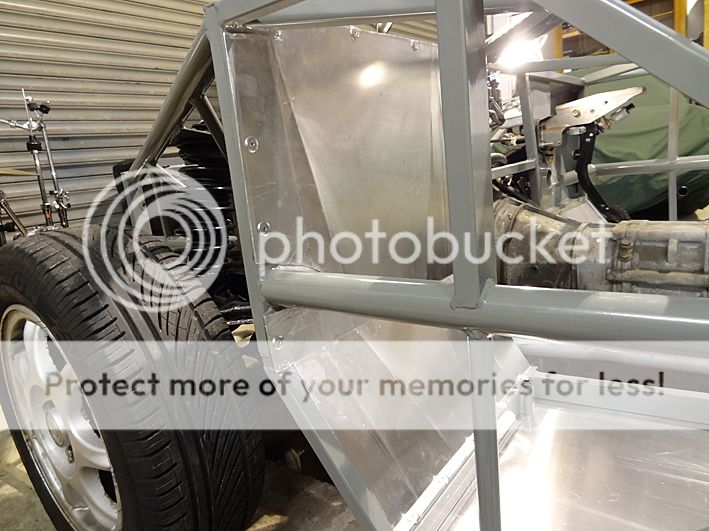 Just time left to start cleaning and refurbing some airflow components for the engine bay and the petrol tank for next week. Clutch pedal in position but not connected yet. |
|
|
|
Post by James on Oct 16, 2013 7:34:32 GMT
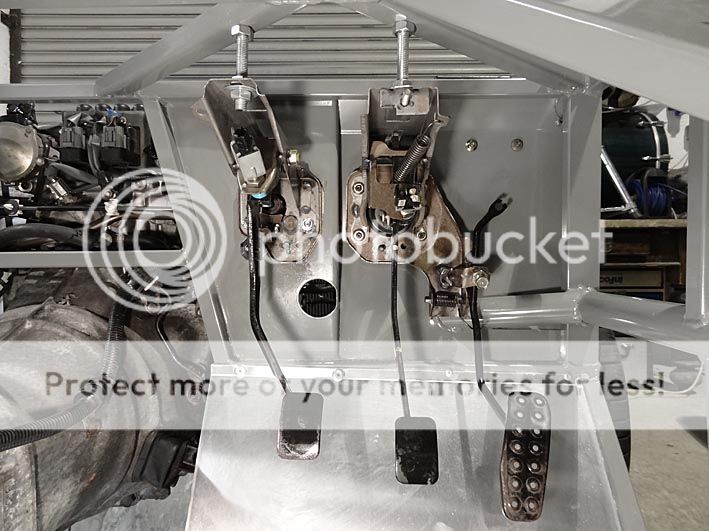 Pedals in place after another short weekly session. It took a little time to pack out the back of the clutch pedal.... 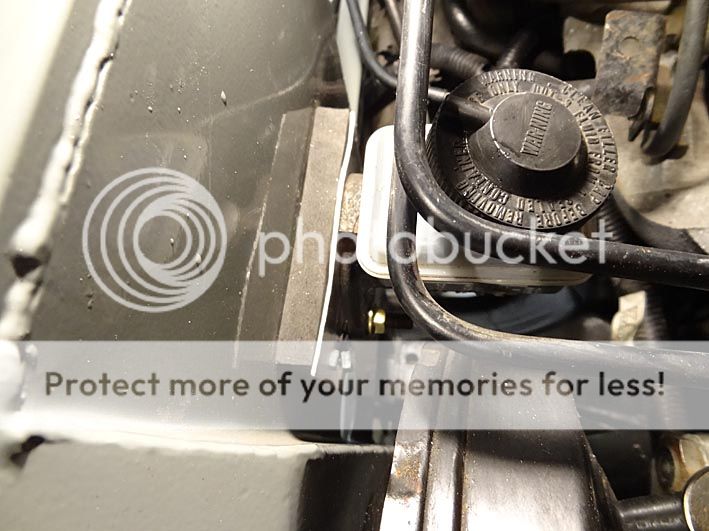 As you can see here we used some high-density foam rubber and an alluminium plate to space out the rear of the pedal so that the bolts had something to tighten up against. 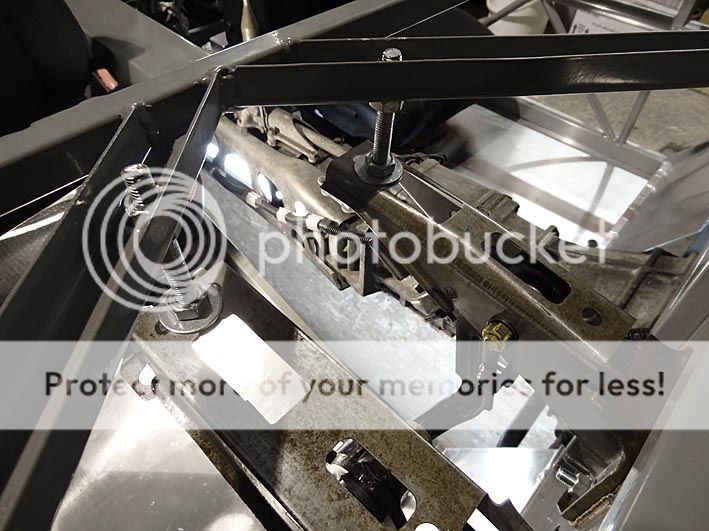 Although the pedals were tight and pretty solid we decided that support at the top was preferable. Threaded rods were cut to size and used to anchor the ends of the pedal brackets to the space frame above. Absolutely solid as a rock. Obviously we tested the pedals and succeeded in shooting brake fluid about 15 feet across the workshop. Idiots!  We had time to clean up the rad hoses and install those and then we turned our attention on the fuse box. We hope we haven't fixed this too high. We made a bracket out of some 90 degree alluminium and just managed to get it in place on the bulkhead in the corner next to the brake master cylinder. It made us think that we need to offer up the body soon so that we get a good picture of how much space there actually is. |
|
|
|
Post by np4wicked on Nov 20, 2013 22:14:19 GMT
C'mon James what been happening with your build, I'm sure you must have some news to tell about it. We are all wanting it to be the first Brit build completed, apart from Stuart's that is. The wait is killing us!
|
|
|
|
Post by James on Nov 28, 2013 9:22:50 GMT
 Sorry there hasn't been any posts recently. Because we only get to the car once a week and for increasingly short times (a couple of hours only sometimes) we don't have time to take pics as well. Any way here's a bit of a catch up. (Above) Rad in place. The header tank has been installed on the exhaust manifold side of the block so we ran a new feeder pipe around the near side, across the front and doubled backed it into the radiator.  We decided to keep the whole fuel feed system including the 'breather pot' thingymajig that reintroduces the petrol fumes into the injectors. It means finding space and running the third line back from the tank. We just figured, what the heck, it's been put there for a reason. 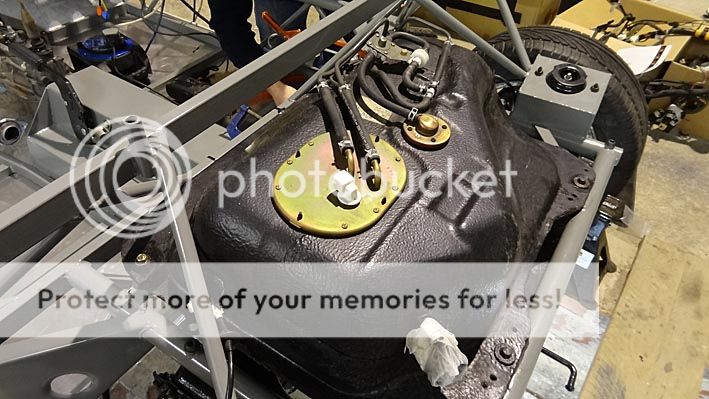 Petrol tank in place and bolted up. We had to make a small bracket on the far side to locate the fourth bolt more conveniently.  Two main fuel lines running inside the tunnel. 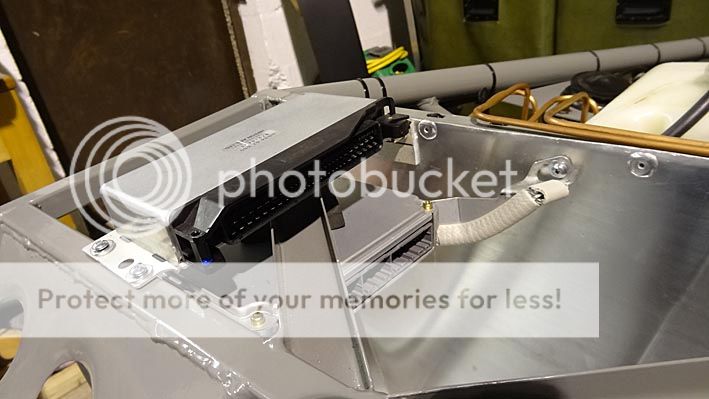 ECU and ABS control unit mounted on the dash on passenger side. Note bits of trim on sharp edges of brackets just in case we get a difficult IV assessor.  Steering column wasn't too bad a job, though we were glad of two pairs of hands. We're using the original steering wheel for IVA.  We had to buy two new rear handbrake cables and installation was relatively straight forward. The bracket on the tunnel allows for the two cables but not the spring so a slot had to be drilled and filed to provide an anchor point. All nice and solid though. There's a little cable guide dufus in the middle you can see which we kept and used a short length of stainless tube to mount at the correct distance from the tunnel wall.  So yes, we decided to keep the ABS. Mounted here in more or less its original position, we ran all new copper (and who thought flares would ever come back in fashion!) Urghhh. Grim. 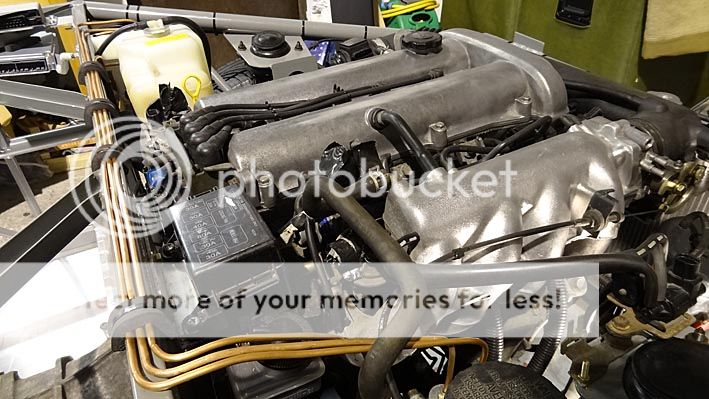 Keen eyes will spot we've moved the fuse box to a more accessible area. Looking at Stuart's prototype and doing some basic measuring, we realsied that where we had put it was too far under the bodywork - the bonnet is not that wide. Throttle cable is also installed. More when we get the chance. Can't wait to get to grips with the loom!  |
|
|
|
Post by R2S on Nov 28, 2013 11:45:21 GMT
The quality work continues and the condition of your donor parts looks so good I feel like scrapping my donor and starting again. Pictures are really helpful, could i be cheeky and ask for a few dimensions?
Do you think moving header tank over exhaust is likely to cause any probs?
Can i ask where you got fuel line and clips from?
|
|
|
|
Post by snowbird1 on Nov 28, 2013 15:12:47 GMT
Nice work there, good to see you kept the EVAPS system in place, basically that traps the raw hydrocarbon fumes coming of the tank in the carbon canister then burns it off when the engine goes into closed loop. Note that the fuel filler and cap are also part of the system, have you thought about filler mounting, I'm thinking of hiding it behind the dummy headrest.
Nice installation on the ABS, they are calibrated for vehicle weight and tyre size, I'll be interested to see how it works on the Replicar.
|
|
|
|
Post by gwnwar on Nov 28, 2013 19:10:16 GMT
Nice build top notch work.. Real pro looking.. Like the use of those fuel lines and clamping..One thing I do notice is the lack of lock washers. on steering hanger, E brake unit and upper pedal support studs.. The rubber filler on the clutch pedal might start to give way and a chance of of miss shift/sloppy pedal.. Again nice detail work..
|
|
|
|
Post by James on Dec 12, 2013 21:49:07 GMT
Hi Snowbird, Know what you mean about filler cap. We do like the idea of a visible one. Have to find an IVA radius compliant version. Some of the flip-tops have some vicious-looking sharp catches on them. Hi GWNWR, eagle eye! You caught us out there. We have been using spring washers when we can find one to fit in our bit box but you've now made us go and buy a proper selection. We're slowly checking everything now. Thanks for pulling us up. On the pedal - the rubber mount is now virtually redundant. It's just a waterproof gasket really as the top bracing has literally locked out any movement whatsoever. Highly recommended. Hi R2S, glad you are enjoying the pictures. Regarding measurements etc. I strongly recommend not taking too much notice of what we're doing - don't forget that this is a brand new kit and it's our first build. We're really making everything up as we're going along. Following us would really be the 'blind leading the blind'. I don't want you failing IVA because of some nonsense we've done! Our donor was HORRIBLE. Everything was seized and much needed replacing. Next time round - we'd pay more and look at more candidates before buying. Buy the biggest breaker bar you can get!  New stainless air filter. Brackets fabricated and fixed to the engine lift ring bolt on one side and the top of the shock bolt on the other. Plenty of spring washers  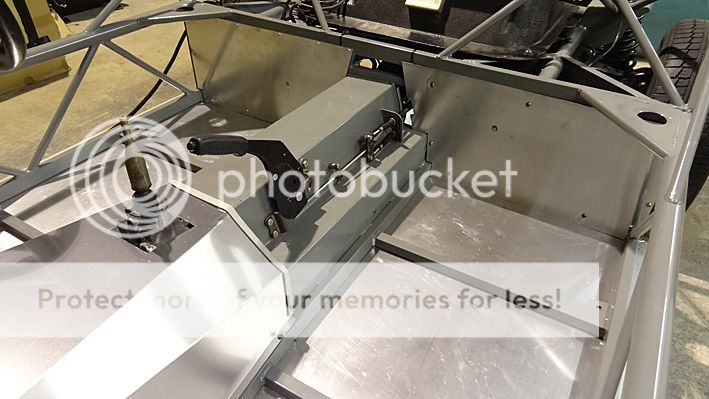 Back cockpit walls fixed in place with self tappers for now. When we're confident with looms etc. we'll probably rivet them permanently. 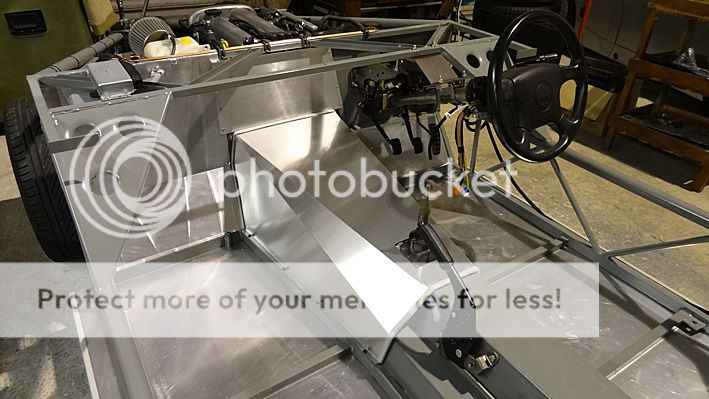 Tunnel front end trimmed and in position. There are some gaps that the plates didn't fill but we're going to leave them until we've done the looms in case the gaps are useful. Next Tuesday we plan to offer up the body. We want to test fit that and get a good handle on the internal spaces before tackling the looms. Can't wait to see it on - once all those brackets are in place and it's solid we'll really feel like we're on the final leg. |
|
|
|
Post by Stiggy on Dec 12, 2013 23:01:00 GMT
Looking very nice chaps. My only concern is that you have joined the chassis to the engine with the air filter mount. The engine should be rubber mounted only.
|
|


