|
|
Post by R2S on Jan 8, 2014 16:18:03 GMT
just had an idea re the bubbles
use the original as mould, fill with expanding foam - heres the new bit - remove the foam and use this as sacrificial template sanding down from back face, if you get it wrong simple to do another which can then be re-inserted in bubble for marking up.
or am i just making things too complicated?
|
|
|
|
Post by snowbird1 on Feb 14, 2014 17:18:18 GMT
Haven't tackled the headlamp covers yet but have been making progress elsewhere, pretty much finished the '91 RHD/'94 LHD hybrid wiring. The '91 dash and harness does not have a VSS or MIL, have not been able to find any documentation for the '94 ECU but I think the speed sensor is only used on JDM cars for top speed limit although it could be used for cooling fan control. The MIL/Check Engine light is useful and required for emission test so I'll figure out where to put it. Got the Kirkey vintage seats, I think they will be good, the Miata runners seem to be the best for mounting.  I'm mounting the battery on the LH side behind the rear firewall;  The battery carrier lowered;  And raised. This is the temporary setup I'll fit a proper 'drop down' battery carrier later. The master switch is mounted on the LH rear web;   The brakes are all overhauled;   A friend that actually makes the stainless steel oil caps for the modern Aston Martin race cars has made me a cap for the BP-4 engine;  Working on the body fit now. |
|
|
|
Post by R2S on Feb 15, 2014 17:10:36 GMT
Great photos, really helpful, liking the master switch and battery location. Will need a water tight box for same location on my UK car!!
Loving the seats but won't get through IVA here, good news is i have located a company that will make me seats (IVA compliant) with shaped headrest to match the fairing and will use same design of headrest on passenger seat.
Shouldn't the stainless cap have the number 710 on it ?(couldn't resist the feminist joke, no doubt i'll get a lecture if the wife reads this)
|
|
|
|
Post by snowbird1 on Mar 7, 2014 14:53:16 GMT
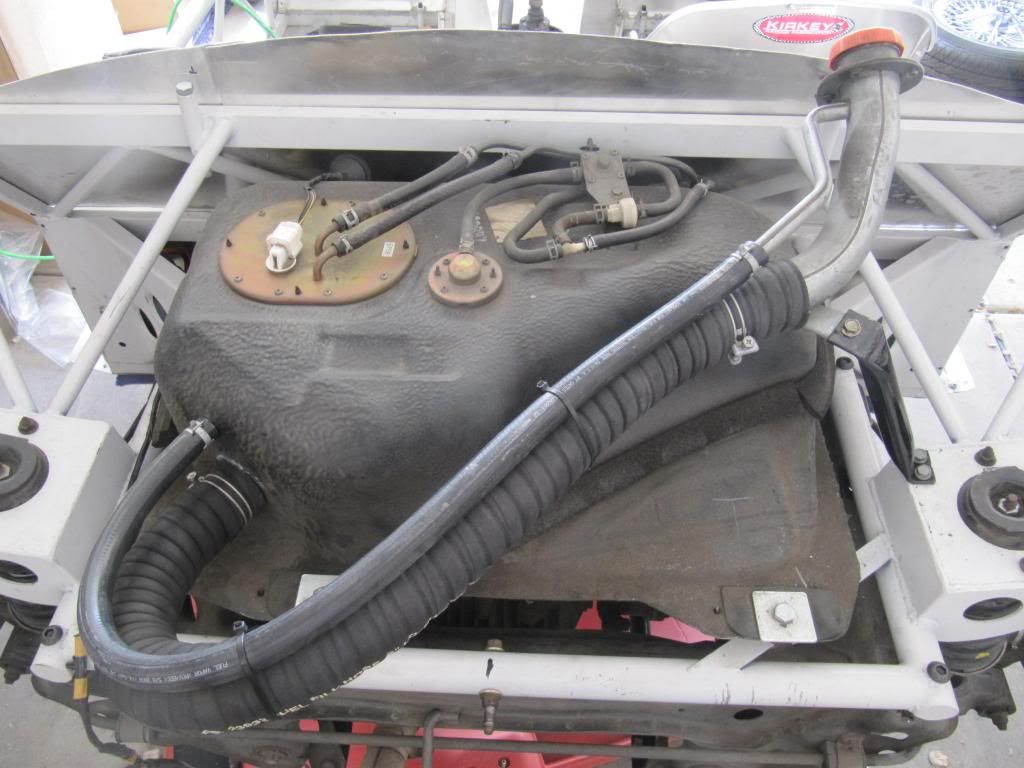
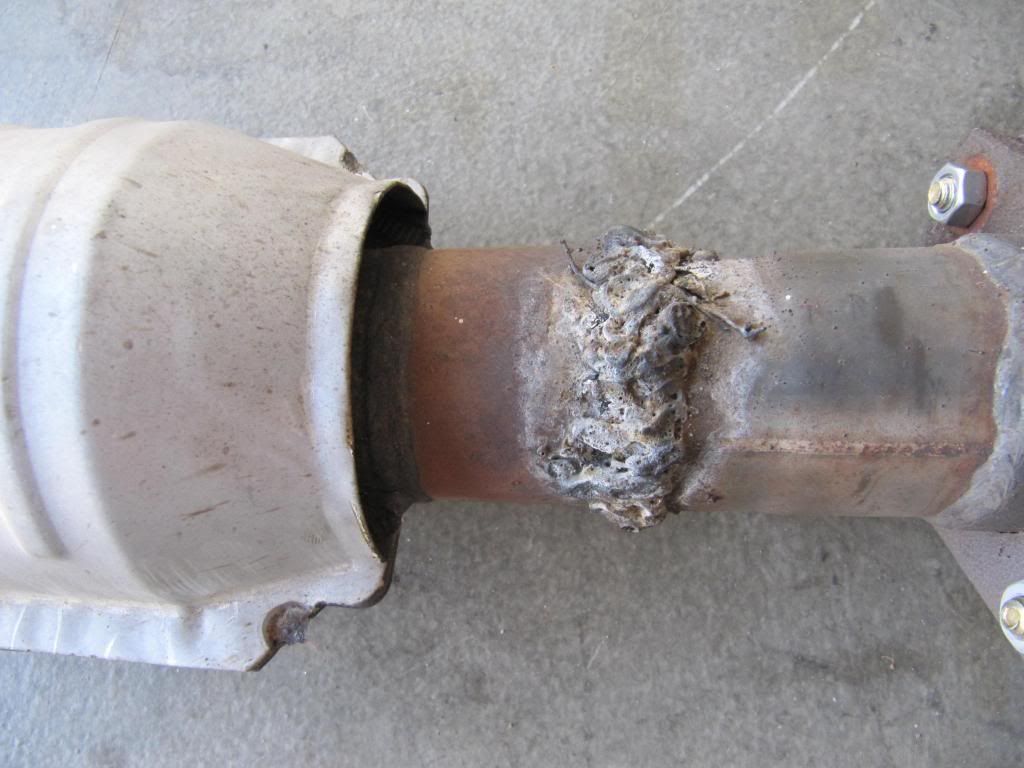
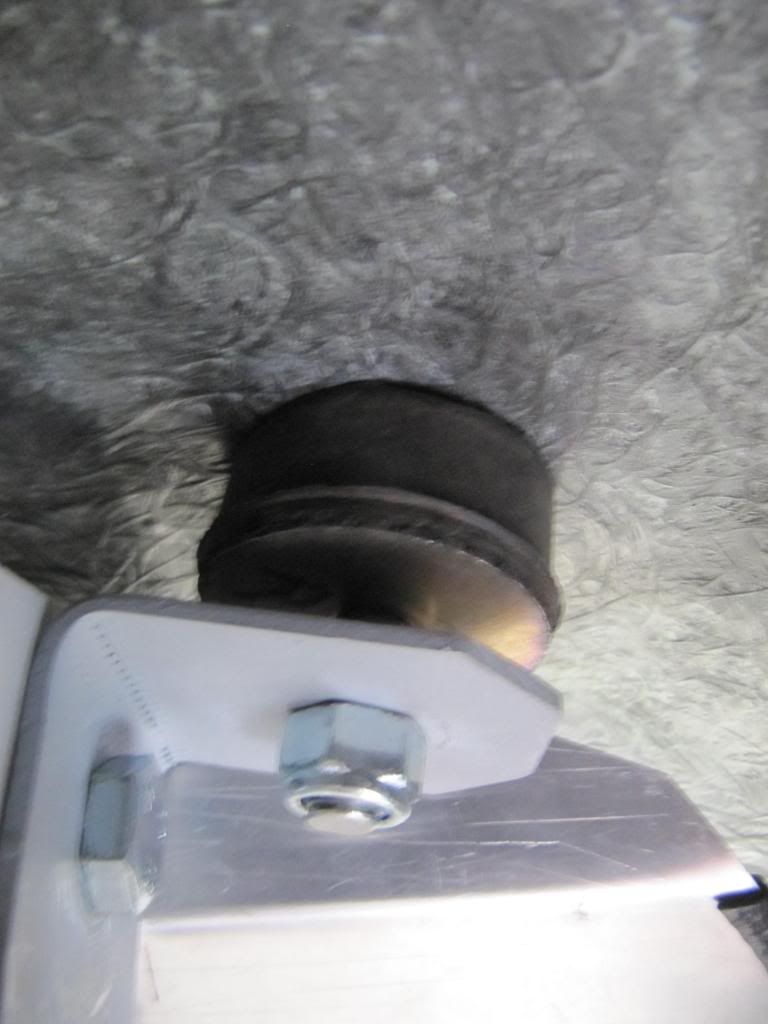
Work is progressing, hopefully body on - off for the last time! Got all the body mounts made up;  Now need to concentrate on getting the chassis finished, clutch and brakes are bled, powered up the electrical systems - smelled smoke - spent 5 minutes sniffing round like an airport dog before realizing the farmers where burning stubble! Every thing works so far, should be able to do a startup soon, got the fuel filler connected so I can put petrol in it now.   Exhaust shouldn't be too much of a problem, the guy I bought the donor told me it had a new cat fitted for the last smog test, didn't tell me it was installed by the worlds worst welder;  Talk about 'Mallard Injected Guano', it is also out of line and hitting the PPF, so a bit of work there. |
|
|
|
Post by R2S on Mar 8, 2014 16:48:08 GMT
I now understand (I think) how you are placing filler, assume it is going behind a hinged panel on he vertical face of the hump? What about having a head rest on the front of the hump which is hinged at top (hinge hidden behind leather/vinyl) that lifts up?
Cant believe the weld on the exhaust doesn't leak looks like an aero bar!
|
|
|
|
Post by snowbird1 on Mar 29, 2014 16:08:33 GMT
|
|
|
|
Post by R2S on Mar 30, 2014 15:11:33 GMT
If only I was this far on! Once i got body off i found just how bad things were, all the front plastic covers on engine had been cracked at bolt holes, powered steering rack and pump in a right state but as i am depowering doesn't really matter. Front subframe not too bad as oil leaks had kept well lubricated but back frame needs quite a bit of attention.
I note your position of fusebox and use of Mazda under tray, neat.
Does standard air box fit under body work? and what is plan for wiring strapped to chassis in bottom picture is this final position?
|
|
|
|
Post by gwnwar on Mar 30, 2014 23:04:14 GMT
John.. Nice going so far..I would go with both coolant fans for the radiator.. Either wired together or 2nd one with a switch in cockpit.. Your AZ temps are really high.. Looks like you cut the bottom of the air box off and just using the frame to secure filter panel.. nice idea..Do you plan any duct work to it..When do you plan to go back to Wales.. leaving car here??
|
|
|
|
Post by snowbird1 on Mar 31, 2014 14:31:03 GMT
Does standard air box fit under body work? and what is plan for wiring strapped to chassis in bottom picture is this final position?[/quote] It doesn't look like it but there is plenty of room under the bonnet for the filter, I've rubber mounted the air box and AFM to the chassis so it is not subjected to engine vibration. I'm planning to run a cool air duct up from the small front grill. Main wiring is in place but I need to finish the lighting wiring when the body is on. Gunwar- I do have the twin fan radiator off the US donor, but planning to try the single fan first. We don't have much traffic here and the fans actually create a restriction to airflow at speed. We head back to 'sunny' Wales May 1st so I'm running out of time but still planning to have it registered before we leave  . Regarding the timing belt cover, I think this is about the worst bit of the Mazda design, the one my car had been rubbing on the timing belt and fan belt! Tempted to leave it off but it does provide a splash shield and keeps rocks out of the belt. I haven't seen a good aftermarket fix either. |
|
|
|
Post by gwnwar on Mar 31, 2014 19:14:37 GMT
John.. I just put a want to buy ad on Miata.Net for a set of front TB covers. Lets see what shakes out of the trees..
Your build looks real pro done..
|
|
|
|
Post by snowbird1 on Apr 8, 2014 4:08:42 GMT
First drive in the Replicar chassis:
Goes, stop and steers, seems pretty lively, with the Torsen diff it needs to be pointing straight when you boot it. I realized it has been a while since I drove a front engine/rear drive car, fun to steer with the throttle. Now need to get the body fitted and the lights wired, they need to be DOT marked for the MVD inspection. |
|
|
|
Post by snowbird1 on May 1, 2014 1:34:39 GMT
Quite a bit of progress since the last post, the body is mounted:  Rear upper body support.  Front mounts. ADOT inspection requires DOT and SAE marked lights, not pretty but they comply:   ADOT also requires a glass windscreen with wiper, note the car has only a single seat so a single screen should be all that is needed  I did not do a great job of fitting these items, I'm afraid they might 'fall off' after the inspection  . |
|
|
|
Post by snowbird1 on May 1, 2014 2:09:07 GMT
7AM appointment at the MVD for class III inspection:  ADOT inspector checked numbers and paper work and assigned a AZ ID number:  15 minutes - $25. Walk round to the MVD office, present paperwork and receipts to nice MVD lady, get issued with registration for a 1959 Aston:  I love Arizona. 20 odd miles on the clock, runs great but have to leave for sunny 8-)Wales tomorrow, plenty to do when we get back in October, including fixing the coolant leak from the little core plug under the intake manifold in the center of the head  Made a start on the grill and headlamp bubbles:   I shold be able to receive ITV on that!  Easier than I thought, just keep trimming until they fit. |
|
|
|
Post by Stiggy on May 1, 2014 7:23:35 GMT
FANTASTIC, have to say I burst out laughing when I saw ASTON or your paper work!!!!
Love the stickers they hand out, we have to stamp our own, yours are much nicer. Well done, glad you got a ride b4 returning to Blighty
|
|
|
|
Post by R2S on May 1, 2014 12:00:55 GMT
Brilliant, looking good for a 55 year old car.
|
|