jack
Junior

Posts: 76
|
Post by jack on Jul 8, 2012 20:08:39 GMT
|
|
|
|
Post by JimK on Jul 8, 2012 20:22:16 GMT
Hi Jack,
Look forward to seeing your build, I built a moving trolley for my build last year, a really good idea ;D
Regards
Jim
|
|
|
|
Post by jacksdad on Jul 8, 2012 21:37:51 GMT
Hi Jim
We did indeed steal your idea so thanks mate !!
The plan is to put the chassis on axle stands on the platform so we (by that i mean jack) can crawl underneath to rivet and screw bits I'm a bit worried that the platform may not be wide enough or long enough but we'll see on thursday.
All the best
Jon
|
|
jack
Junior
Posts: 76
|
Post by jack on Jul 15, 2012 16:54:34 GMT
Hey, just wanted to say me and dad went to RTR to pick up the chassis and suspension, brakes etc. Looks awesome  a shame the lower wishbone shock bracket is in the wrong place  (as on froggy's build) but RTR are replacing it straight away  so we will get on with the floor 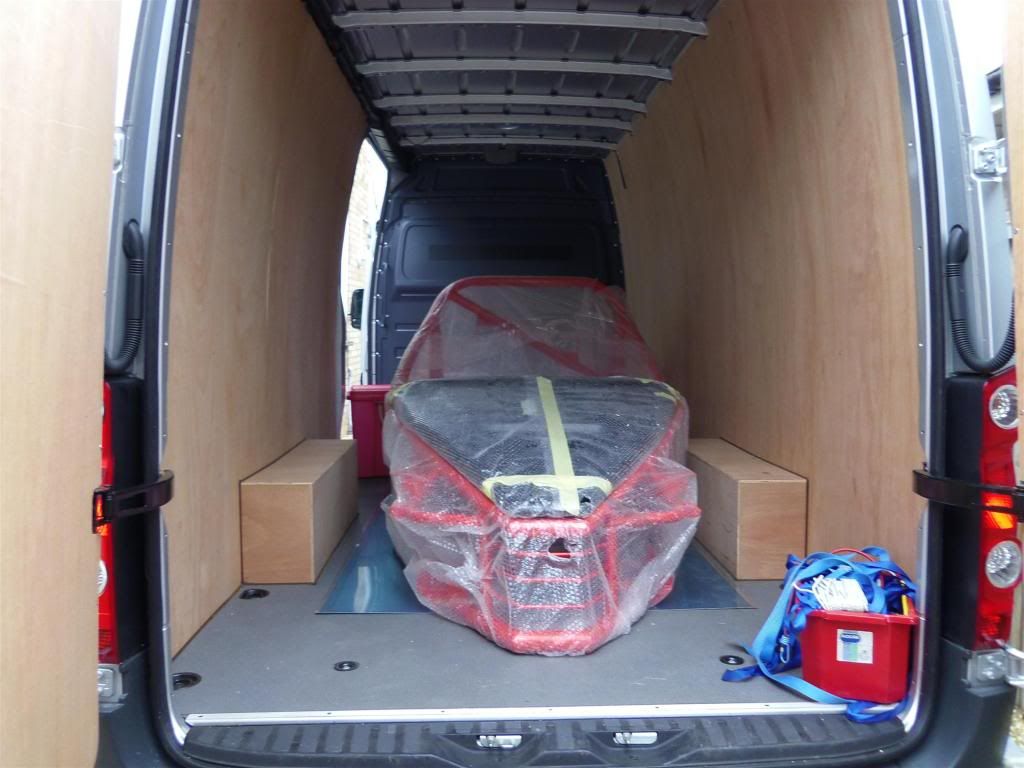 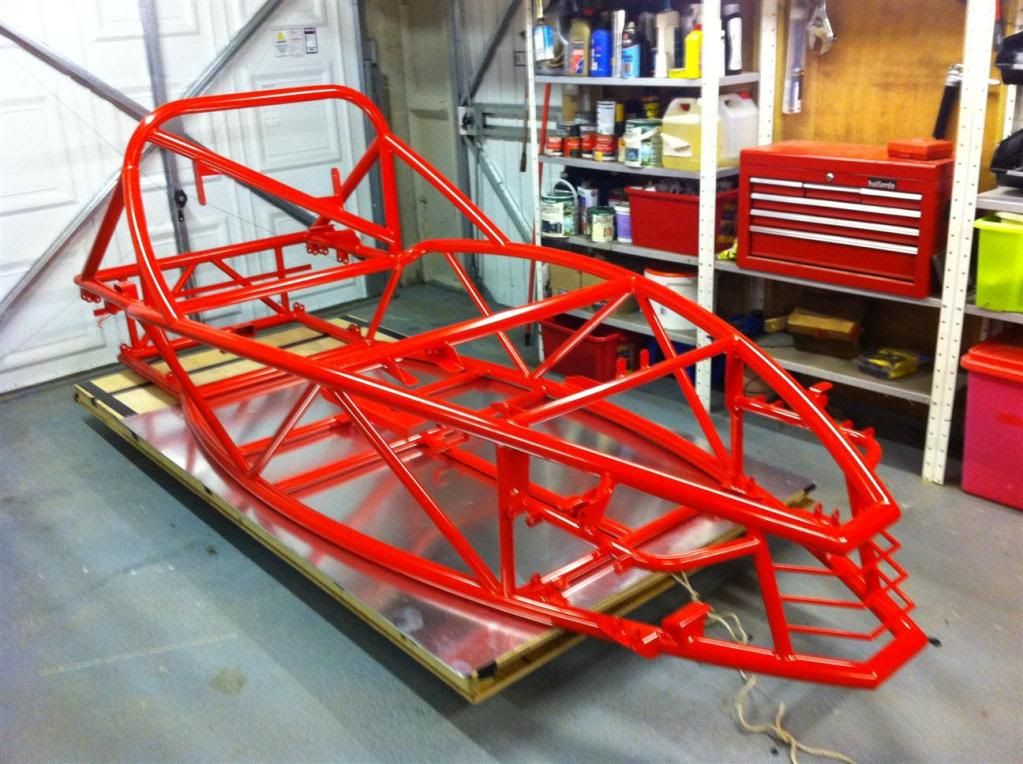 |
|
jack
Junior
Posts: 76
|
Post by jack on Jul 15, 2012 17:20:23 GMT
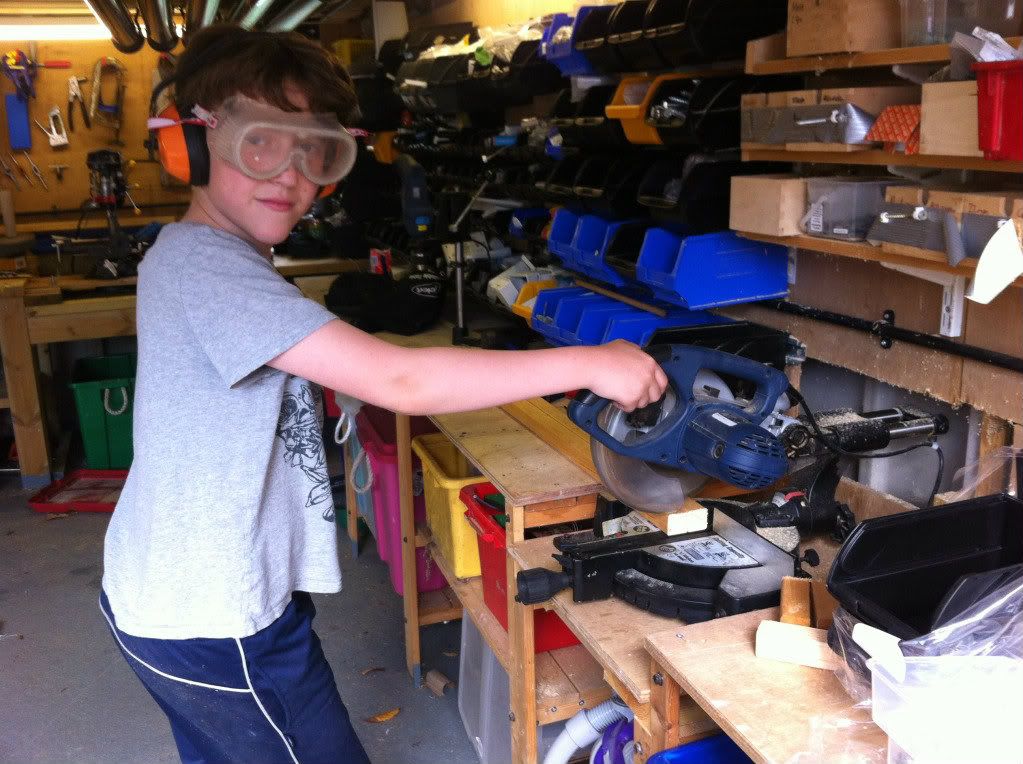
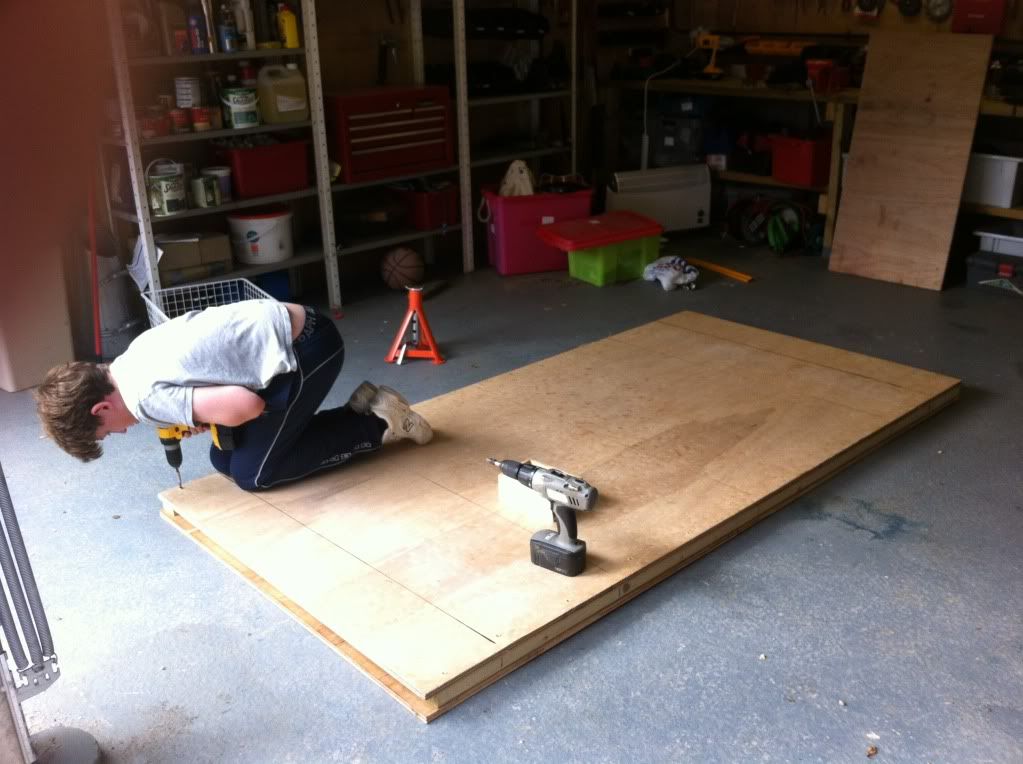
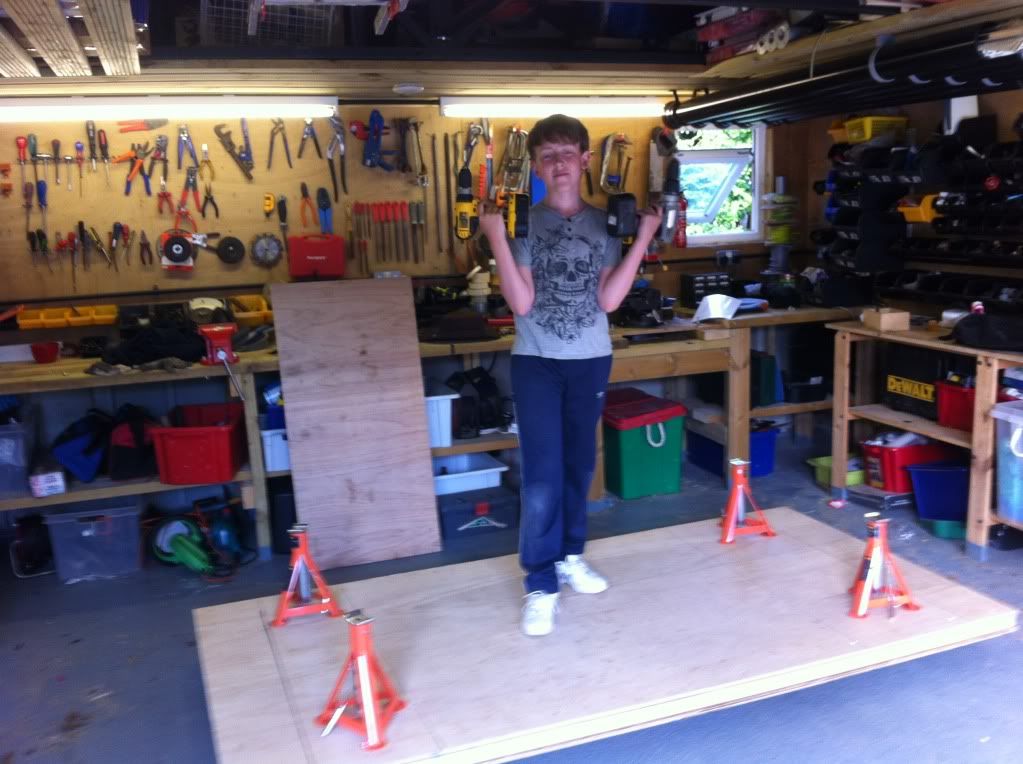
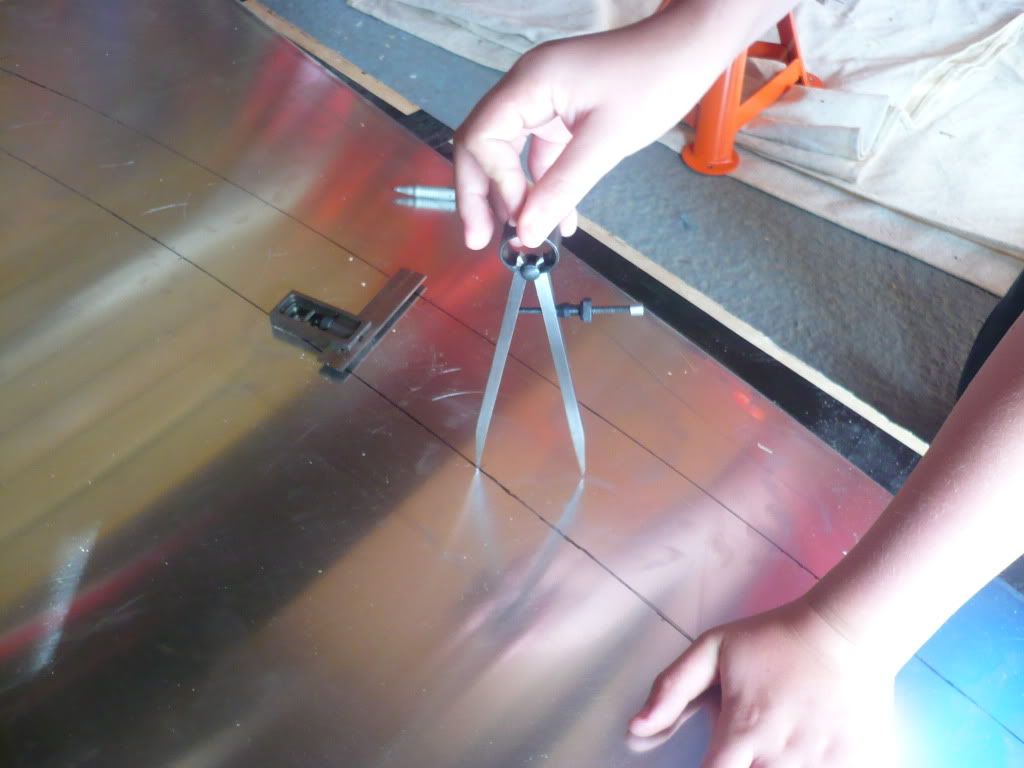
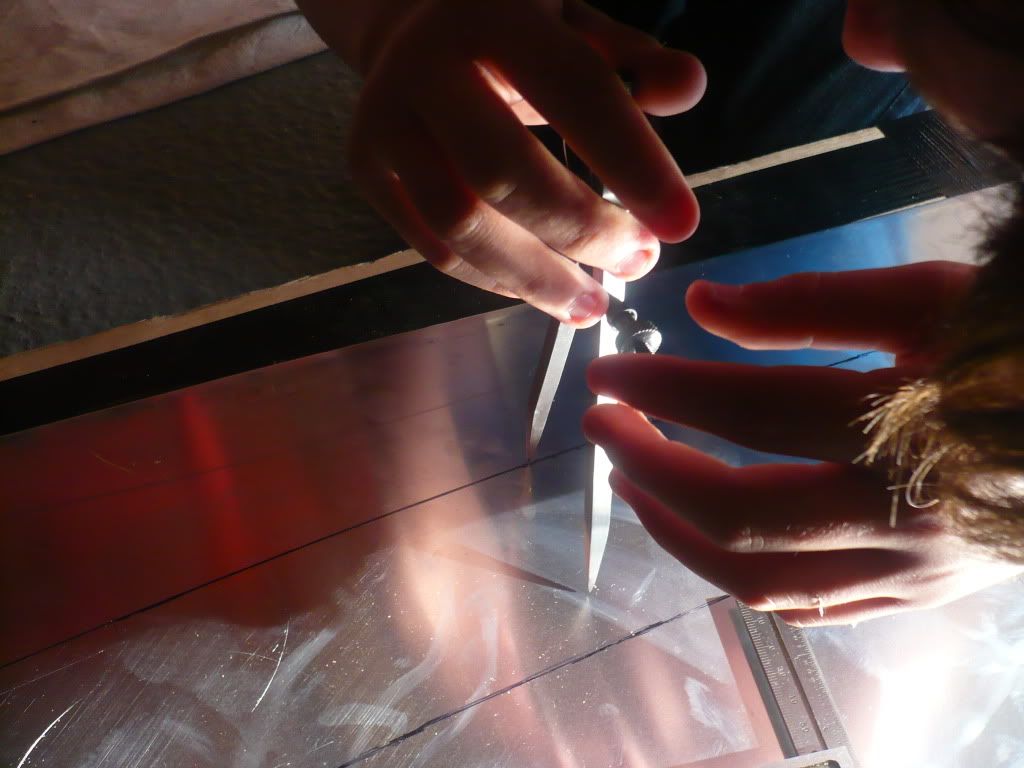
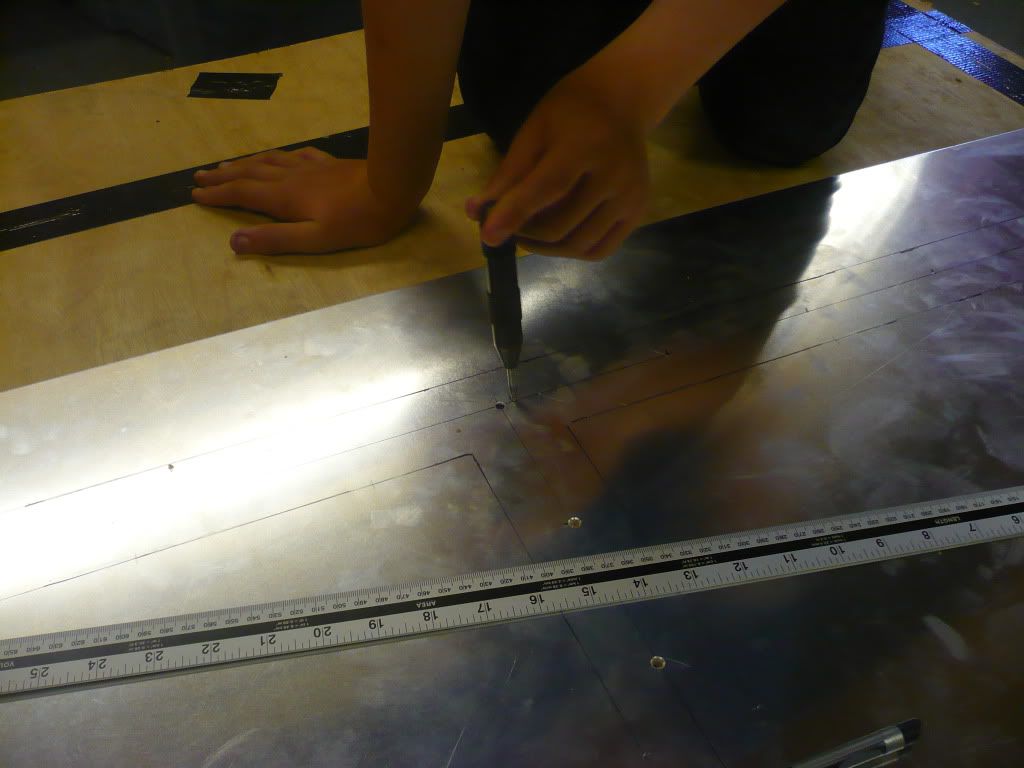
Build Diary #1 Build philosophy: Safe well constructed with attention to detail Longevity and reliability and function above form & performance Performance through weight control (mainly dad's  ) No rush What we hope to get out of build Dad Re-discover automotive DIY skills Overcome build challenges whilst discovering new techniques and materials Produce a detailed and valuable build diary for future builders Quality time with the lad Jack Learn about working of cars Learn automotive DIY skills Okay so we started the floor well, with dad finally making a crazy Idea that WORKED basically he made a wooden jig and drew round the frame in permanent marker, then I used a compass to make bisectors to give the line so me and dad know where to drill for the rivets, so that was today. laters 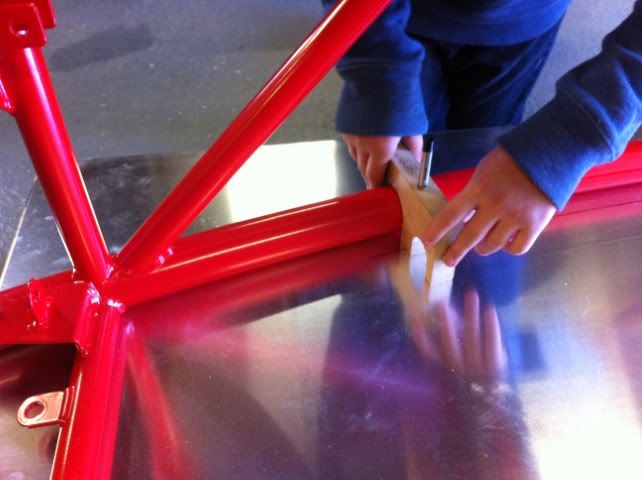 |
|
|
|
Post by 2beers on Jul 16, 2012 6:35:43 GMT
Looking forward to seeing the build!
Nice colour on the frame and clever wood jig. So the line on the inside is for locating the centre of the tube? Think I'll use the same setup.
Regards
/Tobias
|
|
|
|
Post by jacksdad on Jul 16, 2012 9:59:52 GMT
Hi
yep we drew 2 lines either side of the frame with the jig and then took the chassis off and used a compass (to create a bisector KS3 maths finally having a practical use) to create a midpoint line which should coincide with the midpoint of the chassis frame so we'll drill the rivet holes 10 cm apart along this line, and let you know if they line up !!
|
|
jack
Junior
Posts: 76
|
Post by jack on Jul 17, 2012 19:48:55 GMT
|
|
jack
Junior
Posts: 76
|
Post by jack on Jul 21, 2012 23:18:20 GMT
Build diary #2 hi today we cut out the floor using one of dad's inventions, a strip of metal stuck to the jigsaw 2cm from the blade, so yeah that's how we cut out the floor.  after that we use a deburring tool to deburr the edge of the floor sheet which took ages.  so yeah, once we put it on the frame it looked like this:  all the holes lined up with the centre line of the chassis pipes ;D and that's really good because it means that once we've drilled the steel  the rivets will have a better connection and then the water won't get in and the floor won't stretch. |
|
|
|
Post by BobN on Jul 24, 2012 8:56:41 GMT
Hi chaps
Like the way you measured it all up, I just got my kit and also got the floor down. Will keep an eye on your build for ideas as I am be a few weeks behind you.
Bob.
|
|
|
|
Post by Paul (madeye) on Jul 24, 2012 10:04:41 GMT
i have my kit now, but no major build progress yet, slowly slowly catchy monkey
|
|
|
|
Post by Stevo on Jul 24, 2012 18:18:03 GMT
Great to see another red chassis with black panels Rocket being built - not that I'm biased As it happens, my Dad's name is Jack and he helped me start my build, but then promptly returned to Australia. I also have Jim's rolling platform, which is proving the most useful bit of kit I have so far. Looking forward to seeing your build progress (faster than mine I hope)! Cheers, Steve |
|
jack
Junior
Posts: 76
|
Post by jack on Aug 2, 2012 19:47:14 GMT
build diary #3 over the last week we put the floor on, we did that by first drilling through the chassis in line with the holes in the aluminium  which took a while, and claimed the lives of three brave cobalt drill bits though these were the best. then I deburred it whilst dad was at work. then we used sikaflex to seal the chassis to the aluminium floor to stop water that will collect at the bottom of the mev getting into the chassis via the hole and rusting them:  then we started putting rivets in 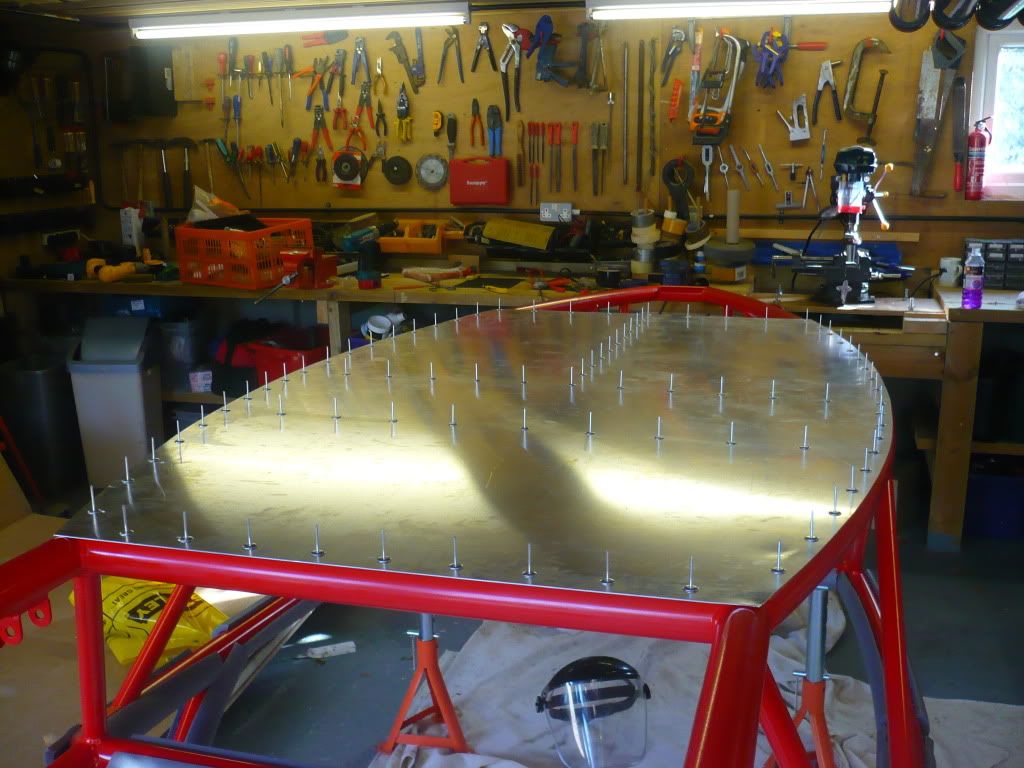 but after ten or so the fancy-pants drill attachment broke: 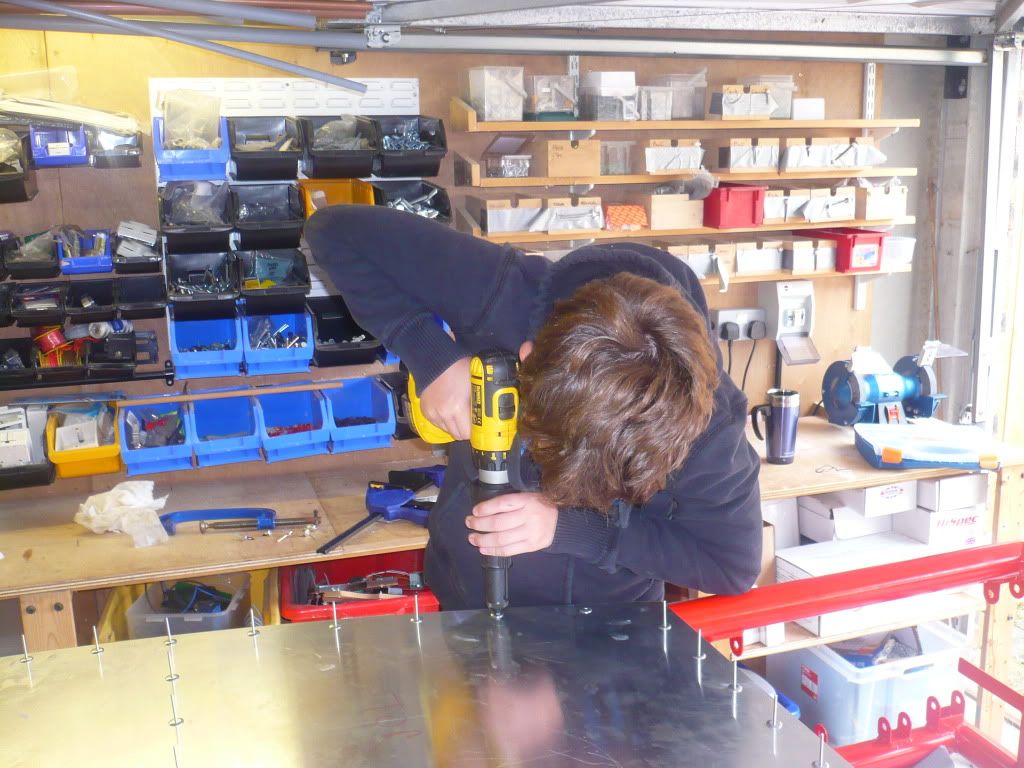  luckily victorian technology came to the rescue, and dad bravely used the ancient tool 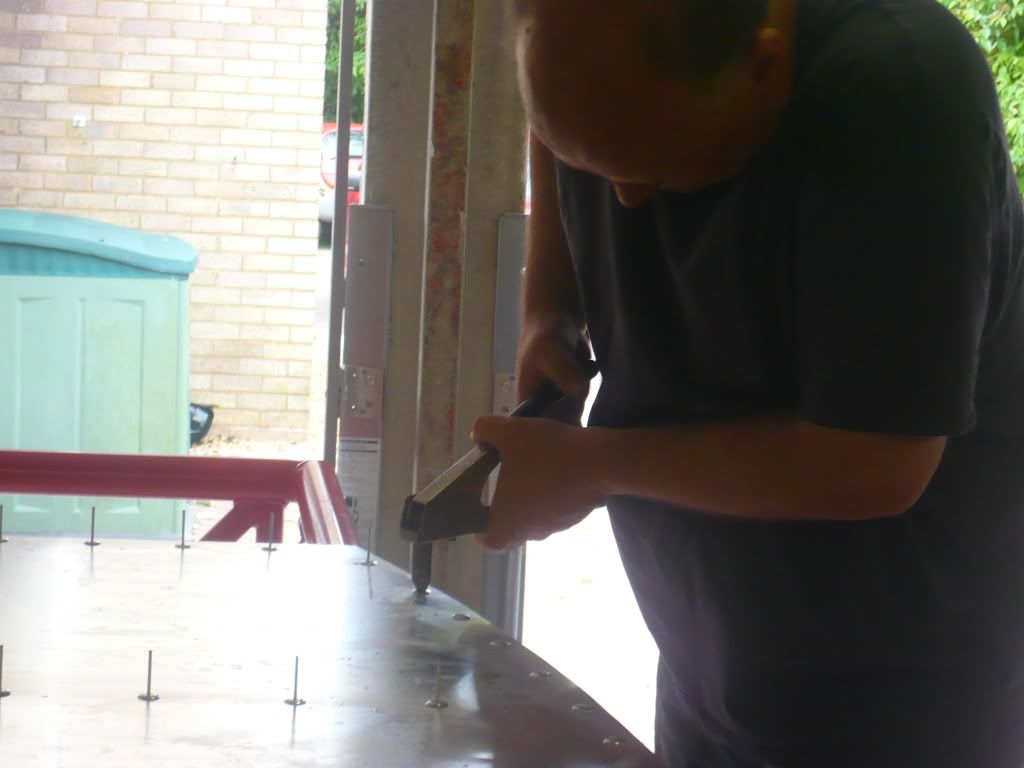 to put in the the rivets, hurting his wrist in the process, which was definitely not funny (definitely) then we used the rubber mallet to hammer the floor edges flush to the chassis: 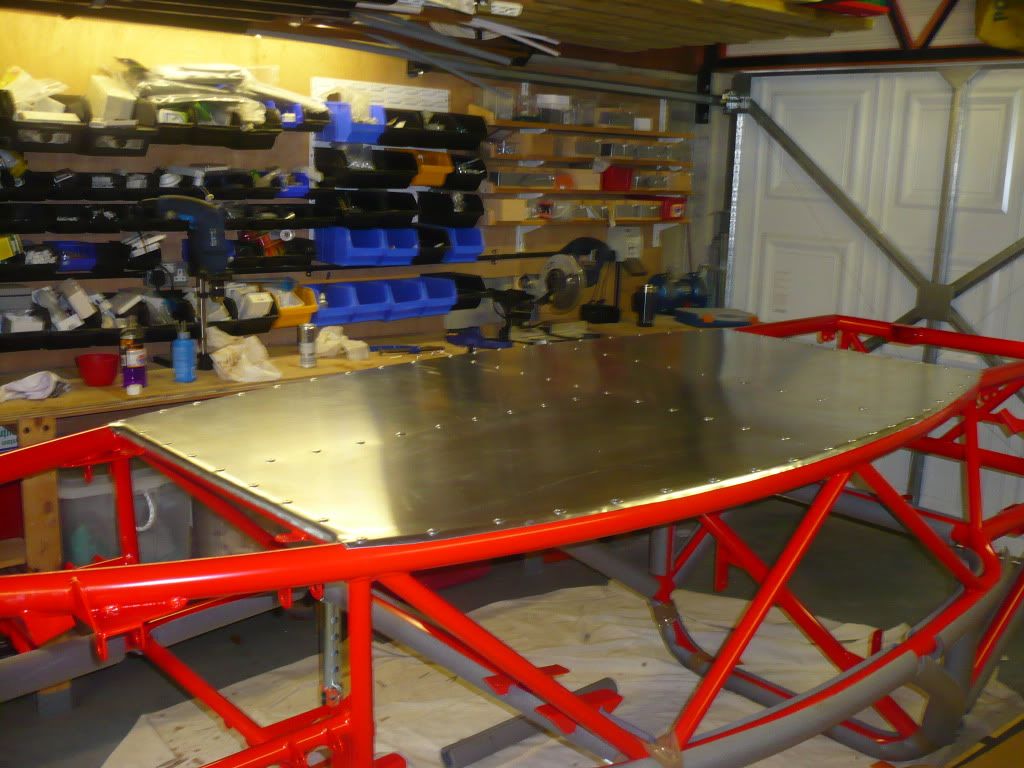 and that is how we spent our spare time this week  |
|
|
|
Post by Paul (madeye) on Aug 2, 2012 19:51:07 GMT
looking good. reminds me, i need a load of pipe lagging for mine
|
|
Deleted
Deleted Member
Posts: 0
|
Post by Deleted on Aug 2, 2012 20:17:49 GMT
Good move using silkaflex, it stops panel resonance/vibration as well.
|
|


 a shame the lower wishbone shock bracket is in the wrong place
  (as on froggy's build) but RTR are replacing it straight away
  so we will get on with the floor
 )
)
 the rivets will have a better connection and then the water won't get in and the floor won't stretch.


 luckily victorian technology came to the rescue, and dad bravely used the ancient tool