|
|
Post by erik on Jun 19, 2012 20:27:23 GMT
|
|
Noah
Junior

Posts: 25
|
Post by Noah on Jun 19, 2012 22:00:37 GMT
Edwin, not sure I get your point about Ikea.
At the price of the Tr1ke I certainly don't expect it to include everything; I just want to know what I'm in for.
Erik, thanks for your comprehensive answer.
I agree with your logic on welding on brackets vs. drilling the frame.
|
|
Deleted
Deleted Member
Posts: 0
|
Post by Deleted on Jun 19, 2012 22:50:09 GMT
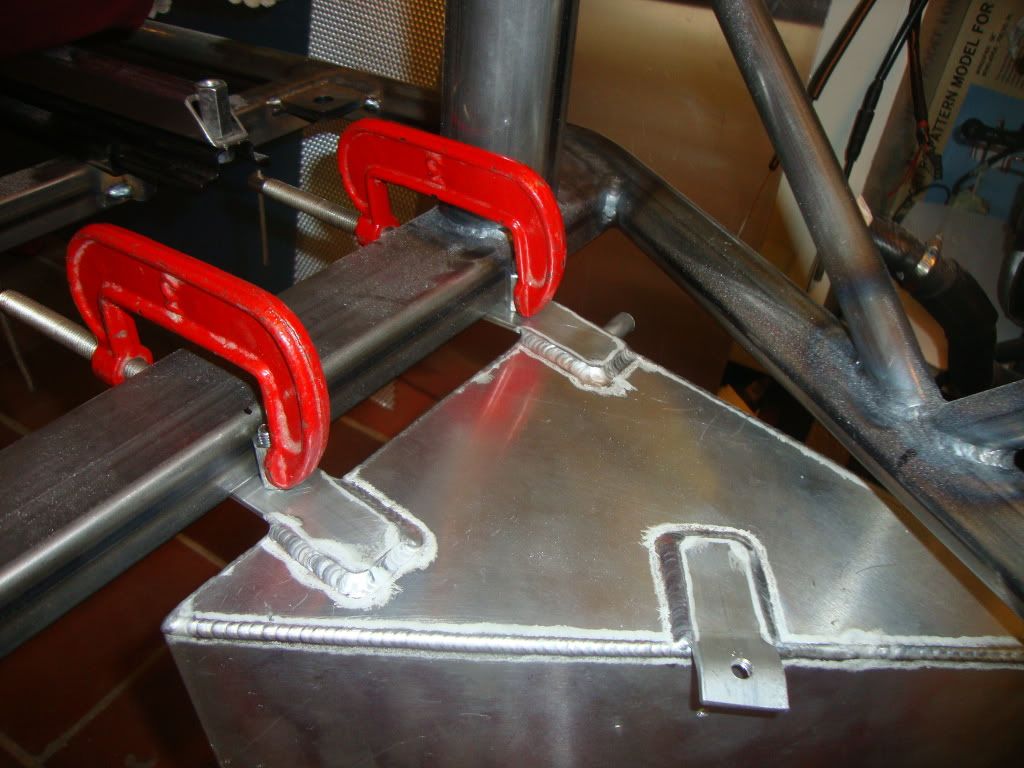
I don't get why you have done this with the tanks? The two brackets on the front of the tanks will fit nicely onto the bottom of the cross bar, I bolted mine through with M10 nuts and bolts, the one that mounts to the side tube will fit nicely also, but it looks like yours has been cut far to short now to do that. Did you ever turn the chassis over to sit the tanks into the frame upside down? this was maybe my second job, they sat nice, and I maybe had to bend the outer tube bracket to fit nice and flush on the bottom of the tube, I then drilled and riveted this one into the frame. I managed to mount my nearside tank a little too close to the framework so it chatters on revving, once again, not sure whats going on with your radiator mounts, unless you have a much newer R1, if its a Carbed R1, brackets are fairly easy to fabricate, I didn't need to weld anything onto the frame, rivets or nuts and bolts are fine as long as they pass through the middle of a support tube or square section in my opinion. With regard to welding the frame, this is all well and good if these welds are strong, but you don't want the fuel tanks breaking welds and dropping onto the road a full chat. Of course each person has there own building way, but bolting into that main cross beam is going to be just as strong as welding.
|
|
vtR1k
Full
 I'm a trike lover...
Posts: 398
|
Post by vtR1k on Jun 20, 2012 4:33:45 GMT
Well, I can follow Erik's thoughts here. The less you drill in the frame, the stronger it stays. Also, the possibility that water enters the frame, causing rust from the inside, is very small now. And, a good weld should be as least as strong as the original material.
Just my 2 cents...
Sent from my HTC EVO 3D X515m using ProBoards
|
|
|
|
Post by erik on Jun 20, 2012 5:10:07 GMT
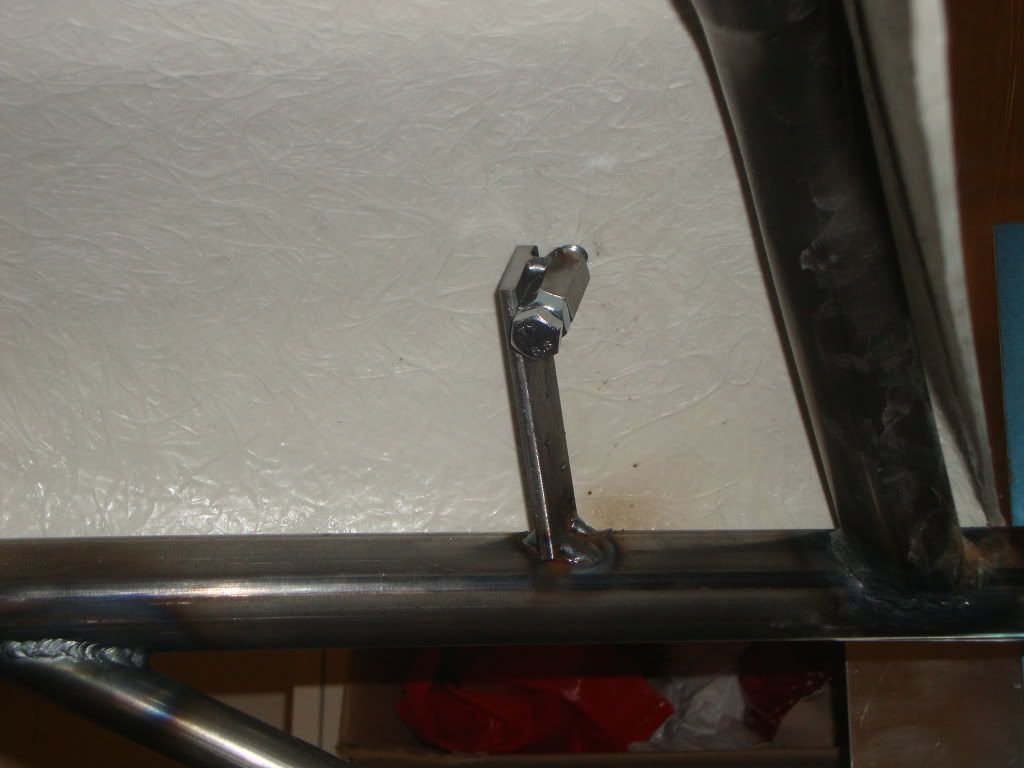
Rivets may wear out under vibrations and load. I don't expect it to hold a tank forever on it's place. The Bottom plate has been glued and rivetted for a reason...
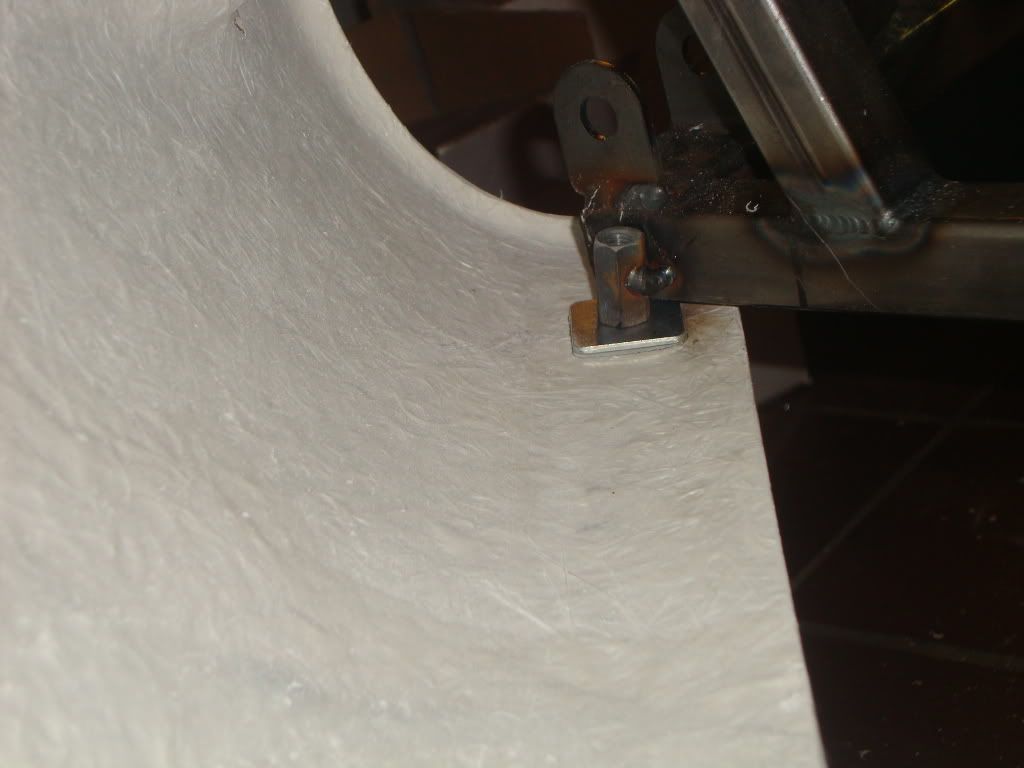
I tried to straighten the rear tab on the tank but the alu weld showed a small tear. Bending the tab downwards would not be my option.
Weldings can always be reversed or corrected if i change my mind.
|
|
|
|
Post by erik on Jun 21, 2012 17:32:13 GMT
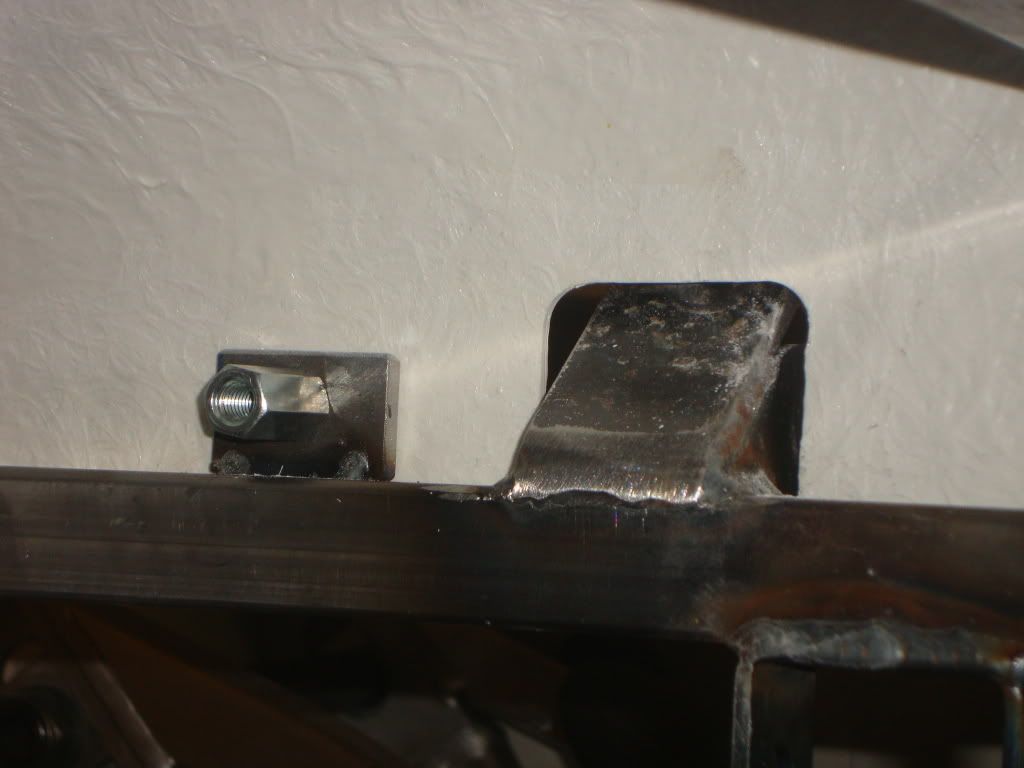
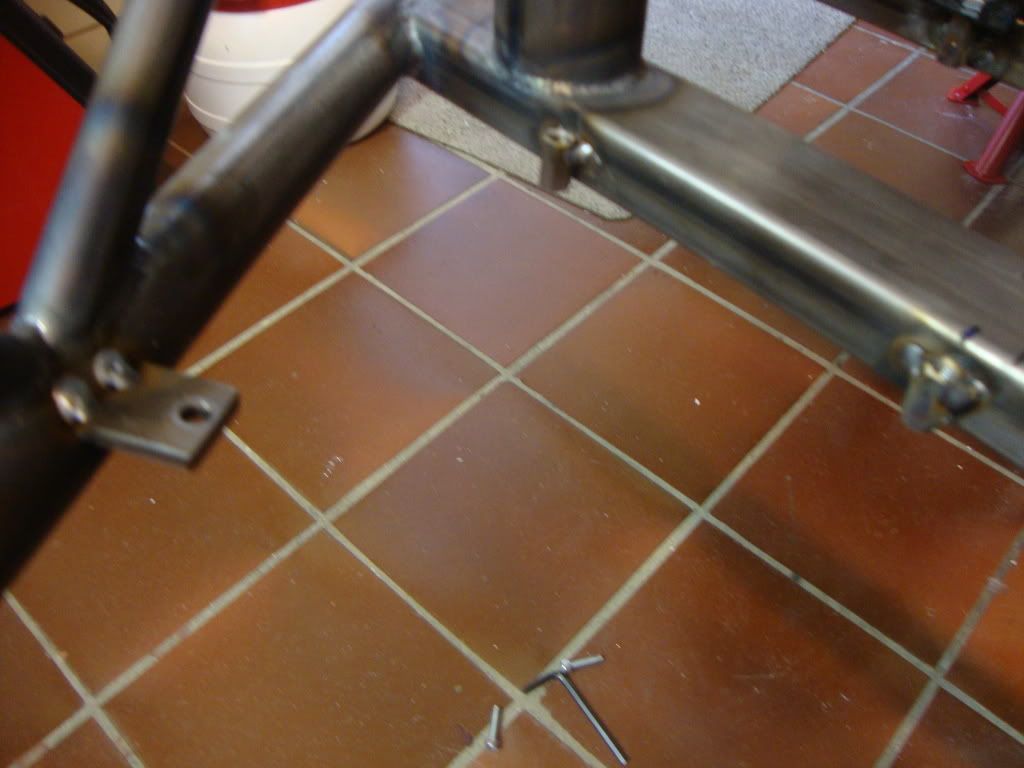
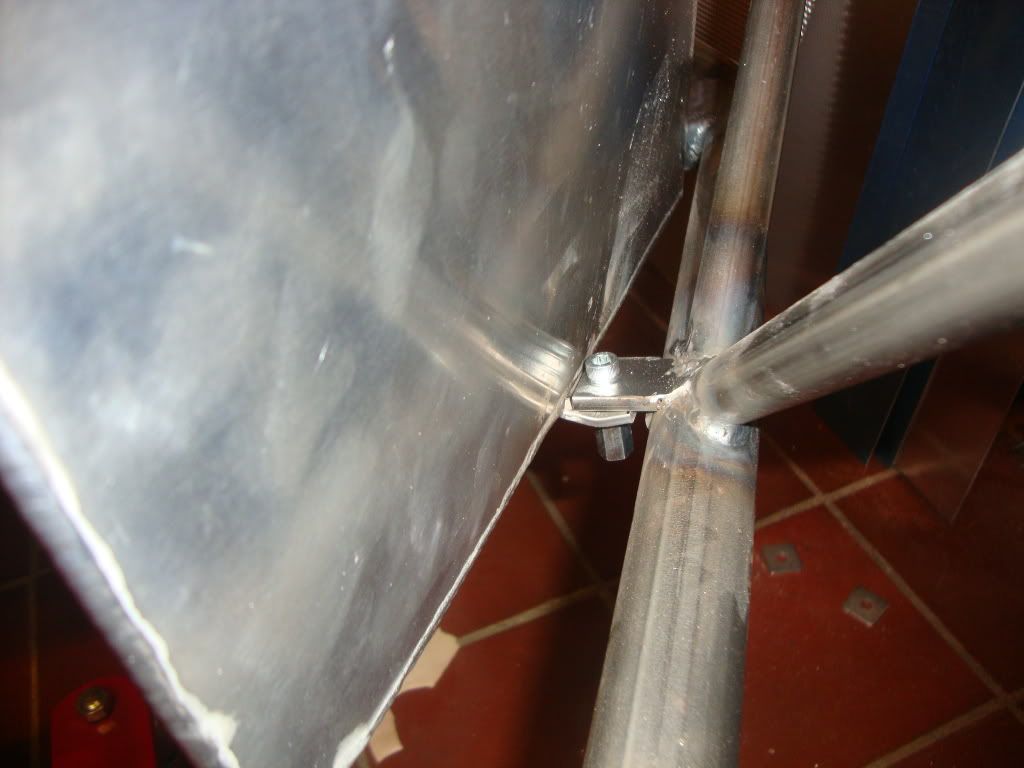
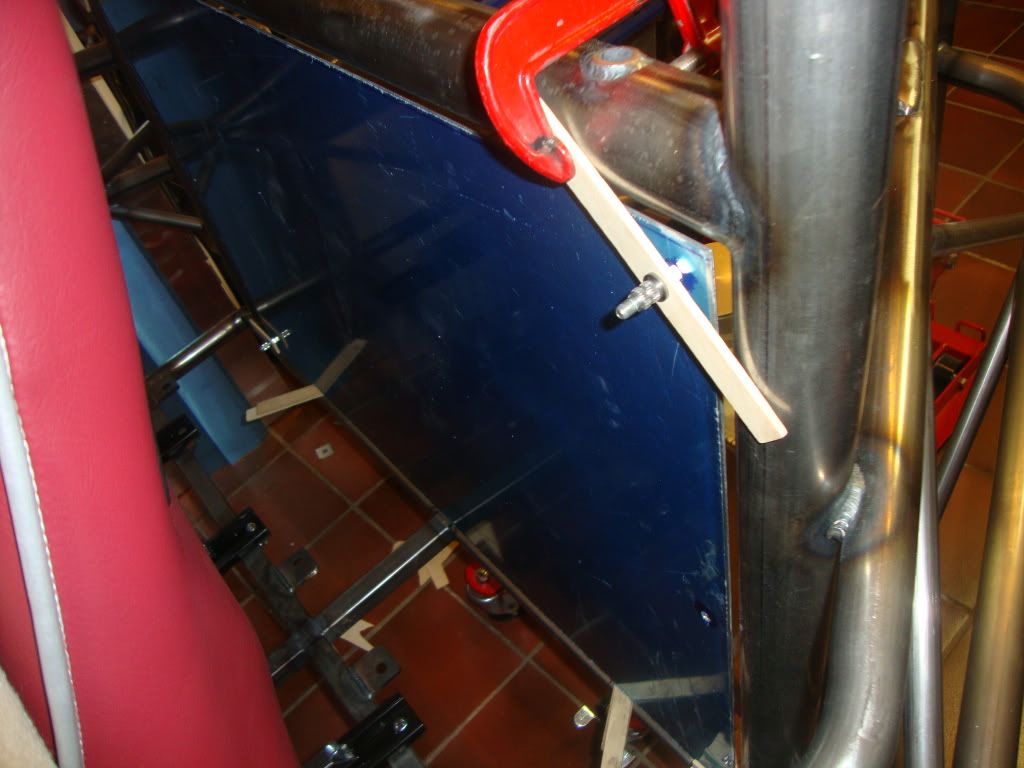
Just weighted the seats and they are 10kg each, including rails. I removed all uneeded parts and was able to make a bunch of pics of the brackets I made. You can see I rotated the radiator to gain some clearance for the top right and bottom left hose connection. The brackets will be trimmed to shape after they are fully welded. I think I will place the engine in the chasis to make the exhaust bracket. unfortunately, I haven't been able to ssource round tubes so I will make a square version for this moment. Perhaps It may not look too bad at all. regards, Erik handbrake: 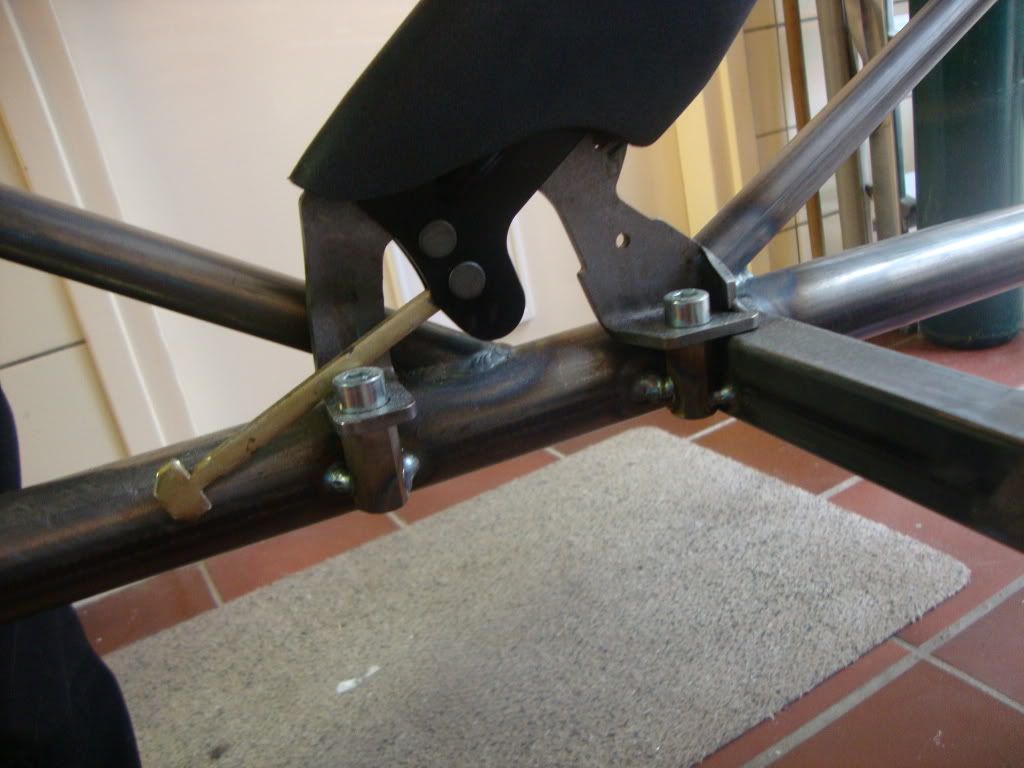 bulkhead brackets, 6 in total, will ad a few more when the tunnel opening has been made later. 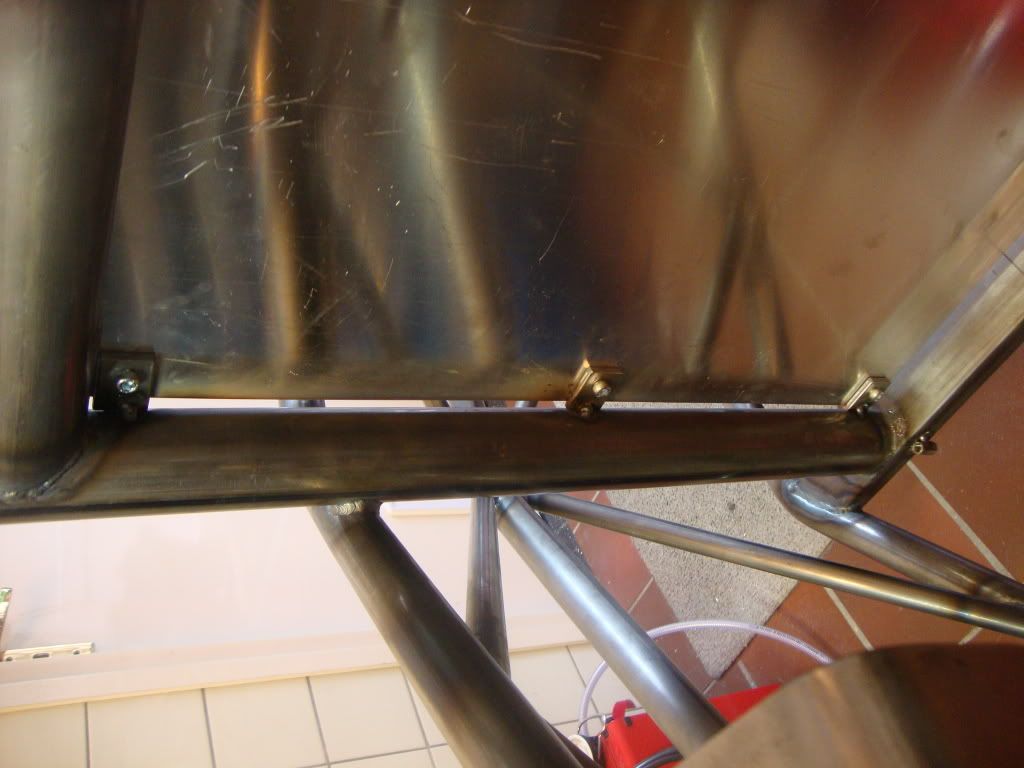 radiator side view. Placed normal to the ground to maximize efficiency of the laminair airflow. 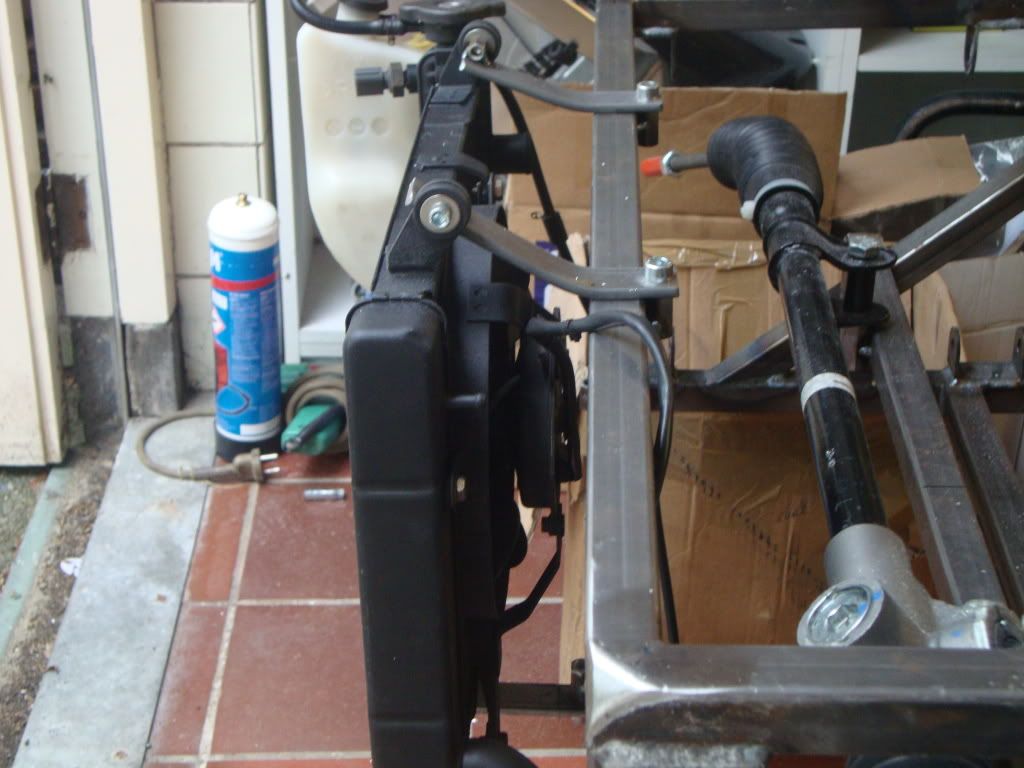 Frontview shows the slightly rotated radiator: 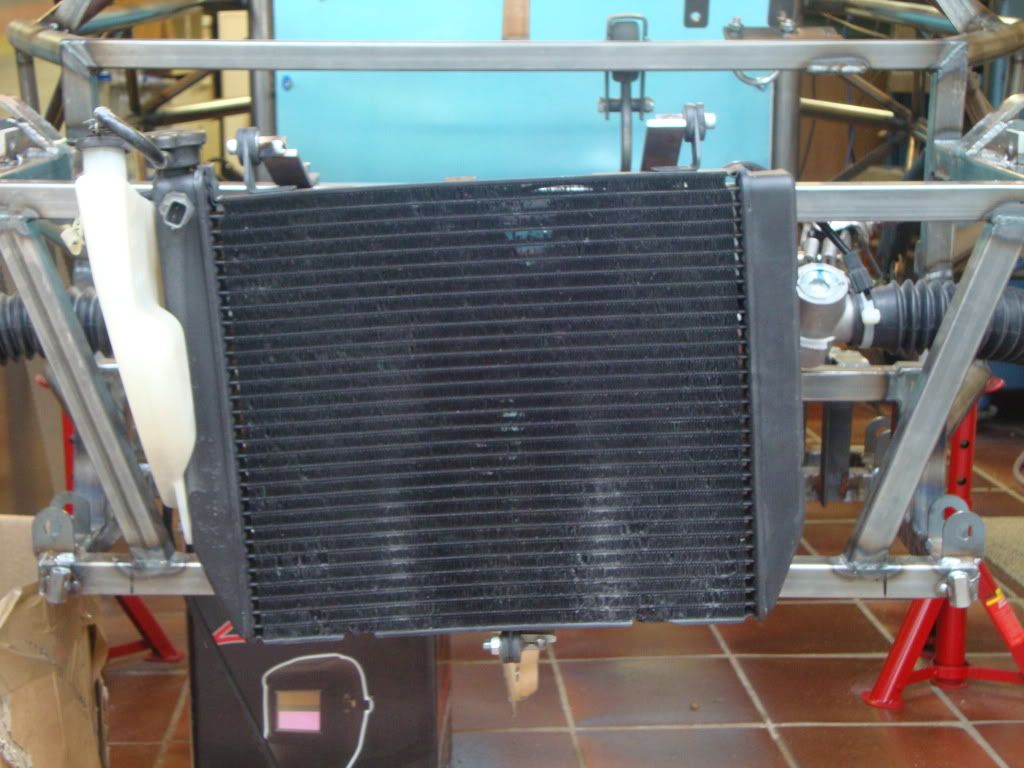 rearside of the radiator shows the clearance for the hoses: 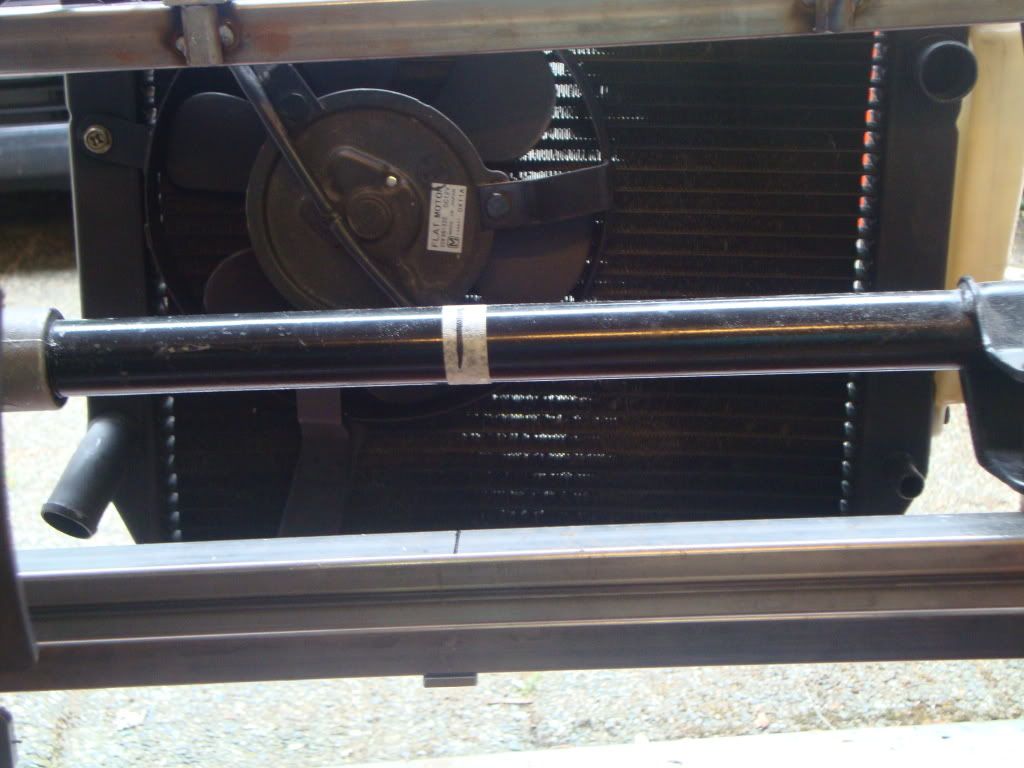 lower bracket. 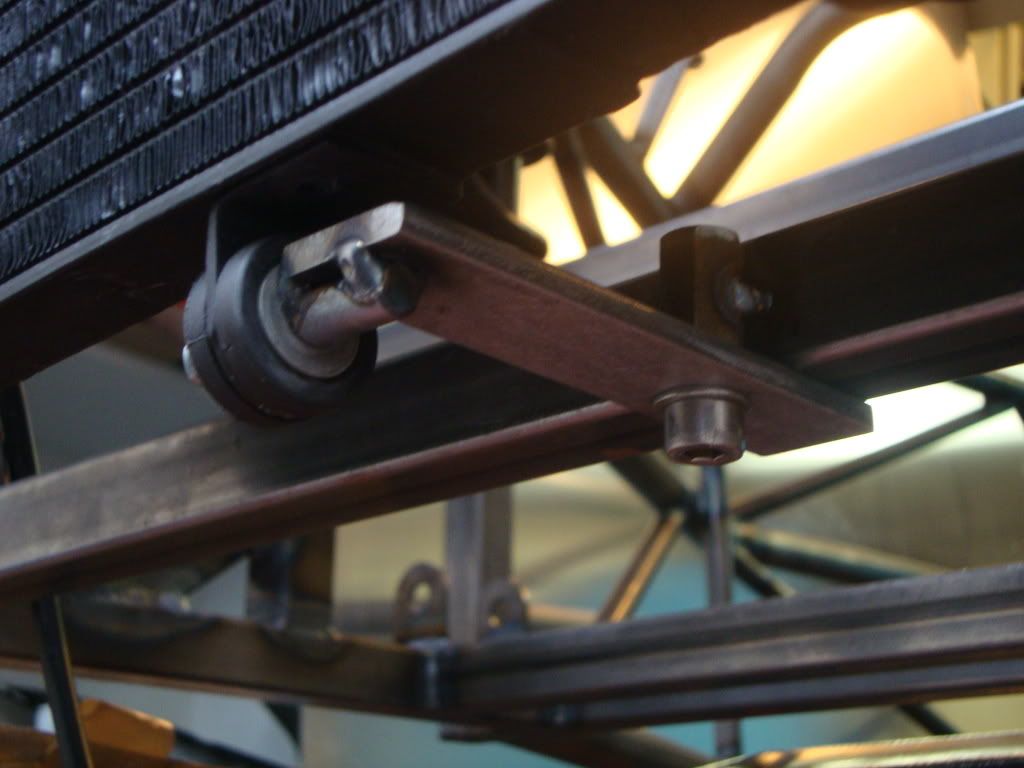 2 top brackets made to match the rotation: 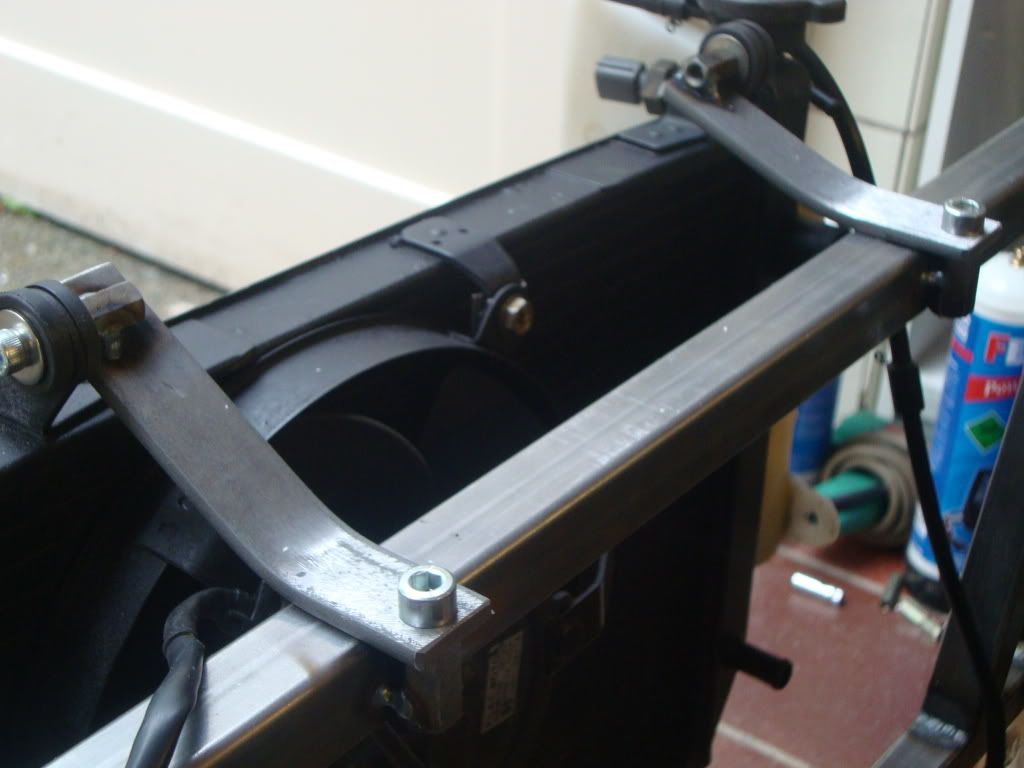 |
|
|
|
Post by erik on Jun 21, 2012 17:40:06 GMT
One note on the pic of the rear view radiator. You can clearly see the backlight through the radiator showing the maximum cooling area. any other angle will decrease cooling area.
I am planning to make a mesh to radiator tunnel later but I haven't figured out how to install this when the body is mounted.
|
|
Noah
Junior
Posts: 25
|
Post by Noah on Jun 21, 2012 20:02:15 GMT
Just weighted the seats and they are 10kg each, including rails. Excellent, thanks, Erik. |
|
|
|
Post by erik on Jun 21, 2012 20:31:05 GMT
This evening I tried to place the engine in the chasis with no luck. After 3hrs fighting the engine brackets, ending up having a wet shirt, I gave up. The bolts are m10, holes in the cases are 11mm and the holes in the brackets are 12mm and still the holes in the top bracket and the lowest brackets need to be made oval to place this engine in.Yes, this means the tolerances of the bracket locations are more than 2mm off center to bolt locations. This issue(not fitting the engine in the brackets) has been reported a few times on this forum. Worst thing of all is the engine force cannot be distributed to all brackets which is basically the same as the engine power not divided on all bolts which may stress the casing a lot. the only way to deal with this is to bolt them really hard but no guarantee the engine won't drift. Buying a new M10 tap tomorrow because one 1st pitch in the engine case is ruined. Need a shower to remove the stink and anger. Here a pic of the 2012 chasis. I think this should be good for opening the clutch  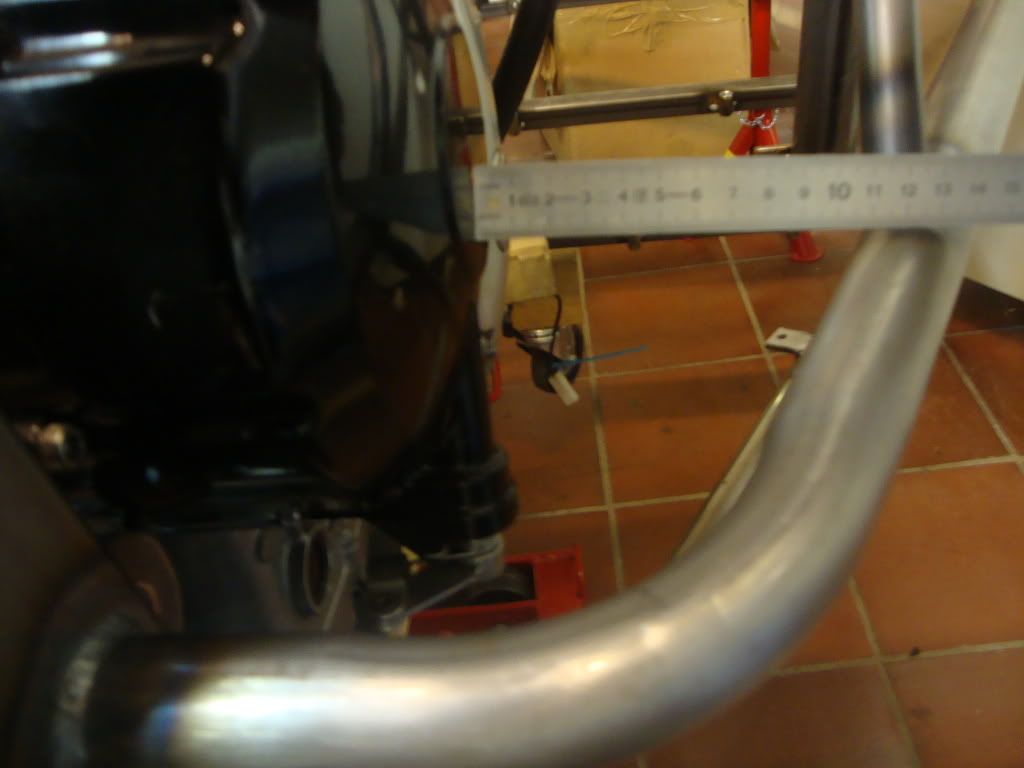 |
|
|
|
Post by edwinwl on Jun 21, 2012 22:01:20 GMT
Getting the engine fitted was also a touch job with my tr1ke.
No ikea....
My plan:
1. You have to lift the car frame over the engine.
2. Find a friend, neighbor, wife or other person who Will help you. One has to do the lifting, the other does the guiding.
Better safe than sorry.
3. Lift the frame over the engine and find out if the engine fits or some tweeks need to be made.
4. Drink a cup of thee. Together of course.
5. Confirm the needed tweeks and mark them on the frame.
6. Remove engine
7. Make tweeks
8. Fit engine
8. Thank your friend for helping out. Drink a beer and/or kiss his/her cheek.
Take your time. Don't forget enjoying while building your tr1ke. Don't compare yourself with others. Don't forget your family while building and Good luck.
Sent from my GT-S5660
|
|
|
|
Post by erik on Jun 22, 2012 15:21:32 GMT
Pic of today: Name those holes! Take as long as you need, I haven't figured out the reason for these holes myself. I don't think these are for the exhaust bracket 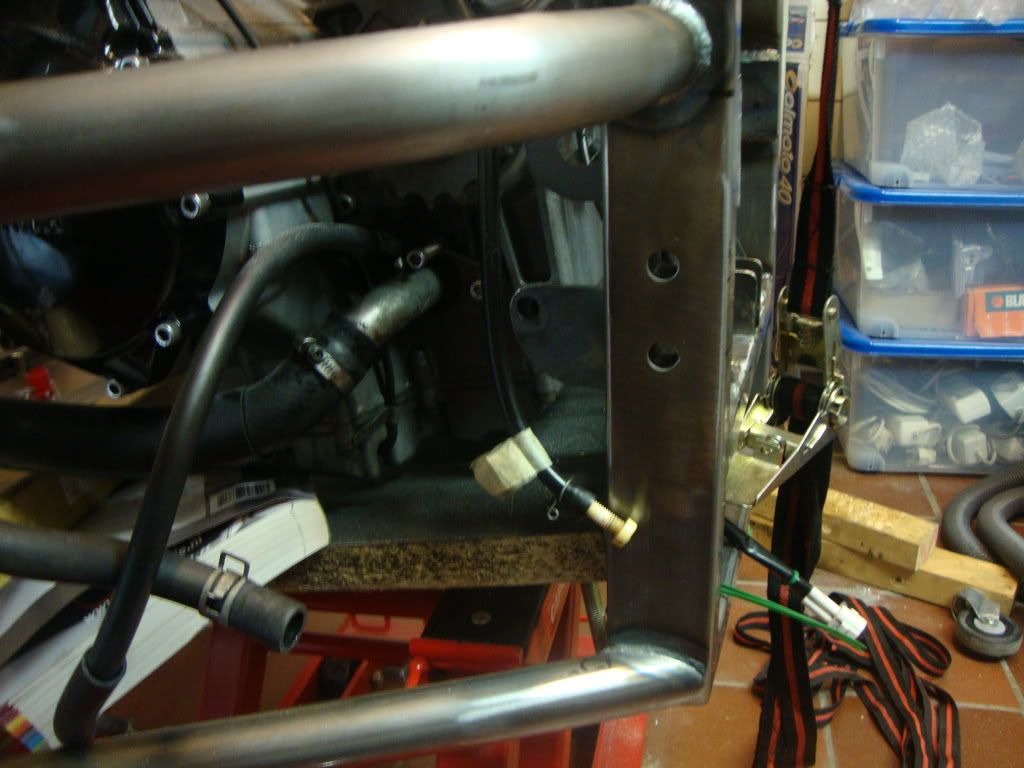 |
|
|
|
Post by slugshot on Jun 22, 2012 15:51:31 GMT
Hi Eric, i named the top hole david and the bottom one paul  they are there for the reverse gear bracket to bolt too if you look through my pics you might see it. very well engineered by the way keep it up. |
|
vtR1k
Full
I'm a trike lover...
Posts: 398
|
Post by vtR1k on Jun 22, 2012 16:23:55 GMT
I say: listen to Edwin and take some time to enjoy it!
I think I wasted 2 months looking, thinking, making parts I discarded an hour later and so on... But I always tried to have fun. If the fun part slips away, its just another job and you will lose patience quickly, and the consequence is an unfinished tR1ke, or, worse, a tR1ke which you afterwards you don't like...
Back to the topic, I couldn't say because my own engine and rear wheel suspension were the molds for my own frame. If I read all the complaints, I think RTR must adjust their molds a bit...
Sent from my HTC EVO 3D X515m using ProBoards
|
|
vtR1k
Full
I'm a trike lover...
Posts: 398
|
Post by vtR1k on Jun 22, 2012 16:47:52 GMT
Btw, I promised to make some pics of the scratches due to speed bumps, but there are no scratches visible... The gel coat must be very strong!
Sent from my HTC EVO 3D X515m using ProBoards
|
|
|
|
Post by erik on Jun 22, 2012 18:38:34 GMT
@ Slug, Yeah, looked at RTR website and I see the holes are for the reversed motor. I think I will be sticking something else in David&Paul LOL!! Thx for liking my build skills. I try very hard to make it as simple that everyone can do a shameless copy with good results. @ Rik, Hehe, I guess you're right i need to enjoy the project, but now I want to check every bracket and hole RTR has made first before I can enjoy my own build without stalling the building speed. I have been waiting 15 weeks for my kit and I think that's enough for me When I look at the drifting of tolerances there should be only one way to achieve this and I do assume the holes are already in the brackets before welding. After welding the chasis will stress when cooling down and this is the base for drifting. One reason could be the high production rate forces them to remove the moulds before the welds have been cooled down. To make ends meet the holes have been enlarged a lot, but I'd rather would have seen the holes were drilled after welding instead before. That should be no problem with Cobalt drills. Fabricating drill moulds copied from an engine may take only a few hrs. In the crane building business (what I do for a living after being a 5-axis miller for 10 years) all holes need to be reworked after welding. This is a usual way of producing constructions. |
|