|
|
Post by erik on Jun 3, 2012 21:29:58 GMT
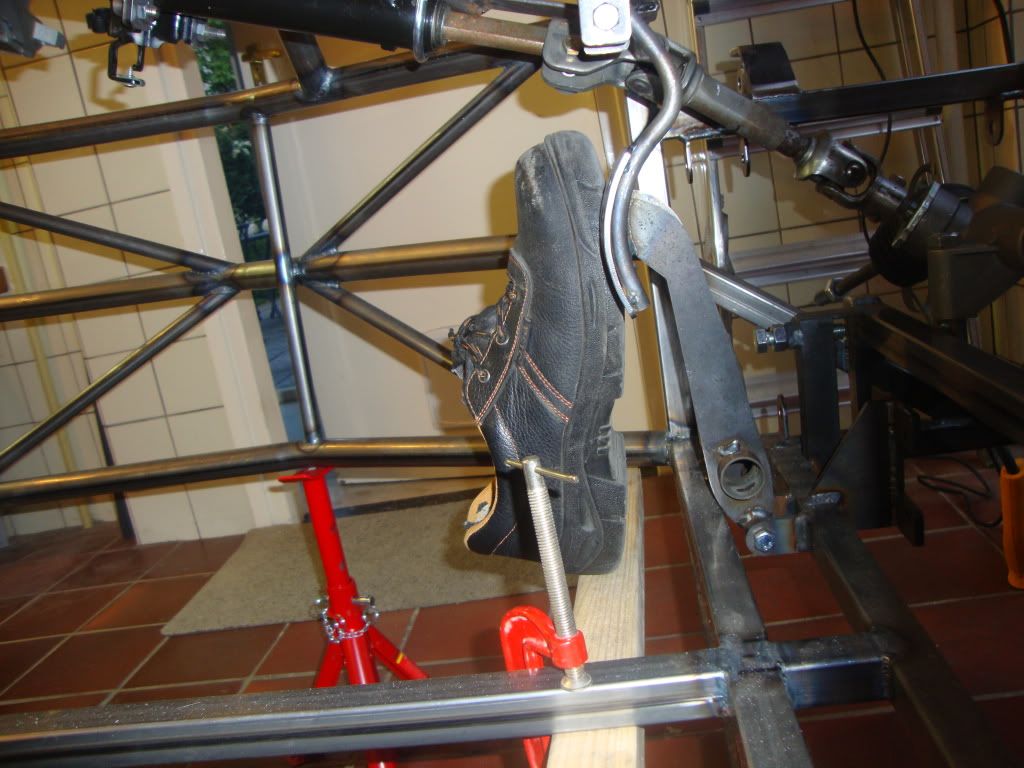
Yep!! Picked her up yesterday!!! Looks pretty good to me! the tR1ke mk2012 version it is. The changes over the older versions is the pedals and steering column have been modified for the left side drivers, an clutch pedal stop angle has been added and the rear section has been modified to fit the reverse motor. The first thing on my list was to mount the pedals in position . I have no suitable bolts and nuts at this moment but I get me a bunch of long bolts and nuts in M8/M12 of cheap qty and get me proper lenghts and strenght when reassembling and do it right so I don't need to get me to the hardware store every day. Now I know our dutch friends had some serious pedal+steering column issues so i was very curious how this problem has been solved. The foot clearance from the column and pedal clearance is amazingly big!! The next issue was the lenght of the steering column showed it is to long on previous builds and had to be shortened to make ends meet. On the steeriing wheel side an additional boss has to be added. because of this I placed my seat in the chasis and made a testfit to derermin the location of the seat to match my legs angled like a normal car. The steering wheel could only be reached with stretched arms. i made some measurements and for an acceptable steering wheel position it needs to be moved backwards at least 50mm, The lenght several builders have shortened the column on the front side... on the testfit I noticed the pedals are in good position related to the seat (placed as far to the left to fit my upper arm in between the seat and chasis) but the steering wheel is by far not in line with the seats and bubble on the body. Proof of this can be seen at Edwin's tR1ke (front view): www.mevowners.proboards.com/index.cgi?board=tr1ke&action=display&thread=1044&page=12To match the steering wheel to the bubble takes the steering column 56mm to the right. A Testsit showed 45mm is very close in line with the seat, creating huge space on the left side for the bike switches, handbrake area and possible gear handle. Having this kit 30hrs at home now. because the disc grinder is too loud at night I will remove the steering column brackets tomorrow to make wrong things right ;-P Need to ask a friend to dial in my welding machine first LOL!! Pics to come. regards, erik |
|
|
|
Post by erik on Jun 3, 2012 21:39:08 GMT
Hihi,
Carma-4 LOL!!
I guess several cannot handle a straight forward opinion weather it is rain or shine. Tipically Dutch mentality ;-P
|
|
|
|
Post by edwinwl on Jun 4, 2012 19:46:42 GMT
Stop crying about your karma and start building your tr1ke.
If your building skills are as straight forward as your opinion I am not sure how your tR1ke will end up.....
Supprize us and don't forget to share some pictures!
:-)
|
|
|
|
Post by slugshot on Jun 4, 2012 20:04:42 GMT
Well said edwin, i for one cannot wait to see your accessories eric ;D
|
|
|
|
Post by erik on Jun 4, 2012 21:18:48 GMT
Hehe, the disc grinder is my favourite tool :fast results.
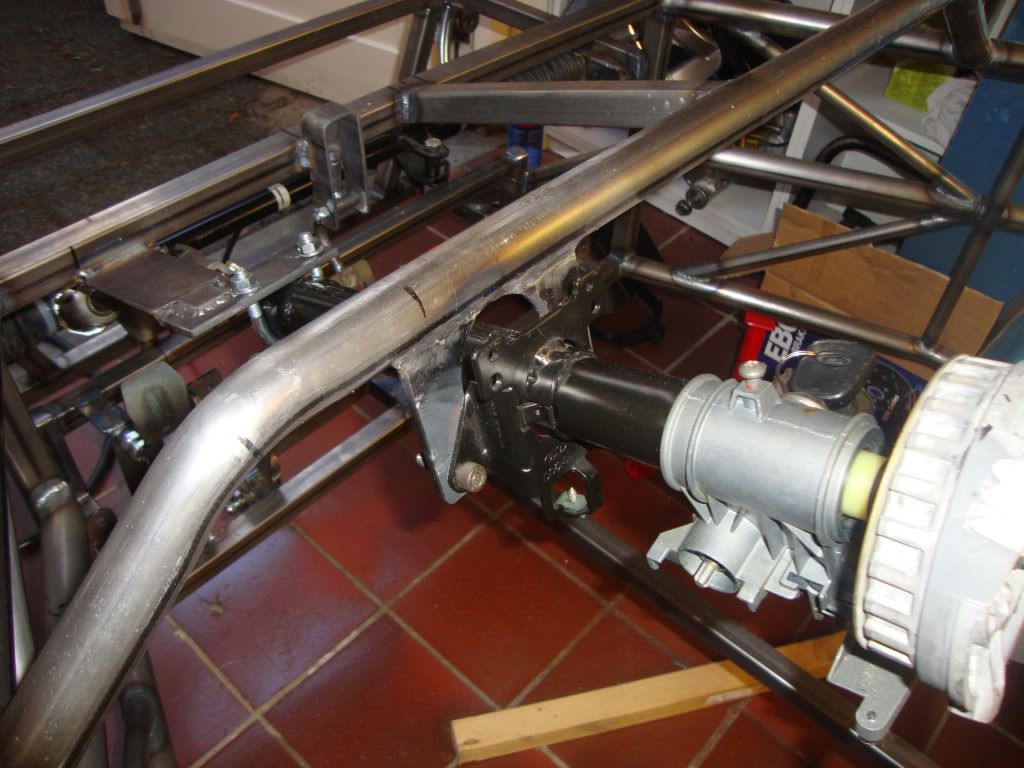
I just finished the modification on the steering column. The brackets are clamped to the chasis and tomorrow a proffessional welder will dial in my new hobby MIG welder and hopefully he will weld the brackets for me as well. When The clamps are removed I will show you a clear view of the steering column.
I made a new testsit in the tR1ke and if the upperarm is slightly against the chasis and I look forward the center of the colum is in between the eyes. The column is moved rearwards by 55mm as well. the bracket on the colum can be used for the r1 display or nav unit. I am planning to take the column and Luisi steering wheel to a car accessoiries shop to find me a proper attachement. Hopefully I can still use the steering lock tough I only have 1 key. I do reconsider to order new keys+lock at the ford dealer later.
Oh yeah the accesiories!! Still waiting on the anthraxite Momo Corse wheels but being close to the italian summer holiday (4 weeks!!) I don't expect them to arrive soon. You'll see them during the build ;-P
I'll post some intersting pics of the Mk2012 asap.
|
|
|
|
Post by erik on Jun 5, 2012 20:25:28 GMT
|
|
|
|
Post by erik on Jun 5, 2012 20:30:26 GMT
This was all I needed to remove. Just a few cm to make ends meet. 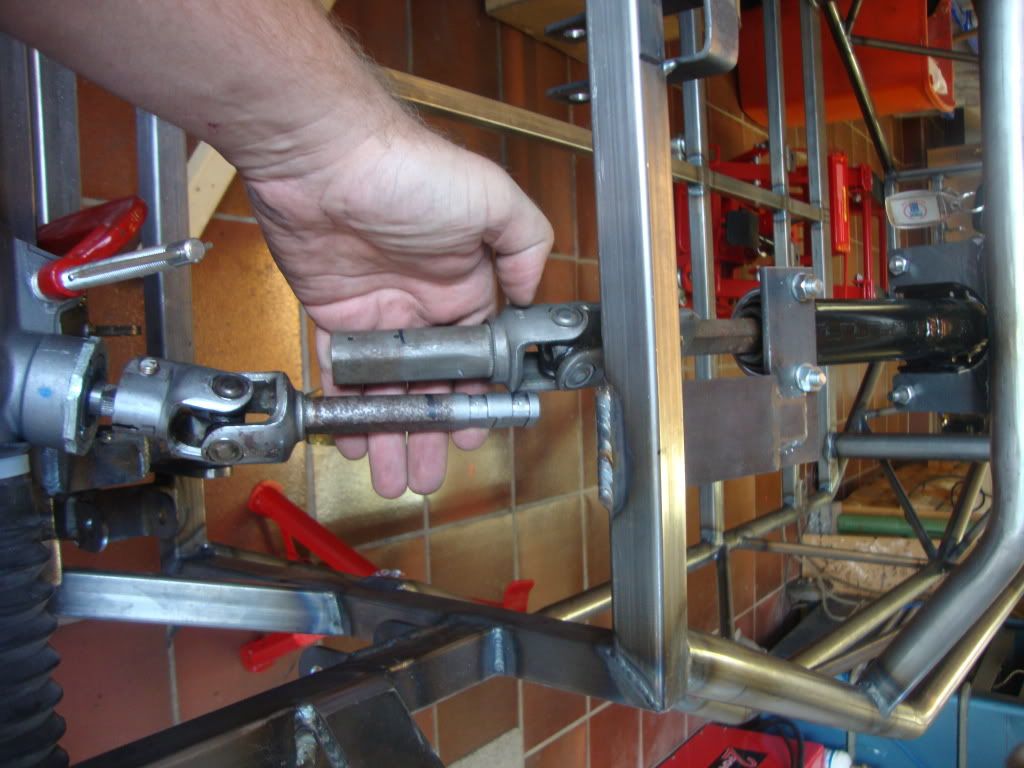 |
|
|
|
Post by erik on Jun 6, 2012 21:40:20 GMT
Hey guys, I have a safetybelt issue here. because my seats have a foam bottom the my shoulder is higher as the seatbelt holes. because of this I have to mount the seatbelt to the underside of the bar to get a straight line. The only downside is this might be not approved because this might compress my spine during a crash. What do you think? The runners are placed under the seats (25mm high) but this does not affect the hole has been positioned rather low for my 1.76m lenght which is average size in Holland. regards, Erik 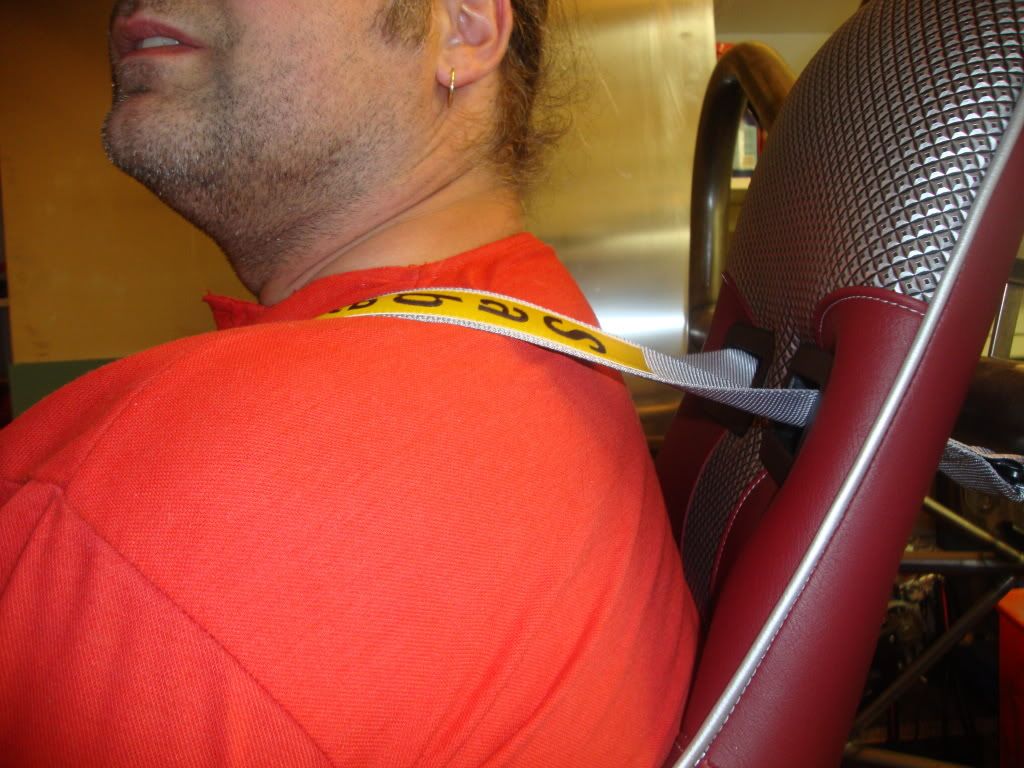 |
|
|
|
Post by anglais on Jun 7, 2012 11:17:25 GMT
Good progress doing the tough jobs first is a good idea. In terms of the uk MSVA i dont think the harness and seat will pass, like you said the angle would potential crush your spine.
|
|
|
|
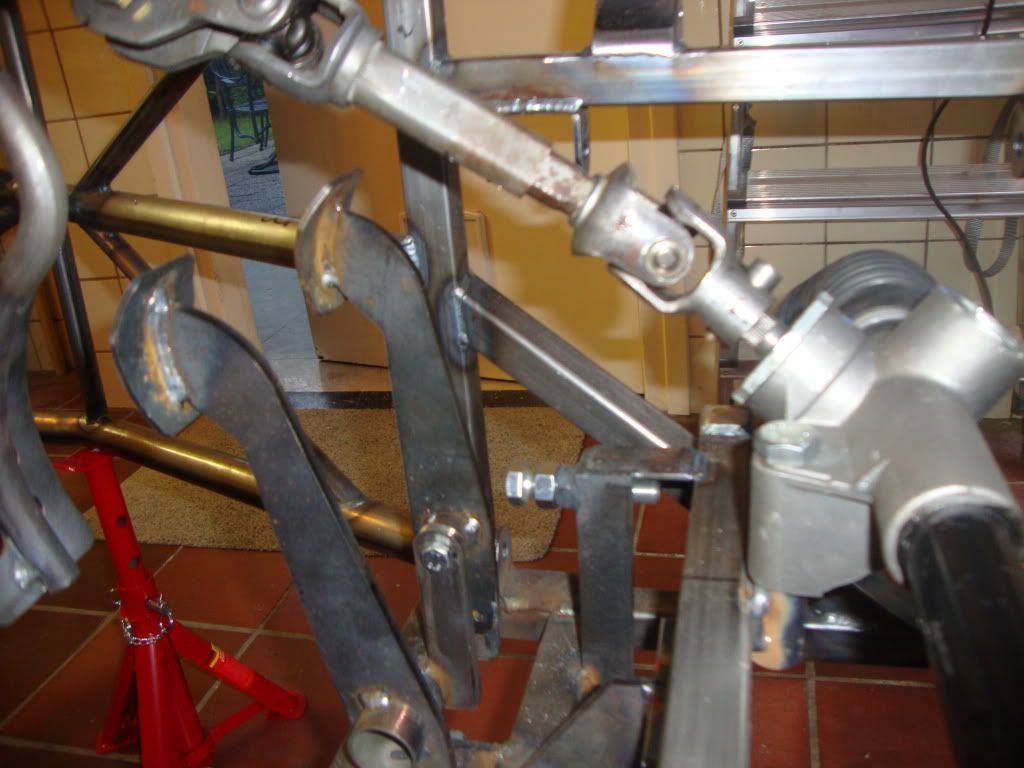
Post by erik on Jun 7, 2012 19:45:24 GMT
Hi Anglais! Yes I thought let's get rid of the headaches first. The steering column was a very straightforward fit, even with the original brackets in place one can make it work if the 2 parts I am showing in my hands are shortened a bit more. The only free slob I have is the plastic strip I removed from this male part. I am not sure if i should weld these parts together or not. It should be okay to weld this because the plastic was injected in through the female part (see 2 small holes) to the male part so it was a fixed shaft together, Perhaps I will inject some epoxy in it which can be removed when heated. I had a look at my Sabelt upper seatbelt bracket and it is bend upwards! This shows the belt is facing upwards correctly as the earlier pic shows!! The spine crushing question should be history. After some thought I reconed a level or downwards placed belt would show a downwards vektor on the spine as well. Because these seats are CAR seats I reconed the IVA rules about seats and seatbelts are best reference to find out if these seats are street legal or not: online.businesslink.gov.uk/Transport_files/124_IVA_M1_Inspection_Manual_Version_0511.pdfpage 216: 16. A harness or three point belt “effective upper anchorage” location must be at least 450mm above the reference point. (see note 14) page 217 shows a pictire of the measurement. I placed the (flat bottomed!!) seat on the table and did some measurements. Turned out the seat is 69mm and the most upper part of the seatbelt hole (not the center...bummer) is 575mm 575-69-53 (block in seat)=453mm. This results that the anchor point(450mm) is only 3mm under the top of the seatbelt hole. Because the Sabelt bracket is facing upwards I have to use this height as anchor point instead of the bush in the bar. 618-575-24(rails)=19mm of additional height to raise the top of the seatbelthole to the sabelt bracket. Having only +3mm of tolerance I used an old catalogue of 21mm to raise the seat and voila: the seatbelt heading upwards has just enough clearance for my lenght. tomorrow I buy me some 20x20 tube and a big washer to bolt the grp seat to the rails. As you can see the max width of the seatbelt holes are just enough for clearance of my belts. This dictates the position of the seat so there isn't play room for the outer arm.The only part of the belt tuching the seat slightly is the loop through the bracket. Now I do hope the MVSA is gentle with their clients. 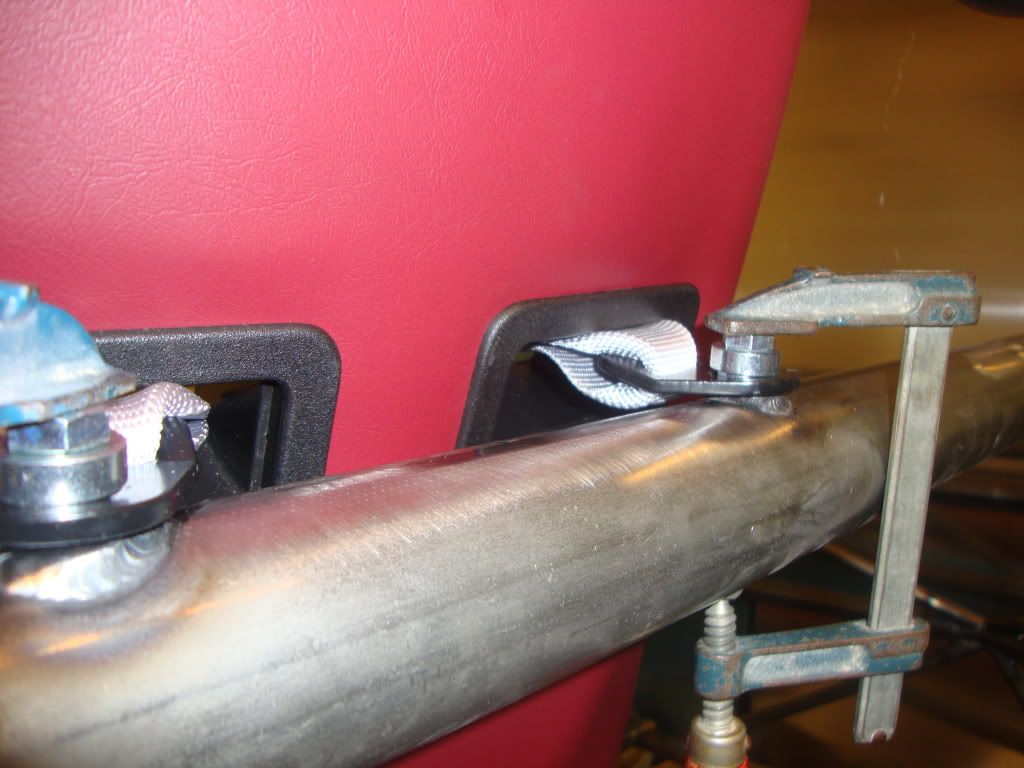  |
|
|
|
Post by erik on Jun 7, 2012 19:50:52 GMT
Btw, the maroon color you see doen't do justice to the real thing. In the sun it is as dark red as blood. Btw2, Got me a new spare key at the Ford dealer. Btw3, Got me a steering wheel adapter as well and the steering lock needed only a minor rework to make it fit. Pics will follow asap. The next steering wheel issue will be the horn wiring linkage(  ). |
|
|
|
Post by erik on Jun 12, 2012 20:58:45 GMT
Basic rule of construction is one needs to do the dirty jobs first and the details later. Because of this I do all grinding, welding and trimming in an early stage, hopefully to finish the body in short time notice so it can be painted to cancel out unwanted waiting time. The only thing which is an issue are the r1 clocks. the connector and chasis tubing are a real PITA to place the clocks on top of the steering column. Now I understand why the clock location is in the center of the body. Only for left hand drivers it is a bit hard to see all digits because the steering wheel is in between the rpm and kmh clocks. after I located the gear knob location the seats will be removed and stored. bottom plate will be made after the tr1ke has been disassembled. br, erik 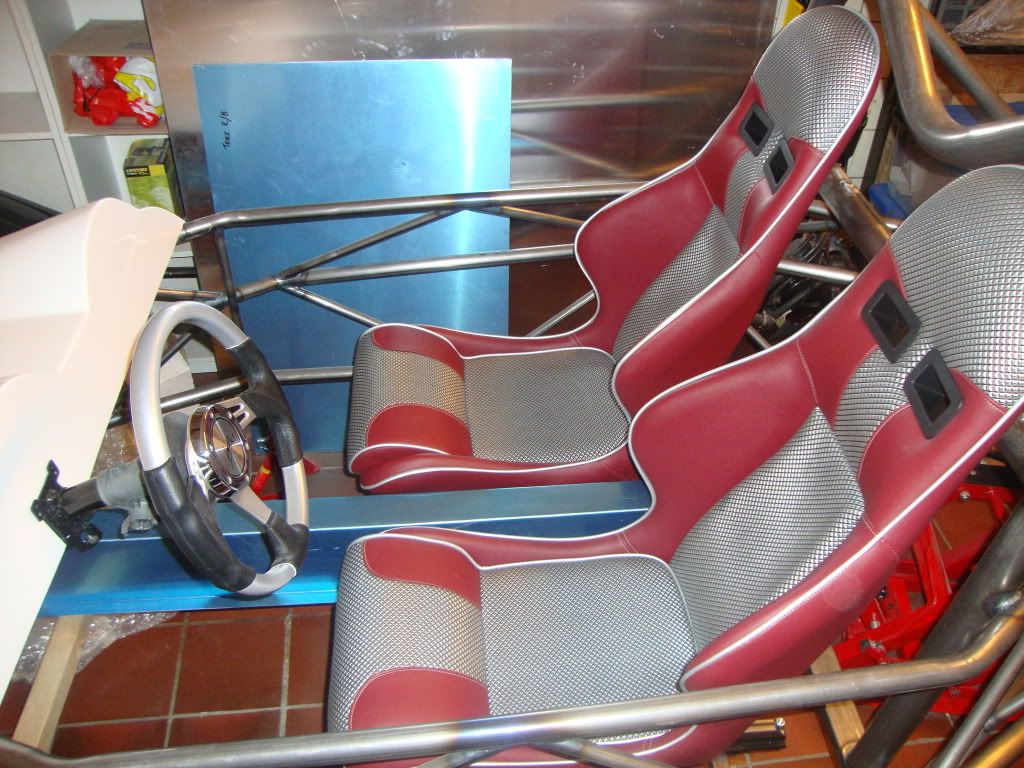 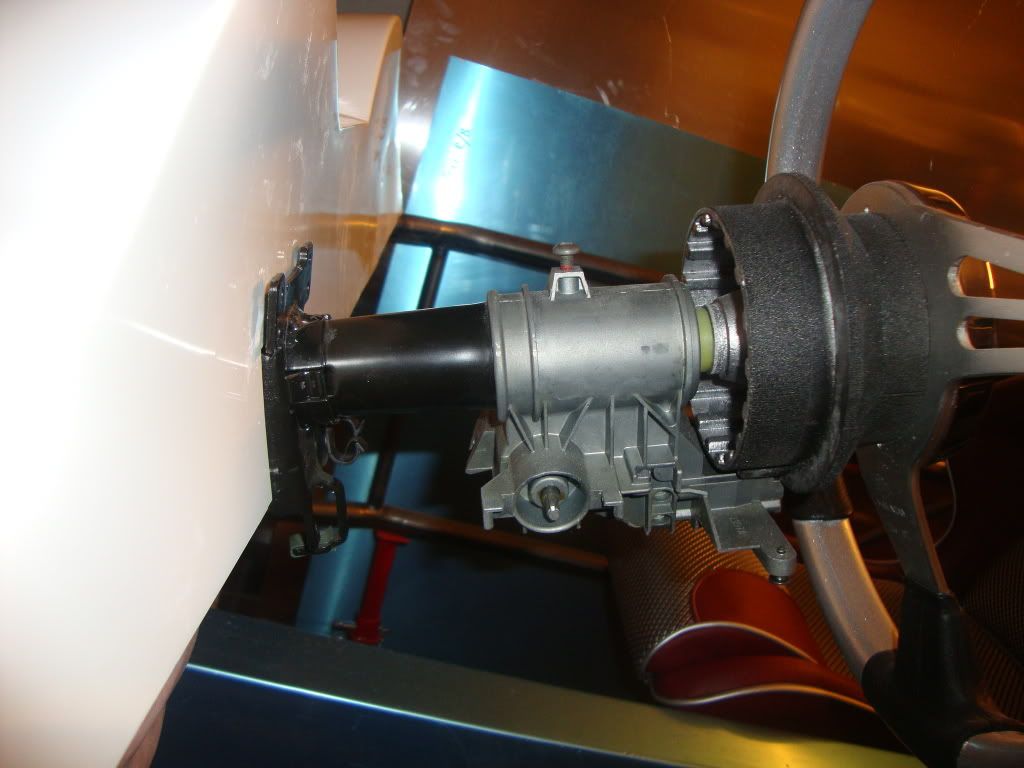 |
|
|
|
Post by slugshot on Jun 12, 2012 23:07:23 GMT
Hi eric, good planning and being organized is the key to a quick build. I had the same thoughts with putting the yam clocks in front of the wheel, but having it mounted on its own bracket makes it easier to remove the nose.
Your seats look very posh, my fiberglass lightweight ones are good for cornering fast but ill have to get some padded covers for the bumpy country lanes i go down.
I don't know if you're still interested in getting some headlights like i have, I tried them in the dark tonight and they light the road very good and the daytime running led function certainly helps to be seen.....kev
|
|
|
|
Post by erik on Jun 13, 2012 16:13:14 GMT
Hi kevin,
Thx for liking my seats! i have tested the fibre seats and some were too narrowl for my size (1.76m lenght is average in Holland but I believe the brittisch are a tad smaller). After a short time i really felt uncomfortable in 3 versions I tested. This is a glass seat as well with a flat bottom but with immitation leather covering and foam. A deskchair will be jalous of the comfort!
I have your lights already at home with some nice rear lights as well (leds). The only thing not placing them on the tR1ke for now is my tR1ke needs right handed lights for approval later.
I am still a bit confused on the dachboard location. I think I need to make me a MDF template for testfitting first to see what location is worth living or not. I can always import a pic of the template in Acad and make a file for laser cutting later or make one with a babysaw ;-P
I am not too organised at this moment. I am working towards a short term body and seat placement . I hope to have nihil hangar rash like this (S+H damage) and minimal cleanups which is a waste of time LOL!!.
grtz!
Erik
|
|
Noah
Junior

Posts: 25
|
Post by Noah on Jun 13, 2012 19:27:26 GMT
Erik, those are beautiful seats; what kind are they?
How much do they weigh?
|
|


 ).
).